A few years ago I took part in a Raw Dairy Processing Class, the description of the class intrigued me, “Learn how to make delicious soft cheeses, yogurt and butter in your own kitchen! Get acquainted with using butter molds and adding herbs, or other flavors to your final product. With simple instruction and good quality raw milk, it is an easy and exciting activity adding delicious artisanal treats for any occasion.” The class was held on a farm where they raised cows, heritage turkeys, pigs and had large gardens. The house was off the grid yet you never would have known. The best thing about the class was I leaned how Amazing Homemade Yogurt was!
Not only was the class a lot of fun but I learned that making yogurt is so easy! I always thought you needed special equipment. Other than the culture you don’t need any special equipment and the yogurt you can make at home is so tasty! Freshly made yogurt really does taste better than store bought. I purchased my yogurt culture from www.cheesemaking.com. You do not need to use raw milk to make yogurt, you just do not want to use the ultra high pasteurized milk.
Amazing Homemade Yogurt
Ingredients:
Raw Milk
Yogurt culture
Directions:
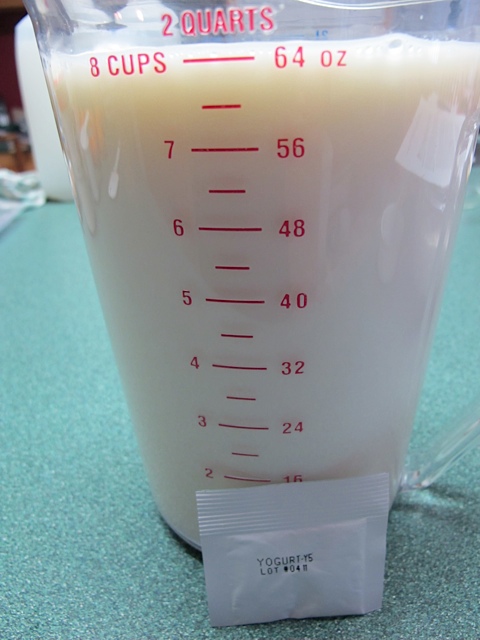
Here are the simple directions. Pour ½ gallon of cold milk into a heavy stainless pot for heating. Heat the milk to 185 degrees and then hold it there for 10-20 minutes.
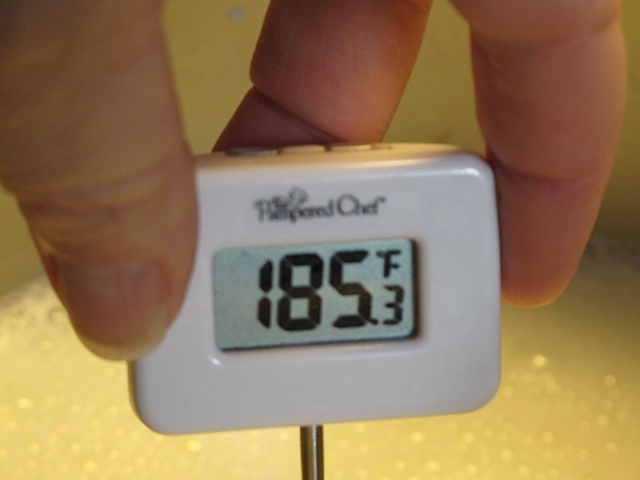
This will prepare the whey proteins, which are largely responsible for the thickening of the yogurt body. Set the milk pot directly on the burner and begin heating with careful stirring to prevent the scorching of the milk. Cool the milk as quickly as possible to your target temperature for inoculating the yogurt (116 degrees F).
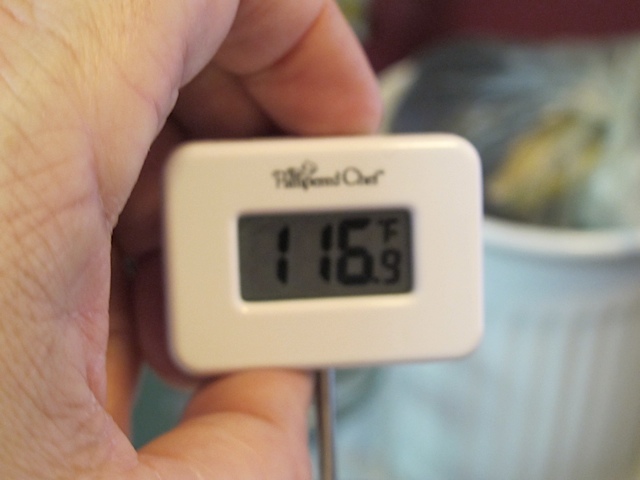
When the milk reaches the proper temperature for inoculation, it is time to add the direct set yogurt culture. The culture will be a mix of Streptococcus thermophiles and Lactobacillus bulgaricus plus and probiotic additions the culture may contain.
Incubate the cultured milk for the required time. This can be done easily by pouring your cultured milk into containers and placing those containers inside an insulated cooler.
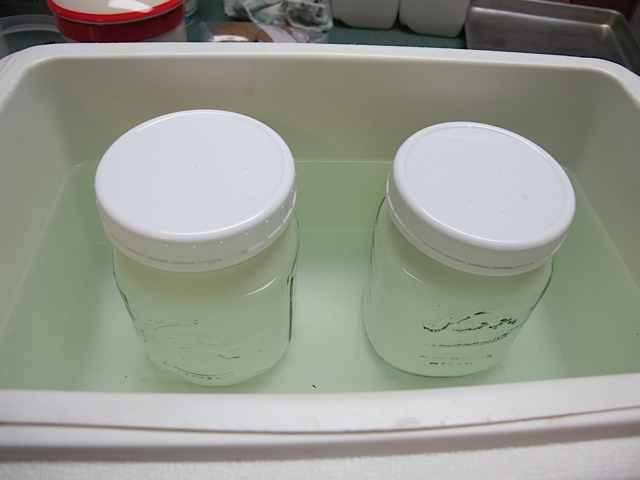
Pour warm water (116 degrees F) into the cooler so that your container lids are just an inch or so above the water line. This “water bath” will maintain the temperature so that the appropriate bacteria will thrive and populate. The time of incubation is about 8-10 hours for most yogurt cultures. Place the yogurt in the refrigerator when the incubation is complete.
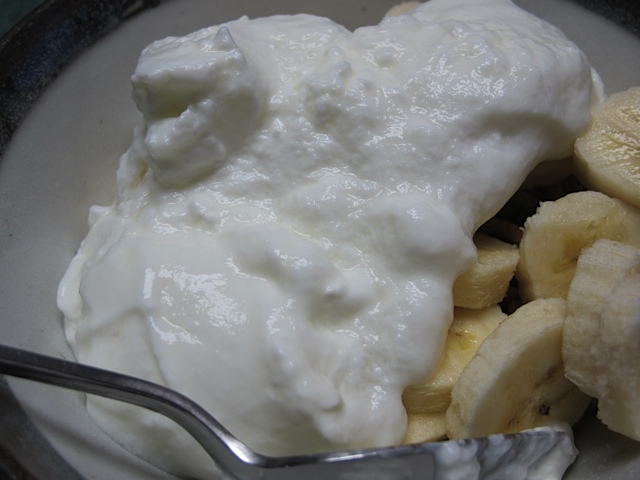
I inoculated my milk, poured it into glass jars and placed them into my cooler. I added the warm water, put the lid on the cooler and let it sit on the counter for 10 hours. Before going to bed I placed the yogurt in the fridge. In the morning I had two containers of plain yogurt ready to enjoy! I have always preferred flavored yogurt but I find this yogurt to be delicious. If you want, feel free to add fruit to flavor it yourself.


I’ve always wanted to do this! It sounds like such a neat project! 🙂
Thanks for joining Cooking and Crafting with J & J!
LikeLike
Jess,
Try it sometime it is so easy and really delicious!
LikeLike
My mom used to make her own yogurt and I’ve always wanted to try. Thanks for the tutorial. Pinned!
LikeLike
On my to-do list! Thanks for the helpful tutorial. 🙂
Found you via Think Tank Thursday.
LikeLike
Sarah Eliza,
I hope you give yogurt making a try!
LikeLike
I used to make yogurt, and I’ve shifted to kefir now. It really was surprisingly easy to make, and we loved flavoring it up any way we liked. 🙂
LikeLike
CJ,
Keifer is on my “to do” list!
LikeLike
Delicious, I too make yogurt at home, I love that compared to storebought, thanks for sharing with Hearth and soul blog hop, pinning, tweeting.
LikeLike
Wow!! What a great tutorial! And you know exactly what’s in it! Thanks for Sharing On My 2 favorite Things on Thursday, Hope to see you again this week!! Pinned!
LikeLike
I have heard such wonderful things about homemade yogurt, Nancy, and your tutorial makes it look really do-able! Thank you for sharing this post with us at the Hearth and Soul Hop!
LikeLike
I have just started in cheese making, and yogurt is on my list to learn next. I have a ready supply of cultures, so all I need is for my cow to have her baby and freshen!!!
LikeLike
Julie,
I took a cheese making class several years ago and learned how to make all sorts of cheese, even made my wn Colby cheese! So delicious!
LikeLike
I love my homemade yogurt so much, you are making home that at least one of my milking sheep girls freshens soon! I use my shuttle chef for making my yogurt, I love that its just one pot and that it can be heated, mixed and set in its fancy “hay box” thermal outer shell, lift the lid and voila.. Done, ready to be moved to the fridge..
LikeLike
Hi Nancy,
I make my own raw yogurt. We had tried different ways but what ended up working out the best and I thought was the healthiest was we use raw milk and do not heat over 140 because then it is considered pasteurized and for thickener I use Grass Fed Beef gelatin and the culture we use is a freezed dried that we buy from an local Amish store. I use about 8 tbsp of the gelatin for 2 gallons of milk (which makes it the right consistency for what we like) We put it in oven in a large stainless steel pot – that has been pre heated to 170 degrees and then turn it off once we put it in the oven about 6-8 hours and it comes out great. We then put in canning jars and with regular canning lids and it stays for months as long as you keep in the refrigerator. Everyone has their own way of doing it. It was a trial and error for us until we got it done just right.
LikeLike
I love my homemade yogurt! I usually buy a small container of plain yogurt and use that for my starter. I usually works out well and you don’t have to order or find the powdered starter. That can sometimes be difficult to find.
LikeLike
Lisa,
Great advice about using yogurt as your starter! I’ll have to try that.
LikeLike