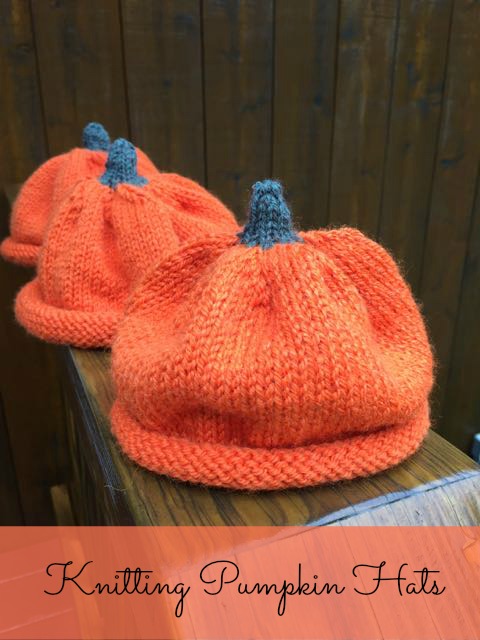
I recently spent several weeks knitting pumpkin hats. As you know our grandchildren were just here for a ten-day visit. I started knitting a pumpkin hat for my two-month-old granddaughter. It went so quickly I decided that knitting hats for my other grandchildren was in order.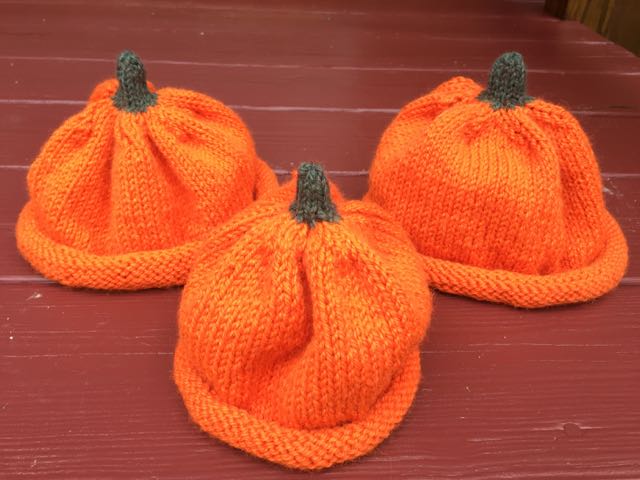 My husband thought the hats were so cute he asked for one as well. By the time I was finished I had completed four adorable hats.
I found the pattern online at the website SimpleJill.com. You can download the pattern HERE. I have seen similar patterns elsewhere but Jillbert’s pattern caught my eye and I immediately found some yarn to complete the project.
The pattern was easy to read and not difficult at all. I purchase two skeins of yarn one a sage green and the other orange. I was able to knit four hats and nearly used up all the yarn! I was able to knit the hats while watching TV or driving in the car. In fact I worked on my husband’s hat on the way to the airport to pick up our two daughters and grandchildren!
I followed the pattern for knitting a newborn size and two child size hats. For my husband’s I adapted the pattern to fit his larger size head! Jilbert has some cute photos on her website. Here are the directions:
Pumpkin Hat Pattern
Size: newborn, (baby, toddler, child)
Gauge: 5 stitches/inch
Needles: size 6 (4mm) double pointed or 16″ circular or magic loop
Yarn: worsted weight in orange & a small amount of green
Always test your gauge — depending on the yarn, I’ve made this hat with needle sizes
that range from size 5 to size 7.
Cast on 64 (72, 80, 88) stitches. Mark your starting point and join in the round and knit
9 rows of stockinette stitch (knit every row). On the 10th row, knit into the back of each
stitch. This marks where the brim ends and helps keep the brim from continuing to roll
upwards.
Starting with the 11th row, knit every row until the hat measures 4.5″ (5″, 5.5″, 6.25″).
Start decreasing by knitting 2 together (K2tog), then knitting 6 stitches. Repeat all the
way around.
The next row, K2tog, K 5, repeat, all the way around.
Then K2tog, K4, repeat, all the way around.
Then K2tog, K3, repeat, all the way around.
Then K2tog, K2, repeat, all the way around.
Switch to your green yarn at this point.
Continue decreasing by K2tog, K1, repeat for the round.
Then, K2tog all the way around. You should have 8 (9, 10, 11) stitches left. Continue
these stitches in the round for an inch or so to form the stem. Finally, K2tog for one
round. You may have an odd stitch left over. That is OK. Cut the yarn and thread the
tail through the stitches.
We managed to get several pictures of everyone and looking at the pictures I think my husband had the most fun! It was a wonderful day at the Woodstock Farmer’s Market picking our fall pumpkins!
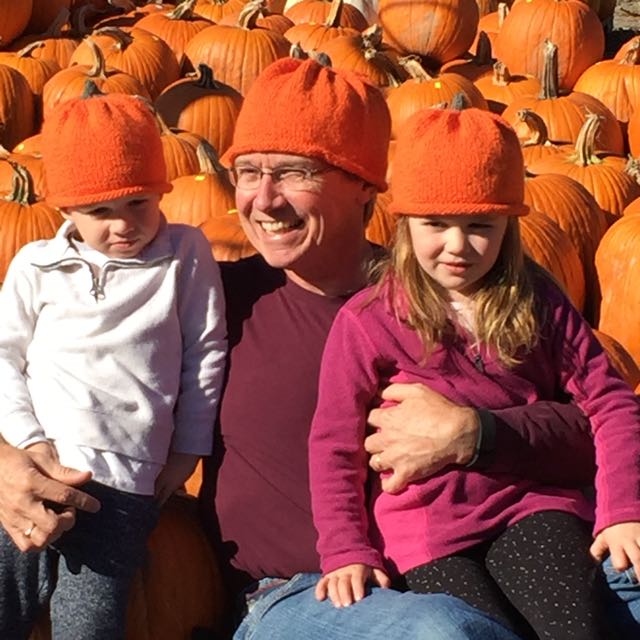

Adorable ! I wish I could knit ! 🙂
LikeLike
Daisy,
Maybe it’s time to learn to knit! 🙂
LikeLike
Those hats are adorable! Pumpkin patch photos are so popular, I bet lots of families would like to wear them while having their picture made.
LikeLike
Michelle,
It was such a fun knitting project and even more fun to see everyone wearing them!
LikeLike
Hi Nancy,
What adorable hats! I’ll bet that you had fun making them. Great photograph – love the laughter on Bill’s face. Happy Halloween!
LikeLike
Bet,
It was a fun project and such fun seeing everyone wear them!
LikeLike
Very cute! Love the photos!
LikeLike
OMGosh…I’ve never seen anything so cute. I would give anything to be able to make something this cute…the photos are adorable and I would enlarge them and hang them each and every fall…no decorations would beat them….and your sweetheart looks like he is in Pumpkin Hat Heaven with those precious little punkins’….
LikeLike
BJ, It was such a fun project for my little punkins!
LikeLike
Hi Nancy. What a gorgeous knitted hat! Something all the family can wear which our readers will love. I’ve included your post in our latest craft inspiration roundup. https://craftylikegranny.com/pumpkin-crafts/ Cheers Jodie 🙂
LikeLike
Jodie,
Thank you so much, those hats are so easy to knit and we’ve had such fun with them!
LikeLike
Hi! Please can you tell me how you adapted this for an adult size? Thank you! 😊
LikeLike
Rachel,
I have to say I just increased the number of stitches I cast on! If you have other hat pattern you could figure out approximately how may stitches to add on and proceed with the pattern from there. Hope this helps. Sorry it took so long to respond, I had to find my pattern and make sure there wasn’t a more accurate answer!
LikeLike