Frugal Tips: Tips for Selling on eBay

Over the course of this last year I seem to have accumulated an assortment of items that we don’t need. Between my mother downsizing into a smaller home and cleaning out my father’s house, I now have this assortment of things! They are too valuable to throw out so I decided to list some of them on eBay.

English: eBay Logo
(Photo credit: Wikipedia)

Here are a few things I learned in the process.

Before you start make sure you know the rules for listing items on eBay. Check to make sure your item is allowed. There are certain items that are prohibited and restricted.

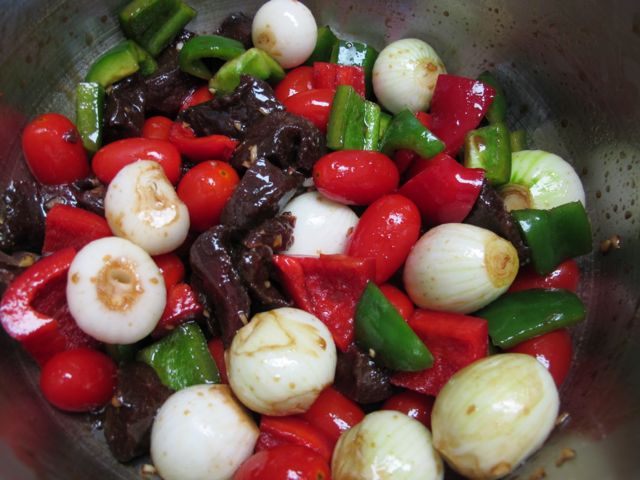
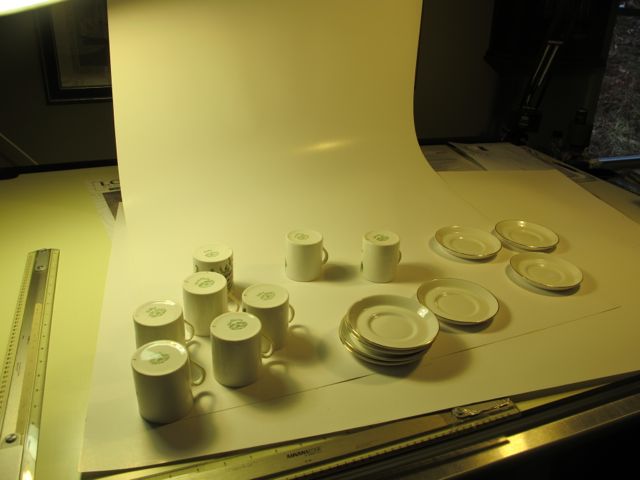
The first step is to take a few pictures of each item. Pictures that are sharp and bright will help you to sell your item. I set up an area with two lights and a white paper background to help me photograph each item. Before photographing make sure that the items are clean and dust free so they show up well in the photograph.

eBay
Set up an area to photograph your items.

When you list your item you want to give it a title that is clear, complete and descriptive. Say exactly what the item is, even if the title repeats the category name and includes details such as brand, product name, size or artist. Imagine that you are the buyer, what would you like to know about the item? Be sure to mention the most appealing characteristics.

Before you set your price do some research. Search completed eBay listings. Visit online stores that sell similar items to help you choose a price for your item. Decide whether or want to list the items at a fixed price or in an auction-style listing.

Decide how you will ship your item once sold. Consider using calculated shipping and decide which shipping service you’ll use. Pack your item for shipping so that you can weigh it and measure the length, width and height so you have this information when you list the item. When you use calculated shipping, you won’t have to guess the amount it will cost to ship the item.

Ready to Ship
(Photo credit: mlcastle)

If you don’t already have an account on eBay you will have to create a seller account before you can list your item.

Once you’ve completed all the necessary steps and your item is listed make sure you check it to see if anyone’s bid on or purchased your item. You can do this by going to the Sell section of My eBay. Be sure to answer any questions you receive about your listings.

Once the item is sold ship the item to the buyer as soon as you receive payment. Leave the buy feedback as well. Your feedback about your buyer is important information for other sellers.

Hope you find these tips useful! Good luck with your online selling!

Linked To: LittleHouseInTheSuburbs

Enhanced by Zemanta

Prudent Pantry – Quick Meals From The Pantry

Are you like me? Do you have dried beans in the pantry that you keep forgetting to use because it is so much easier to open a can of beans for a quick meal? The solution: can your dried beans using a pressure canner. Once they are canned they are ready to use for any meal, just like a can of beans!

The first step is to cover the beans with cold water and let them soak for 12-18 hours in a cool place. There will be some expansion so make sure your pot is large enough! After the 12-18 hours drain the beans and place in a large pot and cover with at least two inches of water. Bring to a boil and boil for 30 minutes. Stir as needed. While the beans are boiling have your jars heating in a water bath. After the 30 minutes pack the hot beans into your hot jars, leaving one inch of head space. Add ½ tsp salt to pint jars and 1 tsp salt to quart jars, if desired. Ladle boiling cooking liquid over the beans. Remove any air bubbles. Wipe the rim of the jar clean and place hot, previously simmered lids on each jar. Tighten each lid.

canning jars, beans, prudent pantry
Pack hot beans into hot jars.

Following the directions on your pressure canner process pints for 75 minutes and quarts for 90 minutes at 10 pounds pressure in a steam pressure canner.

canning, processing
My Pressure Canner

This is a wonderful way to stock your pantry with beans that are ready for any quick meal. We will enjoy our black beans in my Black Bean Cassoulet recipe, the perfect recipe for a cold winter night. I will be sharing this recipe later this winter.

canning, beans, pantry, prudent living
Jars of beans ready for the pantry.

Linked to: HomesteadBarnHop, WildcraftingWednesday, HomemakersChallenge, Saving4Six, ServingJoyfully, FrugalFollies, SimplyNaturalSaturdays


Cranberry Apple Crisp

This recipe is from one of my favorite books; Simply In Season. This book is full of recipes that celebrate fresh, local foods and encourages you to eat in season! Fall and winter is a perfect time to make apple crisp. This Cranberry Apple Crisp recipe is a variation of the traditional apple crisp.

Whether I am enjoying cranberries in a cookie or a crisp I just love the tartness they bring to a recipe. I’ve used cranberries in an apple pie and this crisp is equally as delicious!

Cranberry Apple Crisp

Ingredients:

4 cups of apples, peeled and sliced. I used a variety of apples.
2 cups of cranberries
¼ cup brown sugar
1 tsp orange peel

Directions:

Combine these ingredients in a large bowl and toss gently until the fruit is coated. Place the coated fruit in a greased 8×8 inch baking dish.apples, cranberries

Topping Ingredients:

¾ cup brown sugar
¾ cup flour
¾ cup rolled oats
½ cup oat bran
1 tsp cinnamon

Combine these ingredients in a medium bowl.

4 Tbsp butter
1 Tbsp oil
¹⁄3 cup chopped nuts (optional)

Directions:

Cut the butter and oil into the flour mixture until it crumbles. Sprinkle evenly over the apple mixture. Bake at 350 degrees F for 45-50 minutes or until the fruit is soft and the topping is crisp. Delicious served warm with a little ice cream.

Cranberry Apple Crisp

My Garden: Flowers For The Winter

My garden is put to bed and my houseplants are ready for the winter. Now I can concentrate on forcing some bulbs so we will enjoy flowers in the house for Christmas and later in the winter. Forcing bulbs inside is a wonderful way to enjoy blooming flowers mid-winter.

They can also make a wonderful gift. Who wouldn’t appreciate a gift of bulbs when the world is white outside! Tulips, narcissus, hyacinths, crocus and lily of the valley can be forced into flower in late winter or early spring.  A pot of tulips on your windowsill in February can brighten your spirits!

It is a good idea to keep the same variety of bulbs in the same pot as the blooming times may vary. Bulbs are also planted much closer together than when they are planted outside. With the exception of narcissus bulbs, bulbs must be given a cold temperature of 35-48 degrees F for a minimum of 12-14 weeks. An unheated attic or cellar works well. If this is not possible, then force paper white narcissus bulbs.

Check your local nursery for bulbs. Find a decorative pot to plant them in and purchase some gravel to fill the pot.

indoors blooms, bulbs
Put some gravel in the bottom of your pot.

Rinse the gravel to get rid of any dust. Fill each bowl with gravel about 2/3rd full. Nestle the bulbs in the gravel ½ to 1 inch apart, placing the pointed side up.

bulbs, flowers
Place the bulbs in your pots.

Fill in gravel around the bulbs, leaving the top halves exposed.

forcing bulbs
Fill in with gravel.

Add water up to the base of the bulbs.

bulbs
Water and wait!

Place the pots in a cool, dark area for several weeks to ensure root growth. Then place in a sunny location. Each bulb will send up several flower stems bearing many tiny blossoms. Sit back and enjoy the blooms. It’s wonderful to enjoy a bit of spring color when everything outside is covered with snow!

Linked To: DucksNARow, TheNYMelroseFamily, WeAreThatFamily, SidewalkShoes, ASouthernDaydreamer, MostlyHomemadeMom, AdornedFromAbove, Lambert’s Lately, BloomDesigns, KatherinesCorner, 4YouWithLove,HomemakersChallenge, TootsieTime, LittleHouseInTheSuburbs, SimplyNaturalSaturdays, CreativeHomeAndGardenHop, TheBackyardFarmingConnection

Frugal Tips: Peppermint Lip Balm

I have made this lip balm before and we just love it. This year I decided to make some not only for us, but also would make some up to give as Christmas presents. I purchased these little tins from Rose Mountain Herbs, which are the perfect size.

home remedies
Perfect size for lip balm.

The recipe is quite easy and mixes up in no time at all.

lip balm, homemade creams, prudent living
Ingredients for Lip Balm

I used some of our local honey and our own beeswax, which we still have on hand from when we raised our own bees. It gave the lip balm a beautiful color.

The vitamin E is squeezed out of the Vitamin E capsules; you get about 3 drops out of one capsule.

Here is the recipe:

6 Tbsp almond oil
2 tsp honey
4 tsp beeswax, grated
5 drops vitamin E oil
5 drops peppermint essential oil
8 – ½ oz lidded pots

In a double boiler, melt almond oil, honey and beeswax together. I used a tin can placed in water.

Remove from heat, allowing mixture to cool slightly. Add vitamin E and peppermint oils and stir until well blended. Spoon into tins and allow to cool before covering.

homemade remedies
Lip balm cooling.

Be warned, you will get addicted to this lip balm. I know I am! Making it is now on my annual “to do” list!
Wildcrafting Wednesday Featured Blogger

Linked to: TheGatheringSpot, TheBackyardFarmingConnection, TableForSeven, JugglingAct, BackToTheBasics, FarmgirlFridayWildcraftingWednesday, TheThriftyHome, ALifeInBalance, FrugallySustainable, Feeding Big, SmallFootprintFamily, FromTheFarmBlogHop, AGlimpseInside, Saving4Six, CraftsALaMode, SimplyNaturalSaturdays, AngelsHomestead, CreativeHomeAndGardenHop, TheChickenChick, WildcraftingWednesday, OilMeUpWednesday, WildcraftiingWednesday

Prudent Pantry: Are You Prepared For Winter?

It’s almost wintertime here in Vermont and that means it’s time to stock up on emergency provisions. Winter can mean snowstorms, power outages and snow-covered roads. Disaster preparedness experts suggest you have a week’s worth of food and beverages on hand in case a storm knocks out electricity and contaminates tap water.  We have a well so our water is  fine as long as we have electricity to use the well pump! You can keep your storm supplies boxed and separate from your regular pantry goods. It’s one less thing to worry about if you needed to evacuate. I don’t worry so much about being evacuated but it’s still a good idea to take stock of our storm supplies.prudent living

Your storm supplies could also be used for a hurricane or other natural disaster such as flooding.

Before you shop here are a few points to consider.

◊ Family size: buy meal or individual size portions to minimize waste.

◊ Family Preference: there’s no sense in buying things that nobody will eat!

◊ Cooking Facilities: a gas stove or grill can be a godsend during a power outage; if you don’t have one you might want to invest in a small camp stove.

Here are some supplies to consider as you make your shopping list:

♦ Bottled water: 12 gallon per person per day.
♦ Shelf stable milk.
♦ Fruit and vegetables juices.
♦ Instant coffee, tea, hot chocolate and soft drink mixes.
♦ Powdered or evaporated milk for cooking.
♦ Soups, stews and chili.
♦ Canned tuna, salmon, clams and other seafood.
♦ Canned chicken and ham.
♦ Favorite vegetables.
♦ Favorite fruits (choose juice over syrup packed)
♦ Beans
♦ Spaghetti sauce
♦ Peanut or almond butter
♦ Cold cereals
♦ Instant oatmeal, grits, rice and potatoes
♦ Dried Fruits
♦ Pasta
♦ Crackers and snack foods
♦ Shelf stable pudding and gelatin
♦ Ketchup and salsa
♦ Worcestershire, soy and hot pepper sauces
♦ Bouillon cubes
♦ Plastic garbage bags
♦ Disposable plates, cups, bowls and cutlery
 Paper Towelspaper towels, emergency supplies
And don’t forget a can opener.

These items may be things you don’t normally consume in your household but it doesn’t hurt to have them on hand for an emergency.

Linked To: HomesteadBarnHop, AdventuresInMindfulLiving, NourishgingJoy


Venison Shish Kabob

We have lived in Vermont for over 15 years. During that time we have often tried venison at a church potluck or a friend’s house but I’ve never cooked it myself. This year I was given a Venison Shish Kabob recipe by my boss, along with some venison and asked to try the recipe and see how I liked it.  The recipe sounded pretty good and it was a potential blog post so why not! The result was absolutely delicious! It is currently hunting season in Vermont. I wonder if any of our neighbors would be kind enough to give me some more venison so I can cook this recipe again?

Venison Shish Kabob

Ingredients:

2 lb. venison (cubed – 1 inch)
1/3 cup soy sauce
3 Tbsp. Olive Oil
1 clove minced garlic
1 ½ tsp. sugar
1 tsp. ground ginger
1-pint cherry tomatoes
1 green pepper (cubed to match meat pieces)
1 red pepper (cubed to match meat pieces)
1 cup pearl onions (uncut)
1-pint small fresh mushrooms (uncut)

Directions:

Marinate meat in soy sauce; olive oil, garlic, ginger and sugar. Refrigerate for 2 hours (turning several times to expose all meat to marinade), in a container large enough to contain all components. At the end of one hour, add the tomatoes, pepper pieces, onions, and mushrooms.

Ready for the skewers.

Alternate meat and vegetables on skewer while grill is heating up (alternatively, meat and vegetables can be cooked separately to avoid burning vegetables).

Ready for the grill.

Grill on medium to high heat, five minutes per side, rotating until meat reaches at least 140 degrees (medium rare).

Ready to eat.

Serve immediately, with pita bread or rice pilaf. Serves four (2 skewers each).

Delicious served with rice.

Note: This recipe also works very nicely with beef.

My Garden: Six Tools Tips

I have shared these tips before but as we come to the end of the gardening season it is important that we put ours tools away in good shape so they will be ready for the upcoming garden season!

gardening, prudent living
Six Tips For Your Tools

I hope you appreciate the reminder and put your tools away correctly so they will last for many years to come!

gloves, gardening
Gardening Gloves

Linked to: SidewalkShoes, ASouthernDaydreamer, RuralityBlogHop, TootsieTime, TheWonderingBrain, CreativeHomeAndGardenHop, TheBackyardFarmingConnection

Frugal Tips: Relief For Dry Hands

In the winter my hands suffer from the lack of moisture in the air. After having such success with making lip balm I decided to make my own hand cream as well. With just a few simple ingredients I made a really nice lotion, which my hands really appreciate!

This recipe was too thick to use as a body lotion but it is perfect for my hands. I used lavender as my essential oil but you could use whatever fragrance you like. The olive oil I had on hand and I purchased the emulsifying wax from Mountain Rose Herbs. I used small canning jars to pour the lotion into, and made a few extras to give as gifts this Christmas.

hand lotion, frugal tip
Ingredients for making a hand lotion.

Here’s the recipe:

1 ¼ cup hot water
¼ cup emulsifying wax
¼ cup olive oil
15-36 drops of essential oil (depends on your taste)

In a Pyrex measuring cup I combined the olive oil and emulsifying wax and microwaved it on high for 1 minute or until the wax is melted. The temperature is about 155 degrees.

wax, olive oil, homemade hand lotion
Melted wax and olive oil.

Remove the wax – olive oil mixture from the microwave and heat up the water in another Pyrex measuring cup for one minute. While the water is heating up add the essential oil into the melted wax-olive oil mixture.

Carefully pour the hot water into the wax-olive oil mixture and watch it turn milky white. At this point the temperature is about 125 degrees. Pour the hot lotion into your jars and let it cool over night.

Hand lotion cooling.

I was a bit skeptical that it would thicken, however the next morning the lotion was a nice thick consistency.

lavendar hand lotion, homemade, frugal tip
Hand lotion thickened overnight.

I could have used more essential oil but I really like the gentle fragrance of the lavender, it is not overpowering at all.

Linked To: TableForSeven, BackToTheBasics, DucksNARow, TheNYMelroseFamily, TheThriftyHome, WildcraftingWednesday, MostlyHomemadeMom, AdornedFromAbove, LambertsLately, ALifeInBalance, LovelyLadiesLinky, 4YouWithLove, FromTheFarmTheBrambleberryCottage, AGlimpseInside, BloomDesigns, ServingJoyfully, FrugallySustainable, SmallFoorprintFamily, TheBlogStrutPeacockStyle, LittleHouseInTheSuburbs, CheeriosAndLattes, SimplyNaturalSaturdays, AngelsHomestead, CreativeHomeAndGardenHop, TheChickenChick, AdventuresInMindfulLiving, AHumbleBumble, WildcraftingWednesday


Prudent Pantry: 10 Steps To Get Ready For Thanksgiving

Does the thought of the approaching holidays leave you breathless? Do you feel like there is just not enough time? Perhaps it’s your turn to host the thanksgiving meal, what can you do to be ready for the day?

prudent living
Happy Thanksgiving

Years ago I read an article that had several steps that would help you to be ready for Thanksgiving. I wrote a few notes down on an index card, placed it in with my recipes and have used the advice every year since then. With these ten simple steps you too can be ready for the big day.

preparation, holidays
Thanksgiving notes I use every year.

1. About a month before Thanksgiving compile a guest list. Figure out who’s coming for dinner and if anyone has any sort of food allergy.

2. Have your guests help out by contributing a dish or a dessert. Be specific, ask your aunt to bring her wonderful creamed onions or your sister to bring her delicious cherry pie for example. Tell everyone you’ll do the turkey and let your guests bring the sides. Once everyone has decided what they are going to bring you can fill in the missing items.

dessert, pie, cherries, Recipe Box
Lattice Topped Cherry Pie

3. Purchase your turkey at least 3-4 weeks ahead of the big day. If you’re ordering a fresh bird you can do that 2-3 weeks in advance.

English: Oven roasted turkey, common fare for ...
(Photo credit: Wikipedia)

4. Prepare and assemble any dishes ahead of time. Bakes goods and piecrusts can be prepared ahead of time and placed in the freezer.

5. The Saturday before Thanksgiving shop for your perishable food. Get out your china, serving dishes and serving utensils.

6. The Monday before Thanksgiving put the frozen turkey in the refrigerator to thaw. If making your stuffing from scratch cut bread

The Good china
(Photo credit: Alegrya)

into cubes and put in a plastic bag.

7. The Tuesday before Thanksgiving cook, peel and mash sweet potatoes, cover and refrigerator. Chop your onions and celery for the stuffing and refrigerate.

onions, chutney
Chopped onions

8. The day before prepare your stuffing and refrigerate. Cook the giblet broth for the gravy. Prepare your cranberry molds and refrigerate. Make your creamed onions. If you can, set the table and arrange the centerpiece. Bake your pies.

9. On the big day add your liquid to the stuffing and stuff your turkey. Start roasting the turkey so it will be done 30 minutes before you plan to eat. Make sure you have a few light appetizers set out for your guests. Having a few nibbles will help tide everyone over until dinner is ready.

10. Remember what Thanksgiving is all about. It’s not about the turkey or the special dessert, but who is gathered around your table. Be thankful for your family and friends and enjoy the day!

English: Saying grace before carving the turke...
Be thankful for your family and friends and enjoy the day! (Photo credit: Wikipedia)

Enjoy the day and don’t be bashful about asking for help. My sister-in-law writes down numerous jobs on slips of paper and puts them in a big jar. As guests arrive they are asked to pick a slip of paper out of the jar. That is their job for the day. It may be a simple job such as lighting the candles or pouring water but it’s a big help to the hostess. I think it’s a wonderful idea. What sort of things do you do to make the day enjoyable?

Linked to: NourishingJoy, AdventuresInMindfulLiving, FeedingBig, NaptimeCreations, TheJennyEvolution, CraftsALaMode, RaisingArrows

Enhanced by Zemanta
Design a site like this with WordPress.com
Get started