Prudent Pantry: Storing Eggs

When trying to figure out the best way to store your eggs the first thing to find out is where are your eggs coming from? Do you purchase them from the store or from a local farmer? Or do you have your own chickens?

Where do your eggs come from?

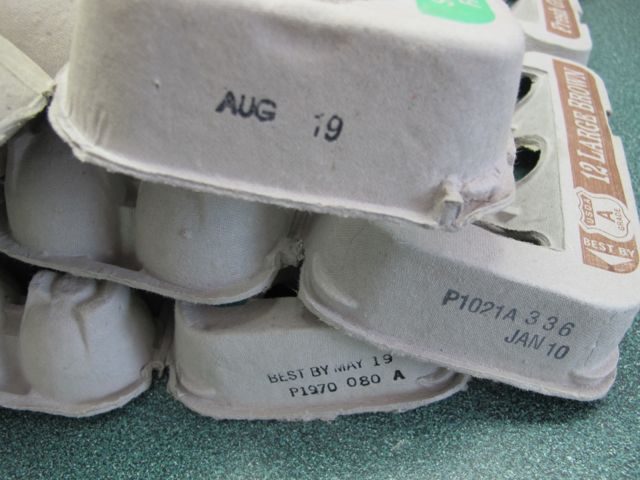
If you purchase your eggs from a local grocery store always check your container for cracked or broken eggs. Cracks and leakage could lead to contamination of the egg. Don’t buy out-of-date eggs either. Check the dates on the cartons as well, egg cartons with the USDA grade shield on them must display a  “pack date” or the day the eggs were washed, graded and placed in the carton. This number, called the Julian Date, is a three-digit code that represents the consecutive day of the year starting with January 1 as 001 and ending with December 31 as 365. The “sell-by” or “expiration” date is not required by the federal government, but may be required by the egg laws in the state where the eggs are marketed.  Always purchase eggs before the sell-by or expiration date on the carton. When you get your eggs home from the store refrigerate them.

Have you ever noticed the dates on egg cartons?

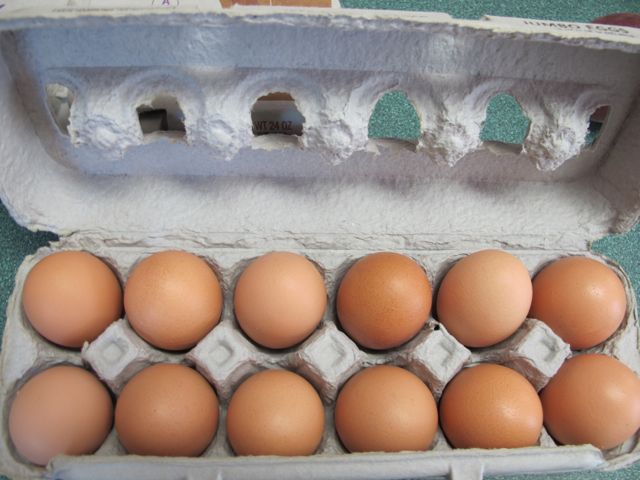
Whether purchasing eggs from a local farm or farm market or collecting your own make sure the eggs are clean and dry. Then place them in an egg carton and label them with the date they were collected or purchased. Eggs are best stored in the refrigerator. Eggs are good for one month after the date of collection, if stored in the refrigerator. I have actually found that they’re good for a few weeks after this, but I bake with them or hard-boil them.

There is a way to check egg freshness; fill a bowl or large measuring cup with water and place your eggs in it. An egg that floats has too big an air pocket inside the shell; the contents have evaporated too much and it is likely spoiled. Compost it.

This egg is fresh!
This egg is fresh!

One last hint, when storing your eggs store them with the large end up. This will keep them the freshest. This is because the air cell in an egg is located at the large end, so less moisture will evaporate out of the egg if it is set with the air cell up in the carton (since the pointy end, with the egg white closer to the porous surface of the shell, is less exposed to the air when it is sitting in the carton).

Store your eggs with the large end up.

Linked to: WeAreThatFamily

Enhanced by Zemanta

Recipe Box: Homemade Crackers

In challenging our household to move toward eating all real food I decided to try making our own crackers. We enjoy relaxing at the end of the week with some locally made cheese and crackers. I was ready to try making my own crackers.

There are numerous recipes online, I decided to keep it simple for my first attempt.

Homemade Crackers
Maria’s Farm Country Kitchen

2 cups whole-wheat pastry flour (ground from soft wheat berries)
1 tsp salt
2/3 cup warm water
1/3 cup olive oil

Heat the oven to 375 degrees. Put the flour, salt, warm water and olive oil in a bowl, and stir until all the flour is absorbed.

Combine all the ingredients in a bowl.

It will feel more like dough than batter. Take a baking tray with edges and grease it well with olive oil. Put the dough on the tray and smooth it out to cover the whole bottom. Use your hands or use a rolling pin, whatever works better.

Roll dough out to fill the pan.

Take a knife and cut the dough into whatever shape you would like, I cut it into little squares.

Score the dough with a knife.

Sprinkle the top with salt or another seasoning of your choice. Bake for about 15 minutes or until golden.

Crackers cooling on a wire rack.

The crackers will harden up after they cool. Store in an airtight container.

Enjoying some cheese and crackers.

I am so excited at how easy it was to make crackers! The possibilities of seasoning are endless! The trick is to roll the dough thin enough and let it cook long enough so the crackers are crispy. My dough was not exactly even so some of the crackers were a little thicker and not as crispy. They sure don’t last long!

Linked to: FreedomFridays, WeekendWonders, FoodieFriday, TheBestBlogRecipes, RattlebridgeFarm, SimplySweetHome, AnnKroeker, FoodieFriendsFriday, JustWingingIt, AnyonitaNibbles, BloomDesigns, TheCountryCook, FarmGirlFridayBlogHop, TheJennyEvolution, DessertNowDinerLater, CheeriosAndLattes, CallMePMC, CreativeHomeAndGardenHop, WillCookForSmiles, MyMixingSpoons, TownsendHouse, TheChickenChick, MakeAheadMealsForBusyMoms, FlourMewithLove. MySweetAndSavory, TumbleweedContessa, NourishingJoy, HomemakerOnADime, FeedingBig, HomesteadBarnHop, OurDelightfulHome, TheDedicatedHouse, AHumbleBumble, HearthAndSoulHop, LoveBakesGoodCakes, RealFoodForager, LoveInTheKitchen, TheGatheringSpot, TuesdayGreens, HealthyRootsHappySoul, BackToTheBasics, NaptimeCreations, MandysRecipeBox, InsideBruCrewLife, AnyonitaNibbles, HomeTo4Kiddos, KellyTheKitchenKop, GastronomicalSovereignty, AllSheCooks, RivertonHousewives, AdornedFromAbove, TheNYMelroseFamily, DucksNARow, HungryLittleGirl, TheThriftyHome, ThisChickCooks, MostlyHomemadeMoms, EasyLifeAGlimpseInside, FrugalFollies, HomemakersChallenge, 7Alive, KatherinesCorner, BrambleberryCottage, MizHelensCountryCottage, LambertsLately, Saving4Six, BloomDesigns

Frugal Tips: Turn Takeout Into Make-In

Here in Vermont we don’t have the opportunity to order take out and as a result we’ve learned to make our own meals as good or better than anything you could order. However if you live in an urban or suburban area, you probably have dozens of places that deliver cheap, fast takeout food. When you’re juggling a busy schedule it’s hard not to rely on take out now and then.

But convenience comes with a price. Not only does takeout generate numerous disposable containers but the food is usually higher in fat, calories and sodium content than just about anything homemade. If you’re trying to spend less money reduce your take out ordering! There are many typical take out meals that you can reproduce at home for a fraction of the cost. Pizza, stir-fries and fried rice are just a couple of examples.

Here is our Fried Rice Recipe that we’ve been making for years. You can also add any leftovers you have in the fridge. The last time I made this meal I used up our leftover rice and a little left over corn. It is also wonderful the next day for lunch.

Ingredients for Stir-Fry Rice

Ham and Egg Fried Rice

3 cups cooked rice
2 eggs – scrambled in 1 Tbsp oil
½ cup diced cooked ham
½ cup cooked peas
1 ½ Tbsp soy sauce
1 stalk scallion, finely chopped
2 Tbsp oil

Heat 1 Tbsp oil, when it is hot, add your eggs and scramble them. Remove the eggs from the pan and set aside.

Scramble eggs then set aside.

Heat 2 Tbsp oil and stir-fry the rice thoroughly.

Stir Fry Your Rice.
Stir Fry Your Rice.

Add soy sauce and stir. Add peas and ham and stir again. Add scrambles eggs and scallions breaking the eggs into smaller pieces while mixing. Stir a few more times. Serve hot.

Stir and serve hot!
Stir and serve hot!

I hope you enjoy this recipe, with a little practice, you may end up tossing  that takeout menu collection!

Ham and Egg Fried Rice

Linked to: HungryLittleGirl, LoveBakesGoodCakes, EcoKidsTuesday, MostlyHomemadeMom, AllSheCooks, KatherinesCorner, LambertsLately, FrugalFollies, FrugallySustainable, HomemakersChallenge, SevenAlive, TheBrambleberryCottage, ADelightsomeLife, ALifeInBalance, ServingJoyfully, MizHelensCountryCottage, Saving4Six, TheThriftyHome, AGlimpseInside, LoveInTheKitchen, KatheWithAnE, GooseberryPatch

Prudent Pantry: Is My Baking Powder Fresh?

How can you tell if baking powder is still fresh?

Is your baking powder fresh?

Perhaps you’ve had this container of baking powder sitting in your pantry for a while. How can you determine if it is still fresh and ready to be used in your next baking project?

Place ½ teaspoon in a small bowl, add ¼ cup of hot water, and see whether or not it foams.

Add 1/4 tsp to your water.

If so, keep it.

My baking powder is fresh!

If not, toss it. In general baking powder will last for 6-12 months in your pantry.

Linked to: NourishingJoy, HomemakerOnADime


Easy Veggie Pasta – Delicious

As our garden begins to produce fresh vegetables one of my favorite meals is a Veggie Pasta dish. The original recipe came from a Weight Watchers recipe. I have just made a few changes. This is a flexible recipe, use what you have on hand and enjoy! Be sure to use the freshest vegetables you can. If you don’t grow your own check out your local farmer’s market.

Easy Veggie Pasta

Ingredients:

½ pound spaghetti noodles
2 small yellow squash or zucchini (about 2 cups), julienned
2 cups of carrots, julienned
2-4 tomatoes, diced
½ cup garlic scapes, sliced thinly
¼ cup onions, diced
1 Tbsp olive oil
2 tsp Italian seasoning

Directions:

Cook the spaghetti noodles according to the package directions. After about 6 minutes add the carrots and the yellow squash. Cook until the pasta is al dente and the vegetables are tender, about 6 more minutes. Drain the pasta and the vegetables in a large colander.

Pasta, carrots and squash.

While the pasta is draining, add the olive oil to a large sauté pan. Add the diced onion and the garlic scapes and cook until the onion is tender.

Saute onion and garlic scapes.

Add the diced tomatoes to the pan and sauté until the tomatoes are soft.

Cook tomatoes until soft.

Add the seasoning to taste.  Serve the pasta and vegetables with the sauce on top. Sprinkle with freshly ground parmesan cheese and enjoy!

Easy Veggie Pasta

My Garden: Compost Bin Update

Last year we made a wonderful three-bin composter.

composting, prudent living
Three Bin Composter

Over the summer and into the fall we would layer weeds and chicken shavings into the bins. We didn’t spend enough time turning the pile or even paying much attention to the bins. The problem with this is that turning your pile may mean all the difference between getting compost within 4-8 weeks or 3-8 months.

Neglected compost bins.

Every pile needs an influx of oxygen to help things decompose. Lack of oxygen means slower decomposition, lower temperatures and possible odors! Ideally you should turn your pile every 7-10 days. This is easily done with a garden fork, a shovel or a compost aerator.

We decided to combine the bins, layer the materials we’ve collected and create optimum conditions for good compost production.

Filling the bins.
Filling the bins.

We started with the bin with the least amount of material. What was in the bin was turned over and combined. We then took the material from the other two bins and layered the material making sure there was a good mixture of greens and browns.

Ready for compost production,

We will spend more time turning these new piles regularly and by the fall we should have a good amount of compost to add to the garden.

English: A picture of compost soil
Beautiful compost.

If you want to create compost there are four rules to remember. Use quality materials, have adequate volume in your pile, have consistent moisture and good air circulation.

Linked To: ASouthernDaydreamer, SidewalkShoes, TheHomeAcreHop, SmallFootprintFriday, LittleHouseInTheSuburbs, TootsieTime, InspirationCafe, TheBackyardFarmingConnection, AnOregonGarden


Enhanced by Zemanta

Frugal Tips: Using Up Every Last Bit

We all want to avoid waste in the kitchen but what can we do to make use of every last bit? We don’t want to just keep reheating the same meal and eating it until it’s finished so what can we do?

My Fridge with Thanksgiving Leftovers
(Photo credit: Pixel Playa)

Use the leftovers to pack a lunch to bring to work or send to school.

makunouchi bentou (lunchbox)
 (Photo credit: Wikipedia)

Small amounts of chicken, veal, pork or even fish can be chopped and gently warmed in soups, stews or pasta dishes. Use them cold in salads or as sandwiches. Leftover seafood should be used within a day. One of my favorite soups is a soup using smoked salmon. Whenever we receive a gift of smoked salmon and don’t eat it all in one sitting I make this wonderful salmon chowder.

Red meats like beef and lamb are easier to reheat because they are fatter and juicier. Chop into pieces and reheat in soups, stews, casseroles and stir-fries. They can also be used in salads and sandwiches or minced into burrito or taco fillings.

Tacos
(Photo credit: YardSale)

Do you have leftover stir-fry? Refry with a new ingredient or add some salad dressing and eat chilled. Or chop the stir-fry up, thin with a sauce and serve over pasta, lentils or grains.

Add some stock to your leftover casseroles and serve them as a soup!

Vegetable beef barley soup
(Photo credit: Wikipedia)

There are some leftovers that no one seems to mind eating, like leftover pizza! How do you use up the leftovers in your kitchen?

pizza, grilling
Cheese & Pepperoni Pizza.

Linked to: CarrieThisHome, Frugallysustainable, TheThriftyHome, ALifeInBalance, ServingJoyfully

Enhanced by Zemanta

Prudent Pantry: Clean, Sparkling Fruit!

Many of you may have seen this fabulous tip already. It’s an easy way to clean your fruit without any chemicals! All you need is some vinegar!

Ingredients for washing fruit.


Fill your sink with water and add one cup of vinegar. Stir.

Fill your sink and add vinegar.

Add all your fruit and soak for ten minutes. The water will be dirty but your fruit will sparkle with no wax and no dirty film.

Add fruit and vegetables to the sink.


This works for berries as well and it will keep them from molding. Do this with strawberries and they will last for weeks!

Clean, sparkling fruit.

Linked to: OurDelightfulHome, TheDedicatedHouse, EcoKidsTuesday, HealthyRootsHappySouls, Titus2Women, TheNYMelroseFamily, AdornedFromAbove, WeAreThatFamily, WildcraftingWednesday, APeekIntoMyParadise, AGlimpseInside, HomemakersChallenge, SevenAlive, BloomDesigns, LambertsLately, TheHomeAcreHop, TwoGirlsAndAParty, BrambleberryCottage, Saving4Six, GodsGrowingGarden, SimplyNaturalSaturdays, TutusAndTeaParties

Garlic Scape Scampi

As I mentioned recently,  I have harvested my garlic scapes. Garlic scapes can be used in many ways. Although I froze most of the garlic scape pesto I made, I used some  of the scapes to make Garlic Scape Scampi. The combination of the garlic and shrimp was delicious!

The ingredients were simple; I had everything on hand except the shrimp.

Simple ingredients.

Garlic Scape Scampi
Closet Cooking

Ingredients:

1 Tbsp olive oil
1 Tbsp butter
1 pinch of red chili flakes
½ pound shrimp, shelled and deveined
½ cup white wine
½ lemon juiced
¼ cup garlic scapes, chopped
1 Tbsp butter

Directions:

Heat the oil and melt the butter in a large pan. Add the red pepper flakes and sauté until fragrant. Add the shrimp and sauté until cooked, about 2-3 minutes per side. Remove the shrimp form the pan.

Remove shrimp from the pan.

Add the wine, garlic scapes and lemon juice to the pan and bring to a boil Simmer the liquid until reduced by about half.

Simmer the scapes in the wine.

Add butter, wait until it melts and turn off the heat. Add shrimp, stir and serve over pasta.

Garlic Scape Scampi

You may not grow your own garlic however I have noticed more and more that you confined garlic scapes in the local market or Farmer’s Market. If you’ve never tried cooking with garlic scapes you are in for a treat!

My Garden: What To Do With Garlic Scapes?

Toward the end of June – early July is the time to harvest the scapes from your garlic plant. You want the plant to send all of its energy into bulbs not into a flower producing seeds. So you cut the scapes off.

Garlic Scapes
Garlic Scapes

They can be used in many ways, you can cut them up and use them in a stir-fry or you can use them to make pesto. I made a delicious Garlic Scape Scampi which I will share on Friday.

With the majority of the scapes I made pesto!

Garlic Scape Pesto

Ingredients for about two cups:

9-10 garlic scapes, knobby seed-pods removed and discarded
1/2 cup (2.5 oz bag) slivered almonds
3/4 cup extra virgin olive oil
1/4 cup grated Parmesan cheese
Salt and Pepper to taste

Special Equipment – A food processor; a rubber spatula

Preparing the scapes – Rinse scapes in cold water, then roughly chop into half-inch pieces.

Processing — Pour scapes and slivered almonds into the bowl of your food processor. Blend for 30 seconds, or until a fairly smooth texture is achieved. Scrape down sides of bowl with your rubber spatula.

Puree the scapes and the almonds.

With the machine running, slowly add olive oil, and process until thoroughly incorporated, about 15 seconds. Then add the Parmesan cheese, salt, and pepper, and blend for another 5 seconds. Taste carefully — you might like to add more salt and pepper.

Although this pesto is good freshly made, it is even better when refrigerated for several hours or overnight. Before chilling, place the pesto in a glass bowl and cover tightly with plastic wrap.

This pesto can be frozen in an airtight container for up to three months.

Garlic Scape Pesto for the Freezer!

Although I froze a good portion of the pesto we enjoyed some on pasta immediately! It was so good!

Garlic Scape Pesto and Pasta


Linked to: AnOregonGarden , TheNYMelroseFamily, AdornedFromAbove, SidewalkShoes, ASouthernDaydreamer, WildcraftingWednesday, APeakIntoMyParadise, MostlyHomemadeMom, HomemakersChallenge, KatherinesCorner, BrambleberryCottage, SevenAlive, ADelightsomeLife, MizHelensCountryKitchen, ServingJoyfully, ALifeInBalance, LittleHouseInTheSuburbs, TootsieTime, SmallFootprintFridays, FromTheFarm, SimplyNaturalSaturdays, BackyardFarmingConnectionDeborahJeansDandelionHouse, MySweetAndSavory, HomesteadBarnHop, HomemakerOnADime, TuesdaysGreens, AnOregonCottage, BackToTheBasics

Enhanced by Zemanta
Design a site like this with WordPress.com
Get started