I was torn between sharing this recipe or the recipe we enjoyed in our home last week, Homemade Noodles with Peas, Asparagus and Pancetta. After much debate and the fact that this post was already written, I decided to share my delicious Spinach, Butternut Squash and Leek Lasagna recipe. I will share the other recipe soon, promise!
I’ve been known to tweak a recipe now and then. When making this lasagna I looked over a few other recipes and decided to completely make my own version. The result was excellent, and after serving it to our company, there was nothing left!
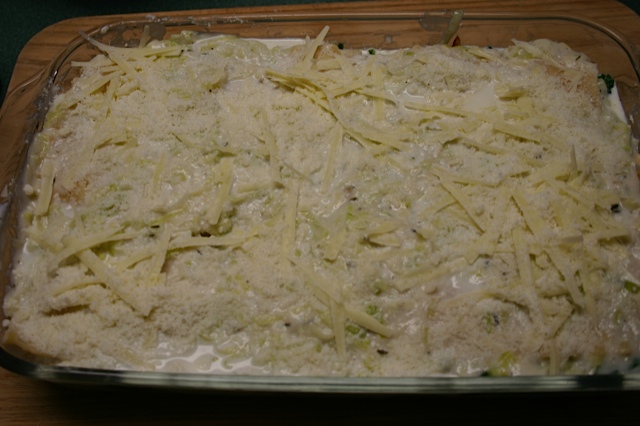
Spinach, Butternut Squash and Leek Lasagna
Made one 9 x 13 pan
Ingredients:
6 lasagna noodles
2 small packages of frozen butternut squash ravioli
2 Tbsp butter
5 medium leeks, thinly sliced and washed thoroughly (about 6 cups)
½ cup flour
4 cups milk
1 tsp thyme
1 tsp salt
3.4 tsp grated nutmeg
½ tsp freshly ground pepper
1 cup Parmigiano-Reggiano cheese, grated
1 cup Asiago cheese, grated
¼ cup toasted pine nuts
Cooking spray
1 tsp olive oil
¼ tsp crushed red pepper
4 garlic cloves
18 oz fresh baby spinach
¼ tsp salt
Directions:
Preheat your oven to 350 degrees. Coat a 9×13 pan with cooking spray.
Bring a large pot of water to a boil, cook noodles until not quite done about two minutes less than the package directions. Drain; return the noodles to the pot and cover with cold water. Cook the ravioli until not quite done.
Melt butter in a heavy pan over medium heat. Add leeks; cook, stirring often until softened, about six minutes. Sprinkle flour over the leeks and stir well. Cook, stirring constantly, for 2 minutes. Whisk in milk and cook, whisking constantly, until thick and bubbling, 8-10 minutes. Whisk in thyme, salt, nutmeg and pepper. Remove from the heat.

In another non-stick pan combine 1 tsp oil, red pepper, and garlic over medium heat; cook 2 minutes, stirring constantly. Add spinach, a little at a time and cook until wilted, stirring frequently. Add ¼ tsp salt and cook until liquid evaporates. Remove from heat.

To assemble lasagna spoon about 1/3 cup of the leek mixture on the bottom of your 9×13 pan. Arrange 3 noodles over the leek mixture; top with some of the spinach, some pine nuts, ¼ cup Asiago cheese and ¼ cup Parmigiano-Reggiano cheese.
Instead of arranging more lasagna noodles over the cheese; arrange half of your butternut squash ravioli over the cheese.

Repeat layering the leek mixture, spinach, cheese and the rest of your ravioli. Repeat layering with the leek mixture, the rest of the spinach, cheese and top with your remaining lasagna noodles.

Pour the remaining leek mixture over the lasagna noodles and top with the remaining cheese.

Cover with foil and bake for 50 minutes, uncover and bake until bubbling and lightly browned, about 30-45 minutes. Let stand for 10 minutes before serving. Enjoy!
Unfortunately in the busyness of company arriving and serving the lasagna, I did not take a picture before serving. You’ll have to use your imagination! By the time dinner was over there was nothing left to take a picture of! Take my word for it, it was delicious!