Prudent Pantry – Pantry Challenge

I have a well-stocked pantry and a well-stocked freezer. For this I am very thankful.

frozen foods, frozen meals
My freezer is full of frozen meals!
pantry, prudent pantry, well stocked
My pantry cupboard is full!

I usually have ingredients on hand at any given point to come up with a meal. I have decided to challenge myself. For the next two weeks I am only going to purchase items from the grocery store that are absolutely necessary such as fresh vegetables. I will give myself a budget of $50 for the two weeks. Milk I will get at the local farm. Our chickens will supply eggs. For the rest of the time I will be utilizing food from our pantry and freezer. This will give me a chance to use up leftovers, unbury freezer items and clean out my pantry. I will use the money normally spent on groceries to bolster our savings. My desire is to continue this challenge for an additional two weeks which would mean we only spent $100 on food for the month. Do you think it’s possible?

This challenge will start on Sunday and go for two weeks. I will give you our meal plan as I go along. This is what I’m planning to eat for the first week:

Sunday: Shepherd’s Pie (freezer)
Monday: Pork, Bean & Kale Soup (leftovers)
Tuesday: Chicken Stir-fry
Wednesday: Baked Barley Risotto with Butternut Squash (squash on counter)
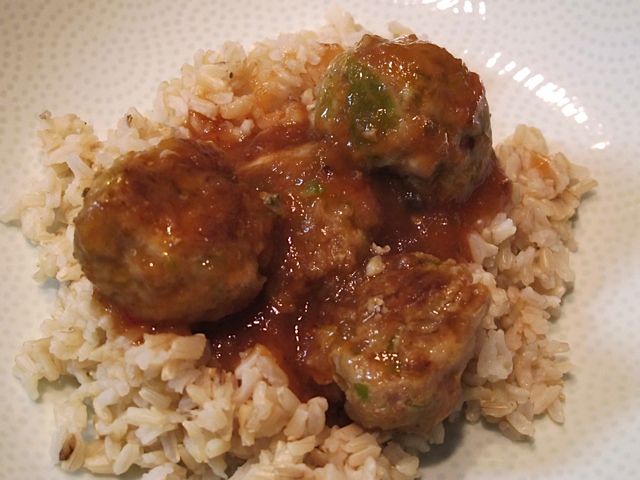
Thursday: Spaghetti and Meatballs (freezer)
Friday: Country Chicken Chowder
Saturday: Quiche

Breakfast will either be dry cereal we have on hand, homemade granola, oatmeal or eggs. If inspired I might even make pancakes or waffles (much to my husband’s delight, he claims they are an excellent excuse to enjoy our local maple syrup!). Lunch will be leftovers or soup from the freezer or sandwiches from what is on hand. I’m hoping this will inspire me to make better use of the food we do have in stock. I usually cook meals from scratch but don’t always do a good job with using things already in the pantry! I spend a lot of time in the summer preserving our harvest, now it’s time to make use of it.

soup, broth, prudent pantry
Homemade soups and canned broth.
canning, tomato sauce, prudent pantry
Lots of tomato sauce on hand.

Next Thursday I’ll give you an update as to how we’re doing! If you’d like any of the recipes I’m going to be making please comment below and let me know, I’d be glad to share them! This challenge is something we’re taking on personally, would any of my faithful readers like to join us?

My Garden: Making Your Own Seed Starting Mix

Starting your own seeds is one way to save money in your gardening costs. Another way is to make your own seed starting mixture. A variety of materials may be used to germinate seeds and root cuttings. These mixtures must be sterile and must meet certain other criteria.

They must be firm and dense enough to hold cuttings or seeds in place during rooting or germination. They must be of a consistency that will not alter drastically either dry or wet, since this would cause root damage. They must be porous enough to drain properly yet retain enough moisture so that frequent watering will not be necessary.

When starting seeds you can purchase large bags of pre-mixed soil designed especially for seed germination. I have begun to mix my own when I just wasn’t happy with the results of the store bought mixture.  The mixture I have been using is easy to make and does a great job. As you experiment with various components you will discover what works best for you.

Top soil, Peat moss, gardening
Ingredients to make your own seed starting mixture.

This is the combination I use:

top soil, loam, gardening
Top soil or garden loam.

1 part sterilized garden loam or top soil
1 part coarse sand or perlite
1 part peat moss

Pearlite is used to increase aeration in a mixture. It is derived from a type of volcanic rock and is processed into light, porous, sterile particles that hold many times their own weight in water.

Perlite, soil mixture, gardening
Perlite

Sand is used to add body and drainage to a soil medium, and is also excellent when used alone for root cuttings.

Peat moss is used in heavy mixtures to lighten and increaser porosity; it is derived from partly decomposed aquatic plants.

Peat moss, soil mixtures, gardening
Peat Moss

Now that we have mixed up our soil we are ready to start planting seeds! Hopefully next week I will start with my leek and onion seeds. They need time to grow and establish themselves before I can plant them directly into the garden. I enjoy starting seeds inside as it is a sure sign that spring is coming even when it doesn’t look or feel like it outside!

seed starting mixture, gardening
Homemade seed starting mixture.


Frugal Tips: Homemade Vanilla Extract

I learned two things this week and it’s only Tuesday. In Vermont you can return vodka bottles for a $.15 deposit and how to make vanilla extract! Having not bought many bottles of vodka I had no idea the bottles were returnable; you learn something new every day!

This week I started my first batch of homemade vanilla extract. It won’t be ready for a while as I do have to let it sit for four to six months. To start your own batch you will need:

A large jar (a gallon or less, depending on how much extract you plan to make)
Vodka (the inexpensive stuff is fine)
Vanilla Beans (which I ordered through Olive Nation)
Kitchen Shears

vanilla extract, vanilla beans
Vanilla Beans

Begin by cutting through each bean lengthwise, leaving about an inch at the top of each bean so they stay together.

homemade vanilla extract
Cut vanilla bean.
homemade vanilla extract, vanilla beans
Carefully cut each bean.


Place all your beans into your jar.

Fill the jar with vodka. Put the lid on and store in a dark place for 4-6 months. Occasionally check the jar out and give it a shake.

Vodka, vanilla beans, homemade vanilla extract
Pouring vodka into the jar.
vanilla beans, vodka, homemade vanila extract
Cut vanilla beans and vodka.


Once the time period has passed, strain out the vanilla beans using a coffee filter lined colander. Bottle the extract in dark amber bottles and you’re ready to give it as gifts and start cooking with it yourself!

1 gallon of vodka takes 80 vanilla beans
½ gallon of vodka (1.75L) takes 40 vanilla beans
1 quart of vodka takes 20 vanilla bean

homemade vanilla extract, frugal tip
Homemade Vanilla Extract in the works.
homemade vanilla extract, prudent pantry, frugal tip
Labeled jar ready for the pantry.


Asian Meatballs

As we head toward the middle of the month my focus is on healthy recipes. For the next few weeks I will be sharing recipes that are better for us. This Asian Meatballs  recipe  is adapted from a Weight Watchers recipe I discovered years ago. It is actually an appetizer recipe but I have to admit I have never served it as an appetizer, rather I serve it with some brown rice and it makes an excellent dinner. Mix up a salad and you’ve got a well-rounded meal!Eating Healthy, asian meatballs

I hope you enjoy this recipe as much as my family does. The great thing is that you can mix it up ahead of time and just keep it in the fridge until you’re ready to eat. It reheats wonderfully in the microwave. This recipe can be halved. It makes about 16 appetizer servings or feeds 6 for dinner.

Asian Meatballs

Ingredients:

Package of ground turkey (about 20oz)
1 green pepper, seeded and minced
8 scallions, thinly sliced
2/3 cup dried bread crumbs (sometimes I used seasoned)
4 Tbsp minced water chestnuts (almost the whole small can)
2 egg whites
2 Tbsp reduced sodium soy sauce
½ cup sweet and sour sauce
1 cup unsweetened applesauce

Directions:

Preheat your oven to 375. Spray a nonstick jelly roll pan with cooking spray. In a medium bowl, lightly combine the turkey, pepper, scallions, bread crumbs, water chestnuts, egg whites and soy sauce.

Shape into meatballs, about 1” in diameter ( I make them slightly larger when serving this for dinner). Place on the pan and bake until cooked through and browned about 15-25 minutes.eating healthy,turkey meatballs, asian meatballs

Meanwhile in a 2-quart microwavable dish, combine the sweet and sour sauce and applesauce; microwave on high until hot and bubbly, 2 minutes.

Combine the meatballs and sauce and pour over rice. Serve at one or reheat in the microwave when you are ready to enjoy this tasty meal.eating healthy, meatballs, brown rice

Prudent Pantry: Salt

table salt, kosher salt, sea salt, prudent pantry
Salt comes in many varieties.

I have already mentioned many of the items I keep on hand in my pantry; wheat berries, oats, vinegar, baking soda, barley, quinoa, and dried beans. Salt is another item that is perfect to store in your pantry. Both table salt, kosher salt and sea salt are good items to have on hand.

Kosher salt — which really should be called koshering salt — is a coarse-grained salt, named for its use in the production of kosher meats. (It helps to draw blood out of meat, much like drawing water out of eggplant or zucchini.) Unlike table salt, which since the 1920s has had iodine and starch added, kosher salt is additive-free.

Kosher salt differs from table salt in other ways, table salt is granular while kosher salt is shaped like a tiny, delicate, four sided pyramid. Similar to the difference between a snowflake and an ice cube! It helps kosher salt to dissolve in half the time.

Sea salt is made by the evaporation of sea water. It is a finishing salt added after the cooking to brighten the flavor of the food. Though salt is salt (containing approximately 2400 milligrams of sodium per teaspoon), sea salt has fewer crystals per teaspoon than table salt or kosher salt — and, therefore, less sodium.

Salt can be stored indefinitely. Iodized salt can yellow over time, but it is still good. Salt might also cake, if there isn’t any anti-cake ingredient already in the salt. Store in an airtight container to prevent this. If it’s already hardened just dry it in the oven and break it up. It will still be perfectly usable.

In addition to using salt in cooking and preserving food salt also has many other uses around the house.

Test for rotten eggs. Put an egg in a cup of water to which you’ve added two teaspoons of salt. A fresh egg will sink, but one that’s iffy will float.

Grease: Remove grease spots in a rug with a mixture of 1 part salt to 4 parts rubbing alcohol. Rub hard, going in the same direction as the nap of the carpet, then rinse with water.

Red Wine: Immediately blot up all moisture from the spill, and then sprinkle the area with salt. Let the stain sit for 15 minutes. The salt should absorb any remaining wine in the carpet (turning pink as a result). Then clean the entire area with a mixture of ⅓ cup vinegar and ⅔ cup water.

Candles: Stop new candles from dripping by first soaking them in a strong solution of 1/2 cup water and 1/2 cup salt for several hours. Let the candles dry, then burn them as usual.

Fireplaces: An occasional handful of salt thrown into your fireplace fire will help loosen soot inside your chimney. It also makes a cheery, bright yellow flame.

Rust: Mix salt and cream of tartar, and moisten with enough water to make a paste. Apply to a rust stain on a piece of metal outdoor furniture; let it sit in the sun until dry. Repeat the process if necessary. Another rust removal method is to make a paste of lemon juice and salt. Apply paste to the rusted object, and rub with a dry, soft cloth.

In the garden: Kill the grass growing in the cement or between patio stones. Sprinkle salt on the grass and pour very hot water over it. Or sprinkle coarse salt on the grass, let stand all-day or overnight, then pour hot tap water over it.

As you’ve seen, salt is not just for the dinner table. It can be great for cleaning and home repairs as well.

My Garden – Repotting a Peace Lily

Before I get into making my own seed starting mixture there are a few things I have to do regarding my houseplants! When I can’t work outside in the garden I tend to focus on my houseplants and take care of them. I’ve already transplanted my orchids and my aloe but one plant still to take care of is my peace lily.

spathuphyllum tango, houseplants, repotting
My peace lily before repotting.

Many people have a peace lily (spathuphyllum tango) in their home; it is very easy to care for and produces wonderful flowers. They thrive in indirect bright light. They like heavy watering but also like to dry out in between watering. Do keep pets and children away from this plant, as it is one of the many poisonous houseplants. Although they prefer a more compact root ball every other year or so I divide the plant, which seems to keep it pretty happy. When the active growth slows down or the leaves become smaller it is time to repot. My plant is flowering less and less and it is extremely crowded so I know it’s time to re-pot.

Repotting is rather easy. You can divide the plant into a number of new plants; perhaps you have a friend you would like to share with?

First fill a slightly larger pot that has drainage holes halfway with potting soil. Choose a pot only slightly larger because the plants grow well in crowded conditions. Make a small space in the middle of the soil for the divided peace lily plant.

houseplants, repotting, potting soil
I have a new pot ready, filled with potting soil.

Loosen the dirt around the roots of the peace lily. Use a gardening spade to loosen the soil, and then carefully lift the plant out of the container. You can also tilt the container on its side and squeeze on it to loosen the soil from the container. I gently pull the plant out of the pot over some newspaper, usually in the garage.  Today it was too cold for such a project in the garage so I made a huge mess over a sheet on my kitchen floor. When you start pulling the plant apart you will realize it is made up of many plants. You could actually put each plant in it’s own pot! After separating the plant I set aside the ones that will get re-potted. Rinse the dirt off the roots and run the roots of the plant under cool water.

repotting houseplants, plants
You can see the many baby plants.
houseplants, root bound, repotting
My peace lily is really root bound.


houseplants, repotting, prudent living
Separating the plants I want to repot.
washing roots, repotting
Selected plants ready for a root washing.


Place the peace lily in the new container. Fill it with potting soil, and pack it down around the roots. Water the peace lily to keep the soil moist. I usually give the leaves a wipe with a damp cloth as well. I now have two plants and a pile of discarded plants for my compost pile!

repotted peace lily, houseplants
In a few weeks this plant will start to fill out again.
repotted peace lily
Repotted peace lily.


Once my peace lily is re-potted I can now focus on our spring vegetable garden. I have placed my seed order and as soon as my seeds come in I will be starting certain varieties inside. I look forward to having my kitchen filled with baby seedlings, a sure sign that spring is coming!

Frugal Tips: Homemade Mixes

There are many ways to save money on your grocery budget. You can keep track of sales and purchase items at a discount. You can buy in bulk and you can grow your own food. Another way to save money is to make your own mixes. Not only are these mixes easier on your wallet but they can also be much better for you. Many seasoning packets and mixes are full of MSG and other additives, things our bodies just don’t need. Here are a few recipes for you to adapt in your kitchen.

Homemade Rice Seasoning Mix

Ingredients

¾ cup chicken bouillon granules
½ cup dried parsley
1 tbsp. basil
1 tbsp dill weed
2 tbsp, dried onion flakes
1 tsp seasoning salt
2 tsp garlic powder
1 tsp lemon pepper seasoning
1 cup almonds, coarsely chopped (optional)

Mix together and store in an airtight container. When preparing rice, combine 1 cup rice, 2 cups water, and three tablespoons of the seasoning. Bring your water to a boil and add rice & seasoning. Reduce to simmer and cook for eighteen minutes.

Homemade Baking Mix (AKA Bisquick)

Ingredients

5 ½ cups sifted flour
1 tsp baking soda
3 tbsp baking powder
1 cup shortening

Mix all ingredients well until crumbly. Store in an air tight container.

Homemade Shake & Bake

Ingredients

4 cups flour
4 cups ground inexpensive crackers
4 tbsp salt
2 tbsp sugar
2 tsp garlic powder
2 tsp onion powder
3 tbsp paprika
¼ cup vegetable oil

Mix well and store indefinitely in the refrigerator in a covered container.

Before moving to Vermont I used to make our own homemade pancake syrup. It was much tastier than the products I could find in the store and we rather enjoyed it. It’s no where near as good as real maple syrup but not a bad replacement.

Homemade Pancake Syrup

Ingredients

3 cups granulated sugar
1 ½ cups water
3 tbsp molasses
1 tsp vanilla
2 tsp butter flavoring
1 tsp maple extract

Bring all of the ingredients to a boil, stirring until the sugar dissolves. Turn off burner, but leave pot on burner until the bubbling stops.


Hot Milk Sponge Cake

A dear friend I met while living in Florida shared this Hot Milk Sponge Cake recipe with me. She and I had the same birthday and she was like a surrogate grandparent to our children while living so far from family. Needless to say she is a very special person in my life and this is a delicious simple recipe. It’s one of those recipes you can easily make and your probably have all the ingredients on hand.

milk sponge cake, homemade

Hot Milk Sponge Cake

Ingredients:

1 Cup all purpose flour
1 tsp baking powder
¼ tsp salt
½ cup milk
2 eggs
2 Tbsp butter
1 cup sugar
1 tsp vanilla

Directions:

Sift together the flour, baking powder and salt. Heat the milk and butter slowly until the butter melts. Beat eggs until thick and lemon colored, about 3 minutes on high speed if using an electric mixer. Gradually add the sugar  to the egg mixture while continuing to beat for 4-6 minutes. Add sifted dry ingredients to egg mixture; stir just until blended. Stir in hot milk mixture and vanilla; blend well. Pour into a greased and floured 9×9 pan.

Bake at 350 for 25-30 minutes. Cool in pan.

Excellent for shortcake with fruit, use with a sauce or very good plain!

cake, home cooking
Enjoy a pice plain, it’s so good!

If necessary you can also freeze this cake, although in our family there are never any leftovers!

Do you have a favorite recipe shared by a friend that whenever you make the recipe it brings back wonderful memories?

Prudent Pantry: Baking Soda

Having a well-stocked pantry can help you in so many ways, mostly in saving you money. Did you know that having a well-stocked pantry can also help the environment? By having certain ingredients on hand you can make your own cleaners and help the environment by having less environmental pollutants from cleaning and personal care products washed down the drain and into our water system. Baking soda is something that not only has uses in baking but it can be used in other ways around the house.baking soda, homemade cleaners

1. Did you know you can make a toothpaste from baking soda? Make a paste from baking soda and 3% hydrogen peroxide; this can be used in place of commercial toothpaste. You can also just tip your toothbrush in baking soda for an extra boost. If you’d rather have a minty version try this recipe, this is a simple, inexpensive, odor-eliminating, tooth-whitening, and very effective formula from Organic Body Care Recipes (Storey, 2007) By Stephanie Tourles.

INGREDIENTS:

1 teaspoon baking soda
1/2 teaspoon sea salt, finely ground
1 drop peppermint, spearmint, sweet orange, clove, or cinnamon bark essential oil
A few drops tap water

Combine ingredients in a small bowl and mix them thoroughly with a toothbrush, your finger, or a small spoon until a smooth, thick paste forms. The paste shouldn’t be too runny; it has to stay on your toothbrush. Dip your toothbrush into the paste and use as you would regular commercial toothpaste.

2. Help Your Hair –  Vinegar is amazing for your hair, but baking soda has its place in the shower too. Sprinkle a small amount of baking soda into your palm along with your favorite shampoo. Shampoo as usual and rinse thoroughly–baking soda helps remove the residue that styling products leave behind so your hair is cleaner and more manageable.

3. Clean Brushes and Combs – For lustrous hair with more shine, keep brushes and combs clean. Remove natural oil build-up and hair product residue by soaking combs and brushes in a solution of 1 teaspoon of baking soda in a small basin of warm water. Rinse and allow to dry.

4. Clean the Microwave – Baking soda on a clean damp sponge cleans gently inside and outside the microwave and never leaves a harsh chemical smell. Rinse well with water.

5. Clean Floors – Remove dirt and grime (without unwanted scratch marks) from no wax and tile floors using 1/2 cup baking soda in a bucket of warm water–mop and rinse clean for a sparkling floor. For scuffmarks, use baking soda on a clean damp sponge, then rinse.household helps, cleaning, prudent living

6. Deodorize Your Refrigerator – Place an open box in the back of the fridge to neutralize odors.

7. Deodorize and Clean Dishwashers – Use Baking soda to deodorize before you run the dishwasher and then as a gentle cleanser in the wash cycle.

8. Extinguish Fires – Baking soda can help in the initial handling of minor grease or electrical kitchen fires, because when baking soda is heated, it gives off carbon dioxide, which helps to smother the flames. For small cooking fires (frying pans, broilers, ovens, grills), turn off the gas or electricity if you can safely do so. Stand back and throw handfuls of baking soda at the base of the flame to help put out the fire–and call the Fire Department just to be safe.

9. Deodorize Sneakers – Keep odors from spreading in smelly sneakers by shaking baking soda into them when not in use. Shake out before wearing.

10. Camping Cure-all – Baking soda is a must-have for your next camping trip. Its a dish washer, pot scrubber, hand cleanser, deodorant, toothpaste, fire extinguisher and many other uses.

As you can see Baking Soda has numerous uses, definitely an item you want to have in your pantry!cleaning, laundry, baking, prudent living


My Garden: What Seeds to Order?

As I mentioned last week, this is the time of year when seed catalogs start to arrive in your mailbox, full of bright glossy pictures of various vegetables and flowers that you can grow in your garden. Perhaps you’ve never had a garden before or have only purchased plants from a garden center but his year you want to plant your own seeds. How do you decide what to order?

seeds, ordering seeds, vegetable gardening, prudent living
So many choices!

The first thing you have to decide is whether or not you want to start your seeds inside or just plant your seeds directly into your garden. There are certain seeds, which must be started early, there is just not enough growing season to directly sow these seeds into your garden. Such plants as tomatoes, peppers and eggplants must all be started inside.

tomato seeds, vegetables, gardening
Tomato seeds must be started inside.

There are other seeds such as lettuce, which can be either started early inside or directly planted into your garden. Beans and corn can be directly planted outside in your garden once the soil has warmed up and the danger of frost has passed.

bean seeds, vegetable seeds, gardening
Some seeds are sowed directly into the garden.

I have been starting seeds indoors for years. It’s an enjoyable winter project and a relatively inexpensive way to grow a wide variety of plants. The first thing I do is to check the seed packet for the number of days before harvest, I want to make sure my plants will have enough time to produce before our first frost! Several years ago I found a wonderful link online for a booklet that helps you determine when to start seeds. Little House in the Suburbs offers a free download for their Spring Garden Planner. You print it out and put together a little booklet where you can easily see the dates of what needs to be planted when. The only thing you have to figure out is your frost date, when the last frost can be expected in the spring. It’s a great tool for keeping your seed-starting adventure organized!

Another important factor to consider is the size of your garden. If this is your first garden start small! Pick a few vegetables you enjoy and you know your family will like. Plant a few tomato plants, some cucumber, lettuce and beans. You will have an enjoyable time picking the fruits of your labor and knowing that your family is eating fresh, organic vegetables.

Spend some time reading a seed catalog, read the descriptions and have fun planning your garden! Once your have your garden planned and have decided to start some seeds indoors, I will tell you how to make your own seed starting mixture!

flower seeds, vegetable seeds, gardening, prudent living
I have quite a collection of various seeds!


Design a site like this with WordPress.com
Get started