My Garden: Planting Garlic

I haven’t grown garlic in years but this year I got my act together and managed to get some planted in the garden before the real snow! I purchased some locally grown garlic so it should do very well in my garden. There are two main types of garlic. Stiffneck and soft neck.  Stiffneck garlic plants send up a false flower stalk in the spring called a scape. Stiffneck garlic bulbs usually contain 5-7 large cloves. Softneck garlic plants do not produce a scape, and generally contain a dozen or more relatively small cloves. I planted the stiff neck variety. Garlic is multiplied by vegetative reproductions rather than by seeds. Individual garlic cloves are planted and they each produce a bulb. The nice thing about planting garlic is that it is planted in the fall, it’s out of sync with other crops. Garlic requires a cold treatment for about two months to induce bulbing. You want to give the garlic enough time to form roots but not enough time to form leaves! Our fairly mild fall gave me the opportunity to plant my garlic.

I pulled all the weeds from one of my raised beds and removed the various little stones that seem to pop up every year. First thing I did was to break each garlic set into its cloves, just like you do when you are going to cook them. Then I planted each clove, root side down every 5-6 inches apart. Each clove was pushed into the ground about 4 inches and then covered with dirt. I didn’t want the frost to pop them out of the ground. Once the garlic was all planted I mulched the bed with a nice layer of straw. Hopefully each of those cloves will grow into a nice, plumb garlic bulb! Now to be patient.

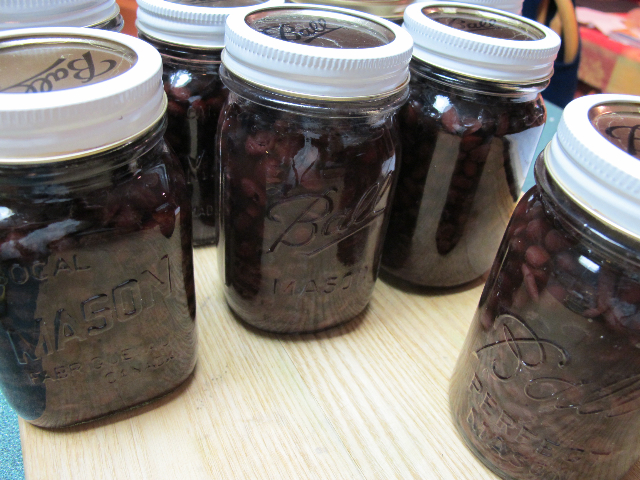
In the late spring the scapes should develop. These should be removed to retain the plant’s resources for bulb formation. The scapes are edible! Something new to try! I won’t be able to harvest my garlic until the lower leaves begin yellowing from the tips on down, usually in July. Ideally you want the bulbs to have attained their maximum size but the cloves have not started to separate, this way they will store better. I will let the bulbs air dry where they are protected from the sun. Then they will be ready to store.


Frugal Tips: Homemade Household Cleaners

When you compare the prices of cleaning products in the stores with the cost of making them at home you’d be surprised at how much you can really save! If you were to add up the toilet cleaner, kitchen cleaner, window cleaner etc. it seems the average clean household requires close to $150 worth of chemical supplies at all times. You can switch to the healthier alternatives sold in the stores but they are also expensive. The best choice for your budget and your health is to make them yourself.

One of the first products I began to make myself was a window cleaner. A good friend shared her recipe years ago and I’ve been using it ever since! With just several basic products you probably already have in your home you can make a window cleaner that really does get your windows clean! In researching various homemade window cleaners I found there are two main recipes; one uses vinegar and the other ammonia. I’ve been using the one with ammonia, I’ll have to make both and compare!

Window Cleaner #1: This can be made right in your spray bottle. Mix ½ tsp dish detergent, 3 Tbsp vinegar and 2 cups of water. Shake it up and use like any commercial variety.

Window Cleaner #2: This can also be made in your spray bottle. Combine 3 Tbsp ammonia, 1 Tbsp vinegar and fill the rest of the way up with water.

Let me know which one you think is better! Or do you have your own unique recipe?

A good all purpose cleaner:
16oz spray bottle
2 Tbsp distilled vinegar
1 tsp borax
water (if you have hard water this needs to be distilled or purified water, otherwise use tap water)
2 Tbsp mild liquid dish soap

Mix the vinegar and borax with 1 cup of hot water until dissolved. Let the mixture cool and then pour into your spray bottle. Add enough water to the bottle leaving just enough room for your dishwashing detergent. Then add the liquid soap.

Next  weeks frugal tip will be making your own laundry detergent! Stay tuned!

ammonium, vinegar, cleaners
Ingredients to make household cleaners!

Homemade Granola

This homemade granola recipe has been in our family for years and years. Originally a neighbor shared it with my mom and she’s been making it ever since.

When I left home it was one of my mom’s recipes that I brought with me! The recipe is very simple and you can make the basic recipe as is or add more ingredients if you want. Use any kind of nuts, I’ve made it with walnuts, pecans and sliced almonds. All are delicious.

Once the granola is cooled completely you can also add a variety of dried fruits; cherries, cranberries and raisins. This recipe is easy, inexpensive, very flexible and tastes much better than anything you can find in the supermarket!

Homemade Granola

Ingredients:

6 cups of quick or old fashioned oats, uncooked
1/2 cup firmly packed brown sugar
3/4 cup wheat germ
1/2 cup flaked or shredded coconut
1/3 cup sesame seed
1 cup chopped nuts
1/2 cup vegetable oil
1/3 cup honey
1-1/2 teaspoon vanilla (optional)

Directions:

Heat the oats in an ungreased 9 x 13 pan in 350 degree oven for ten minutes.

Remove the oats from the oven and combine oats, wheat germ, coconut, sesame seed and chopped nuts and stir. Combine brown sugar, vegetable oil, honey and vanilla. Pour over dry ingredients and stir until coated.

Divide mixture in half. Bake half in ungreased 9 x 13 pan at 350 degrees for 20 to 25 minutes, stirring often to brown evenly. Cool. Repeat for other half, don’t let the granola get too brown or it will burn!

Store in an airtight container. this recipe is also perfect for gift giving.

Prudent Pantry: Wheat Berries

One of the items found in my pantry are wheat berries. Wheat berries are a true whole grain! Without these kernels there would be no flour. They are loaded with nutrients and are as easy as rice to prepare, perfect for a meal any time of the year. Did you know that raw wheat, if kept dry and free of insects, can last hundreds of years without any loss of quality or taste. Unfortunately, once wheat is ground into flour, it will last only a few days without turning rancid, which is why regular store-purchased flour is heavily bleached and full of preservatives. I started buying wheat berries more than 15 years ago even though I didn’t own a wheat grinder. I had a friend that would grind the berries for me. Eventually I purchased a wheat grinder of my own and have been happily grinding my own wheat for years.

In addition to grinding wheat berries to make flour you can also enjoy them in other ways. When they are boiled, cooked wheat berries have a chewy bite and a nutty, earthy flavor. They can be eaten as a breakfast cereal with milk and cinnamon or added to a salad or a main dish. A cup of cooked wheat berries has about 300 calories and is packed with fiber, protein and iron. If you Google major cooking sites like the Food Network and search “wheat berries” you’ll find at least fifty tasty suggestions that incorporate whole wheat into soups, salads, sides and main dish casseroles.

You may not be a baker but wheat berries are definitely a staple that should be in your pantry! Try serving them to your family this week. Besides grinding wheat berries for flour do you have a favorite way to enjoy them?


My Garden – Planting Daffodil Bulbs

Here in the northeast fall is the time to plant daffodil bulbs. Ideally, you should plant bulbs as soon as you purchase them. I received my daffodil bulbs in the mail and decided to follow the directions and plant them right away. The day was warm and sunny and most of the snow had melted from the weekend storm, a good day to mess in the garden! You want to plant the bulbs when the soil can still be worked, this gives them time to develop roots and establish themselves before winter arrives.

The rule of thumb for planting bulbs outdoors is to set them two and a half times deeper than their diameter. For my daffodil bulbs this meant 5-6″ deep. If you want a naturalizing look to your planting, take a few bulbs in your hand, toss them gently on the ground, then plant them where they have fallen. Dig a hole in the dirt with a trowel for each individual bulb. Special bulb-planting tools are available at garden centers, they make it easy to dig neat, circular holes. Place the bulb in the hole and cover with dirt. In the spring before growth or flowering begins spread a complete fertilizer over your flower beds. The spring rains will carry the fertilizer down into the soil.

Planting bulbs requires patience because you have to wait almost six months before you can enjoy the flowers! Patience is a good virtue to practice, it involves waiting. In our society we want things immediately which is why so many people have debt problems! If we would learn to wait and save for something we want rather than “buy now, pay later” we would be much better off financially! Even stocking your party requires patience. A pantry does not become a well stocked pantry overnight. It takes months of careful planning and preparation, which is a good rule to live our life by!

So I will be patient, the bulbs are planted and I will wait to enjoy their beauty. I will look forward to the daffodil blooms come spring.

A garden is a grand teacher. It teaches patience and careful watchfulness;
it teaches industry and thrift; above all it teaches entire trust.
Gertrude Jekyll


Frugal Tips: Homemade Gift Ideas

I love homemade gifts! As the holidays approach I try to think of gifts that I can make myself that might bless others. One favorite idea is homemade gift jars. You can fill jars with all sorts of gift ideas – cookie mixes, brownie mixes, or soup mixes. One of my favorites is a Minestrone Soup Mix. It makes four gift packages and when presented in a jar with a cute tag makes a wonderful gift. Most of the ingredients you probably have on hand in your pantry.

Minestrone Soup Mix

Flavoring Mix;
½ cup dried onion flakes
½ cup dried celery flakes
¼ cup dried parsley flakes
2 Tbsp basil
1 Tbsp dried oregano
1 Tbsp dried marjoram
1 tsp garlic powder
1 tsp pepper

½ cup beef-flavored bouillon granules
1 pound dried navy beans
1 pound dried kidney beans
2 cups elbow macaroni, uncooked

Combine the first 8 ingredients and divide evenly into 4 gift packages. Add 2 Tbsp of the beef flavored bouillon granules to each package. Label and seal.  Combine navy beans and kidney beans and divide into 4 gift packages. Label and seal. Place ½ cup of macaroni into 4 gift packages. Label and seal

Present one package of herb mix, one package of bean mix and one package of macaroni with a copy of the recipe for Minestrone Soup. You can layer the ingredients  in a jar or decorate a brown bag and include the ingredients in the bag. To each jar or bag attach the following recipe:

Minestrone Soup

1 pkg of bean mix
3 quarts of water
1 pkg herb mix
1 carrot, chopped
2/3 (4oz) of chopped lean cooked ham
1 (14.5oz) can stewed tomatoes, undrained
1 pkg macaroni

Sort and wash beans; place in a Dutch oven and cover with water, two inches above the beans. Soak for 8 hours. Drain beans; add 3 quarts of water, herb mix, carrot and ham. Bring to a boil; reduce heat and simmer for two hours, stirring occasionally, until the beans are tender. Add tomatoes and macaroni, cook 20 minutes or until macaroni is tender. Serve hot.

Recipe Box – Overnight Coffee Cake

We have company coming this weekend and what better recipe to share today than my Overnight Coffee Cake. This recipe can be made ahead and just popped in the oven when you get up in the morning, it can also be cooked immediately. I love to make it the night before. Then when you are busy making breakfast you can just place it in the oven and it will be ready in thirty minutes. This is a family favorite!coffee cake, recipes, prudent living

Overnight Coffee Cake

Ingredients:

2 cups flour
1 cup sugar
1/2 cup brown sugar
1 tsp baking soda
1/2 tsp salt
1 tsp baking powder
1 tsp cinnamon
1 cup buttermilk
2/3 cup butter, melted
2 large eggs

Topping Mixture:

1/2 cup brown sugar
1/2 cup chopped pecans (or other favorite nuts)
1 tsp cinnamon

Directions:

Combine the flour, sugar, brown sugar, baking soda, salt , baking soda and spices in a large bowl. coffee cake, prudent living
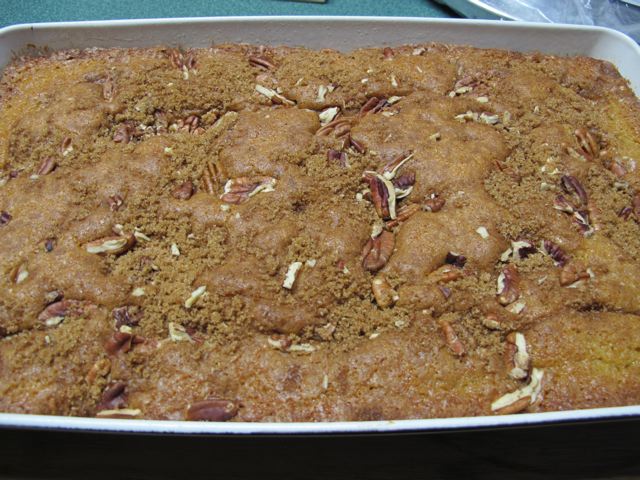
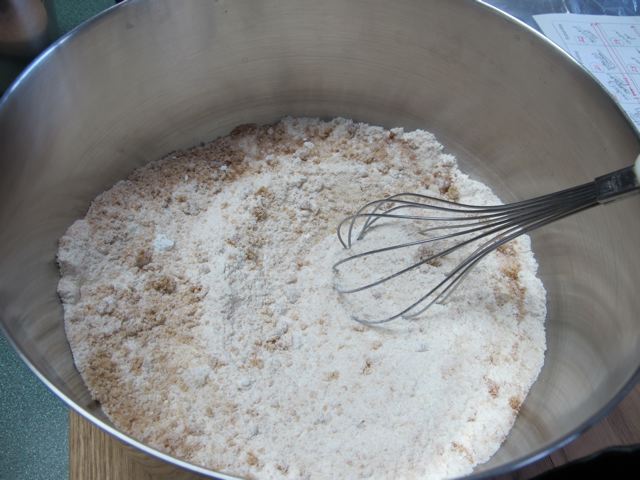
Combine the buttermilk, butter and eggs. Add the buttermilk mixture to the dry ingredients. Beat at low speed until moistened, beat at medium speed 2 minutes. Spoon batter into a greased and floured 13 x 9 x 2 inch pan. (I just spray with non stick cooking spray).

Combine 1/2 cup brown sugar, pecans and 1 tsp cinnamon (topping mixture). Sprinkle over batter. * Cover and refrigerate 8 – 12 hours.coffee cake, recipe, 
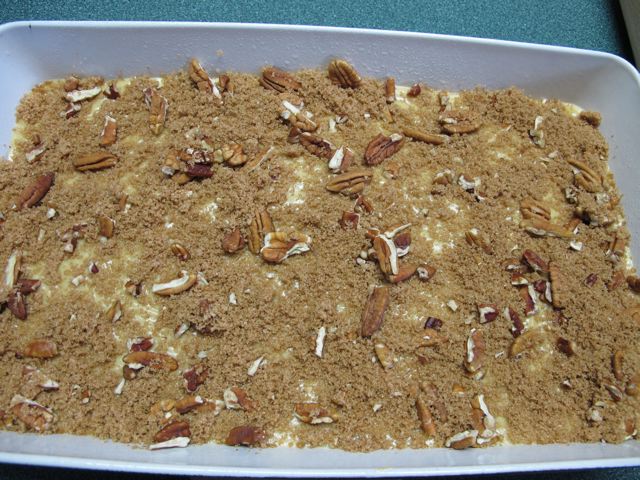
Uncover and bake 350 degrees for 30-35 minutes. Serve warm.

*Can bake immediately 350 degrees for 30 minutes. To reheat cover with foil and bake 350 degrees for five minutes.


Canning Dried Beans

Perhaps you’re like me and have some dried beans on hand that you keep forgetting to use. After all it’s so much easier to open a can of beans rather than remember to soak the dried beans overnight so they’ll be ready to use in a recipe. The solution: can your dried beans using a pressure canner. Once they are canned they are ready to use for any instant meal just like a can of beans! Canning dried beans is much easier than you think!

First cover the beans with cold water and let them soak for 12-18 hours in a cool place. Make sure the pot is large enough to allow for expansion, when I got up in the morning the lid to the pot was raised up because the beans had really expanded! Drain the beans and then cover with at least two inches of water in a large pot. Bring to a boil. Boil for 30 minutes, stirring as needed. While the beans are boiling have some jars heating in a water bath. Pack hot beans into hot jars, leaving one inch of headspace. Add ½ tsp of salt to pints and 1 tsp to quarts, if desired. Ladle boiling cooking liquid over the beans. Leaving one inch of headspace. Remove any air bubbles. Wipe the rim of the jar clean and place hot, previously simmered lids on each jar. Screw down ring firmly. Process pints for 75 minutes and quarts for 90 minutes at 10 pounds pressure in a steam pressure canner.

Canning Dried Beans is a wonderful way to stock your pantry with beans that are ready to use for any meal. I think I’ll use them in my Black Bean Cassoulet recipe, the perfect recipe for a cold winter night. If you’re interested in this recipe please stayed tuned! I will share it when the snow is a little deeper!

My Garden- Putting the Garden to Bed

Well my intention today was to get outside and finish putting the gardens to bed. Snow is in the forecast and I really like to have everything cut back and cleaned up before the first snowfall. I worked outside yesterday in my flower beds and just about finished my work but today was going to be spent in the vegetable garden. I need to take down the blueberry net, move the garden stakes to the barn, cut back the remaining perennials and do a general clean up. However it’s raining and yes did I mention snow is in the forecast! Not exactly the type of day I want to spend outdoors, I’d much rather sit with the dogs and enjoy the warmth of the woodstove!

Instead I will soak some dried beans in preparation for canning them tomorrow. I have several jars of dried beans on hand and I want to can them so they will be ready for a quick meal. I’ve not done this before so we will be experimenting together! I will have to use the pressure canner but the process sounds simple.

For my faithful readers that would like to read about gardening today check out Prudent Living Magazine, I have written an article for this winter issue! Just click on the link on the PrudentLivingMagazine.com menu tab on the left. Hope you enjoy it. I’ll be back tomorrow with a lesson on canning dried beans.


Frugal Tips – Buying in Bulk

Once you know your prices by keeping track of them in your price book you can begin to buy in bulk and work toward having a well-stocked pantry. When you have a well-stocked pantry you never need to worry about making those unexpected trips to the grocery store. Once you have a well-stocked pantry you will only need to stop at the store for produce, milk and the unbeatable sale that you can’t pass up. Stocking up saves money.

When planning to buy in bulk you must know the options for food buying in your area. Aside from the local grocery store there may be food co-ops, warehouse stores such as BJ’s or Sam’s or even local farmers. Be aware of the loss leader sale items, which appear on the front and back of sale flyers. These are meant to get you into the store and will usually beat any price in a wholesale store. Again, it is important to know your food prices so you can find the deals.

Bulk buying isn’t just for large families either; you just want to buy enough to get you to the next sale. Each family will buy according to their need. Be aware of expiration dates as well, no point in having a pantry stocked with items that are no longer good to eat! Buying in bulk will give you a well stocked pantry. There are many reasons to have a well stocked pantry. This past year we learned first hand the importance of having a well stocked pantry.

In December my husband was laid off. After the security of a steady income we faced the uncertainly of unemployment. It was a good feeling to know that we could eat from our pantry and spend a minimum amount on groceries during that time of unemployment. Thankfully after six months of unemployment my husband found a new job. In late August we experienced another interesting situation. Irene hit our area in Vermont hard. Not only were we without power for six days but also the roads were destroyed and travel was severely limited. To top it off we had a houseful of company that week, all four of our children as well as two spouses and our grand-daughter were visiting! Again we were blessed to have a well-stocked pantry. We ate well that week without having to worry about getting to the store.


Design a site like this with WordPress.com
Get started