Cooking with Essential Oils

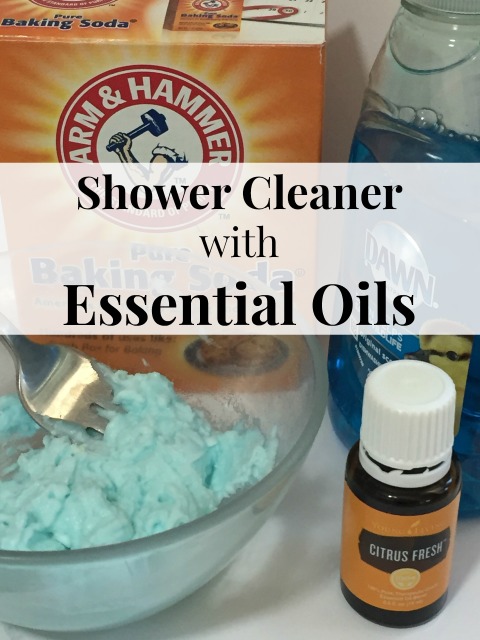
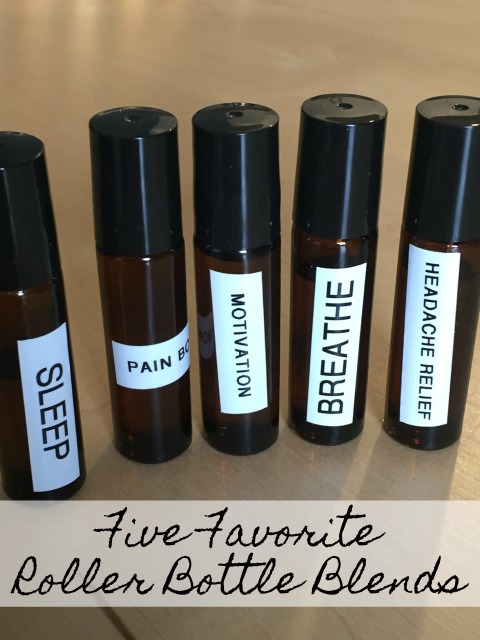
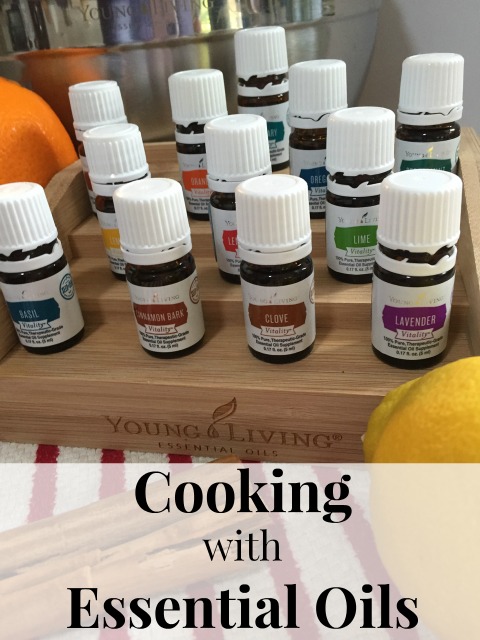
For the last couple of weeks I have shared different ways to use essential oils. You can create rollers and hand lotions, but did you know that cooking with essential oils was possible? Young Living has a line of Vitality essential oils that are made just for your kitchen. You can use them in homemade dishes, desserts and drinks.

Don’t have a certain spice on hand no worries, these dietary essential oils have the same fresh flavor as herbs and citrus fruits from the market with the chopping, mincing, zesting or juicing. These Vitality essential oils also have a long shelf life.

Young Living essential oils all come with their Seed to Seal promise, which means it has undergone rigorous testing and meets their exacting benchmarks for sourcing, science and standards.

It’s easy to substitute essential oils for citrus juice or herbs and spices in your cooking. When just starting out begin with a small amount of essential oil and gradually increase to get the taste you enjoy. Since essential oils flavor can dissipate, add the oil immediately before serving. Use the following conversion chart.

Citrus fruit, juiced – add 10-15 drops of your essential oil
1 Tablespoon herbs of spices – 1 drop or less of your essential oil
1 teaspoon herbs or spices – Dip a toothpick in the Vitality oil. Swirl the toothpick through the wet ingredients and mix.

If you’ve been following along with my goal setting posts you know I am trying to incorporate more healthy recipes into our diet. Black Bean Brownies have been around for a while but I’ve never tried them! I decided to make a batch adding Peppermint Vitality essential oil. The end result was delicious and guilt free. Who knew brownies made from black beans could taste so good!

Peppermint Brownies

Ingredients:

1- 15oz can black beans
1/3 cup coconut oil
¼ cup unsweetened cocoa powder
1/8  tsp. salt
2 tsp. vanilla extract
½ cup honey
2 drops Peppermint Vitality essential oil
3 eggs

Directions:

Preheat your oven to 350. Rinse and drain black beans. Melt coconut oil until clear. You can do this in the microwave or on the stovetop. Blend all ingredients except the eggs in a food processor until smooth. In a separate bowl, lightly whisk eggs until well beaten. Fold eggs into cocoa mixture. Pour the mixture into a greased 8×8 pan and bake for 25-30  minute. Let cool for 15 minutes and then cut. Let cool for another 15 minutes and serve.

Have you cooked with essential oils before? What is your favorite recipe?

Traveling Muffins

These muffins are great for those mornings when you are in a rush and you need to get out of the house quickly. These traveling muffins are just that, great for traveling! They are also healthy and you probably have all the ingredients on hand to make them!

Traveling Muffins

2 cups of almond meal (easily made by grinding 10 ounces of almonds)
1 cup of oats (not quick oats)
2 tsp. Cinnamon
½ tsp. Nutmeg
1 tsp. Baking soda
½ tsp. salt
½ cups nuts (almonds, walnuts, pecans)
½ cup either raisins or chocolate chips
3 eggs, beaten
1 cup of shredded zucchini
1 ¼ cup shredded carrots
6 Tbsp. butter, melted
½ cup maple syrup
1 tsp. Homemade vanilla

Directions:

Preheat your oven to 350. Line your muffin tin with silicon liners. Combine the dry ingredients in a large bowl. Stir in the wet ingredients until just blended. Use a cookie scoop to fill the muffin cups. They should be totally full. Bake for 25-30 minutes, or until the muffins are browned and cooked through. Let cool on a wire rack. Enjoy with your next cup of tea.

Tis post in linked to the Weekend Potluck!

Tips for Seed Starting

Your seeds have been ordered. The next step is to figure our which seeds need to be started inside. Here are a few tips for seed starting inside.

When To Start Your Seeds

First you need to read the back of your seed packets. Many seeds like beans, peas, lettuce and carrots can be planted directly into the garden once the soil has warmed up enough. Other seeds like tomatoes and peppers need to be started ahead of time. Tomatoes and peppers are usually started about 6-8 weeks before planting time. This gives the plants time to get established and gives you a better chance for a good harvest.

Once you’ve determined when you need to start your seeds inside the next step is to either make your own seed starting mixture or purchase a commercial mix. I have always made my own seed starting mixture. It is very easy and makes enough to start all my seeds with some leftover!

seed starting mixture, gardening

This is my recipe for making my own seed starting mix:
1 part sterilized garden loam or topsoil
1 part coarse sand or perlite
1 part peat moss

Combine the three ingredients and mix well. Store in an airtight container.

Making Your Own Seed Starting Mixture

Starting seeds inside is very simple. My husband made me a simple plywood table which I use as a grow table. It just fits my two grow lights and when I placed it in front of our kitchen window it was the perfect place to start my seeds.

Planting Your Seeds

One rule of thumb is to plant the seeds 2-3 times as deep as the seed is wide. Leek and onion seeds are rather small and are pretty much sprinkled on the top of the soil.

Use only the best seeds. Old seeds or seeds that have not been stored properly may not germinate. If you have time do a seed germination test to determine the viability of your seeds. Check my video on the seed viability test I did on some pepper and tomato seeds.

Care of your Seeds

Once my seeds are planted I make sure the soil is moist. One way to do this is to fill a plastic bin with water and float the pot in it until the surface is damp. I then label each container with the date and the name of the plant. This will help me keep track of how many days it took the seeds to germinate and will also help me when it comes time to plant the vegetable plants in the garden. I may be able to tell leeks from broccoli, but it is very important to keep track of the variety of peppers and tomatoes.

Cover the seeds with a plastic or glass cover to create a mini greenhouse.  You need to keep the seeds warm; a heating pad may be necessary. You do not need a grow light until the seeds sprout. Once you see the first seed sprouting remove the cover and place under your grow light. Keep a close eye on the seedlings, as you don’t want them to dry out.

greenhouse, plastic greenhouse, seed starting

Starting seeds is an easy process. It is always a good feeling when it’s time to start your seeds. It’s a good sign that spring can’t be far behind and soon you will be working outside in the garden.

Goal Setting Weekly Update Week 12

The weather is getting slightly warmer, I think spring might finally be on it’s way!

  1. Continue to monetize my blog. My ongoing goal. Have you taken the time to check out my page on Amazon? This page is where I put all the items I just love, from favorite cookbooks to gardening tools. Please check it out. Another aspect of this goal involves increasing my readership. If you enjoy reading my blog, please recommend it to your friends. I sure appreciate all my new subscribers!

2. Create a cookbook.  You may remember this goal was on my list last year and I finally put it aside. My goal for this year is to have my cookbook ready by November 2019. This is going to be a long process and I hope you don’t get tired of hearing about it. I promise you when the cookbook is finished it will be worth it!

3. Have 20 minutes of exercise at least 5 times a week. Spending time with good friends this week. Getting some nice walks in.

4. Explore ten 9 parks or hiking trails in the state of Washington we now call home! Didn’t happen. Look forward to the next park we discover!

5. Incorporate 20 11 new recipes into our dinner plans with the focus on healthy eating. No new recipes this week. I’ll be back on track next week!

6. Read 35 23 new books this year. Finished my twelfth  book , Sisters One, Two, Three by Nancy Star. It tool me a while to get into this book but once I did I really enjoyed it. It’s the story of the Tangle Family and it is the story of secrets kept within a family and the reconciliation with the mother and her three daughters.

7. Complete Four 1 knitting or sewing projects this year. The third project is finished. One more project before this goal is completed. Thinking I should have given myself a larger goal. I’ve got a new knitting pattern and will be using up some of my yarn to make mittens!

8. Visit family on the west coast. Visiting with good friends this week, but not on the west coast!

9. Explore Six 5 new museums in the area. The pass for the Tacoma Glass Museum is one popular pass. Still patiently waiting to grab this pass.

10. Find a new home. Frustrated is the key word for this week! Found a house we really liked. Made an offer, offer was accepted and then we had the inspection done. Bottom line we withdrew our offer. There were just too many red flags. Now back to square one. Eventually we will find our perfect home.

“All who have accomplished great things have had a great aim, have fixed their gaze on a goal which was high, one which sometimes seemed impossible.”
Orison Swett Marden


This post may contain affiliate links. These affiliate links help support this site.

For more information, please see my disclosure policy. Thank you for supporting Nancy On The Home Front.

Shower Cleaner with Essential Oils

Are you looking for a way to have a clean shower or bathtub without resorting to using harmful chemicals? By using two ingredients you already have in your home you can create a shower cleaner that will clean your shower and be safe for the environment and yourself.

Shower Cleaner

Ingredients:

¼ cup baking soda
2 Tbsp. liquid soap
few drops of essential oils

Place the baking soda in a small bowl. Slowly mix in your liquid soap with a fork until the mixture is the consistency of cake frosting. Add a few drops of your favorite essential oil such as lavender, grapefruit or balsam; what ever you want to make your cleaner smell divine.

Scoop a small amount of the mixture onto a damp sponge or cloth. Wipe the surface of the shower or bathtub and rinse.

That’s all there is to it. Just repeat until the shower surface has all been cleaned. Your bathroom will smell wonderful, the shower and or tub will be clean and you have not used any harmful chemicals to get this chore completed.

Are you looking for new ways to do the various cleaning chores without using chemicals that are bad for you and the environment? I also make a Non-Toxic Oven Cleaner, which work so well. No need to use the self-cleaning feature on your stove or a spray cleaner.

non-toxic oven cleaner

Homemade window washer fluid is so easy to make and I really think it does a much better job than any commercial mixture I’ve found.

Window Cleaner

I used to make my own all-purpose cleaner until I switched to Thieves cleaner.  I buy a 14.4oz bottle of Thieves Household Cleaner, which is a concentrate. I mix up my own solution of 1 part cleaner and 30 parts water and it does an excellent job of keeping the counters clean. My 14.4oz bottle lasts me for months. The Thieves cleaner contains 100% pure, therapeutic-grade essential oil.

What do you use in your home to keep things clean?

Linked To Going Green.

For more information, please see my disclosure policy. Thank you for supporting Nancy On The Home Front.

This post may contain affiliate links. These affiliate links help support this site.

Emergency Soup

There are certain recipes I like to have handy in case we have unexpected company or I just need to pull something together quickly for dinner. This Emergency Soup recipe is just that kind of recipe. It’s delicious enough for company, makes a perfect soup to give a neighbor who’s under the weather or a new mom. Or if you just want a simple supper for yourself look no further. Serve with a salad and a loaf of bread and you’re all set. I’m sure you even have all the ingredients on hand to make this soup in no time.

Emergency Soup

Ingredients:

4 cups chicken broth (preferably homemade)
1 carrot, chopped
1 rib of celery, chopped
1 medium onion, chopped
1 cup of small shell pasta (you could use another pasta if you don’t have small shell pasta)
Salt and pepper to taste
1 cup grated Parmesan cheese

Put the broth in a pot and bring to a boil. Add the carrot, celery, and onion and boil gently for ten minutes, then add the pasta and simmer for 5 minutes. When the pasta is done, the soup is done. Add salt and pepper to taste. Serve in bowls with some grated Parmesan cheese.

Serve this soup with a simple salad and a loaf of bread and dinner is served.

Goal Setting Weekly Update Week 11

Goal setting is an ongoing process and I was reminded lately that the satisfaction is in the journey! It’s easy to be discouraged with the progress of meeting a goal but slow and steady wins the race!

  1. Continue to monetize my blog. My ongoing goal. Have you taken the time to check out my page on Amazon? This page is where I put all the items I just love, from favorite cookbooks to gardening tools. Please check it out. Another aspect of this goal involves increasing my readership. If you enjoy reading my blog, please recommend it to your friends. I sure appreciate all my new subscribers!

2. Create a cookbook.  You may remember this goal was on my list last year and I finally put it aside. My goal for this year is to have my cookbook ready by November 2019. This is going to be a long process and I hope you don’t get tired of hearing about it. I promise you when the cookbook is finished it will be worth it!

3. Have 20 minutes of exercise at least 5 times a week.  Enjoyed lots of exercise while visiting out grandchildren Portland. We joked with our six year old grandson that he should bottle all his energy! Arrived back to our apartment to more snow! Not a lot by any means but really thought spring was just around the corner!

4. Explore ten 9 parks or hiking trails in the state of Washington we now call home! Didn’t happen. Look forward to the next park we discover! I have been enjoying all the blooming heather in the snow lately!

5. Incorporate 20 11 new recipes into our dinner plans with the focus on healthy eating. Made a delicious soup called Emergency Soup. Made from ingredients that I’m sure everyone has on hand! Cooks up quickly and is the perfect soup when you need a fast meal! I’ll be sharing the recipe on Friday!

6. Read 35 24 new books this year. Finished my eleventh  book , Circe by Madeline Miller. another good read, quite different from anything else I’ve ever read. Remember learning about the figures from the Odyssey? This is the story of the daughter of Helios, god of the sun and mightiest Titan, and Perse, a sea nymph. I was surprised how swept up I got in the tale of Circe.

7. Complete Four 1 knitting or sewing projects this year. The third project is finished. I have put together two more sets of placemats using the material sent to my by a dear friend. Think the next project will involve knitting! I recently discovered some knitting patterns that a classmate of mine from high school has available online! Think I may order one for my next knitting project! Years ago the patterns were sold in a Yarn Shop in my hometown. They were always the best patterns. I was thrilled to find them available online!

8. Visit family on the west coast. Had a wonderful few days visiting our grandchildren in Portland. No time for exploring, but did manage a nice walk with my grandson!

9. Explore Six 5 new museums in the area. The pass for the Tacoma Glass Museum is one popular pass. Still patiently waiting to grab this pass.

10. Find a new home! Frustrated is the key word in the house search, found another house we really liked but as as we were leaving the house after looking it over, our realtor got a notice that the owners had just accepted an offer 10K over the asking price. Ah the challenges of looking for a new home in a very hot market.

Success is the progressive realization of a worthy goal or ideal.”
Earl Nightingale

This post may contain affiliate links. These affiliate links help support this site.

For more information, please see my disclosure policy. Thank you for supporting Nancy On The Home Front.

Homemade Hand Lotion using Essential Oils

In the winter my hands suffer from the lack of moisture in the air. Even living in a much more humid environment on the west coast my hands still appreciate being treated with hand lotion on a regular basis. I have made my own hand lotion in the past using an emulsifying wax.  With just a few simple ingredients I made homemade hand lotion using essential oils, which my hands really appreciate!

This time around I decided to use beeswax. instead of the emulsifying wax. We still have an ample supply of beeswax from our own bees. I only needed a very little bit (1/4 cup). I used lavender as my essential oil but you could use whatever fragrance you like. The olive oil I had on hand, the beeswax was from our bees and I use Young Living as my source for essential oils.

Why use Young Living essential oils? Young Living uses their own farms, use first distillation and they are the oldest and largest company on the market for oils. I have been very impressed by the quality of their oils.

The experiment using beeswax instead of emulsifying wax was an epic fail! I need to find another recipe for hand lotion using beeswax. The essential oil, beeswax and olive oil combined nicely to form sort of a bar, which when rubbed in your hand does moisturize your skin. However the end result was not a nice lotion which I was expecting. I will share my original recipe using the emulsifying was which did crate a beautiful thick hand lotion.

Homemade Hand Lotion

Ingredients:

1 ¼ cup hot water
¼ cup emulsifying wax
¼ cup olive oil
15-36 drops of Young Living essential oil (depends on how strong you want the smell, I used lavender.)

hand lotion, frugal tip

Directions:

In a Pyrex measuring cup I combined the olive oil and emulsifying wax and microwaved it on high for 1 minute or until the wax is melted. The temperature is about 155 degrees.

Remove the wax – olive oil mixture from the microwave and heat up the water in another Pyrex measuring cup for one minute. While the water is heating up add the essential oil into the melted wax-olive oil mixture.

Carefully pour the hot water into the wax-olive oil mixture and watch it turn milky white. At this point the temperature is about 125 degrees. Pour the hot lotion into your jars and let it cool over night.

essential oils

I was a bit skeptical that it would thicken, however the next morning the lotion was a nice thick consistency.

essential oils

You could have used more essential oil but I really like the gentle fragrance of the lavender, it is not overpowering at all.

This post may contain affiliate links. These affiliate links help support this site.

For more information, please see my disclosure policy. Thank you for supporting Nancy On The Home Front.

African Stew

In my search for healthy recipes I came upon a recipe for African Stew with Spinach and Sweet Potatoes. After looking over the ingredients it seemed like an unusual combination but I was willing to give it a try. It was so delicious, very creamy and a perfect soup for a cold winter day.

African Stew with Spinach and Sweet Potatoes

Ingredients:

2 medium onions, chopped
1 medium green pepper, chopped
1 uncooked sweet potato, peeled and chopped into ½ inch cubes
2 medium carrots, peeled and thinly sliced
2 garlic cloves, minced
2 Tbsp. fresh ginger, minced
½ tsp. ground cloves
½ tsp. salt
¼ tsp. Cayenne pepper
4 cups, vegetable broth
6 Tbsp. peanut butter
8 cups baby spinach

Directions:

Coat a large saucepan with cooking spray and set over medium heat. Add the onion and pepper and cook, stirring often until softened, about 3 minutes.

Stir in the sweet potato, carrots, and garlic and cook for 1 minute. Add the ginger, cloves, salt and cayenne and cook for another 30 seconds. Pour in the vegetable broth and bring to a simmer. Stir in the peanut butter until smooth. Cover the saucepan and reduce the heat to low and simmer slowly, stirring ever so often, until the sweet potatoes are tender, about 30 minutes.

Add the spinach and cook for another 10 minutes of so until the spinach is wilted. Serve. Makes about 6 servings.

Next time you’re looking for a delicious soup try this African Stew with Spinach and Sweet Potatoes, it’s a winner. The original recipe was found on the Weight Watchers site.

Homemade Rollers using Essential Oils

Next week I will show you how easy it is to make your own homemade hand lotion. Essential oils can also be used to make your own rollers. What is a homemade roller using essential oils? If you are familiar at all with essential oils you know how useful roller bottles are to make topical applications of oils so simple.

Homemade rollers can be used for many different remedies. You can make roller bottles using single oils or make a blend. Blends are a mixture of a carrier oil such as jojoba oil, grape seed oil or sweet almond oil mixed with several drops of an essential oil.

Using essential oil roller bottles will also help you save money, as your essential oils will last longer. Usually you add ten drops of an essential oil to your roller bottle and then fill the rest of the bottle with your carrier oil. My favorite essential oil are from Young Living.

This chart is based on using a 10mL roller bottle.

  • Newborn-6 months: 1-2 drops
  • 6 months- 2 years: 1-3 drops
  • 2 -5 years: 2-5 drops
  • 5-12 years: 5-10 drops
  • 13 and up: 15-20 drops

Once you make your homemade roller bottles you can use them to roll onto just about any area of your bottle except your eyes, inside your ears or any mucous membrane. My favorite places to use the roller on the bottom of my feet, my neck or on my wrist.

There are many recipes for various roller blends, I use the Essential Oils Pocket Reference which is a wonderful resource. You can look up an ailment and they will list various essential oils that you can use.

Five Favorite Roller Bottle Blends

Sleepytime Roller

12 drops of lavender
12 drops of cedarwood
12 drops of Vetiver
12 drops of Valerian
Place the essential oil e in a 10ml roller bottle and fill with your favorite carrier oil.

Headache Relief

5 drops of lavender
5 drops of frankincense
5 drops copaiba
5 drops of peppermint
Place the essential oil in a 10ml roller bottle and fill with your favorite carrier oil.

Breathe Blend

10mL roller bottle 
5 drops peppermint
5 drops eucalyptus (globulus or radiata)
2 drops lime
2 drops of lemon
2 drops rosemary
Place the essential oil in a 10ml roller bottle and fill with your favorite carrier oil.

Pain Bomb

5 drops copaiba
3 drops sweet marjoram
3 drops basil
3 drops frankincense
Place the essential oil in a 10ml roller bottle and fill with your favorite carrier oil.

Motivation

10 drops lemon
4 drop eucalyptus radiata
3 drops peppermint
1 drop cinnamon
Place the essential oil in a 10ml roller bottle and fill with your favorite carrier oil.

Where to find roller bottles to make your blends? There are numerous sources, I usually purchase amber roller bottles on Amazon.

There are many more combinations of essential oils that you can use to create your own blends. These three are just the tip of the iceberg! If you have any questions about Young Living Essential Oils don’t hesitate to ask, I’d be glad to help.


This post contains affiliate links. These affiliate links help support this site.

For more information, please see my disclosure policy. Thank you for supporting Nancy On The Home Front.


Design a site like this with WordPress.com
Get started