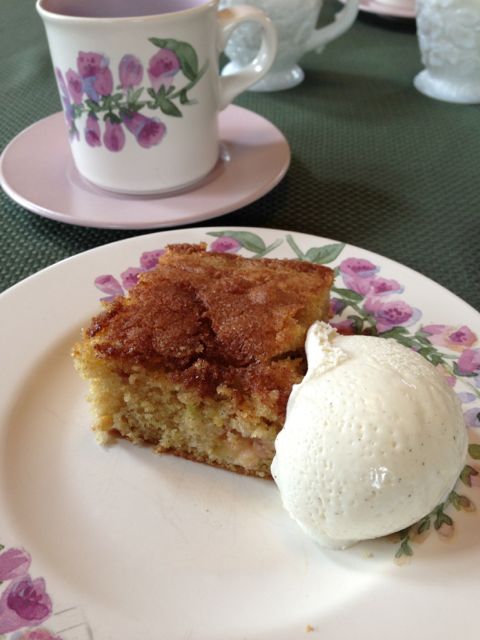
This Great Depression Cake has no milk, no eggs and no butter in the ingredients, it became popular after the stock market crash of 1929. It’s often called “Boiled Raisin Cake”or “Economical Spice Cake.” The great depression cake is moist, spicy and delicious. If you’re lucky you probably have all the ingredients to make this cake! It tastes like a cake version of the old fashioned molasses cookies I made recently!
Great Depression Cake
Ingredients:
2 cups granulated Sugar
2 cups Strong Coffee
2 cups Sun-Maid Raisins
1/2 cup Vegetable Shortening (I used coconut oil)
1 Apple, pared, cored and grated
2 cups all-purpose Flour
2 tsp. Baking Powder
1 tsp. Baking Soda
1 tsp. Ground Cinnamon
1 tsp. Ground Cloves
1 tsp. Ground Nutmeg
1 cup chopped Walnuts
Powdered Sugar, for garnish
Directions:
In a large saucepan, combine the granulated sugar, coffee, raisins,shortening and apple. Simmer 10 minutes over low heat, stirring
occasionally. Cool 10 minutes.
In a large bowl, blend remaining ingredients, except powdered sugar. Stir raisin mixture into flour mixture. Pour batter into a well-
greased and floured 13 x 9-inch pan.
Bake at 350º for 30 minutes or until toothpick inserted in center comes out clean. Cool in pan. Dust with powdered sugar if desired.
Makes one 13 x 9-inch cake. (Can also split the recipe between two 8×8 pans)
Note: 2 cups of water may be substituted for the coffee.
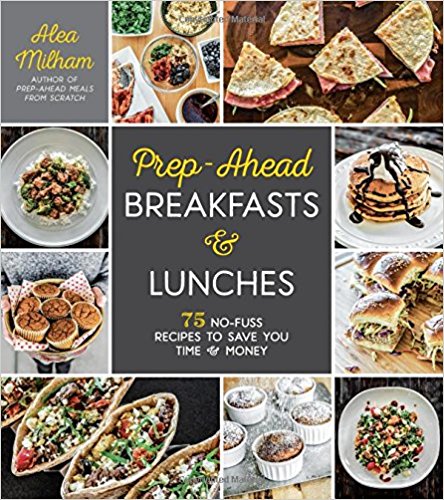
I was so excited when I was given the opportunity to review Alea Milham’s new book, Prep-Ahead Breakfasts and Lunches. Prepping for breakfast has been something I’ve been trying to do more often. I’ve made several batches of Spinach Bacon & Quinoa Muffins but I wanted to expand my repertoire. Alea’s book contains 75 recipes to help you save both time and money.
After looking over all the delicious sounding recipes I decided to try the Cajun Egg Croissant Sandwiches. Spending very little time in the kitchen I was able to create enough sandwiches to cover six breakfasts. These sandwiches can be stored in the refrigerator for up to 3 days or frozen for up to one month.
Prepping for breakfast shouldn’t take a lot of time, this recipe involves several steps, but they really aren’t that hard to make. They are well worth the effort. No missed breakfasts with a croissant sandwich waiting for you! I am so thankful my freezer has these delicious breakfast sandwiches ready to enjoy!
Photo credit by cookbook photographer Ken Goodman
Cajun Egg Croissant Sandwiches
Photo credit by cookbook photographer Ken Goodman
Ingredients:
Eggs:
16 large eggs
½ cup diced red onion
½ cup diced red pepper
1 ½ cups thinly sliced asparagus
2 Tbsp. Cajun Seasoning Mix
Sausage:
2 lb. ground pork
2 Tbsp. chicken or vegetable broth
2 Tbsp. Cajun Seasoning Mix
Sandwiches:
12 croissants
12 slices medium cheddar cheese
Directions:
To make the eggs, preheat the oven to 350. Grease 2 (15×10 inch) rimmed baking sheets, then line with parchment paper.
Add the eggs to a medium bowl. Beat the eggs until they are a pale yellow color. Add the onion, bell pepper, asparagus and Cajun Seasoning Mix to the eggs. Mix well.
Pour the egg mixture into one of the baking sheets. Bake the eggs for 30 minutes or until the eggs are cooked through and staring to separate from the edges of the pan. Remove the baking sheet from the oven and let the eggs sit for a couple of minutes. Use a knife or pizzas cutter to cut the eggs into 12 squares.
While the eggs are cooking, make the sausage by combining the pork, broth and Cajun Seasoning Mix in a medium bowl.
Spread the pork mixture out evenly on the other baking sheet so that it touches all of the sides. Bake for 20 minutes. Remove the sausage from the oven and let it sit for a few minutes. Brush off the excess oil with a pastry brush or blot it with a paper towel. Then use a knife or a pizza cutter to cut the sausage into 12 squares.
To build the breakfast sandwiches, slice the croissants in half. Place one slice of cheddar, one square of sausage and one square of egg on the bottom of the croissant. Place the top of the croissant on top of the eggs.
Allow the sandwich to cool before storing them. Place in an airtight container and store in the refrigerator for up to 3 days.
To freeze, wrap breakfast sandwich individually and freeze for up to 1 month. To reheat a thawed breakfast sandwich, unwrap it, place it on a microwave safe plate and microwave on high for 30-45 seconds.
I you are interested in prepping ahead for breakfast and lunch this book is for you. Prep-Ahead Breakfasts & Lunches is more than a tool for families to save time and money. It’s also a way to take care of your family’s well being. Cooking your breakfasts and lunches in advance will save you money and give you complete control over the ingredients, so you know your dishes are made with ingredients you can feel good about.
To order the cookbook click on the image below.
This post may contain affiliate links. These affiliate links help support this site.
For more information, please see my disclosure policy. Thank you for supporting Nancy On The Home Front
June is one of my most favorite times of year in Vermont. Everything is just so green! The weather for the most part is perfect, with warm, sunny days and cool nights. During the busy month of June there are more than enough projects to keep us busy. It’s finally warm enough to get out into the garden! By the first week in June the garden is planted and it’s time to weed and mulch the flowerbeds.
The lilac bushes are just about past. When the flowers are blooming the swallowtail butterflies visit the blossoms.
Our rhubarb is once again producing an abundance of rhubarb. I found a wonderful recipe for Vanilla Rhubarb Jam, which I think I will have to try. How can I not preserve this wonderful harvest? I may make a rhubarb cake as well.
During this busy month of June we have been working like crazy to get the flowerbeds weeded and mulched. Our realtor is planning to send over a professional photographer to take some pictures. We’ve had some good showings in the last few weeks, but no offers yet.
June is also when the flowers start to show their glory. We have numerous lupines on the property; they are one of my favorites.
There is also Lily of the Valley, which smell heavenly. Before long our early day lilies and all the iris will burst forth in bloom as well. June in Vermont is such a beautiful time of year, even if it is such a busy month.
The field strawberries will be producing soon followed by our garden strawberries. Each year I make at least one batch of Wild Strawberry Muffins for my husband. He picks the tiny berries and I make the muffins.
We are looking forward to downsizing and making some changes in our life, but there are many things I will miss about Vermont. Everywhere I look there is so much beauty especially during the busy month of June!
The year is flying by. I have to say my goal setting took a back seat to gardening and getting our house ready for professional photos for the realtor! It’s a nice feeling to have all of our garden beds mulched and the vegetable garden planted. Now we just need a buyer.
1. Find a new hosting site for my blog and make it secure.Done! This was the first goal accomplished this year and I am so happy to have a secure website.
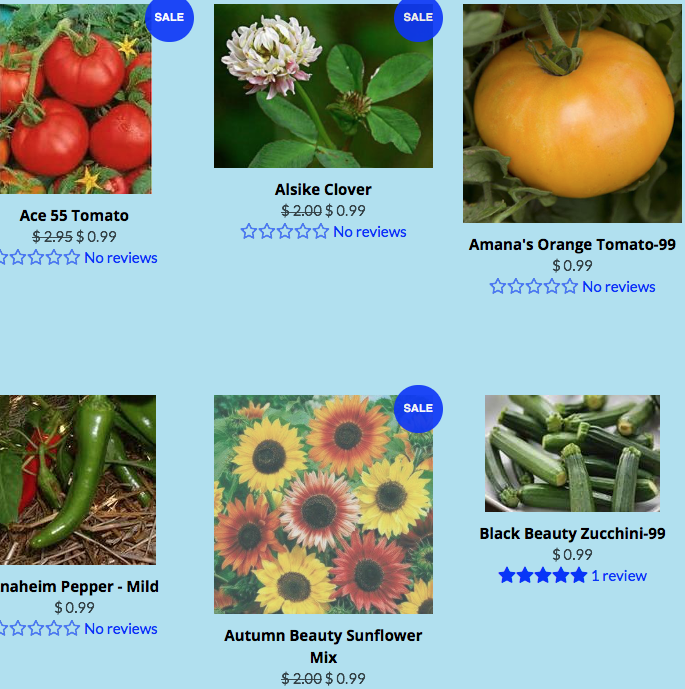
2. Monetize my blog. This is in the works, I have set up two affiliate accounts. Soon you’ll be seeing links to my favorite items on amazon. I’ve also teamed up with an amazing heirloom seed company, Mary’s Heirloom Seeds. The .99 cent sale is still going on. Plus she’s got a lot of other great offers on her site. Click here for more information.
3. Create a cookbook. One step at a time, as we are now in the gardening seasoning and I’m spending as much time as I can outside this goal might be pushed off until later this summer.
4. Be diligent about getting 10K steps in 5 out of 7 days a week. YES! Accomplished this goal this week! With all the gardening, mulching and spending time outside as well as walking with a friend I managed to get over 10 thousand steps in for 5 of the 7 days! Not always easy but I love it when I can say I accomplished this! Plus June is so beautiful in Vermont, who doesn’t want to be outside!
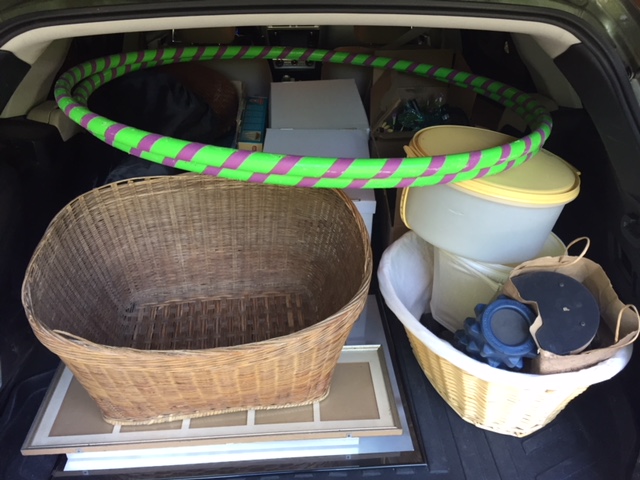
5. As we continue to prepare for an eventual house sale, continue to de-clutter. Made no progress on this goal this week. We have things that we will pass along when we get an offer, but I’m beginning to wonder if I’ve de-cluttered as far as I can for the moment? Still have 73 items to go.
6. Read 25 books this year! Still reading a book called The Insanity of Obedience. Very good and very meaty book. I have to admit I did not get much reading done this past week. May have more of a chance this week as we are supposed to have some rainy weather. 7 books to go!
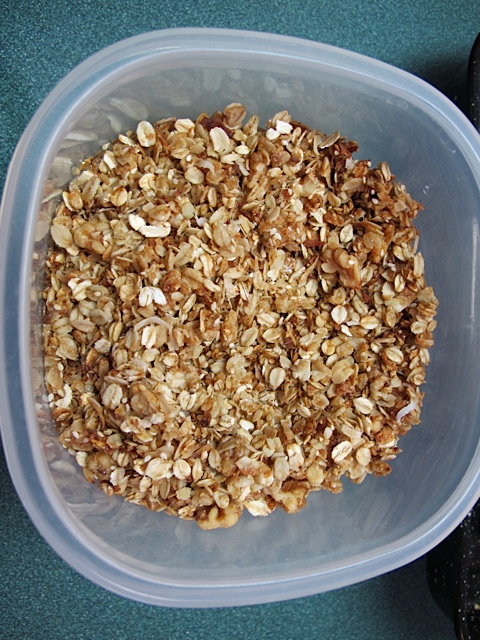
7. Have a consistent meal plan each week and prepare ahead. I am loving the new book I was asked to review called Prep Ahead Breakfasts & Lunches. We’ve just about finished up the baked oatmeal I made last week. It was so good. Think I’ll make something else from this book this week.
If you are interested in ordering the book, click on the image below.
8. Finish 4 knitting projects. Completed! Made two hats and two scarves. Found a baby sweater that I’d started years ago so I’m going to keep knitting and finish that sweater. Did not accomplish even one stitch this week!
9. Clean out our freezer. I am down to tomato sauce, some frozen rhubarb, frozen breakfast sandwiches and a loaf of carrot zucchini bread. Not bad. Our kitchen freezer is pretty much under control I have some frozen peppers to use up and some frozen vegetables. Love the progress. Used up some frozen peas from our upstairs freezer this week. Even though I’m not doing much canning this year I did see a recipe for Vanilla Rhubarb Jam which looks very good and I do have that frozen rhubarb to use up!
10. Take a few road trips and visit family and friends on the east coast that we will not see as often once we move to the west coast. Just a few more weeks until we head off on our road trip! So thankful for friends to watch the house so we can go visit our southern friends!
I did not make much progress at all on the goals this week. Should be able to finish the knitting project on our road trip and I’m thinking of renewing our Audible membership so we can listen to a few books while driving. What are your favorite books for road trips?
This post may contain affiliate links. These affiliate links help support this site.
For more information, please see my disclosure policy. Thank you for supporting Nancy On The Home Front
It’s six months until Christmas, which means it’s time to make vanilla extract! Making vanilla at home is so easy and what better gift to give to your baking friends than a bottle of DIY vanilla extract!
With our home on the market I debated whether or not I should make another batch of vanilla extract this year. However I am nearly out of vanilla and I figured why not. If we end up moving before December I either pack up my jar or give it away!
DIY Vanilla Extract
Ingredients:
Vodka (the inexpensive stuff is fine)
Vanilla Beans (which I ordered through Olive Nation)
Kitchen Shears
Directions:
Begin by cutting through each vanilla bean lengthwise, leaving about an inch at the top of each bean so they stay together.
Place all your beans into your jar.
Fill the jar with vodka. Mark the jar so you’ll know when the vanilla is ready. Put the lid on and store in a dark place for 4-6 months. Occasionally check the jar out and give it a shake.
Once the time period has passed, strain out the vanilla beans using a coffee filter lined colander. Bottle the extract in dark amber bottles and you’re ready to give it as gifts and start cooking with it yourself!
Usually I make a gallon of vanilla extract but this year I decided I would only make a quart. I may not have as much to give away at Christmas but it will be easier to move a quart size jar than a gallon!
If you haven’t made your own Vanilla extract now is the time to give it a try. You’ll never go back to store bought again!
1 gallon of vodka takes 80 vanilla beans
½ gallon of vodka (1.75L) takes 40 vanilla beans
1 quart of vodka takes 20 vanilla bean
The month of May was a wonderful month. Spring is here and the world around me is busting in green. May was also the month I joined a dynamic group of bloggers for the Self Reliance Challenge! 31 Days to A More Self-Reliant Life. I hope you read along as we all challenged ourselves to live a more self-reliant lifestyle for the entire month of May.
Many of the bloggers had specific goals they wanted to accomplish during the month.You can check out there progress on their blogs:
I am currently in a different mode as our house is on the market and although the real estate market is slow in Vermont we have to be prepared that the house could sell at any time. Now is not the time to be stocking up my pantry!
However I still was able to focus on what it means to be self reliant and go about my normal business of planting our garden and making our own bread.
I may not have a well-stocked pantry at this time but I do have several weeks worth of food on hand just in case of an emergency.
The month of May provided me with the time to focus on our goals. I intend to continue to live a self-reliant lifestyle no matter where we end up living. We may downsize and not have as much land but I still intend to grow as much of our own food as possible and have chickens to supply us with fresh eggs. If we can’t raise our own meat I intend to purchase from local farmers who do raise their own chickens, pork or beef.
Did you follow us along in our journey? What are you doing to save money, grow your own vegetables, preserving your harvest and cooking from scratch? If I can help you in any way don’t hesitate to reach out.
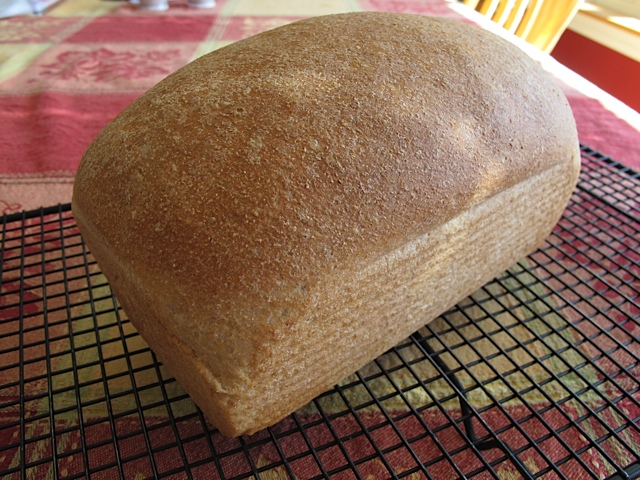
I grew up reading Little House on the Prairie and often thought about what life was like for the early pioneers. Between 1820 and 1880 the promise of free land tempted settlers to make the perilous journey westward by covered wagons. Having made the journey by car it’s hard to imagine making the same journey by covered wagon. I’m sure the early pioneers had different versions of pioneer bread, probably made with corneal and rye and wheat flour. Without commercial yeast they would have relied on either sodium bicarbonate as the leavening agent or a sourdough starter.
This bread is reminiscent of the true Pioneer Bread, it relies on sour milk to do its leavening and has no butter or oil. The recipe makes two loaves. It is a quick bread and is delicious!
Pioneer Bread
Ingredients:
3 cups whole wheat flour
1 cup flour
½ cup sugar
1 tsp. Baking powder
1 tsp. Baking soda
1 tsp. Salt
1 large egg
2 cups buttermilk
½ cup maple syrup
1 cup walnuts, chopped
½ cup raisins
½ cup dried dates, chopped
Directions:
Preheat your oven to 300 degrees. Grease two 9×5 inch loaf pans. Whisk the flours, sugar, baking soda, baking powder and salt together in a large bowl. Beat the eggs in a medium bowl, and then stir in the buttermilk and maple syrup. Stir the egg mixture into the flour mixture until just combined. Then stir in the walnuts, raisins, and dates until just incorporated.
Divide the batter evenly between the prepared loaf pans and bake until a toothpick inserted into the center of the bread comes our clean, about 1 hour. Cool on a rack for 10 minutes, then turn out onto the rack to cool completely, at least 45 minutes. Serve.
This Pioneer Bread will keep at room temperature wrapped in plastic wrap for up to 4 days. It can also be frozen for up to two months.
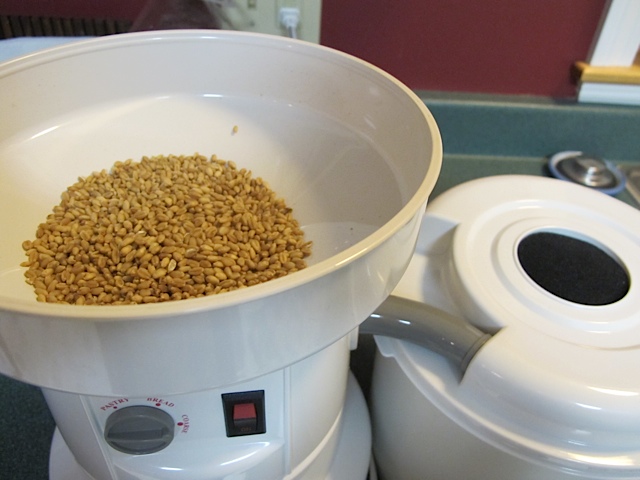
Making my own bread is one of the steps I do in living a self-reliant lifestyle. Not only do I make my own bread but also I grind my own wheat berries! For the last twenty years wheat berries have been a common household staple.
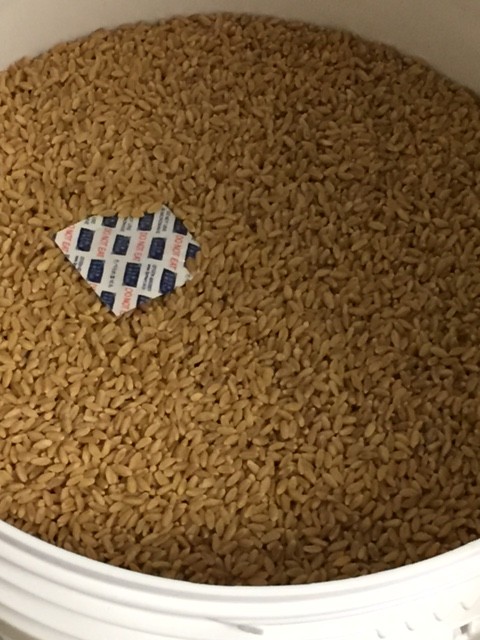
Wheat berries are a true whole grain! Without these kernels there would be no flour. They are loaded with nutrients and are as easy as rice to prepare, perfect for a meal any time of the year. Did you know that raw wheat, if kept dry and free of insects, could last hundreds of years without any loss of quality or taste?
Unfortunately, once wheat is ground into flour, it will last only a few days without turning rancid, which is why regular store-purchased flour is heavily bleached and full of preservatives. I started buying wheat berries more than 20 years ago even though I didn’t own a wheat grinder. I had a friend that would grind the berries for me. Eventually I purchased a wheat grinder of my own and have been happily grinding my own wheat for years.
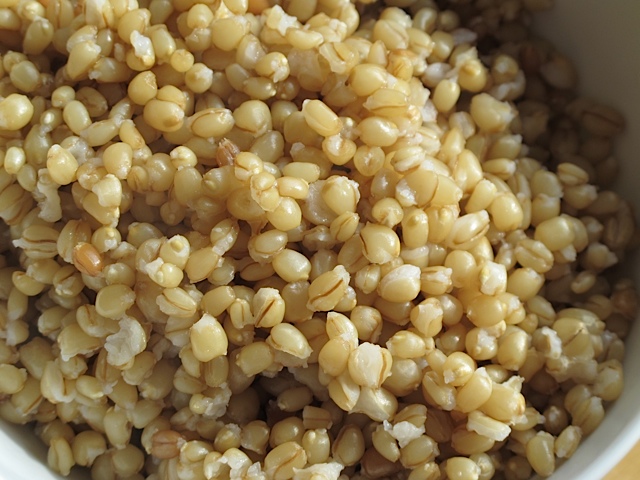
In addition to grinding wheat berries to make your flour, you can also enjoy them in other ways. When they are boiled, cooked wheat berries have a chewy bite and a nutty, earthy flavor. They can be eaten as a breakfast cereal with milk and cinnamon or added to a salad or main dish. A cup of cooked wheat berries has about 300 calories and is packed with fiber, protein and iron. If you Google major cooking sites like the Food Network and search “wheat berries” you’ll find at least 50 tasty suggestions that incorporate whole wheat into soups, salads, sides and main dish casseroles.
You may not be a baker but wheat berries are definitely a staple that should be in your pantry! Try serving them to your family this week. Besides grinding wheat berries for flour do you have a favorite way to enjoy them?
Have you been following along with the Self Reliance Challenge? For more information check out the following bloggers, we’ve all been challenging ourselves this month of May.
My first goal was to update my goal list each week. I can’t believe how fast the year is flying by, it’s almost June! I’m enjoying keeping my goals in the forefront. I’m thinking about them each week and realizing that some goals are so easy to accomplish, like reading. While other goals are more challenging.
1. Find a new hosting site for my blog and make it secure.Done! This was the first goal accomplished this year and I am so happy to have a secure website.
2. Monetize my blog. This is in the works, I have set up two affiliate accounts. Soon you’ll be seeing links to my favorite items on amazon. I’ve also teamed up with an amazing heirloom seed company, Mary’s Heirloom Seeds. There is currently a 99 cent sale going on. Click here for more information.
3. Create a cookbook. One step at a time, as we are now in the gardening seasoning and I’m spending as much time as I can outside this goal might be pushed off until later this summer.
4. Be diligent about getting 10K steps in 5 out of 7 days a week. This is the first week I have accomplished this goal! Being outside almost every day sure helps to get my steps in plus with the days getting longer it is nice to take a walk at the end of the day.
5. As we continue to prepare for an eventual house sale, continue to de-clutter. Felt so good to have a car load of items out of the house last week. We have a local church that has a big sale later this summer. Everything we collect now will be donated. Didn’t make much progress on this goal this week. Only one item out of the house. It’s going to be hard to beat the carfull that left last week! 73 items to go.
6. Read 25 books this year! Spent very little time reading this week. I am currently reading a book called The Insanity of Obedience. Very good and very meaty book. I read a little and then have to think hard about what I’ve read. I have 7 more books to read this year, not a problem!
7. Have a consistent meal plan each week and prepare ahead. I am loving the new book I was asked to review called Prep Ahead Breakfasts & Lunches. This week I made Apple Pie Baked Oatmeal. It is delicious. Makes 12 servings and will store in the fridge for five days or you can freeze it.
If you are interested in ordering the book, click on the image below.
8. Finish 4 knitting projects. Completed! Made two hats and two scarves. Found a baby sweater that I’d started years ago so I’m going to keep knitting and finish that sweater.
9. Clean out our freezer. I am down to tomato sauce, some frozen rhubarb and a loaf of carrot zucchini bread. Not bad. Our kitchen freezer is pretty much under control I have some frozen peppers to use up and some frozen vegetables. Love the progress.
10. Take a few road trips and visit family and friends on the east coast that we will not see as often once we move to the west coast. Looking forward to our trip to North Carolina at the end of the June. Spoke to my aunt in upstate New York and made plans to visit later this summer. Now to contact our friends in Maine and make a plan to visit them!
Fun to see the progress in the goals I have set. We’re almost halfway through the year and two of my goals are completed!
This post may contain affiliate links. These affiliate links help support this site.
For more information, please see my disclosure policy. Thank you for supporting Nancy On The Home Front
Being part of the Self Reliance Challenge has been a fun challenge. It’s gotten me to re-think about our goals and why we want to be as self-reliant as we can. Saving money is one of the main reasons and cooking from scratch not only helps us save money but I know exactly what we are eating. You will find very little processed food in our house.
One of the items I cut out long ago was cereal. When the children were young I would often have a box of cereal in the cupboard for a quick breakfast. Then I started making my own granola. I purchase the oats in bulk and make up a fresh batch of granola every two or three weeks. My recipe is just as delicious as that expensive store-bought granola. Click on this link for my simple and delicious granola recipe. Not only have I been making it for years but my mother made it for years as well!
My daughter once won a year’s supply of Eggo waffles. It was a wonderful prize, which the whole family enjoyed. However I usually make my own waffles and freeze the extras so we can enjoy our own freezer waffles. My recipe for Amazing Overnight Waffles can be mixed p the night before. It’s all ready to go when you wake up in the morning. I freeze the extras and I guarantee they are tastier that any store bought waffle!
Have you made your own yogurt yet? I started making yogurt on a regular basis once I found out how easy it was. I usually make it plain but it’s easy enough to add fruit or vanilla to flavor it. No special equipment is needed either.
I’ve been making bread for years! When we had four children under the roof I made it every week. The kids would often consume one loaf as a snack after school! You can use a mixer or your hands to make this easy and no fail recipe. By making you bread at home you know exactly what it in it. I double the recipe so I make three loaves at a time. I still make three loaves at a time but two go into the freezer to enjoy later.
Where we live take out is not an option. As a result we have learned that cooking from scratch is better than any take out. My husband has developed the talent for making a pizza that is better than anything we can find locally.
If you have the yearning for Chinese you can cook a stir-fry dinner in less than thirty minutes. Make your own stir-fry rice, you can use up leftovers from your fridge and it will taste better than anything you can buy. With a little practice you will find that cooking from scratch is easy, saves you money and you may find yourself tossing that takeout menu collection!
If you are interested in seeing how other bloggers are involved in the Self Reliance Challenge visit their sites. Join us as we challenge ourselves to live a more self reliant lifestyle for the entire month of May!

 This Great Depression Cake has no milk, no eggs and no butter in the ingredients, it became popular after the stock market crash of 1929. It’s often called “Boiled Raisin Cake”or “Economical Spice Cake.” The great depression cake is moist, spicy and delicious. If you’re lucky you probably have all the ingredients to make this cake! It tastes like a cake version of the old fashioned molasses cookies I made recently!


 It’s finally warm enough to get out into the garden! By the first week in June the garden is planted and it’s time to weed and mulch the flowerbeds.


 Now we just need a buyer.
 With all the gardening, mulching and spending time outside as well as walking with a friend I managed to get over 10 thousand steps in for 5 of the 7 days! Not always easy but I love it when I can say I accomplished this! Plus June is so beautiful in Vermont, who doesn’t want to be outside!


 Occasionally check the jar out and give it a shake.