Grilled Shrimp Tostadas

Bring the taste of summer into your kitchen with these Grilled Shrimp Tostadas. These delicious tostadas can be made under your broiler or on your grill. This time of year our grill is buried in the snow so I opted for using the broiler and they came out perfectly. This dinner can be prepared in less than 35 minutes perfect for a quick diner when you don’t want to spend a lot of time prepping.Grilled Shrimp Tostadas

Grilled Shrimp Tostadas

Ingredients:

2 Tbsp. Taco seasoning
2 Tbsp. Lime juice
2 Tbsp. Olive oil
2 Plum tomatoes, chopped
¾ cup Corn kernels
½ Avocado, pitted, peeled and cut into small pieces
½ cup Red onion
¾ pound shrimp, peeled and deveined
4 (6 inch) corn tortillas
1/3 cup chopped fresh cilantro
1 cup refried beans, warmed
2 cups thinly sliced romaine lettuce
¼ cup feta cheese

Directions:

Spray your grill rack with olive oil non-stick spray or if using your broiler spray the broiler pan. Preheat broiler or grill.

Whisk together taco seasoning, lime juice, and onion in a medium bowl. Add the tomatoes, corn, avocado and onion and toss to coat. Set aside.

Lightly spray shrimp with the olive oil non-stick spray. Place on grill rack or broiler pan and cook until just opaque in the center, about 2 minutes per side. Transfer to a plate.

Lightly spray the corn tortillas and place on grill rack or broiler pan and cook until browned in spots and crispy, about 2 minutes per side.

Add the shrimp and cilantro to the tomato mixture and toss to combine. Spread each tortilla with ¼ cup of the refried beans, top with ½ cup of the romaine lettuce and then add the shrimp tomato mixture on the top. Sprinkle with the Feta cheese and serve.Grilled Shrimp Tostadas

Makes four generous servings.Grilled Shrimp Tostadas

Spicy Kielbasa Soup

Our weather has been cold and rainy for the last several days. It was the perfect weather to cook up a batch of spicy kielbasa soup. The red pepper flakes give it a little zip. If you have any leftovers don’t worry this soup is great reheated, after the flavors have had a chance to blend. I served this soup with some bread and a salad and it was the perfect rainy day dinner.spicy kielbasa soup

This recipe was adapted from a recipe I found on the Taste of Home website.

Spicy Kielbasa Soup

Ingredients:

1 pound turkey kielbasa, sliced
1 medium onion, chopped
1 medium green pepper, chopped
2 celery ribs, thinly sliced
4 garlic cloves, minced
4 cups chicken broth, preferably homemade
1 can (15.5oz) can white cannellini beans, drained and rinsed
1 can (14.5oz) can stewed tomatoes
1 small zucchini, sliced
1 medium carrot, shredded
1 Tbsp. dried parsley
¼ tsp. crushed red pepper flakes
¼ tsp. pepperspicy kielbasa soup

Directions:

In a nonstick skillet, cook kielbasa over medium heat until slightly browned. Add the onion, green pepper, celery and garlic. Cook and stir for five minutes or until the vegetables are tender. Transfer to a 5-quart slow cooker. Stir in the remaining ingredients. Cover and cook on low heat for 8-9 hours. Makes about 5 servings.spicy kielbasa soup

This spicy kielbasa soup recipe is even better the next day when the flavors have blended a bit. I’m sure it would be one of those soups you could freeze as well. We enjoyed it for diner one night and lunch the next day and there were no other leftovers!spicy kielbasa soup

We are really looking forward to the arrival of spring and being able to enjoy salads out on the deck. However with the cold rainy weather we’ve been having this week spicy kielbasa soup seemed the perfect choice!

Goal Setting Week 12

My first goal was to update my goal list each week.  I have to say having a post on goal setting has helped me to stay focused on what goals I want to accomplish this year. The biggest drawback is to remind myself that I have the whole year to work on accomplishing these goals. Hopefully you, my faithful readers will remember this as well and not get tired of reading about my progress! I tend to get a little stressed when I realize just how fast the year is flying by. However, I am making progress!goal-setting 12


  1. Find a new hosting site for my blog and make the site secure. Done!! So excited after all this time I finally have a secure website! Currently we are doing a little tweaking of the site behind the scenes. Another week or so and I can move on to monetizing my blog!
  2. Monetize my blog.  Still on my to do list. Time to put this goal on the forefront! It would be nice to have some money coming in for a change. No progress yet on this goal.
  3. Create a cookbook! One step at a time, get the blog running smoothly, increase readership and then I’ll be working on the cookbook!
  4. Be diligent about getting 10 K steps in 5 out of 7 days each week. Welcome to April in Vermont where we have had everything from rain to freezing rain and snow! Now good for getting those daily walks in!goal setting 12
  5. As we continue to prepare for an eventual house sale, continue to de-clutter. Get rid of at least 250 items from the house this year!  Cleaned out two closets this week and pulled an assortment of things, 10 to be exact, to go out the door! 178 items to go!goal setting 12
  6. Read more  25 books this year! Managed to get two books read this week! Continued with the trilogy following Call The Midwives  and read book 2 (Shadows of the Workhouse) and book 3 (Farewell To The East End)! Still keeping track of the books I’ve read on Good Reads, what a wonderful app. I can keep track of all the books I have read, the books I want to read and the books I am reading. I listed on the app that I want to read 25 books this year, 14 to go! Beginning to think my goal here should have been a few more books!goal setting 12
  7. Have a consistent meal plan each week and prepare ahead! Finding that only thinking about he meals for the week is much easier than thinking of the whole month. Still trying to make healthy choices, did well… although there was the night my husband made his famous Clam and Bacon Pizza!Cut into slices.
  8. Finish 4 2 knitting projects. Second project finished! Third project just started. another infinity scarf but this one you knit on a very long 47 inch round needle, the needle is then doubled on itself so you are actually knitting two rows at once. I had to watch the video on YouTube several times to get it all set up. I think I’m good to go now!goal setting
  9. Clean out our freezer. Such progress! Did make three loves of bread this week so two loaves went into the freezer. Managed to use up a container of tomato sauce so we’re slowly making progress. Working on the upstairs freezer now!Delicious Homemade Bread
  10. Take a few road trips and visit family and friends on the east coast that we will not see so often once we make a move to the west coast. We came up with a list of three people that we would like to visit while we’re still living on the east coast. Now to take a hard look at the calendar and plan these trips. Recently contacted our friends in North Carolina and an aunt in upstate New York. I foresee a road trip in our future!goal setting


So we’re now into April and I’m continuing to think about my goals every week. I think having them on paper and reviewing them each week is really helpful! This might be the first year I actually complete the majority, if not all, of my goals!

SaveSave

Save

SaveSave

SaveSave

Spinach and Bacon Quinoa Muffins

Are you looking for a quick and easy breakfast? These Spinach and Bacon Quinoa Muffins can be mixed up the night before (everything but the eggs). In the morning scramble the eggs and add them to the mix and in twenty minutes your muffins are ready. I usually make a double batch and save the extras for future breakfasts. They keep in the refrigerator for a couple of days just fine. I have not tried freezing these Spinach and Bacon Quinoa Muffins yet, but I’ve been told they do freeze well. These muffins are perfect for meal prep. This recipe makes one serving, which is three muffins, very easy to double or triple the recipe.Spinach and Bacon Quinoa Muffins

I’m always looking for new breakfast ideas and I like to find recipes that include some sort of vegetable. Not always easy as eating vegetables for breakfast does not seem to be the norm, unless you are enjoying a spinach omelet! Often I will stir fry some peppers to enjoy with my eggs but I love the idea of making these ahead of time and having my breakfast ready to enjoy!Spinach and Bacon Quinoa Muffins

Spinach and Bacon Quinoa Muffins

Ingredients:

1 cup spinach
1 Tbsp. scallions
1 egg, scrambled
2 slices cooked turkey bacon, chopped
½ cup cooked quinoa
1 tsp. Olive oil

Directions:

Preheat your oven for 375. Cook the spinach with olive oil just until wilted. Transfer the spinach to a bowl and add all of the remaining ingredients. Stir to combine. Spoon the mixture into your muffin pan, which has been lined with muffin cups or coated with nonstick spray. I used my silicon muffin liners and they work perfectly. Bake for 20 minutes.Spinach and Bacon Quinoa Muffins

As I mentioned this recipe can easily be multiplied to make more muffins. Why not make a big batch to freeze so you always have a healthy, pre-workout meal ready to enjoy!Spinach and Bacon Quinoa Muffins

Chicken Stuffed with Fresh Basil

Recently we traveled to visit my mother-in-law and I asked if I could cook dinner one night. Chicken stuffed with fresh basil was the meal I decided to make and was it ever a winner. The recipe takes only minutes to prepare and can easily be doubled or tripled. The chicken breasts I used were small so we each had our own chicken breast. There were no leftovers.chicken stuffed with fresh basil

The key to making a delicious chicken stuffed with fresh basil is the quality of the ingredients. Use fresh basil and a good quality of tomatoes and fresh mozzarella. The juice from the tomatoes helps the chicken to stay moist. I can’t wait to try this recipe using fresh garden tomatoes.chicken stuffed with fresh basil

Chicken Stuffed with Fresh Basil

Ingredients

2 boneless chicken breasts
6 – 8 thin slices of mozzarella cheese
3 – 4 small cocktail tomatoes
Fresh basil leaves
Italian seasoning
olive oil

Preparation

Preheat your oven to 400 degrees F. Slightly spray a small baking dish with non-stick spray.

Place the chicken breasts on a cutting board and cut 3-4 thin slices across the top of the chicken. Do not cut all the way through.

Stuff each slice with a piece of cheese, some tomato and a fresh basil leaf. Place the chicken breasts in the baking dish. Sprinkle each chicken bread with salt, pepper and Italian seasoning. Lightly drizzle with olive oil.chicken stuffed with fresh basil

Bake in a 400 degree oven for 30 minutes or until the internal temperature of the chicken is 160 degrees.chicken stuffed with fresh basil

Additional Notes

Chicken stuffed with fresh basil can easily be doubled or even tripled. Use good quality mozzarella and fresh tomatoes and basil!chicken stuffed with fresh basil

SaveSave

15 Items I No Longer Buy

Items I No Longer BuyI’m always trying to find ways to make household items myself. Not only is this a great way to save money but also helps you live a healthier life style. No more chemicals in your cupboards! Cooking from scratch also helps us to save money. You know exactly what is in each food item and as a result you will be consuming less preservatives. These are the top 15 items I no longer buy. I have divided the list into food items and household and personal products.


Hot CerealItems I No Longer Buy


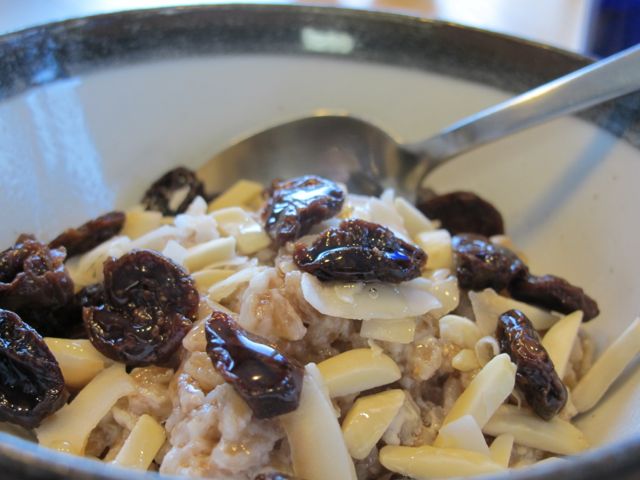
Recently a friend of mine introduced me to the grain farro. Have you heard of it? Farro is a type of hulled wheat that is typically used in salads, soups and side dishes. It has sort of a nutty flavor. Farro looks very much like a wheat berry. Doing a search on the Internet will give you all sorts of recipes from salads to soups to everything in between. I found a warm farro cereal recipe that I just had to try. Our mornings are still rather chilly and I enjoy a nice bowl of warm cereal to start my day.


Granola


I have personally been enjoying this recipe for years! Originally a neighbor shared the recipe with my mother and she continued to make it! When I left home I copied the recipe and have been making it myself ever since. The recipe is simple and you can make it as is or add more ingredients if you’d like.


BreadDelicious Homemade Bread, Items I No Longer Buy


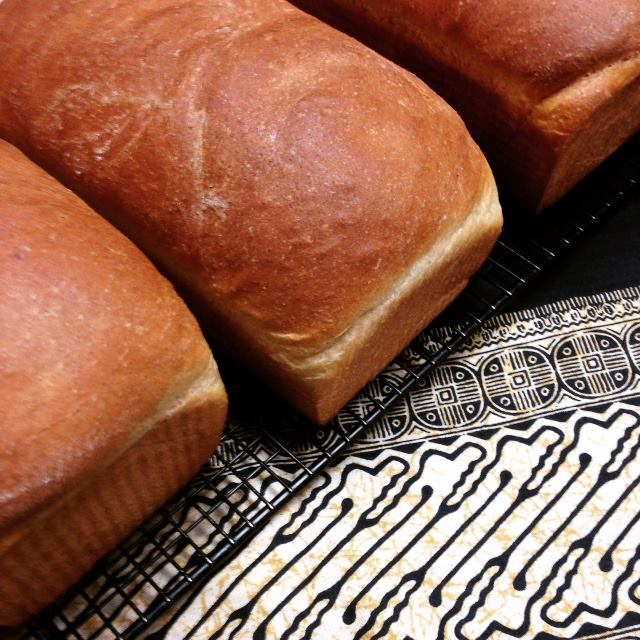
I make all sorts of bread from quick breads to traditional yeast breads. When we were busy raising our four children I made bread at least once a week. Our children really did not like store bought bread and much preferred my bread. I would bake three loaves at a time and freeze two to eat later. Sometimes this didn’t work so well as one loaf would get eaten right out of the oven. You have to admit there is nothing better than fresh baked bread still warm from the oven. Bread became one of the first things I no longer buy, especially when we had four children at home! It was just easier to make it myself!


Canned SoupTomato Soup, Items I No Longer Buy


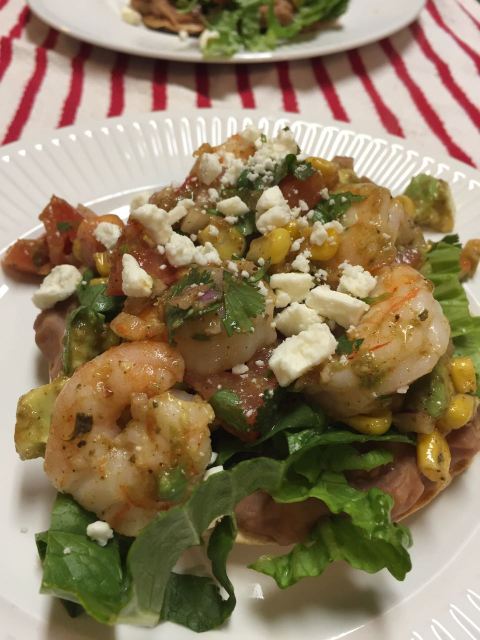
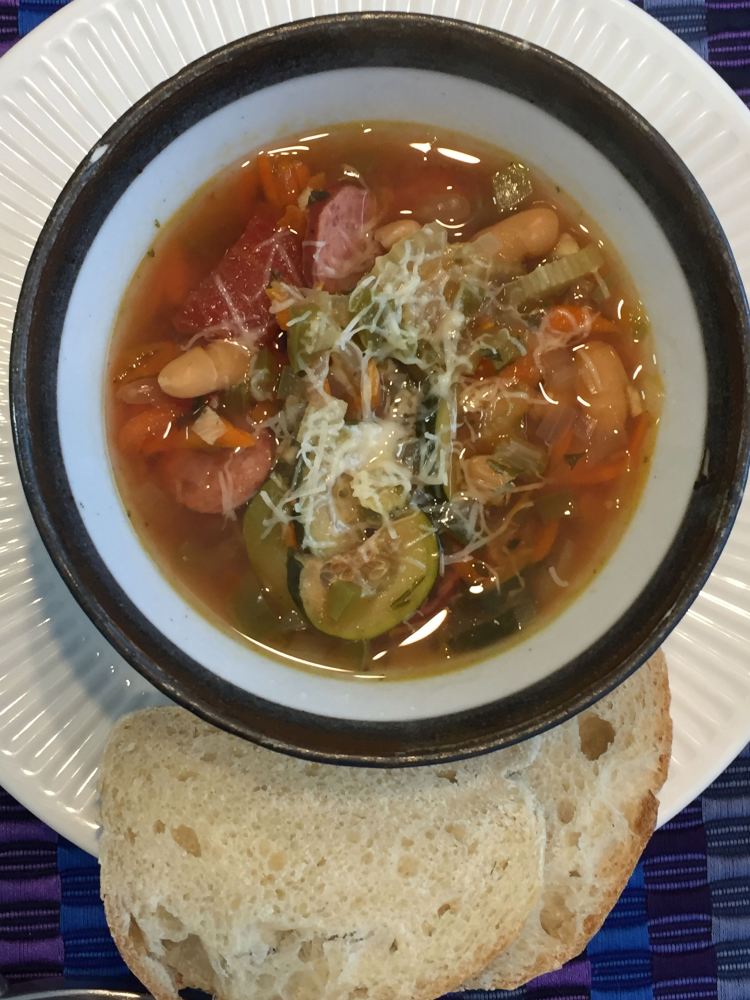
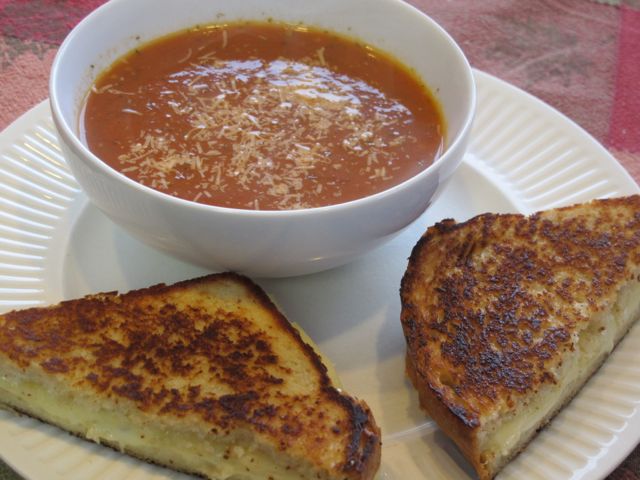
Are you making your own soup? Homemade soup not only easy to make but you can actually replace buying canned soup! No more purchased chicken stock or tomato soup, you can make you own! Homemade tomato soup and a grilled cheese sandwich on your own bread is a perfect lunch!


Pizzapizza, tomato sauce, Items I No Longer Buy


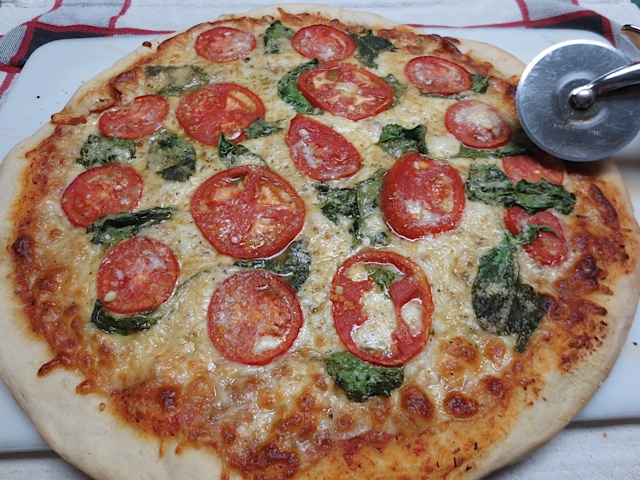
Years ago we moved from Connecticut to Florida. In Connecticut we were used to delicious pizza that you could have delivered to your house. When we first moved to Florida we could not find a decent pizza anywhere. As a result my husband learned how to make the most delicious pizza. It didn’t happen over night and we had many pizzas where the crust was too thick or too thin. However it didn’t take long for him to perfect his pizza. I am so glad he did because now that we live in Vermont we once again live in an area where good pizza can be hard to find and not close by. We also make our own pizza sauce so we are enjoying a totally made from scratch meal!


Vanilla ExtractHomemade Vanilla, Items I No Longer Buy


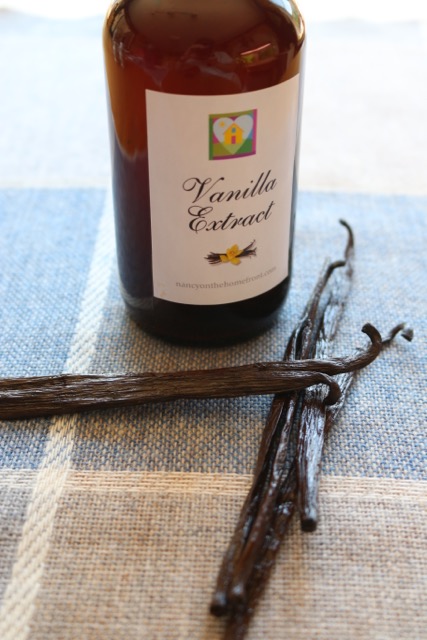
I began making my own vanilla extract years ago. So easy and it makes enough to give as gifts too.  Making Vanilla Extract at home is so easy!  Once you’ve combined the vodka and vanilla beans you have to let it sit for 4-6 months before it is ready.


Chicken BrothChicken broth for the pantry, Items I No Longer Buy


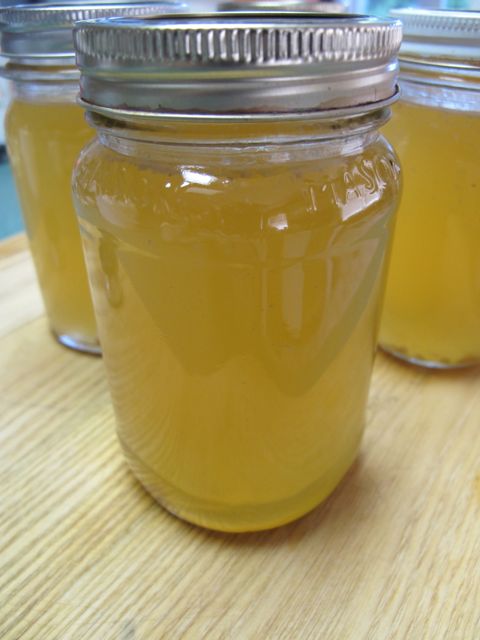
Have you made your own chicken broth yet? I have always made my chicken stock with the leftover chicken (or turkey) carcass. Recently I have been making my chicken stock using the whole chicken and my crockpot! When the process is finished I have 6-8 cups of cooked chicken meat, which I can use in a casserole, enchiladas or soup. I also end up with the most beautiful chicken stock! Homemade chicken stock can be frozen or pressure canned for later use.


Dog Treatsprudent pantry, Items I No Longer Buy


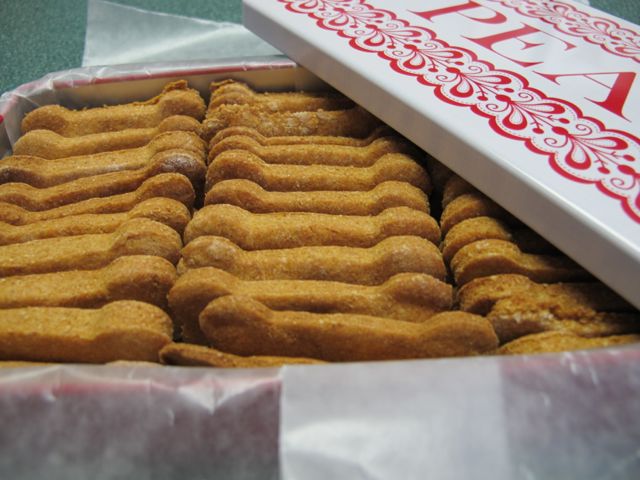
We are currently dog-less but I still like to make dog biscuits for my daughter’s dog. This is an easy recipe with only four ingredients! If you’ve made cookies before you will find it very easy to make dog biscuits!


Hand Lotionessential oils, Items I No Longer Buy


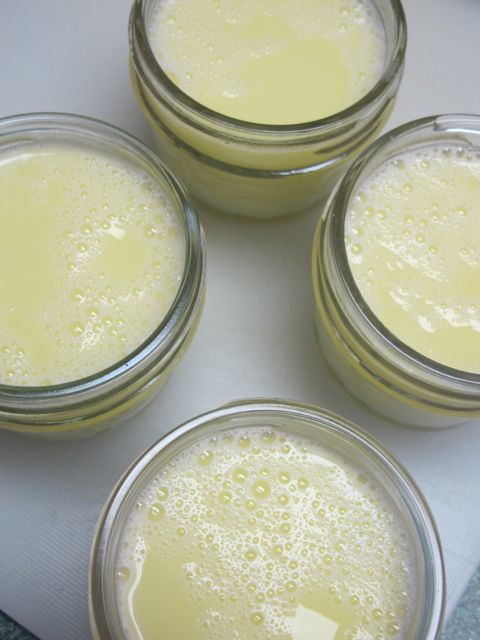
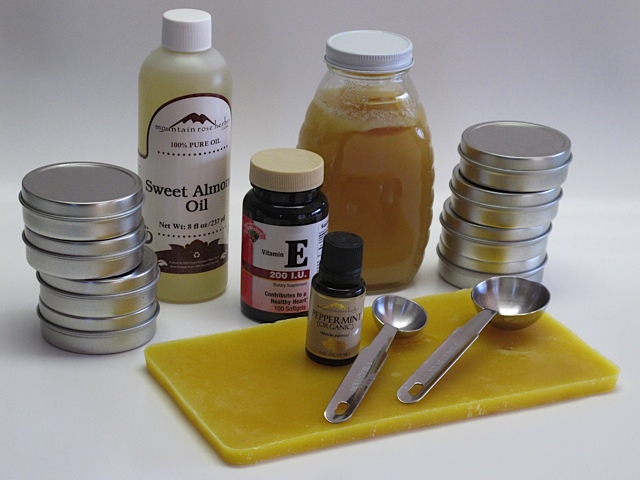
Living in Vermont our winters are long and dry and my hands suffer. I’ve been making this hand lotion for years and I love the relief it gives my hands. I use small mason jars to store the lotion in. If you can’t use it all up yourself give some away as gifts!


Lip Balmlip balm, homemade creams, prudent living, Items I No Longer Buy


Even before I started reading about the items contained in a commercial brand of lip balm or chapstick I have been using this recipe. I love the natural ingredients and the fact that I can use our own beeswax to make this lip balm.


Candlesbeeswax candles, Items I No Longer Buy


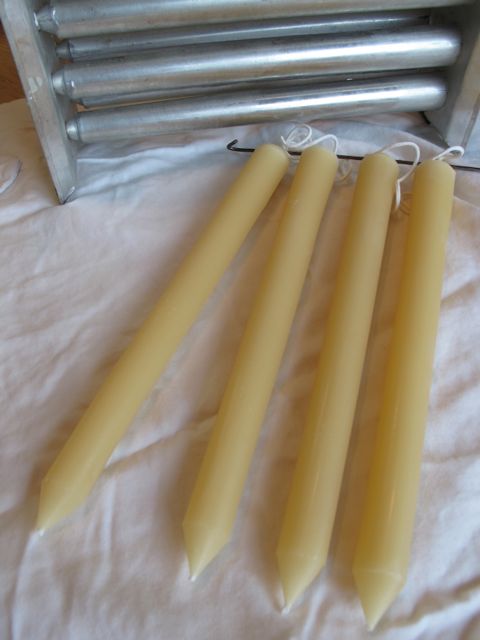
Several years ago we had our own beehives. One of the byproducts of having your own bees, besides honey is beeswax. There are many uses for beeswax including lip balm, sore muscle salve and wood butter. I love to make beeswax candles with the wax. Not only are they a beautiful color but they burn cleaner than paraffin candles and they burn slower and are usually dripless.


Dryer Sheetshomemade dryer sheets, Items I No Longer Buy


Growing up my mother never used dryer sheets. When our children were younger I used dryer sheets, as I loved that the clothes smelled “clean” and there was no static. As time went on and our lifestyle changed I began to experiment with making my own laundry detergent. I never thought of making my own homemade dryer sheets! To replace commercial dryer sheets I decided to try making my own. Recently I received this wonderful recipe for homemade dryer sheets from a friend of mine. Jen is also the one who has introduced me to essential oils and I think I am hooked!


Dryer BallsItems I No Longer Buy


Dryer balls are an eco-friendly alternative to dryer sheets and liquid fabric softener. Would they really help my clothes dry quicker with less static? Yes they do! They decrease the drying time, which saves you money on your utility bills. Unlike dryer sheets, wool dryer balls can be used over and over again. Wool dryer balls can be used for cloth diapers keeping them soft and chemical free. I loved the dryer balls and despite the fact that they often end up inside a sleeve or a pant leg I use them every time I dry a load in the dryer.

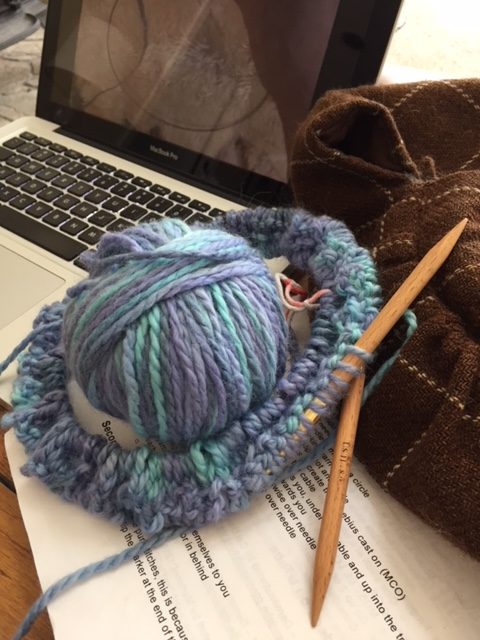
How hard could it be to make them myself? After searching the Internet I found several ways to make them. You can use yarn. What a perfect use for those small leftover balls of yarn I have in my yarn box!


Homemade Cleanerscleaners, all natural, Items I No Longer Buy


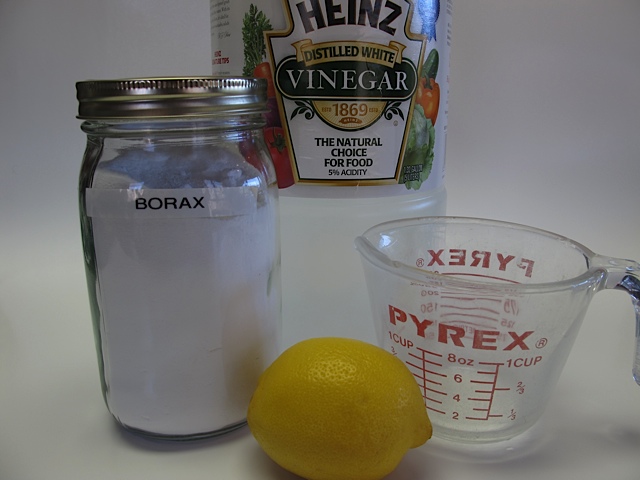
When you compare the prices of cleaning products in the stores with the cost of making them at home you’d be surprised at how much you can really save! If you were to add up the toilet cleaner, kitchen cleaner, window cleaner etc. it seems the average clean household requires close to $150 worth of chemical supplies at all times. You can switch to the healthier alternatives sold in the stores but they are also expensive. The best choice for your budget and your health is to make them yourself. Homemade cleaners are just a few of the items I no longer buy.


Bug Sprayhomemade bug spray, chemical free, Items I No Longer Buy


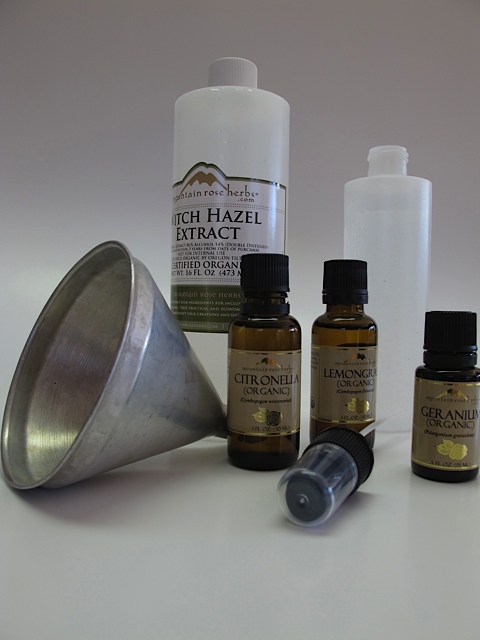
We have bugs in Vermont especially in the spring. It’s no fun working in the garden having the bugs biting. I am really trying to get away from purchased cleaning products and decided I should try this bug spray as well. Much better for you than a commercial bug spray!


I am amazed at the items I no long buy. What started with making my own window cleaner and baking bread for the family has resulted in an abundance of items I make myself! The end result is a healthier lifestyle.

Goal Setting Week 11

My first goal was to update my goal list each week.  I have to say having a post on goal setting has helped me to stay focused on what goals I want to accomplish this year.

The biggest drawback is to remind myself that I have the whole year to work on accomplishing these goals. Hopefully you, my faithful readers will remember this as well and not get tired of reading about my progress! I tend to get a little stressed when I realize just how fast the year is flying by. However, I am making progress!goal-setting


  1. Find a new hosting site for my blog and make the site secure. Done!! So excited after all this time I finally have a secure website! Currently we are doing a little tweaking of the site behind the scenes. Next step is to work on monetizing the site.
  2. Monetize my blog.  Still on my to do list. Time to put this goal on the forefront! It would be nice to have some money coming in for a change. No progress yet on this goal.
  3. Create a cookbook! One step at a time, get the blog running smoothly, increase readership and then I’ll be working on the cookbook!
  4. Be diligent about getting 10 K steps in 5 out of 7 days each week. This past weekend we were visiting my mother-in-law in Connecticut. It was so nice to have no snow and I could actually wear sneakers while walking! Managed to have two good days of walking! Such fun to see the signs of spring!goal setting
  5. As we continue to prepare for an eventual house sale continue to de-clutter. Get rid of at least 250 items from the house this year!  This week I continued working on decluttering my sewing supplies. Managed to pull a few old patterns out which I will try to sell on eBay! Also pulled things out of the pantry as well as two pairs of boots I no longer wear and have seen better days! A total of 12 items out the door! 188 items to go!goal setting
  6. Read more  25 books this year! Managed to get two books read this week! Call The Midwives (book 1) was the book series that the PBS show was based on. If you loved the show you will love the book. I really enjoyed it as it went into a lot more of the history of the times. The Life We Bury was a quick read. Started as a good story and ended up as a thriller and I just couldn’t put it down! Still keeping track of the books I’ve read on Good Reads, what a wonderful app. I can keep track of all the books I have read, the books I want to read and the books I am reading. I listed on the app that I want to read 25 books this year, 16 to go! Beginning to think my goal here should have been a few more books!goal setting
  7. Have a consistent meal plan each week and prepare ahead! Stopped at the grocery store on our way home last night from Connecticut. Meals planned for the week ahead. Notice all the vegetables, we’re making healthy choices! I have my meal plan in a plastic binder so I can re-use it each week. Using a dry erase pen which can easily be wiped off each week!goal setting
  8. Finish 4 2 knitting projects. Second project finished! With the driving time to Connecticut and back I finally finished my infinity scarf! Now to figure out my third project!!goal setting
  9. Clean out our freezer. Such progress! Brought a loaf of banana bread and the last of the cinnamon buns to Connecticut with us! Thinking I might be able to have a totally empty freezer before too long. This is a second fridge we have in our basement in case you’re wondering. We do have another refrigerator/freeze in our kitchen!goal setting
  10. Take a few road trips and visit family and friends on the east coast that we will not see so often once we make a move to the west coast. We came up with a list of three people that we would like to visit while we’re still living on the east coast. Now to take a hard look at the calendar and plan these trips. Recently contacted our friends in North Carolina. I foresee a road trip in our future!


So we’re now into April and I’m continuing to think about my goals every week. I think having them on paper and reviewing them each week is really helpful! This might be the first year I actually complete the majority, if not all, of my goals!

SaveSave

Save

SaveSave

SaveSave

What To Do With Leftover Ham?

One of the things I like best about the holidays is having leftover ham. No matter what the holiday is if you serve ham you are bound to have leftovers. Ever wonder what to do with leftover ham?what to do with leftover ham


There are many ways to use up leftover ham, but one of my favorites is Ham and Egg Fried Rice. I have been enjoying this recipe since I was in high school when my mother took a Chinese cooking class. It’s a quick recipe and makes use of leftovers in the fridge. If you enjoy take out fried rice this is a wonderful recipe to save you money and make at home.


Wondering what to do with leftover ham?… this is the perfect solution!


Ham and Egg Fried Ricewhat to do with leftover ham


Ingredients:


3 cups cooked rice
2 eggs – scrambled in 1 Tbsp. oil
½ cup diced cooked ham
½ cup cooked peas
1 ½ Tbsp. soy sauce
1 stalk scallion, finely chopped
2 Tbsp. oil


Directions:


Heat 1 Tbsp. oil, when it is hot, add your eggs and scramble them. Remove the eggs from the pan and set aside.what to do with leftover ham


Heat 2 Tbsp. oil and stir-fry the rice thoroughly.what to do with leftover ham

Add soy sauce and stir. Add peas and ham and stir again. Add scrambles eggs and scallions breaking the eggs into smaller pieces while mixing. Stir a few more times. Serve hot.what to do with leftover ham

I hope you enjoy this recipe, with a little practice; you may end up tossing that takeout menu collection! Plus it’s the perfect solution of, “What to do with leftover ham?”!what to do with leftover ham

/* Kulinarian Recipe Embed (do not include newlines/breaks) */!function(e,n,t,a,i,c){function o(){getEmbed(typeof config == “undefined”?{}:config,a)}i=n.createElement(t),c=n.getElementsByTagName(t)[0],i.id=”kaembed”,i.async=1,i.src=a,c.parentNode.insertBefore(i,c),i.addEventListener?i.addEventListener(“load”,function(){o()},!1):i.attachEvent&&i.attachEvent(“onload”,function(){o()})}(window,document,”script”,”https://www.kulinarian.com/js/embed.js”);

Cabbage and Carrot Salad

Earlier this week I mentioned the fun I had on a business trip to Colorado. Although it was a work week we were staying with our dearest friends. One of the highlights of the week was enjoying my friend Lauryn’s cooking. She and I cook quite differently, I am usually adapting a recipe I have found while she makes up the recipe as she goes along. She gave me permission to share her delicious Cabbage and Carrot Salad on my blog this week. This is a quick and healthy recipe and comes together in no time at all.

We have fun cooking together and we have created some amazing meals over the years!cabbage and carrot salad

Red Cabbage and Carrot Salad

Ingredients:

¼ red cabbage, julienned
8 baby carrots, julienned and cut in half

Dressing:

2 Tbsp. Olive oil
1 Tbsp. Lime juice
1 Tbsp. chopped cilantro
1 Tbsp. chopped scallions
1 Tbsp. Chopped basil
¼ tsp. Celery salt
Couple of shakes of salt
¼ tsp. Black pepper

Directions:

Combine the julienned red cabbage and the carrots in a bowl. In a smaller bowl combine the dressing ingredients. Pour the dressing over the cabbage mixture. Toss to coat and serve over julienned cucumber.cabbage and carrot salad

This cabbage and carrot Salad recipe made four servings and there was not a bite left!

Starting Seeds Indoors

In many parts of the country there are certain seeds that need to be started ahead of time due to shorter growing seasons. Seeds such as tomatoes, peppers and eggplants must be started inside; they cannot be directly sowed into your garden. Starting seeds indoors is not a complicated process and for the most part no special equipment is needed.starting seeds indoors 
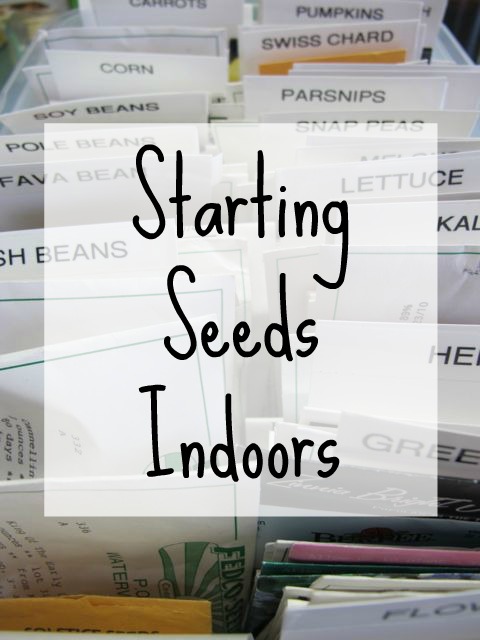
If you have a sunny window or simple grow light that is sufficient. My first grow light was a shop light that I put special bulbs in. Later I inherited a wonderful grow light from my mother. My husband made a special table out of plywood to support the lights and the growing seeds. For me a sure sign of spring was starting seeds indoors!starting seeds Indoors


The first step is to set up your growing area. You also want to keep track of the seeds you’ve started, the date you’ve started them and write down the progress. This will help you in future years. There are several sources online to help you keep track. Little House in the Suburb has a wonderful little booklet that you can download. By determining your last day of frost you work backwards to determine when you should start your seeds.starting seeds Indoors


The second step is to set up your containers to start your seeds in. Anything works from eggshells to gardening containers! I have plastic containers that I re-use each year. You also want to have a suitable growing medium, you can make your own potting soil or buy a commercial seed starting mix.starting seeds Indoors


One rule of thumb is to plant the seeds 2-3 times as deep as the seed is wide. Leek and onion seeds are rather small and are pretty much sprinkled on the top of the soil.


Use only the best seeds. Old seeds or seeds that have not been stored properly may not germinate. If you have time do a seed germination test to determine the viability of your seeds. Check my video on the seed viability test I did on some pepper and tomato seeds.


Once my seeds are planted I make sure the soil is moist. One way to do this is to fill a plastic bin with water and float the pot in it until the surface is damp. I then label each container with the date and the name of the plant.starting seeds Indoors 
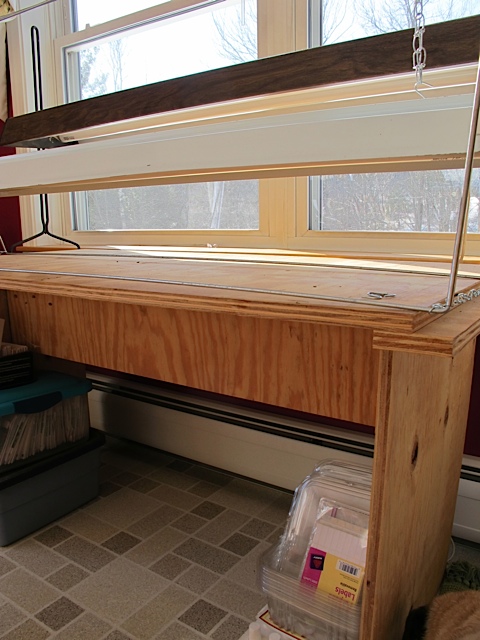
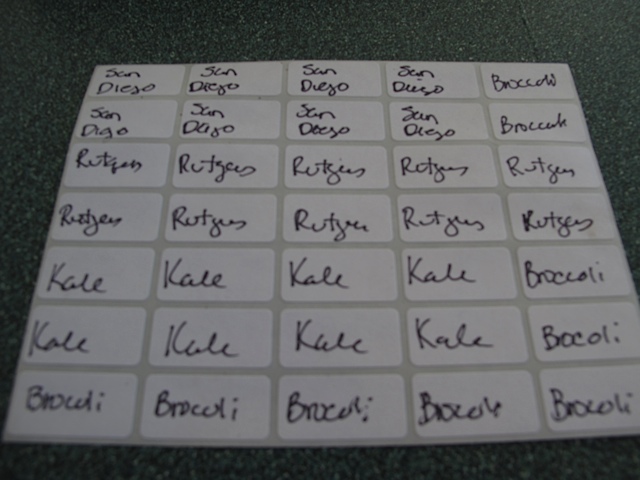
This will help me keep track of how many days it took the seeds to germinate and will also help me when it comes time to plant the vegetable plants in the garden. I may be able to tell leeks from broccoli but it is very important to keep track of the variety of peppers and tomatoes.

Cover the seeds with a plastic or glass cover to create a mini greenhouse. I use recycled lettuce containers, I save them year to year and they make a great little greenhouse!starting seeds Indoors
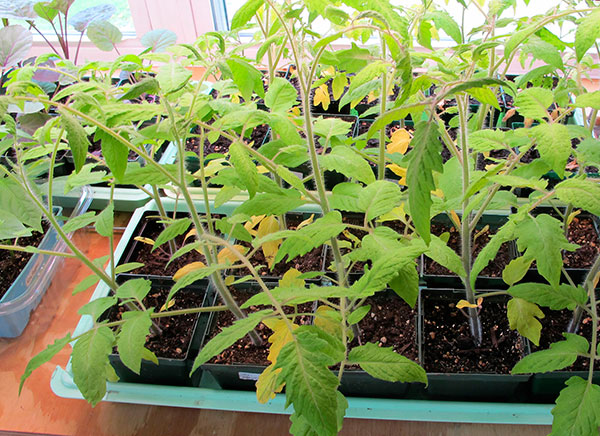
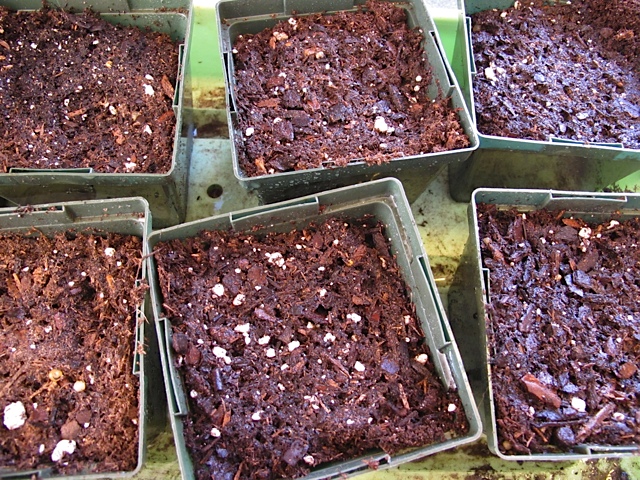
You need to keep the seeds warm; a heating pad may be necessary. You do not need a grow light until the seeds sprout. Once you see the first seeds sprouting remove the cover and place under your grow light. Keep a close eye on the seedlings, as you don’t want them to dry out. Eventually you may need to transplant them into larger pots before they are ready to be planted outside.starting seeds Indoors

Starting seeds indoors is always a good feeling. It’s a sure sign of spring and lets me know that it won’t be too long before I’ll be able to be outside working in the garden!

Design a site like this with WordPress.com
Get started