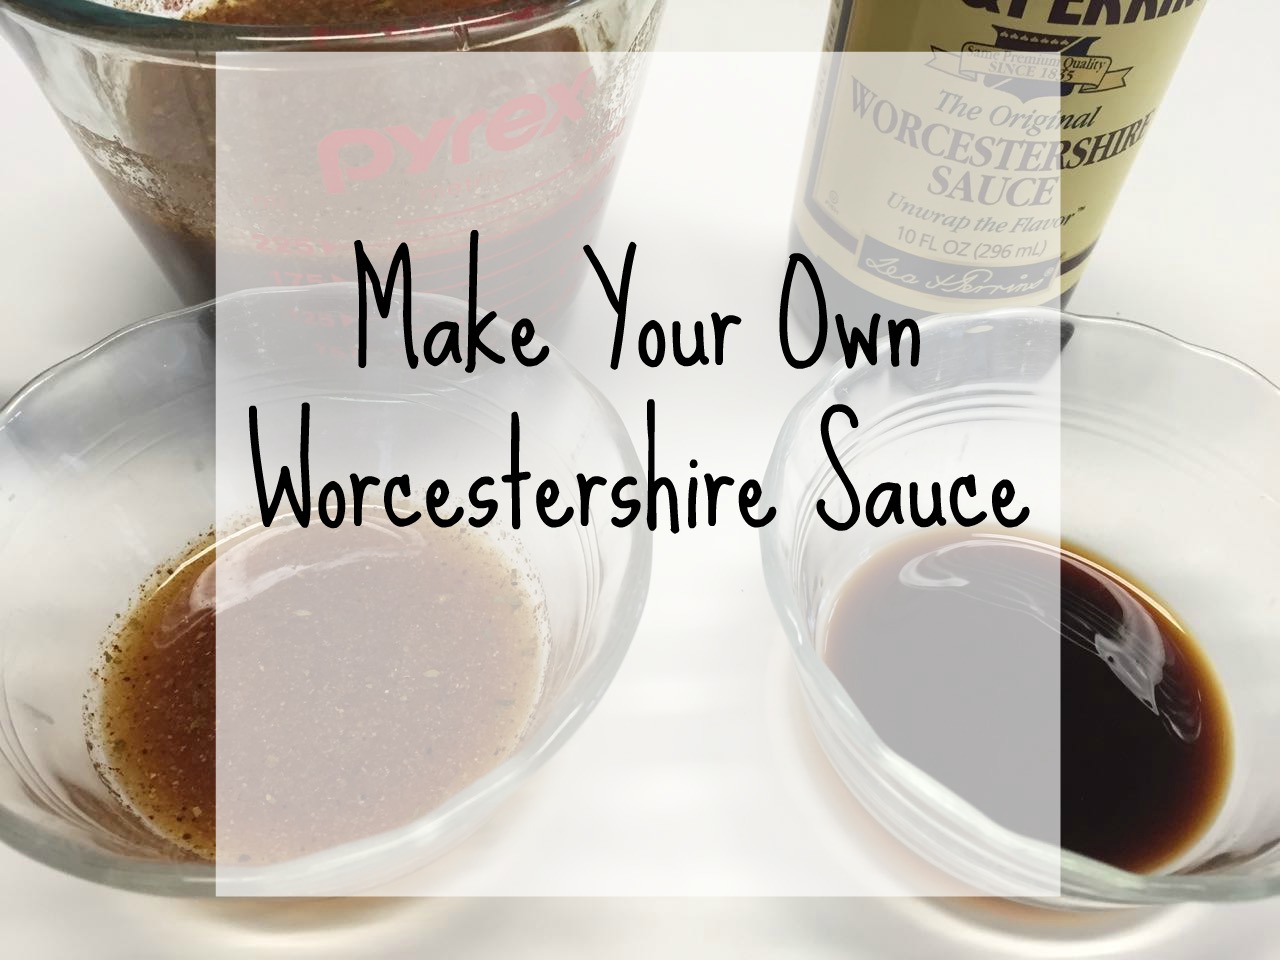
Worcestershire Sauce – Make Your Own!
Do you use Worcestershire sauce? Ever wonder what’s in it? Ever wonder if you can make it at home. I don’t use Worcestershire sauce that often but recently I was curious about the ingredients.
Worcestershire sauce is a fermented liquid condiment of complex mixture originally created by the Worcester chemists John Wheeley Lea and William Henry Perrins, who went on to form the company Lea and Perrins. The ingredients are allowed to mature for 18 months before being blended and bottled in Worcester, where the exact recipe is kept a secret. The original recipe for Worcestershire sauce basically consists of anchovies layered in brine, tamarinds in molasses, garlic in vinegar, chilies, cloves, shallots, and sugar.
Interestingly, the version of Lea & Perrins Worcestershire sauce sold in the U.S. differs from the British recipe. It uses distilled white vinegar rather than malt vinegar. In addition, it has three times as much sugar and sodium. This makes the American version sweeter and saltier than the version sold in Britain and Canada.
The one ingredient that sets Worcestershire sauce apart is tamarind, the fruit of the Indian date. This fruit contains more sugar than any other fruit but is balanced by its high content of acid, giving it that sweet-sour taste. Worcestershire sauce also contains anchovies, actually fermented anchovies!
After searching online I found an easy recipe that didn’t require any long fermenting or cooking. I decided to try it and see how it compares to the bottled version.
Homemade Worcestershire Sauce
1/2 cup apple cider vinegar
- 2 tablespoons Thai fish sauce
- 2 tablespoons honey
- 1 tablespoon molasses
- juice of one lime
- 1/2 tsp ground clove
- 1/2 tsp onion powder
- 1/4 tsp garlic
- 1/4 tsp of chili powder
Mix all ingredients together in a blender, or shake thoroughly in a dressing bottle!
Nourished Kitchen has another recipe which was a little more involved. She found the recipe from Nourishing Joy.
- ½ cup malt vinegar
- ½ cup apple cider vinegar
- ½ cup blackstrap molasses
- ¼ cup naturally fermented fish sauce
- 2 tablespoons tamarind paste
- 1 tablespoon naturally fermented soy sauce
- 3 tablespoons onion juice, or 1 teaspoon dehydrated onion
- 1 teaspoon ground black pepper
- ½ teaspoon cinnamon
- ½ teaspoon ground cloves
- ¼ teaspoon cayenne pepper
- 2 tablespoons olive oil
- 2 shallots, finely minced
- 4 cloves garlic, finely minced
- 1 teaspoon freshly grated ginger
- 8 anchovies, minced
- Juice of 1 lime
- Whisk together the vinegars, molasses, fish sauce, tamarind paste, soy sauce, and onion juice. Set aside.
- Heat a small, dry sauté pan over medium heat. Toast the spices until fragrant, about 1 minute. Pour into a small bowl and set aside.
- In a small saucepan, heat the oil over medium heat; then sauté the shallots until transparent and beginning to brown, 2–3 minutes. Add garlic, ginger, anchovies, and reserved spices and continue to saute just until fragrant, about 30 seconds.
- Pour in the vinegar mixture and scrape up any bits on the bottom of the pan. Bring to a full simmer; then remove from the heat and let cool completely.
- Strain through a fine-mesh strainer into a bowl and stir in the lime juice. Pour into a jar or bottle for long-term storage. Will keep in the refrigerator for 1–2 months.
 I tried the very first version and I have to say the taste is very similar. I’d be very happy to make my own Worcestershire sauce from now on. I know exactly what’s in it and I usually have all the ingredients on hand! Have you ever made your own Worcestershire sauce before?


 Bake for 1 hour at 350 degrees, or until toothpick inserted into middle of loaf comes out clean.


 Cut into wedges and serve.
 They are best eaten as soon as they are cooked.
 The leftover spread can be saved for another day.


 As you know, here at Nancy On The Home Front, I love to share with you all kinds of tips, tricks, ideas and insight into how you can live a cleaner and healthier life. As a 30 year plus gardener, I have a lot of experience in not just how to tend to a garden, but also in knowing how good it is for your wellbeing. I have teamed up with the good people at
