Pesto Spaghetti Squash with Broiled Shrimp

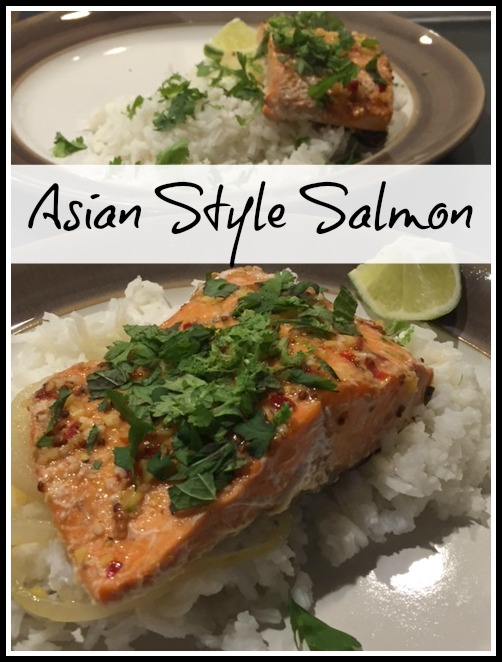
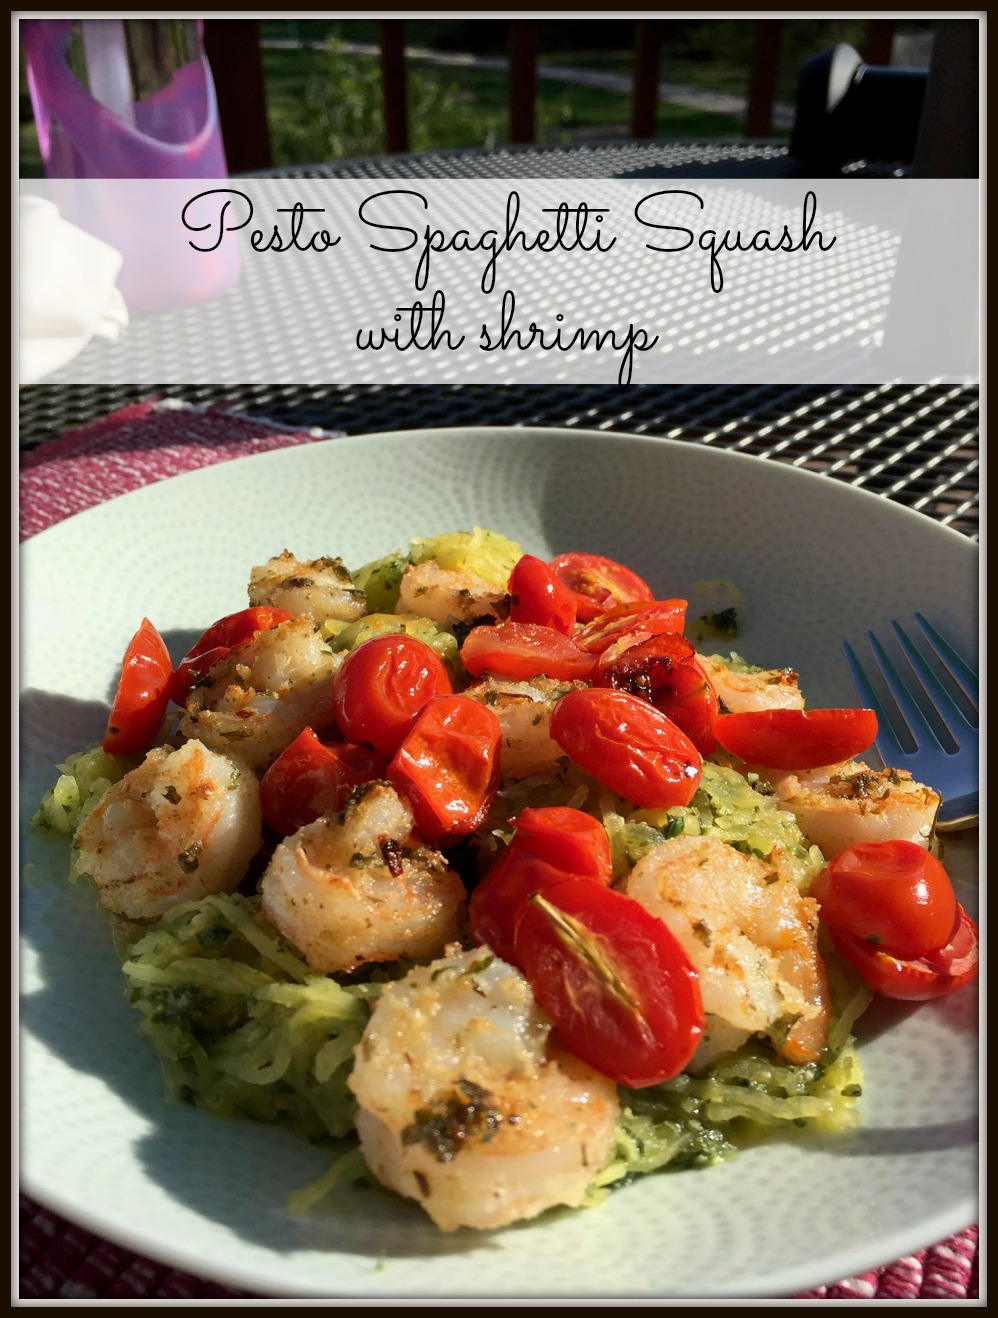
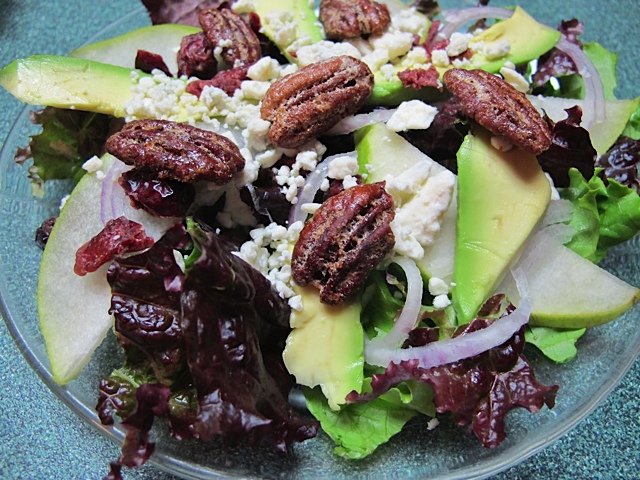
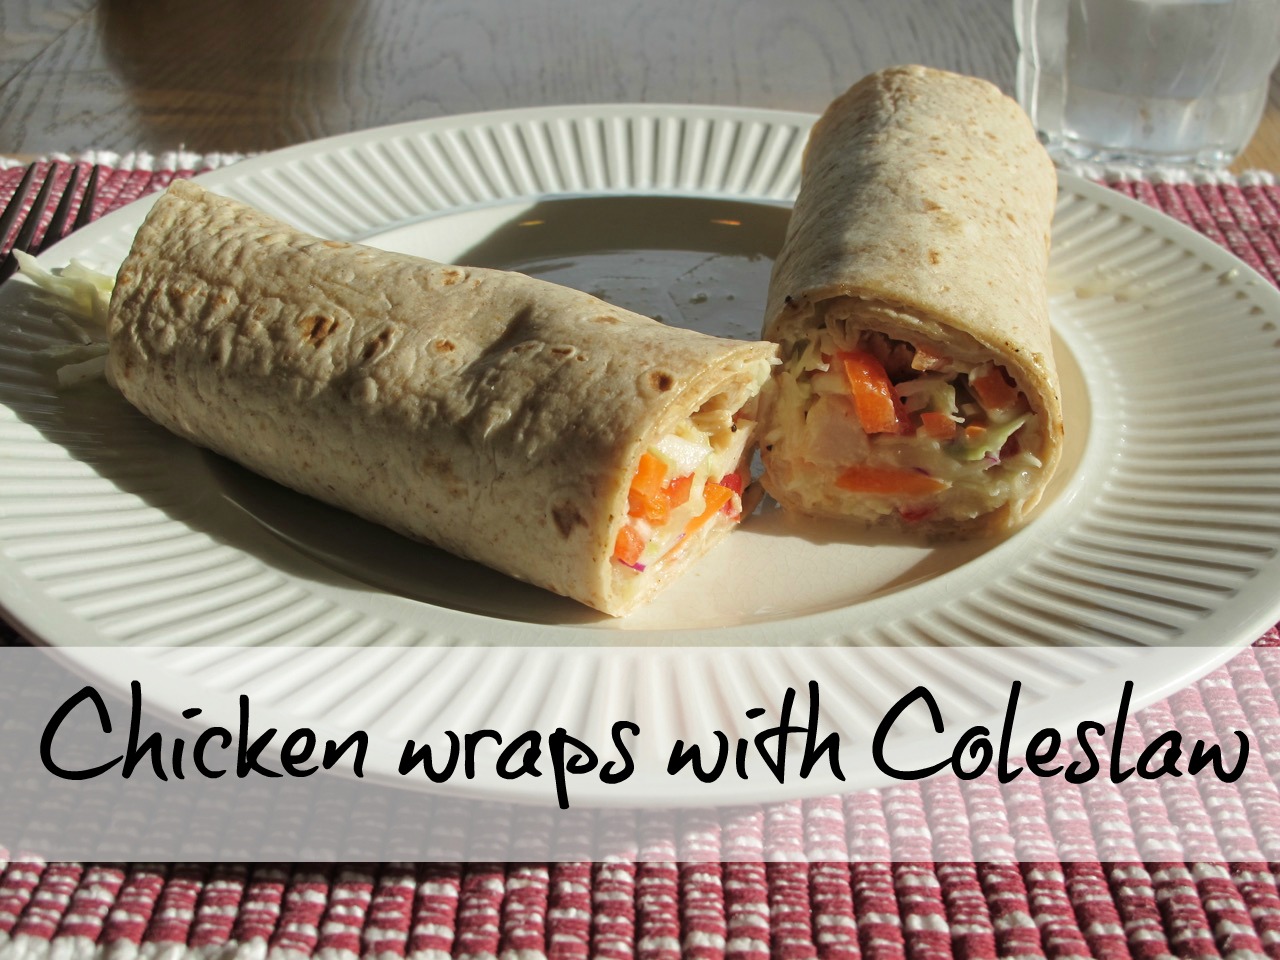
I love shrimp and my favorite way to enjoy shrimp is a quick and easy dinner of broiled shrimp in olive oil and spices. I figured there was no way to improve that meal until I combined it with pesto spaghetti squash. Pesto Spaghetti Squash with Broiled Shrimp is a win-win!

Marinate the shrimp in olive oil and herbs and placed under the broiler for 5-6 minutes. That’s it, so easy. Usually I serve it on rice with a vegetable side dish.pesto spaghetti squash 
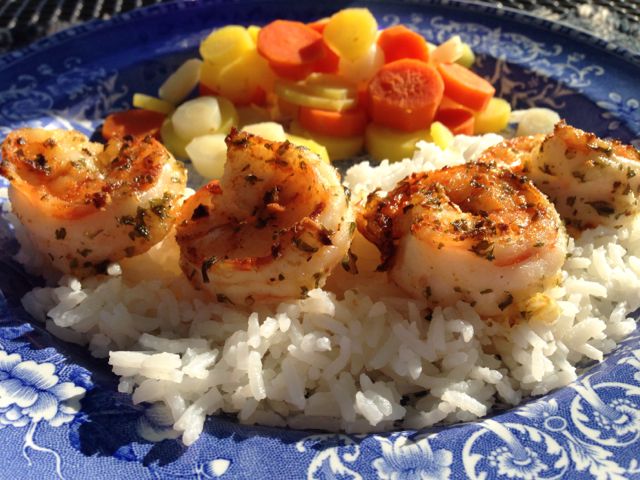
However, I’m trying to cut back on carbs and I discovered this recipe for pesto spaghetti squash. The hardest part of the meal is roasting the spaghetti squash! I have to say the shrimp paired with the pesto spaghetti squash is delicious and is going to be enjoyed many times this summer!pesto spaghetti squash

Pesto Spaghetti Squash with Shrimp

Roast your spaghetti squash. While the spaghetti squash is roasting combine in a food processor:

Ingredients:

2 Cups fresh basil
Zest and juice of 1 lemon
2 Tbsp grated Parmesan
2 Tbsp Extra Virgin Olive Oil
1 Clove garlic

Puree in food processor.

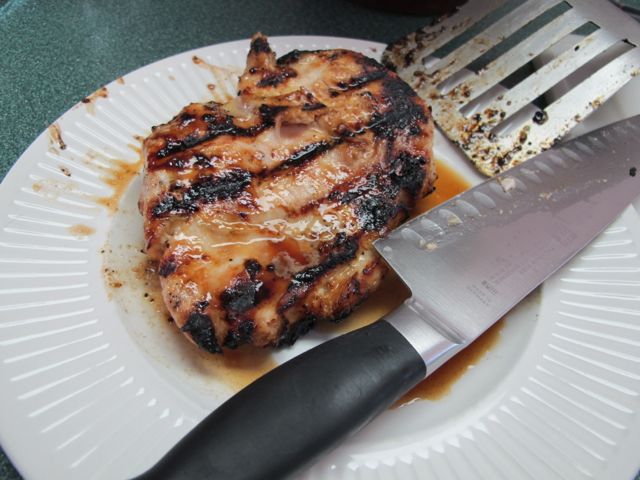
Broiled Shrimp in Olive Oil and Spices

Ingredients:

2 pounds of shrimp, the larger the better
½ cup olive oil
2 tsp finely chopped garlic
2 Tbsp finely chopped parsley
1/8  tsp crushed red pepper
½ tsp dried oregano
2 Tbsp fine fresh bread crumbs

Directions:

Preheat your broiler to high. Split the shrimp down the backside, rinse and pat dry. Add the remaining ingredients to the shrimp and toss to coat evenly. Line a baking dish with foil and arrange the shrimp over it.pesto spaghetti squash

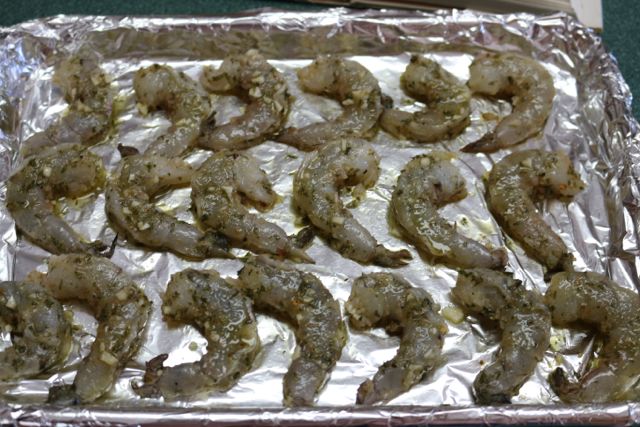
Place the shrimp under the broiler, about three to four inches from the source of heat. Broil 5-6 minutes. It is not necessary to turn the shrimp as they cook.pesto spaghetti squash

Makes four servings. This recipe can easily be halved as well.

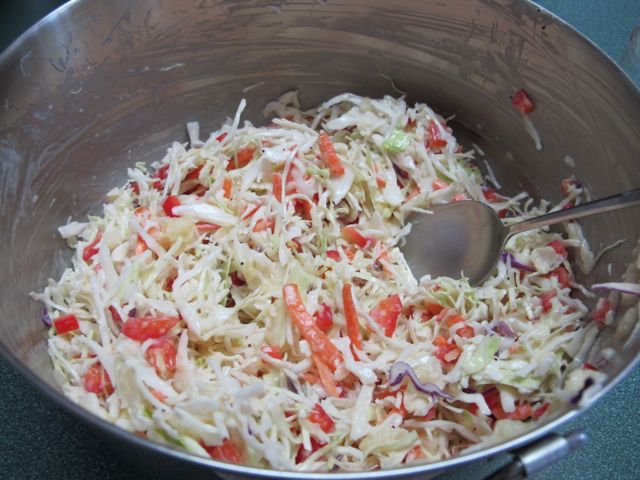
Plan to put the shrimp in the oven just as the spaghetti squash is done. Place the 2 cups of the spaghetti squash in a bowl and pour the pesto sauce over. Serve with roasted cherry tomatoes if you like and the shrimp.pesto spaghetti squash

Any leftovers are perfect for lunch the next day.pesto spaghetti squash

Delicious Spring Salad – Pear and Blue Cheese

Spring is the time of year we all get recommitted to eating healthy and exercising more. The weather is nicer and fresh greens become more readily available. As we incorporate salads into our daily meals one of my favorites to include is this delicious spring salad. It is one of my favorite salads, a pear and blue cheese salad with candied nuts. Candied nuts are a wonderful addition to this salad they add a nice crunch and help dress up the salad just a bit. You can read more about making your own candied nuts by clicking here. As you look for a salad to include in your meals try this delicious spring salad. It’s perfect to enjoy with a simple lunch or alongside your dinner. The homemade dressing made with maple syrup is an added bonus! Adding an avocado and dried cranberries is optional, and delicious, addition to the salad.


Pear & Blue Cheese Saladdelicious spring salad


Ingredients:

1 head of spinach or about 10 oz of fresh salad greens
1 red onion, thinly sliced
1-2 pears, thinly sliced
½ cup blue cheese, crumbled
½ cup candied pecans or walnuts (see my blog for recipe!)
1 avocado, cubed (optional)
¼ cup dried cranberries (optional)


Dressing:

¼ cup maple syrup
⅓ cup apple cider vinegar
¼ cup olive oil
⅓ cup mayonnaise
¾ tsp sea salt
¼ tsp ground pepper


Layer the greens, onion, pears, blue cheese and, pecans. Add avocado or dried cranberries as desired. Blend the dressing ingredients together in a blender or a small jar. Pour the dressing over the salad just before serving.delicious spring salad

Enjoy!


As we enjoy the beautiful spring weather take the time to get outside and go for a walk. Plan your meals ahead of time making healthy choices and be sure to include this delicious spring salad in your menu planning! You’ll be glad you did.candied pecans, pear, salad


2017 May Gardens in Vermont

May in Vermont tends to be a wet month. Elsewhere the sun may be shining and the flowers are in full bloom while here in Vermont we are experiencing a cool wet spring. After last year’s drought we do need the rain. However after a long cold winter I’m really looking forward to getting outside once again and working in the garden. Our May gardens may not look like much but it is wonderful to see things greening up after the winter.May Gardens in Vermont


Since the house is on the market I’ve cut way back on my vegetable gardens. However I want the rest of my flowerbeds to look their best so I do have some work to do.May gardens


The first step in clean up for the gardens is to rake all the gravel out of the lawn. Our plow guy does the most excellent job but inevitably we end up with some gravel that needs to be raked out. My husband tackled that job this year and he did an excellent job. The grass is coming in nicely and the gravel is where it belongs, in the driveway!


This year it’s taking a while for the daffodils to come along. The forsythia was beautiful this yearMay gardens 
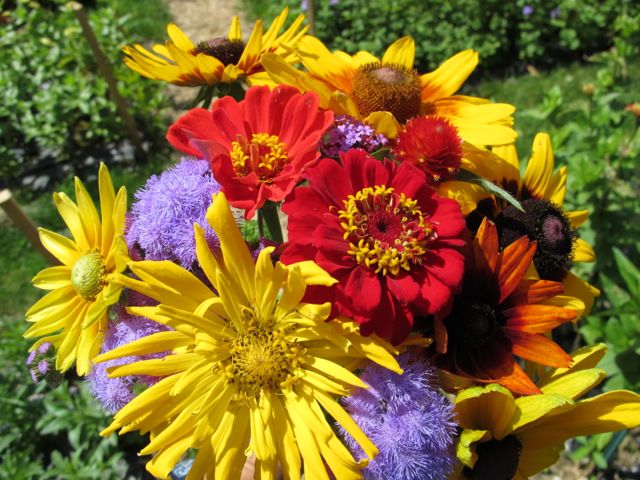
and it won’t be long before the lilac is in full bloom.May gardens


Our rhubarb is also doing well. It won’t be long before I’ll be making a delicious rhubarb cake! I’m going to have an abundance of rhubarb this year and not doing any canning I’ll have to give a lot of it away. We have way more than I can ever use!May Gardens


The strawberries are coming along. I’d forgotten that I created a new strawberry bed last year! I was surprised to see them filling the garden bed. I look forward to our own fresh strawberries, a yearly treat.May Gardens


I picked up some small plants at the local nursery to fill our planters. I have a small planter that sits in front of our chicken coop and two larger plants that sit by the back entrance to the house. We haven’t had many sunny warm days but I managed to get out between showers and get the pots planted.May Gardens


The raised beds will be planted before June first. I plan to plant a few vegetables and lots of flowers! I look forward to being able to fill the house with cut flowers over the summer.May gardens


How is your garden coming along? Do you have a lot of spring clean up where you live?

Guilford, Connecticut – My Hometown

Guilford ConnecticutOver the weekend we drove to Connecticut and spent four days with my mother-in-law. I love that we can still go back to enjoy the town both my husband and I grew up in. Guilford, Connecticut is a very special place, not only because it is our hometown but it is a town filled with old houses kept in wonderful condition. I have mentioned this before in a previous post and it is worth mentioning again. My mother-in-law lives right on the town green so everything is within walking distance.Guilford, Connecticut


Before the rains set in I was able to enjoy a beautiful day and walk around town. At the top of the green is the First Congregational Church of Guilford, the church that my husband and I were married in. Our oldest daughter was also married in the same church. This church was founded in 1643, just a few years after the first settlement of Guilford in 1639. The original simple stone structure was replaced in 1713 with this building. It is reputed to have been the first church in Connecticut with a steeple clock and a bell! The Congregational Church is still quite an active church.Guilford, Connecticut

The town green is surrounded by many old homes and several churches. Several of the old homes have been turned into dress shopsGuilford, Connecticut


As you walk away from the green and turn down Broad Street you’ll find the street is lined with picket fences.Guilford, Connecticut Lilacs and picket fences are so New England.Guilford, Connecticut

At the end of Broad Street you can look over the East River. This is a brackish river which means it connects to the salt water and experiences tides. Sometimes the water will be very high other times you can see the mud flats.Guilford, Connecticut

I tend to take a long walk when I’m enjoying the sights of Guilford, Connecticut. I love that one minute you can be enjoying the view along the river and the next view is of the oldest house. The Henry Whitfield House was the first house built in Guilford, built in 1639 just before the town of Guilford was settled. It is the oldest house in Connecticut and the oldest stone house in New England. The house was built for Henry Whitfield. He was a puritan minister who had come from England to flee religious persecution. It is open to the public.Guilford, Connecticut Around the corner from the oldest house are several other beautiful old homes. Both are now museums. The stately Thomas Griswold House was built in the first or second decade of the 18th century by Thomas Griswold, a local blacksmith. This house is also a museum and open to the public. It includes the 18th century period New England saltbox, a historic blacksmith shop, a barn with farm tools and implements, two corn cribs and a Victorian era three seat outhouse!Guilford, Connecticut Just down the road is the Hyland House.This colonial house was built in 1713 and is also a museum and open to the public. It is a red saltbox built by Issac Parmelee and has been open to the public since 1918.
Guilford, Connecticut

Aren’t the old windows just wonderful? I am so blessed to have grown up in such a wonderful town filled with so much history.


All too soon my walk is over and I am back at the town green.Guilford, Connecticut It was a wonderful weekend and I certainly enjoyed the sights of Guilford on this beautiful spring day.Guilford, Connecticut

Chicken Wraps with Coleslaw

It hasn’t exactly been feeling much like spring around here. The weather has been cool and cloudy with lots of rain. However one of these days it will be time to get the grill our an fired up! I love chicken wraps and this recipe is one of my favorites. This recipe originally came from Healthy Cooking, which was a division of Taste of Home.


I love Taste of Home recipes as they all taste wonderful and usually come out looking exactly like the picture. This is a perfect grilling recipe, fast and fresh. The dressing serves as both a marinade and as a topping for these wraps.


The chicken is grilled but could be done ahead of time; the wrap is as good hot or cold. Which means if you have any leftovers they would make a perfect lunch the next day!


Coleslaw Chicken Wraps


Ingredients:


1 bottle of poppy seed salad dressing or make your own
2 lbs boneless, skinless chicken breast
1 package (14oz) coleslaw mix
1 can (20 oz) unsweetened pineapple tidbits, drained (I used crushed pineapple)
1 medium sweet red pepper, finely chopped
8 whole wheat tortillas (8 inch)
½ cup sliced almonds, toasted (op)


Directions:

Marinate the chicken in 1 cup of the dressing for one hour.chicken wraps


Drain and discard the marinade. Lightly coat your grill with oil and grill the chicken for 6-8 minutes per side or until done. Let stand for 5 minutes before slicing.chicken wraps


Meanwhile in a large bowl, combine the pineapple, coleslaw mix, red pepper and the remaining dressing; toss to coat.chicken wraps


Divide among the tortillas; top with chicken and sprinkle with almonds.chicken wraps


Roll up tightly and secure with toothpicks if you like.chicken wraps


There is nothing easier for a get together than a delicious chicken wrap. Perfect for the next time you decided to do some grilling!

Three Tips To Sell Your House

If you’ve been following this blog for a while you know we are trying to sell our home and move to the Pacific Northwest. Our home is now re-listed with a very motivated realtor. It’s just been back on the market for a few weeks and we’ve had numerous showings! Hopefully we’ll get an offer one of these days. There are many tips to sell your house and I’ve been reading as many as I can!Tips To Sell Your House


On last week’s blog hop I featured a post called How To Sell Your House in Less Than a Week. There were many excellent points in the post. In fact the tips for selling your house yielded an excellent result for the sellers, they had an offer on the first weekend!


Spring is the best and the busiest season to sell a home. The buyer’s pool is strongest in the spring and summer. Many folks want to make a move before the school season starts. Most parents don’t want to move when their children are in school. Most buyers want to move when the weather is most accommodating.


Before you put your home on the market here are three tips to sell you home. Following this advice can help you during the preparation process.


  1. Address the exterior of the home. Here in Vermont winter can be harsh. It’s important to make an effort to address anything that might negatively affect their homes’ curb appeal. If it’s in the budget hire professional landscapers to fix any problematic landscaping or address any issues that arose during the winter. For us it meant renting an electric sweeper and removing all the gravel in the lawn from the plowing!

I will also be planting several large planters we have to add some color. The outside is what the potential buyers will notice first and you want to make a good impression! Tips To Selling your House


  1. Conquer interior clutter. We spend a lot of time in our house during the winter and as a result the clutter accumulates over the season. We spent the winter months packing away all the family photos, cleaning out our closets and sorting through our numerous books. I have to say our house looks much more open and inviting. We even took one of my reader’s advice and repainted our kitchen from a brick red to white so that all the walls are now the same color. We also took down our curtains, which made the view outside our windows much, more inviting.tips to selling your house


  1. Eliminate Odors. We don’t have any pets currently so this is not an issue. If you do have pets or even if you do a lot of cooking it is a good idea to do a thorough cleaning of the house, including vacuuming and removal of any pet hair that has accumulated. We run a wood stove all winter and it’s amazing the dust that accumulates over the winter. Open the windows on those nice spring days and let the fresh air in.tips to sell your house


Spring is a popular and potentially lucrative time to sell a home and if you prepare your home for the market you may reap even greater rewards.


for more information on selling your home check out this handy guide HERE

Cooking with Kale: Baked Kale Chips

Cooking With Kale
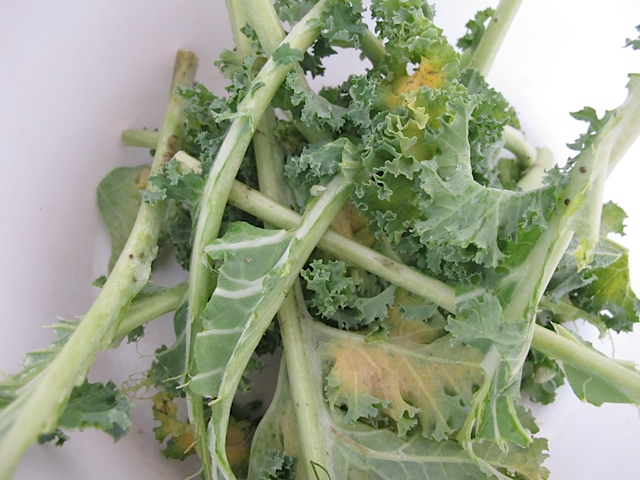
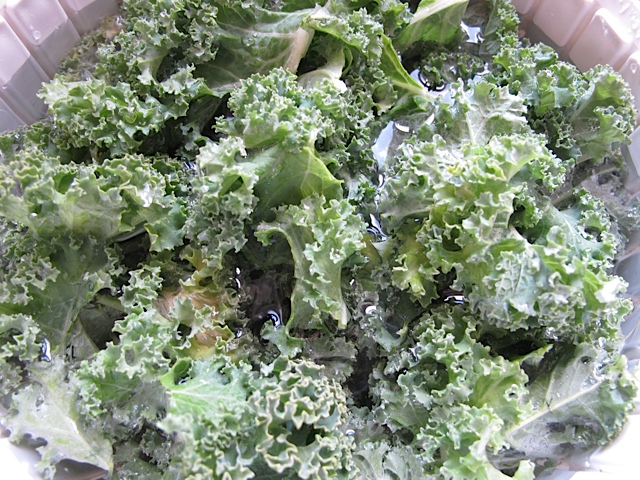
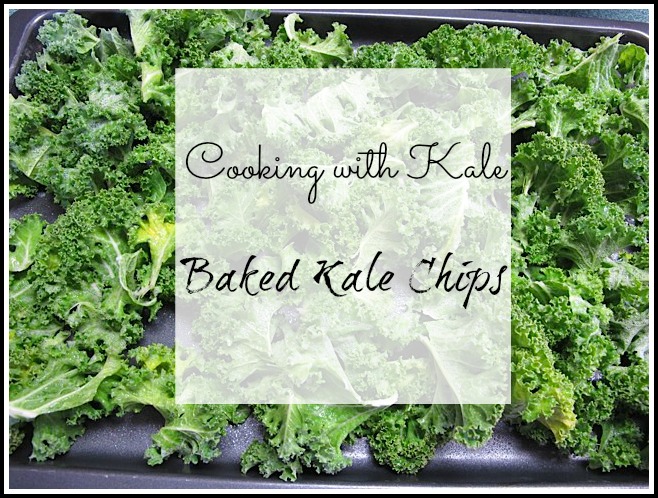
I have been cooking with kale for along time. One of my favorite ways to use kale has been in soup. One of our favorite winter soups is Pork, Bean and Kale Soup.hearty winter soup I have also used kale in a salad. Not all people are fans of kale salad but we enjoy it.salad, prudent living, recipe box 
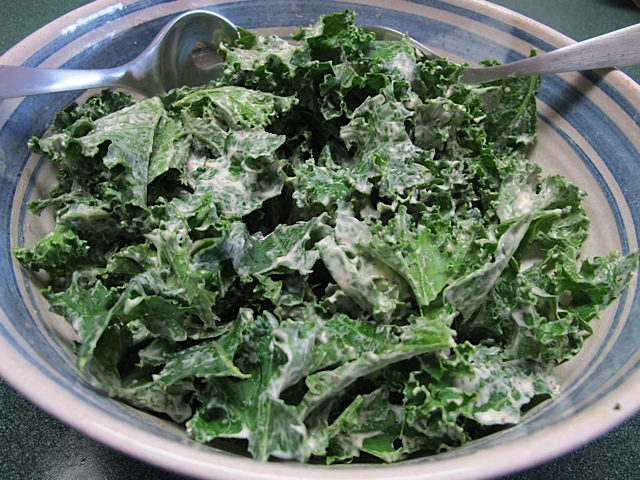
Another way to cook with kale is making baked kale chips.

Kale Chips have been around for a while but I never tried them until recently. They are so delicious! I am definitely going to try them again, soon. They are very easy to make and in just a short amount of time you can have a bowl of kale chips to munch on. And they are much healthier for you than potato chips! I usually grow kale in my garden each year and often have an abundance. I have frozen the excess in the past but cooking with kale and making kale chips is a real winner! Next time you have a craving for potato chips try cooking with kale and making kale chips!

It’s very easy and takes no time at all. Take one bunch of curly kale.

kale, snacks, frugal tip

Tear the leaves off the thick stems into bite size pieces. Set the stems aside for your compost or for your chickens.greens, chickens, compost,Cooking with kale

Soak the leaves in a bowl of water to clean and then dry off in a salad spinner.Cooking with kale

Spread the leaves out on cookie sheets. Spray with some oil (I used spray Pam). Sprinkle with salt or any seasoning of your choice, we have a favorite seasoning called “Nantucket Secret Spice” which I used.raw kale, snacks,Cooking with kale

Bake at 350 for about 15 minutes, until the edges are brown and the kale is crisp when moved in the pan. Keep an eye on the kale so it doesn’t burn.baked snack, kale, Cooking with kale

Enjoy‼ My husband even said “Hey these are GOOD!”

So the next time you have an abundance of kale on hand trying making these baked kale chips, they might just become a family staple!

Exploring the Pacific Northwest in the Spring

It is our desire to relocate to the Pacific Northwest. We try to visit the area at least twice a year. In April we managed to spend several weeks on the west coast dividing our time between Portland and the Seattle areas. Despite the wet spring weather we were able to enjoy some beautiful hikes. We always enjoy exploring the Pacific Northwest.Exploring the Pacific Northwest

Our first hike was in Cape Disappointment State Park on the coast of Washington at the mouth of the Columbia River. The weather cleared up just as we arrived and the walk down to the water was stunning.Exploring the Pacific Northwest 
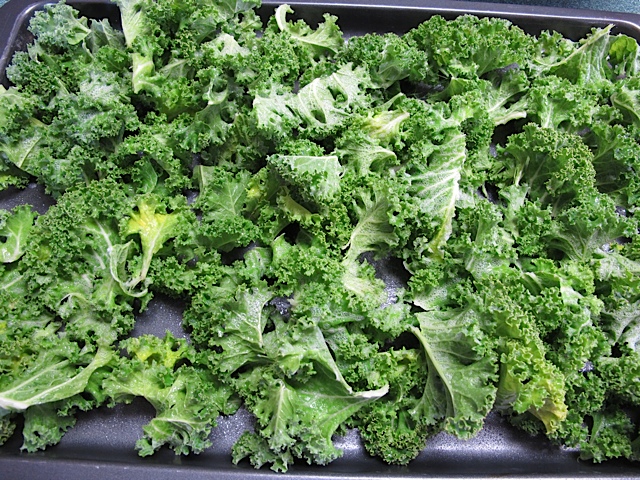
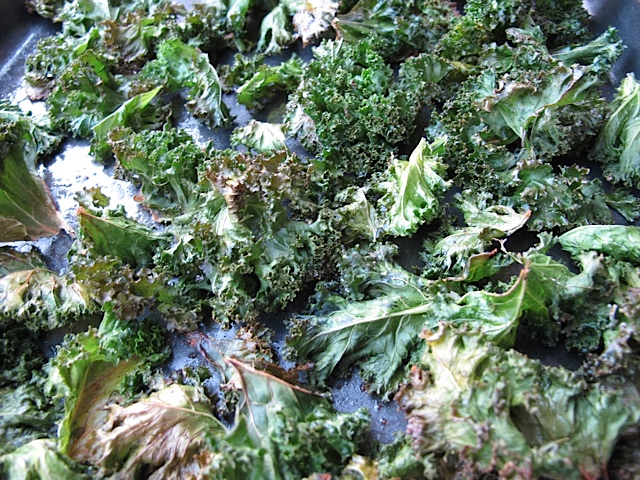
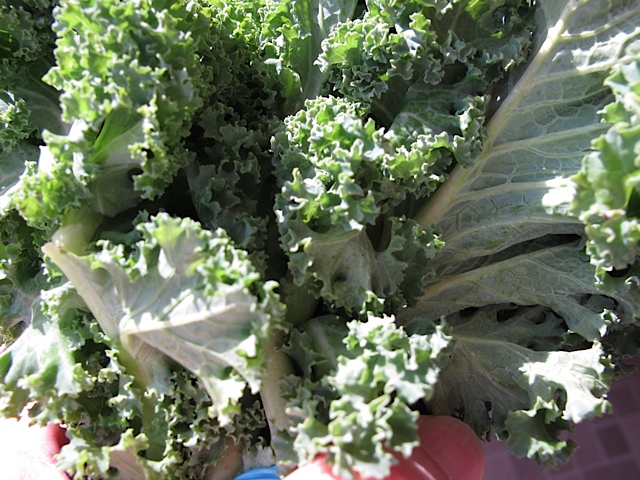
We stopped by Dead Man’s Cove and my grandson was intrigued by the name!Exploring the Pacific Northwest

We also had the opportunity to return to the Portland Japanese Gardens, which are just beautiful.Exploring the Pacific Northwest Despite the fact that you are in the city when you enter the gardens all you fell is the peace and quiet of the surroundings. The Camellias were in full bloom everywhere as were the cherry trees.Exploring the Pacific Northwest

The highlight of our trip was visiting our children and our grandchildren, but it’s always fun to explore the beauty of the Pacific Northwest. I also discovered a wonderful nursery in Portland. I would just love to work there. They even sell Venus Flytraps!Exploring the Pacific Northwest

Our last hike was to Crescent Lake in Washington. It was a bit of a drive from my daughter’s house, but worth every mile it took to get there. The color of the lake was incredible. More like the colors of the tropics.Exploring the Pacific Northwest 
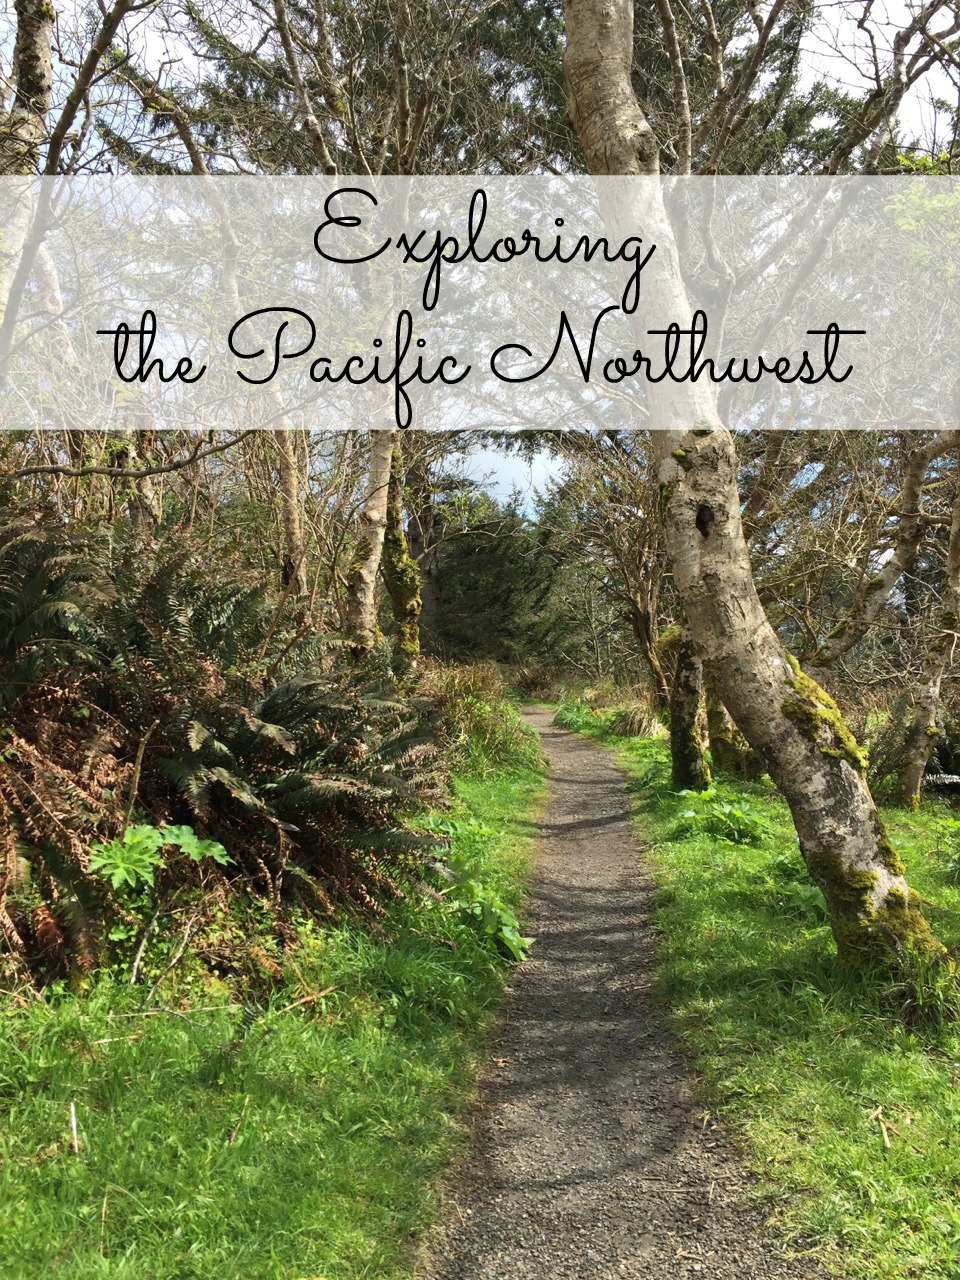
The hike itself was along an old rail bed which ran right along the lake. There were eagles soaring above us as we hiked and every now and then you would glimpse the lake through the trees.Exploring the Pacific Northwest It was the perfect hike for our eight-month-old granddaughter.Exploring the Pacific Northwest


All too soon we were packing up and heading to the airport. We look forward to the day when we can call the Pacific Northwest home and spend many days each year exploring.Exploring the Pacific Northwest

Stop Wasting Food Now!

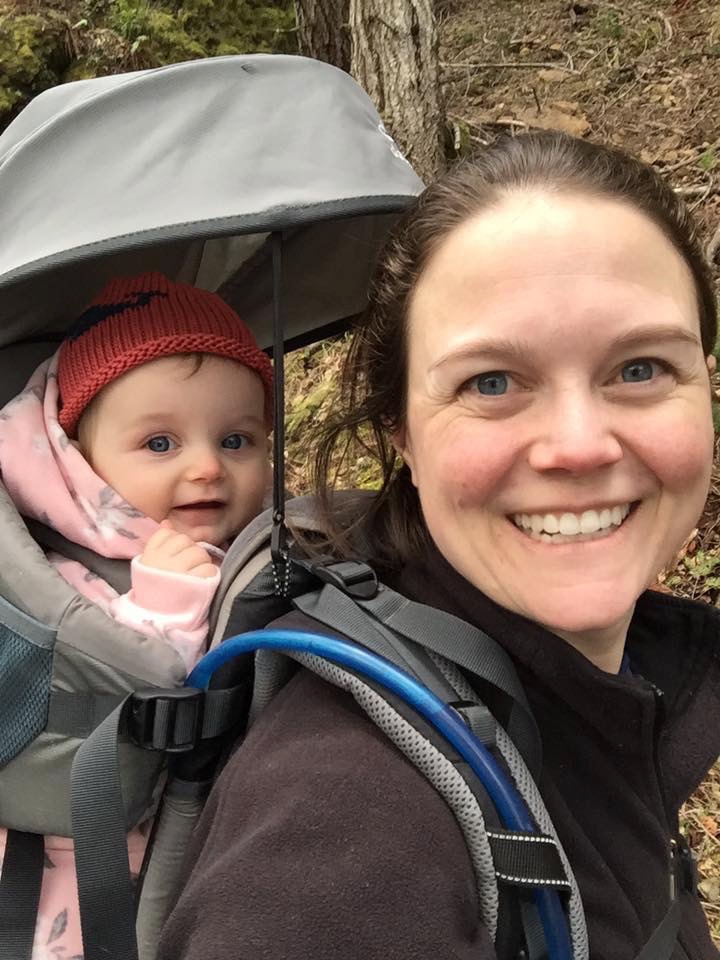
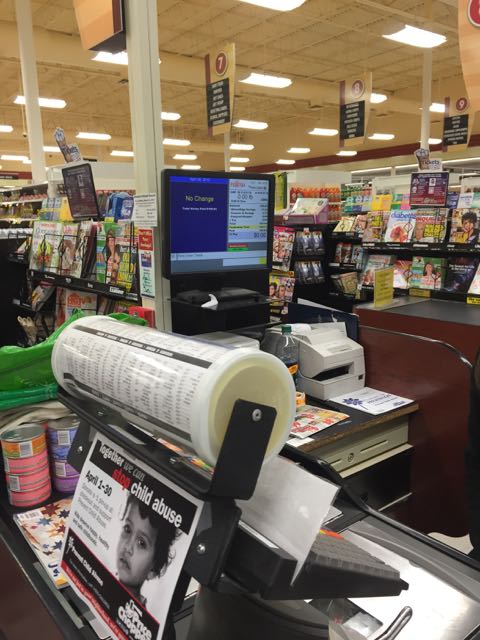
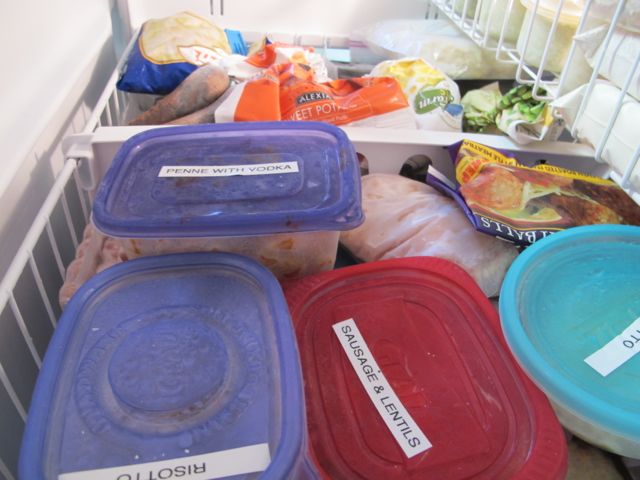
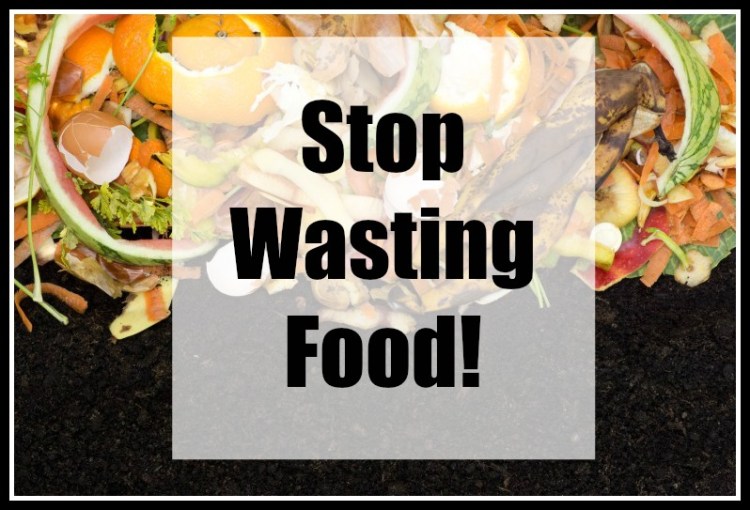
We all want to save money especially on our grocery bill. Seems that food just keeps getting more expensive! Did you know there are a few simple steps you can do to stop wasting food that will also help your grocery bill go down?Watch as groceries are scanned.


Create Meal Plans: Make a weekly meal plan and shop according. Don’t forget about your leftovers, take them to work for lunch or use them to make a different recipe or freeze them to enjoy later.


Freeze It: If you can’t eat a food that will spoil soon, consider freezing it. Even fruits and vegetable can be chopped and frozen. Use frozen fruits or vegetables in smoothies.wasting food


Check your fridge: Keep an eye on the contents of your fridge, is there food that needs to be used up? Plan your meals accordingly. By being creative with your meal planning you can use up the for in your fridge and stop wasting food!


Understand expiration and sell by dates: According to the U.S. Department of Agriculture companies use these dates to guess the freshness of the food and they are not related to safety. Companies generally tend to be conservative in their estimates, the USDA suggests you check the food to see if it looks or smells off or sour.


Store food properly: Not everything needs to be stored in the fridge. Store things that will wilt like spinach or kale in a drawer with high humidity. Things that rot quickly go into a drawer with low humidity.


Use everything: Broccoli stems can be eaten with the rest of the broccoli or chop them and add them to a soup. Beet greens can be added to salads, soups or veggie burgers. Make chicken stock with your leftover chicken carcass.broth, soup


Don’t over-serve: Generous servings usually just end up in the trash. Allow people to serve themselves or give everyone smaller, more manageable portions. They can always have seconds if they are hungry!We still enjoy a full table occasionally!


Make these simple changes and watch your grocery bill go down!

Asian Style Salmon Packets

When I saw this recipe for Asian Style Salmon Packets in the February-March 2017 issue of Taste of Home I just knew I had to try it. It was easily adjusted for cooking for two and it took less than a half an hour to prepare. Perfect for a busy weeknight! These Asian style salmon packets have a wonderful combination of citrus and spiciness. Plus clean up is a breeze, what’s not to like! I decided to prepare this recipe for my daughter when we were visiting her in the Seattle area. Salmon is in abundance on the west coast and there are many sources of fresh fish to enjoy. I had no trouble convincing my daughter to let me cook this meal for her.Asian Style Salmon

Asian Style Salmon Packets

Ingredients:

4 slices of sweet onion
4 salmon fillets (6oz each)
3 Tbsp chili sauce
1 Tbsp lime juice
1 Tbsp sesame oil
1 garlic clove, minced
1 tsp mustard seed
1 tsp ginger, minced
½ tsp black pepper
Sesame seeds
Chopped fresh mint
Grated lime peel

Directions:

Preheat your oven to 400 degrees. Place each onion slice on a double thickness of heavy-duty aluminum foil (about 12 inches square) Top with a salmon fillet.

Combine the next 7 ingredients; spoon over the salmon fillets. Fold foil over the top and crimp the edges to seal.

Place on a baking sheet. Bake until the fish flakes easily with a fork, about 15-20 minutes. Open the foil packets carefully and serve with mint and lime peel.Asian Style Salmon

Delicious served over some hot rice cooked with chicken broth and flavored with fresh cilantro.Asian Style Salmon

The recipe serves four people but is easily doubled or halved depending on how many people you are serving. There were four of us eating this delicious Asian Style Salmon and everyone enjoyed it. There were no leftovers at all!Asian Style Salmon

Design a site like this with WordPress.com
Get started