Tips for Planning Your Vegetable Garden

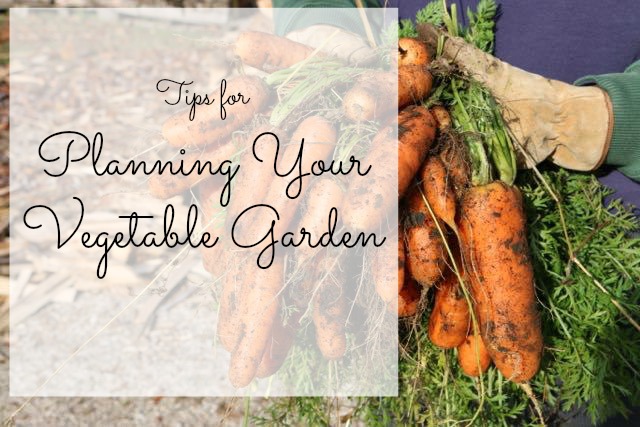
As spring rolls around we start to think of being outside, enjoying the wonderful weather. Now is also the time to think about planning your vegetable garden – it’s a wonderful way to save money, get exercise, and help your family to eat healthy.planning your vegetable garden And taking care of a garden is a never-ending and rewarding learning experience.planning your vegetable garden


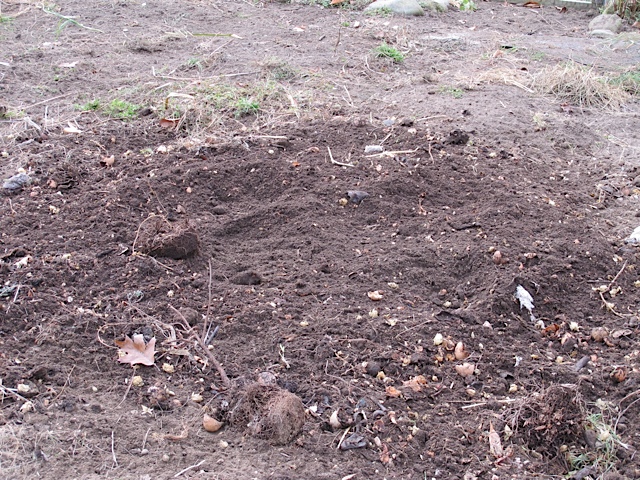
The most important thing to consider is where your garden will be located. Gardens need sun, the more the better. Locate your garden away from any shadows cast by large trees or buildings. Ideally, you would like to have level ground. If the garden is on too steep a slope, the soil will erode and nutrients will be washed away, unless you are able to create several terraces, which is a lot more work than most home gardeners want to do.planning your vegetable garden


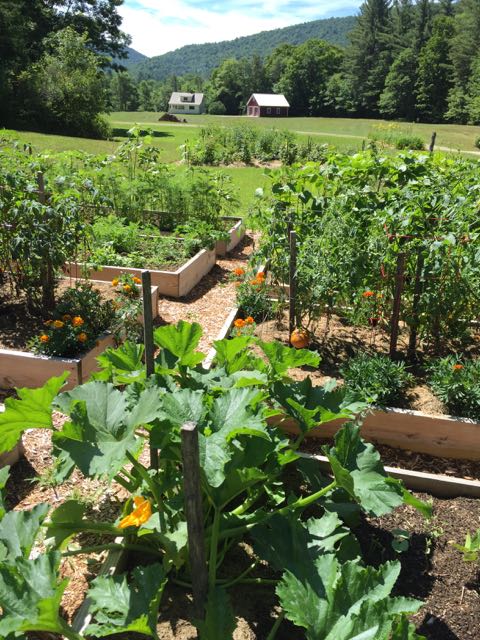
If this is your first year gardening, you also want to consider the size. It is better to start small and increase your garden size year by year. A 15 x 15 foot plot would be a good size to start with.planning your vegetable garden


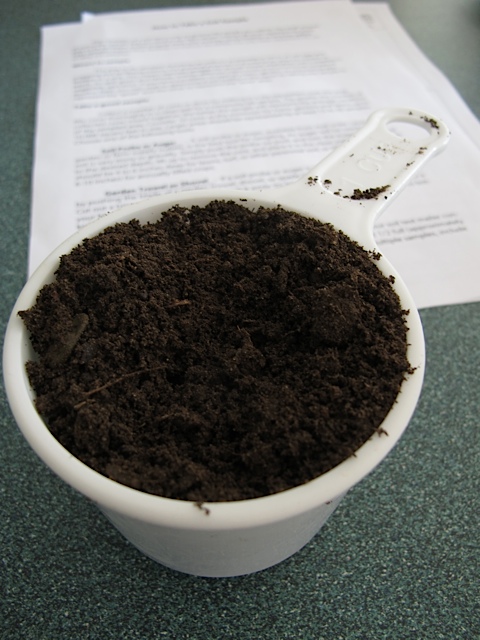
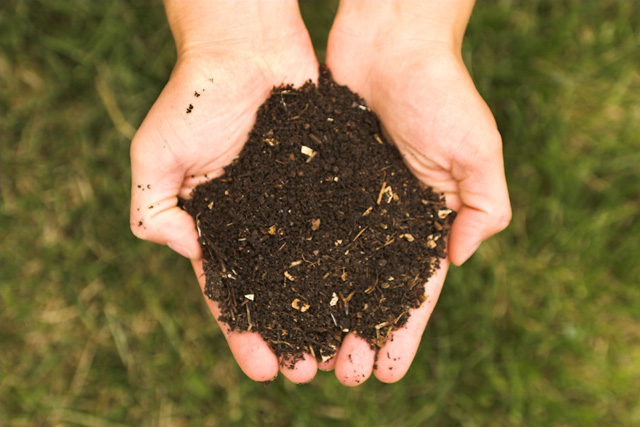
Once you have decided where to place your garden, the next thing to consider is the soil preparation. Well-prepared soil will help you have a successful garden. And any soil can be improved. Soil quality is determined by three characteristics: composition, pH (its acidity), and fertility.soil tests, vegetable gardening, home front


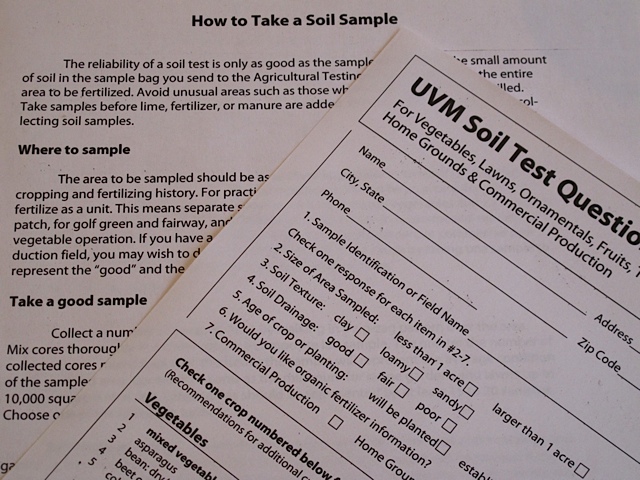
  • Composition: If the soil is too loose and sandy, or too heavy and clayish, aeration, drainage and nutrient retention will suffer.
  • pH: Vegetables require a pH range of 6.0 – 7.0, anything above or below that and optimal growth will be affected
  • Fertility: The fertility of the soil also affects plant growth; insufficient fertility cannot support healthy crops.
  • A simple soil test will help you to determine the level of major nutrients – nitrogen, phosphorus, and potassium – each important for healthy plant growth. A soil test will also help you determine the pH of your garden soil, and to improve it if necessary.soil, testing, gardening
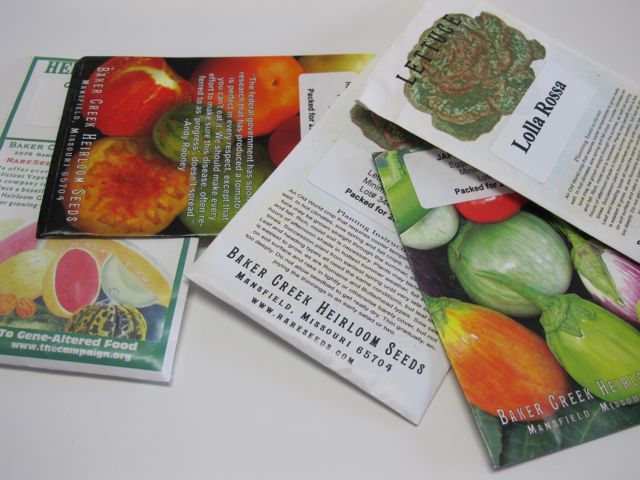
  • Now that your garden plot is laid out and the soil is ready, it is time to decide what vegetables you want to plant. If you want a rewarding, productive garden, do some research to find out what grows well in your area. An excellent resource is your state’s agricultural extension office. You want to make sure you know what growing zone you are living in, when your last frost date is expected in the spring, and when the first date of frost in the fall is expected. These dates will determine when you can plant outdoors, what you should try to grow (since the days to maturation will need to fit in this last frost to first frost window, and when you should be harvesting your vegetables.gardening, prudent livingSome vegetable seeds are planted directly into the garden soil while others have such a long growth period they must be either started indoors or the young seedlings purchased at a local nursery.
  • Usually I have my seeds started by now, but with our house going back on the market I will be purchasing young seedlings from a neighbor who grows a wonderful selection of heirloom vegetables.
  • Whatever you decide to do now is the time to plan for this years garden! Planning your vegetable garden now will insure that you have a successful harvest this year!

Thrifty In The Kitchen

Most of us try to make good use of our money. We try not to over spend, limit our debt and have a saving account. But everyone has to eat. You can’t just cut food out of your budget like you can a cable bill. The issue is how to eat well while saving some money. In other words the question is how to be thrifty in the kitchen?trifty-kitchen


All the advice out there usually boils down to a few essential principles: cook at home, limit your purchases of pre-made convenience foods, and avoid wasting the food you bring home. Yes, there is some comparison shopping involved and yes, there is meal-planning.


No matter the size of your budget or family, you’ll see the difference in your bank account, and possibly your waistline too, if you stick to a home-cooking regimen. Whether you’re just starting to make your lunch or you’re ready to pickle the cucumbers you grew in your backyard garden, you’ll find plenty of culinary inspiration, as well as guidance on how to maximize your thrift in shopping for and preparing your food.thrifty


To get started on your thrift journey save everything. Pack your freezer. Have a bag for vegetable scraps. When it’s full make your own stock. Use the stock to add flavor to sauces, stews and to make soup.thrifty


Leftover that can’t be frozen can be used in other ways. Fry extra potatoes for breakfast. Stir-fry leftover rice with veggies, egg and soy sauce for delicious stir fried rice.Stir and serve hot!


Savings also start with your purchases. Have a good supply of staples on hand so that you will always have some options for meals. Wash and prep your vegetables when you get home, then store correctly so they last and try to use them quickly. It’s also important to be creative with what you have. See what’s in the pantry and freezer. If you have a recipe you want to try, but don’t have exactly the right ingredients, improvise a bit rather than buying more stuff.


Start small and keep going. In no time you will be cooking meals from a well stocked pantry and saving money at the same time as you begin your journey to be thrifty in the kitchen.thrift

Best Ever Banana Mini Muffins

Monday Muffins: Banana Chocolate Chip Mini MuffinsBanana Mini Muffins


I love banana mini muffins especially with the addition of mini chocolate chips.  Mini muffins satisfy your desire to enjoy a morsel of goodness, but you don’t have to feel guilty that you enjoyed an entire muffin! These mini muffins are delicious and low fat which sounds like a win-win to me! Perfect for snacking or packing in lunch boxes. Plus like many of the other Monday Muffins I have shared, they freeze well. The next time you have an abundance of bananas on hand mix up a batch of these healthy mini muffins! Banana Mini Muffins


Banana Chocolate Chip Mini Muffins


Ingredients:


1 cup light vanilla yogurt
½ cup fat-free milk
½ cup uncooked quick oats
½ tsp vanilla
1 large egg, beaten
1 large banana, mashed
¼ cup brown sugar
1 ¼ cup flour
½ tsp baking soda
2 tsp baking powder
½ tsp salt
½ cup mini chocolate chips


Preheat your oven to 375.


Combine yogurt, milk, oats, vanilla and egg. Set aside for five minutes to allow the oats to soften then stir in the banana.banana muffins

In a separate bowl combine brown sugar, flour, baking soda, baking powder and salt. Combine the two mixtures to moisten. Dough will be very thick. Stir in the chocolate chips.

Prepare your mini muffin tins by spraying with cooking spray. Spoon batter into the tins and bake until golden brown, about 15-18 minutes. Banana Mini Muffins Enjoy right away or let cool and freeze to enjoy later.Banana Mini Muffins

Shrimp and Corn Chowder

I don’t know how the weather is where you live but we’re still getting cold weather here in Vermont. Recently I shared a wonderful recipe for pork, bean and kale soup. This recipe is a chowder. Sometimes you find a chowder recipe that is just so comforting you find yourself making it several times during the cold months. This shrimp and corn chowder is one of those recipes. The addition of the fennel gives it a slightly peppery taste but isn’t strong. Next time you’re in for some colder weather mix up a batch of this delicious shrimp and corn chowder. You probably have everything you might need on hand, use frozen corn and frozen shrimp that you might have in your freezer and you’ll be enjoying a nice bowl of this chowder in no time!Shrimp and corn chowder

Shrimp and Corn Chowder

Ingredients:

2 Tsp butter
2 leeks, chopped
1 fennel bulb, chopped
½ tsp salt
¼ tsp pepper
2 Tbsp flour
1 8oz bottle of clam juice
3 cups milk
1 pound of potatoes, peeled and cut into small pieces
¾ pound shrimp, peeled and deveined
1 – 10oz package of frozen corn

Toppings:

2 Tbsp parsley chopped
2 Tbsp fresh lemon juice

Directions:

Heat the butter in a large saucepan over medium heat. Add the leeks, fennel, salt and pepper. Cook, stirring occasionally, until the vegetables are tender, 4-5 minutes. Stir in the flour.

Add the clam juice, milk, potatoes and bring to a boil. Reduce heat and simmer for 12 minutes. Stir occasionally. Stir in the shrimp and corn and cook until the potatoes are tender and the shrimp and corn are heated through, 3-5 minutes.Shrimp and corn chowder

Stir in the parsley and lemon juice and serve with bread or corn muffins.Shrimp and corn chowder 
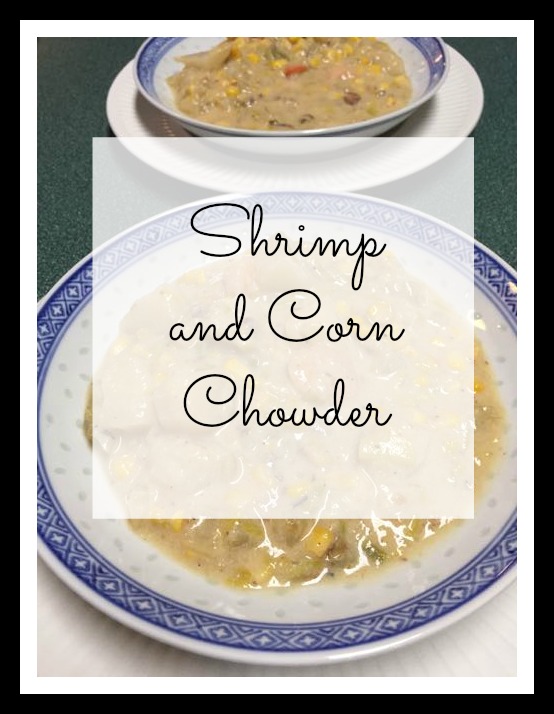
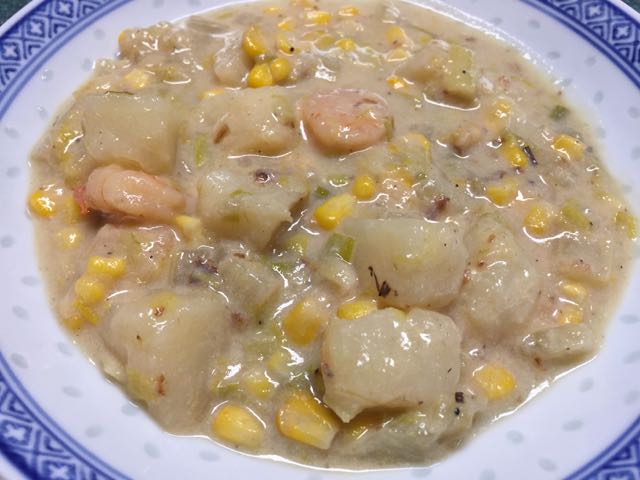
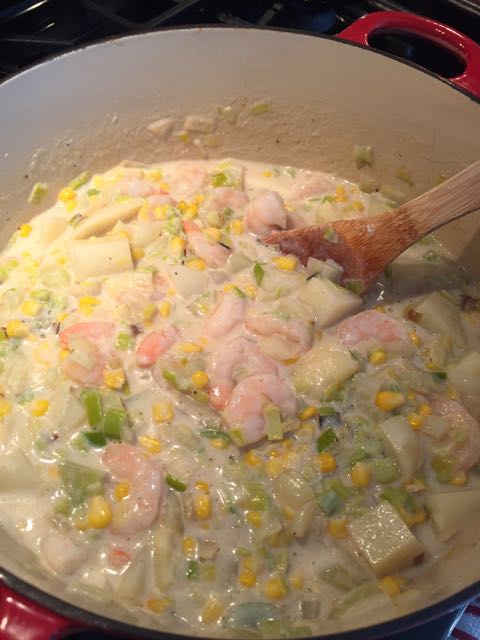
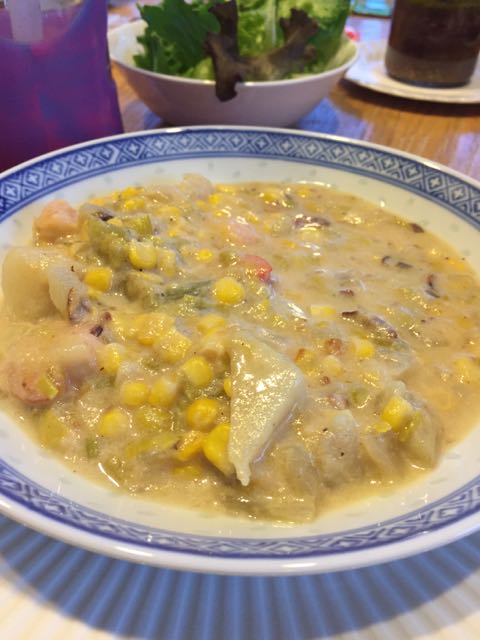
This shrimp and corn chowder makes 4-6 servings depending on how generous you are.Shrimp and corn chowder

Best Ever Popovers

popovers
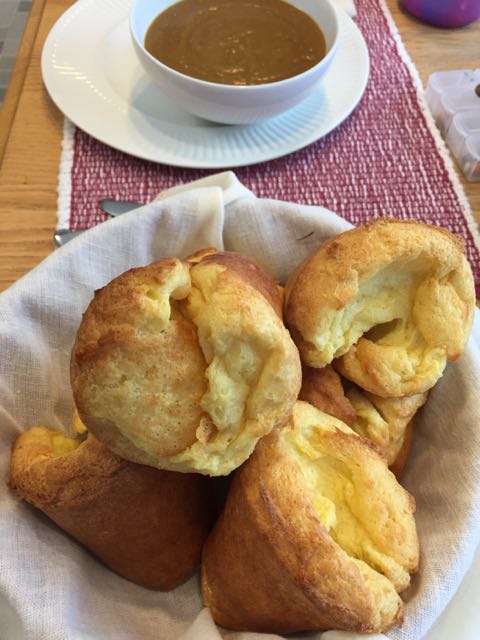
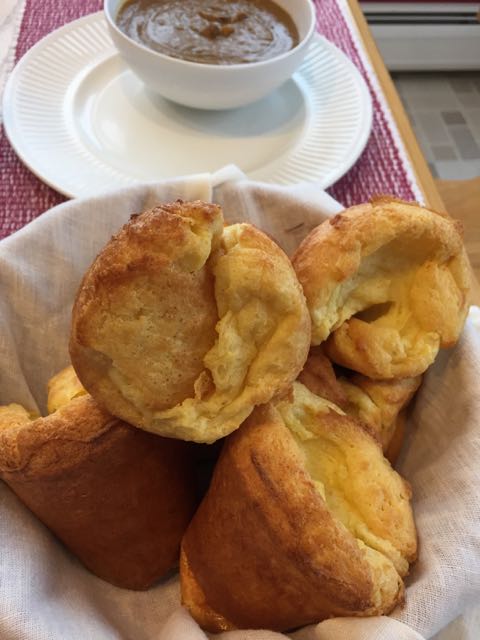
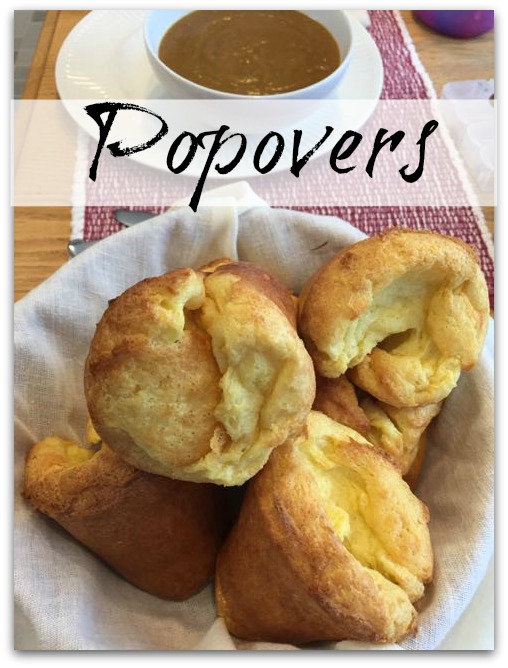
I love popovers. They are a little time consuming, but once you’ve mixed the batter you pop them in the oven and wait. Waiting for the popovers to come out of the oven is the hardest part! The batter can even be made ahead of time and stored in the refrigerator, if you want. Popovers are best right from the oven. Serve with butter, jams, or other sweet or savory spreads. I have two popover pans, which make the most perfect popovers every time. One pan makes 12 mini popovers while the other pan makes 6 large popovers. Depending on how many people we have for dinner dictates which pan I will use.popovers


Popovers


Ingredients:


1 popover pan

1 1.4 cup flour

¼ tsp salt

3 large eggs

1 ¼ cup milk

2 Tbsp butter cut into either 6 or 12 pieces, depending on what size popover pan you are using

1 Tbsp butter, melted


Directions:


Oil or spray (with nonstick oil) popover pan. Preheat your oven to 400 and set the rack in the middle of the oven. Preheat the popover pan for about 2 minutes.


Blend the flour, salt, eggs, milk and melted butter until the mixture has the consistency of heavy cream. This can be done in a food processor, a blender an electric mixer or by hand. Batter should be at room temperature.


Place 1 small piece of butter in each cup and place back in the oven until the butter is bubbling, about one minute. Fill each cup half full with batter and bake for 20 minutes. Reduce the oven to 300 degrees and continue to bake for 20 minutes. Serve immediately.popovers


Popovers are not hard to make and my family considers them a real treat. They are best eaten warm. Leftovers probably won’t be a problem as I’m sure your family will eat them right up!popovers

Carrot Seaweed Medley

Carrot Seaweed Medley
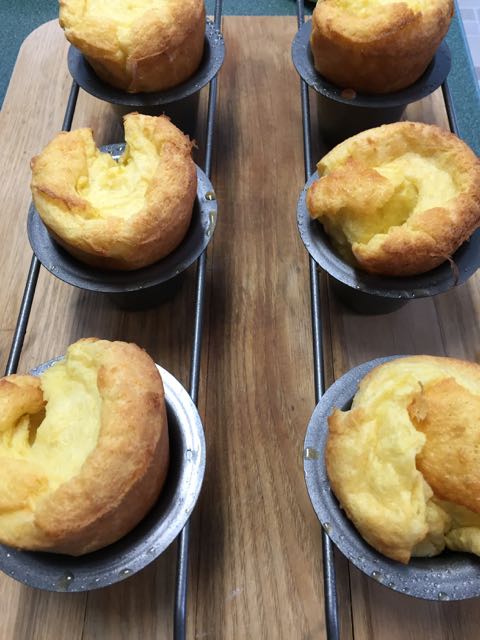
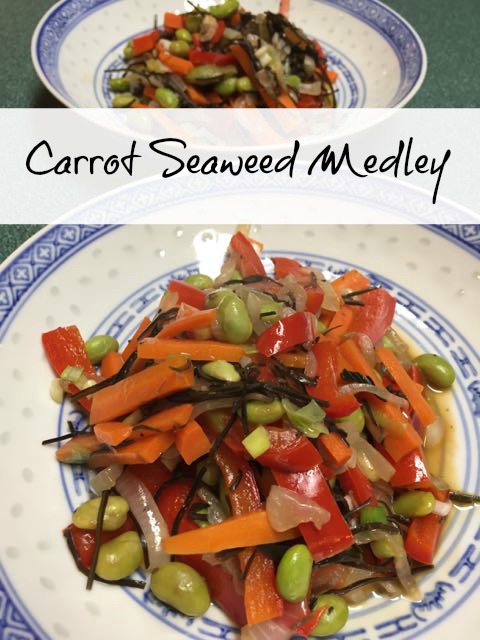
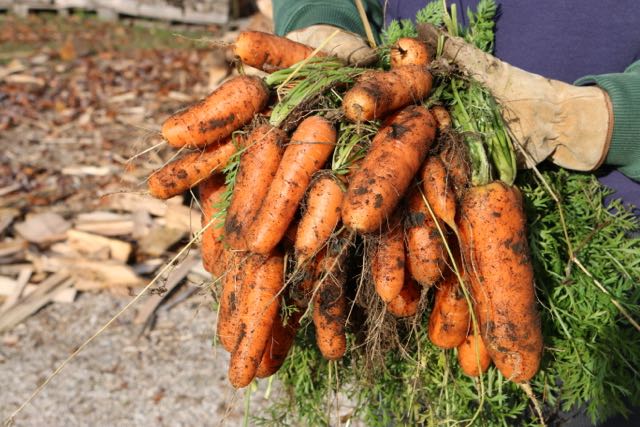
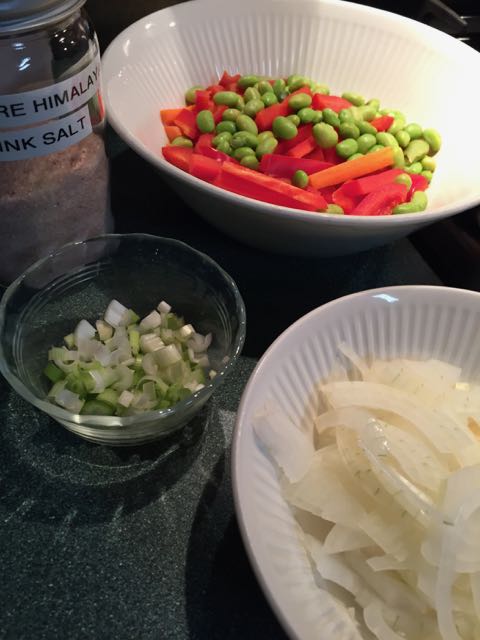
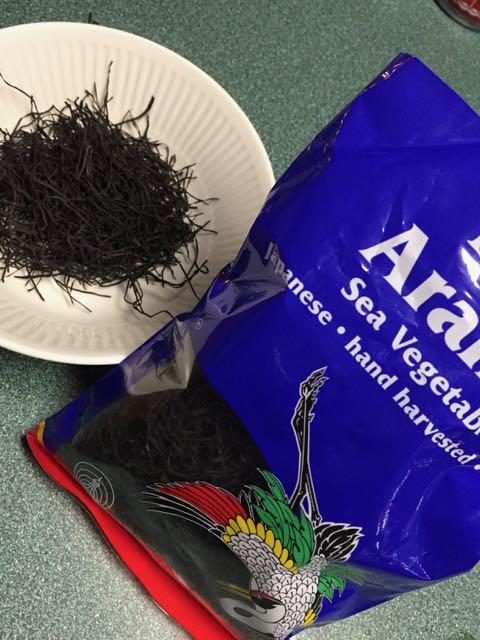
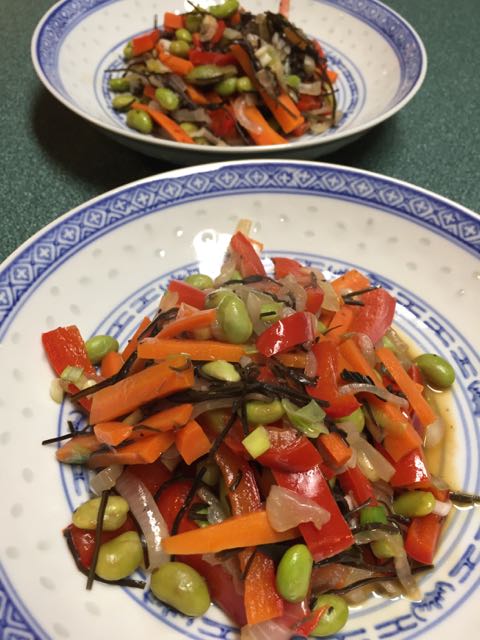
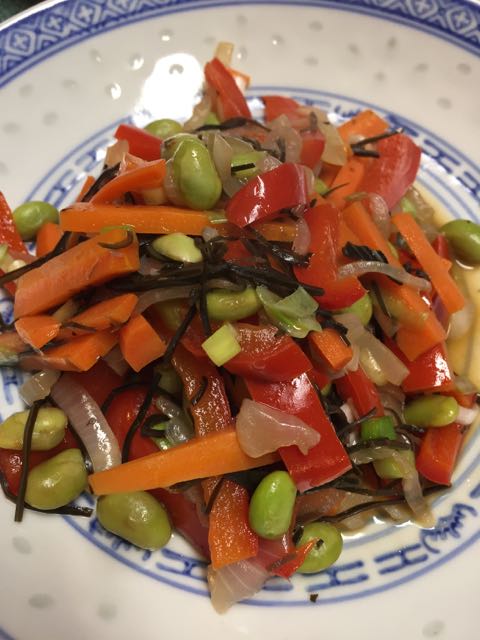
Recently my husband and I tool part in a three-day refresh program. We just wanted to get ourselves back on track after a period of too much eating and not enough exercise. The 3-Day Refresh consists of three daily shakes, a fiber drink, plenty of water, plus a wide variety of fresh fruits, vegetables, and healthy fats throughout the day to keep your energy and metabolism going. This carrot seaweed medley was one of my favorite dishes.Carrot Seaweed Medley

The meal plan is simple and they give you a variety of options for delicious dinners. My favorite is the Carrot-Seaweed Medley. The recipe only makes one serving but is easily doubled or tripled depending on how many people you are feeding. I plan to make it again as a side dish. The seaweed adds a mild flavor and cooking the vegetables in sesame oil give the whole dish sort of a nutty flavor. This is a dish I will enjoy again! I found the package of dried arame seaweed on Amazon. I’m sure you have all the other ingredients on hand.

Carrot-Seaweed MedleyCarrot Seaweed Medley

Ingredients:

½ tsp sesame oil
¼ medium onion, cut into thin slices
½ medium carrot, cut into matchstick size pieces
¼ medium red pepper, cut into strips
2 Tbsp shelled edamame
2 Tbsp arame seaweed
¼ cup water
1 dash of Himalayan salt
1 scallion thinly sliced.

Directions:

Soak the seaweed in cool water for 5 minutes, drain and set aside.Carrot Seaweed Medley

Heat sesame oil in a large skillet over medium heat. Add the onions and cook, stirring frequently for two minutes.

Add the carrots, bell pepper, edamame, seaweed and water. Bring to a boil. Reduce the heat to maintain a gently boil; cook covered for 5-8 minutes.

Remove cover. Add salt and cook for 1 minutes. Add scallion. Mix well and serve.Carrot Seaweed Medley

Don’t let the seaweed throw you off from trying this delicious dish!Carrot Seaweed Medley

Corn Muffins – Monday’s Muffins

I have shared with you my recipe for corn bread; today I share my recipe for corn muffins. They differ from ordinary muffins because of the addition of corn meal. I often use sprouted corn meal in my  muffins. These  are a perfect accompaniment with chili, barbecue or even soup. Placing a basket of these delicious muffins on your table will sure to please everyone. The addition of just a few extra ingredients dresses up these  muffins and makes them special. The addition of the peppers, onions and cheese also gives these muffins a tender moist texture, which I’m sure you will enjoy! My favorite addition is the cheese as it gives the crust of the muffin a wonderful crisp texture and the flavor can’t be beat!corn muffins

Corn Muffins

Ingredients:

1 ½ cups flour
1 Tbsp baking powder
1 tsp salt
3 Tbsp sugar
¾ cup yellow corn meal
1 egg, beaten
1 cup milk
¼ melted butter
1 Tbsp finely chopped green pepper
1-2 tsp finely chopped onion
½ cup grated Cheddar cheese

Directions:

Sift the flour with the baking powder, salt and sugar; add the cornmeal and blend well. Combine the egg, milk and melted butter. Stir the liquids into the dry ingredients until all the flour is dampened. Add the green pepper, onion and shredded cheese and fold in. Pour the batter into greased muffin pans.corn muffins 
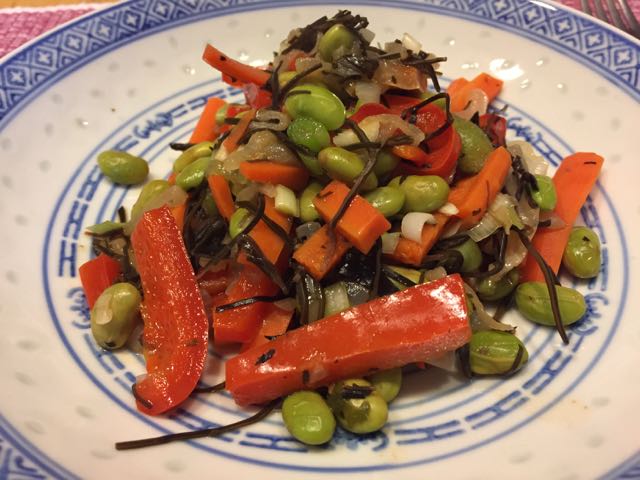
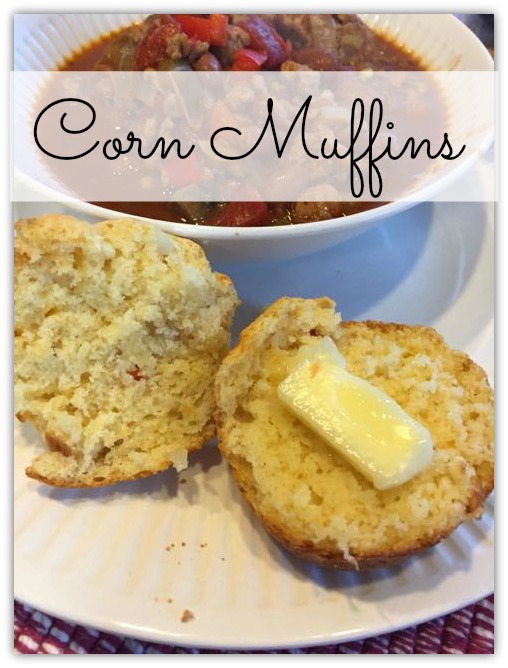
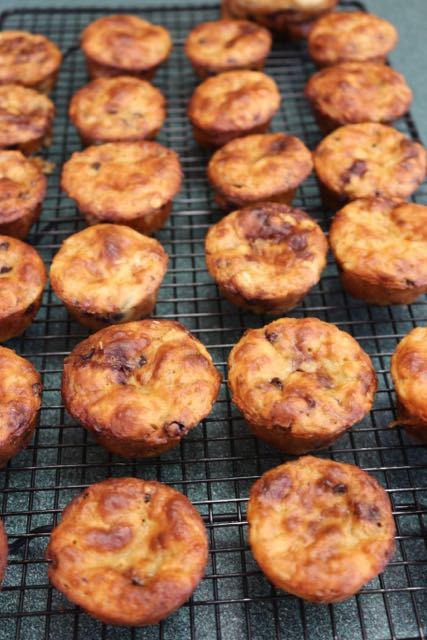
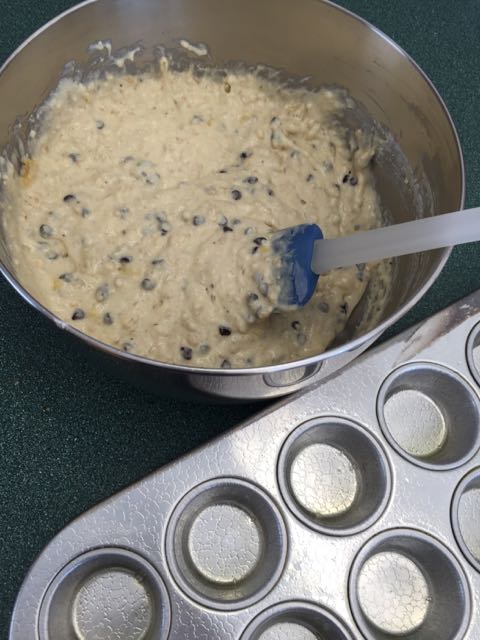
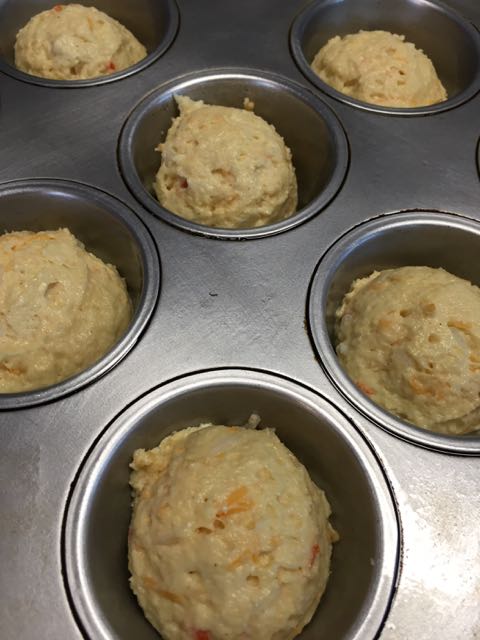
Bake at 400 degree for 25-30 minutes. Makes one dozen muffins. Remove from the muffin tin and either let cool on a wire rack or serve immediately. These corn muffins are best served warm.corn muffins

If you don’t eat all the muffins they also freeze well.corn muffins

Next time you are cooking chili or barbecue be sure to mix up a batch of these delicious muffins.

Thai Chicken with Ginger Sauce

Thai Chicken with Ginger Sauce
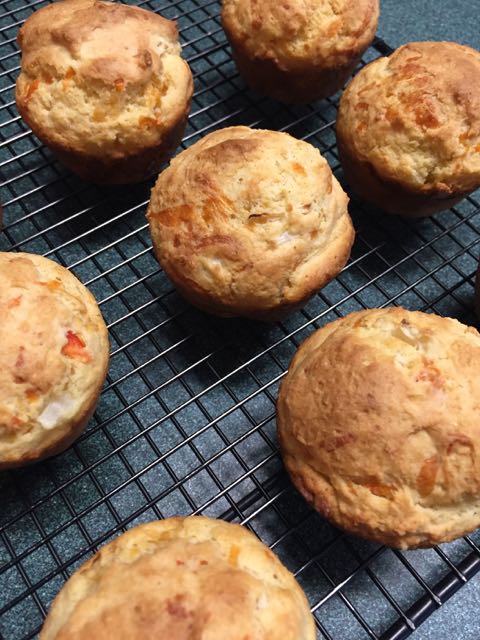
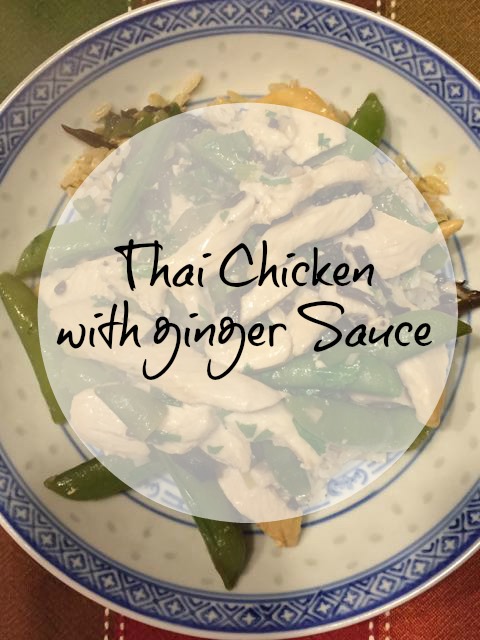
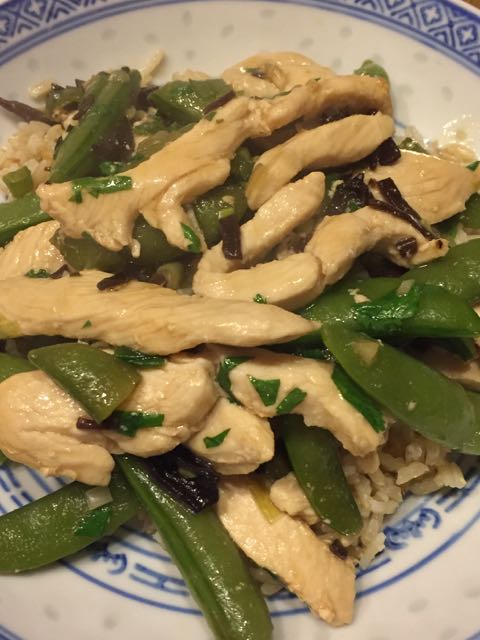
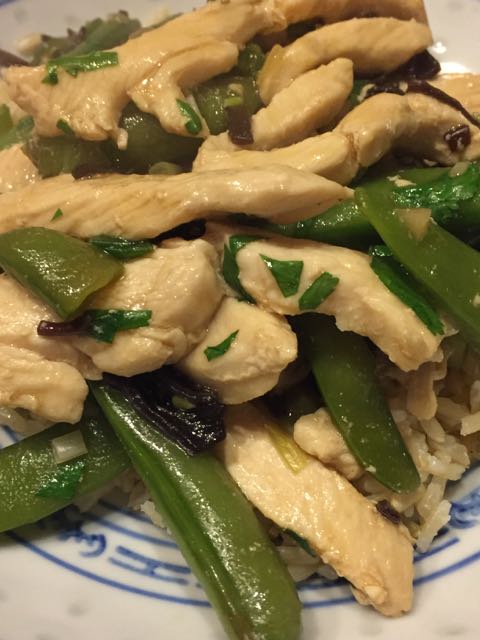
Have you ever cooked with fish sauce? Fish sauce is also called nam pia and is strong flavored and salty, so only a tiny amount is needed in this Thai Chicken with Ginger Sauce. Dried wood ear is another unusual ingredient in this Thai dish. Dried wood ear mushrooms are a type of mushroom commonly used in Asian cooking. You may be surprised by their small package but don’t let that fool you, when reconstituted they increase almost six times in size! Both fish sauce and dried wood ears can be found in most supermarkets or in Asian markets, they make this Thai Chicken with Ginger Sauce taste authentic!Thai Chicken with Ginger Sauce

Thai Chicken with Ginger Sauce

Ingredients:

1 cup water
1 (1/2 oz) package dried wood ear mushrooms
1 cup homemade chicken broth
2 Tbsp soy sauce
1 Tbsp rice vinegar
1 Tbsp cornstarch
1 tsp Asain fish sauce
2 tsp oil
1 ¼ pounds boneless chicken cut into 1 inch pieces
8 scallions, sliced
2 tsp minced peeled fresh ginger
1 garlic clove, chopped
½ pound sugar snap peas
¼ cup cilantro, chopped
2 cups cooked brown rice

Directions:

Bring water to a boil. Add the dried wood ear, remove from heat and let stand for 20 minutes. Drain the mushrooms, coarsely shop and set aside.

Meanwhile whisk together the broth, soy sauce, vinegar, cornstarch and fish sauce in a small bowl, set aside.

Heat the oil over high heat in a wok or large nonstick pan, then add the chicken and sauté until lightly browned, about 3 minutes. Transfer to a plate.Thai Chicken with Ginger Sauce

Return the wok to the heat, add the scallions, ginger and garlic. Sauté about one minute, until the scallions have softened slightly. Add the mushrooms, chicken and snap peas and broth mixture. Bring to a boil stirring constantly. Reduce the heat and simmer until slightly thickened, about two minutes. Stir in the cilantro and serve with rice. Make about 4 servings.Thai Chicken with Ginger Sauce

What To Do With Food Scraps?

By July 1, 2017, The Vermont Department of Environmental Conservation assures that waste haulers and drop-off centers must provide food scrap collection. I am more interested in managing my food scraps at home, it is simple and low-cost, and I can make wonderful compost, which is like black gold for my garden.gardening, composting, prudent living


The benefits of composting are many. It is a great soil amendment for my garden. Compost helps promote root development, enhances retention of water and nutrients and makes the soil easier to cultivate.What To do With Food Scraps


How to go about making compost from your food scraps? One simple method is to use a compost bin made of recycled plastic. Here in Vermont I can actually purchase these bins from the Solid Waste Management District. They are also available at our local hardware store. Once the snow has melted find a suitable site that’s convenient but also out of the way. It should be shaded and out of the wind. We have ours tucked in the corner of the yard. Our compost bin is within easy walking distance from the house yet not really visible when you drive in the driveway.What To Do With Food Scraps?


I also have a small compost container, which sits on my counter and is filled almost daily. When the container is filled it is brought outside and emptied into our larger bin.What To Do With Food Scraps?


When collecting materials to compost you want them to be in small enough pieces so that they will compost quickly. It is a good idea to layer your compost using one part of green material to 3 parts brown. Green materials are food scraps, manure, freshly cut grass, coffee grounds, and vegetable and fruit scraps. Brown materials are dry leaves, sawdust, shredded egg cartons, ground up eggshells, hair and wood ash.


Do not add meat scraps, diary products, oils or bones as they will attract pests. Do not use grass clippings that have been treated with pesticides or pet manure. Remember you will be putting your compost into your garden and you want it to be beneficial to your plants.


As the compost pile builds up you can either stir it with a shovel or remove the fresh compost from the bottom. We usually empty our compost bin each spring and dig it into our garden.What To Do With Food Scraps?


There are also other compost bins that you can build using pallets or wire. The bottom line is that composting is easy. Compost will take your food scraps and give you a supply of dark, crumbly hummus that will enhance your garden.What To Do With Food Scraps?


Applesauce Muffins – Monday’s Muffins

I have been decluttering and cleaning out for months! In cleaning out my pantry I had several jars of applesauce, which I had canned, and what better way to use it up than to make some Applesauce Muffins? These delicious applesauce muffins make a double batch and use two cups of applesauce which was perfect for my goal of working on cleaning out the pantry!home canning, prudent living, applesauce

These muffins are delicious with a cup of tea in the afternoon, to enjoy with your breakfast or to pack in your child’s lunch. Applesauce muffins travel well and they also freeze well. Plus it’s a great way to use up applesauce! The recipe makes a double batch of muffins so you will definitely have some leftover to stick in your freezer!Applesauce Muffins

Applesauce MuffinsApplesauce Muffins

Ingredients:

1 cup butter, softened
2 cups sugar
2 eggs
1 tsp homemade vanilla
2 cups applesauce
4 cups flour
1 tsp baking soda
1 tsp cinnamon
1 tsp allspice
¼ tsp ground cloves
1 cup chopped walnuts (optional)
Cinnamon-sugar (optional)

Directions:

In a large bowl cream together the butter and sugar. Add the eggs and vanilla and mix well. Stir in the applesauce. Combine the flour, baking soda and spices; stir into the creamed mixture and fold in the nuts.

Fill paper-lined muffin cups three-fourths full. Bake the muffins at 350 for 20-25 minutes or until a toothpick comes out clean. Cool the muffins for five minutes before removing from the pans to wire racks.Applesauce Muffins 
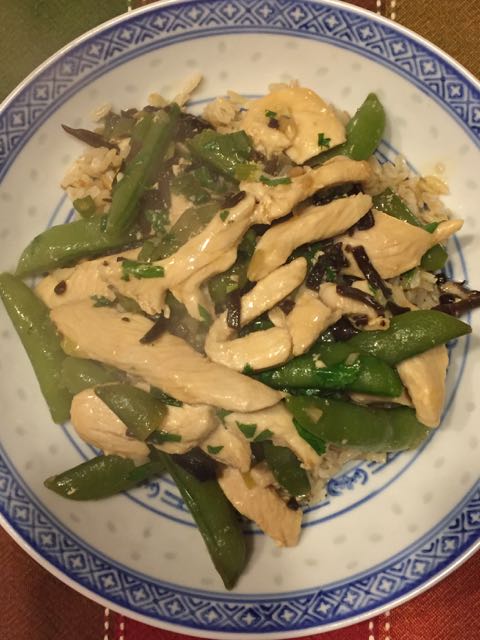
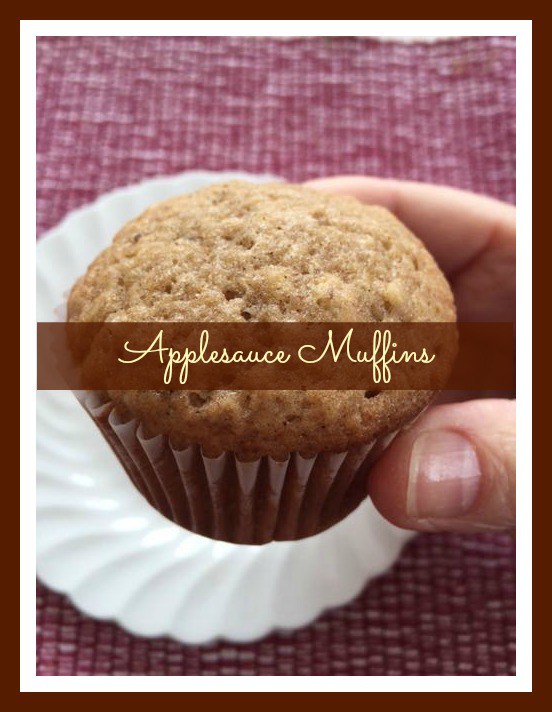
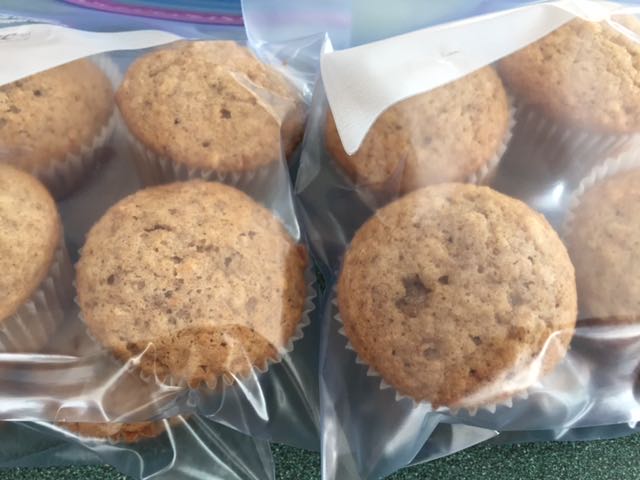
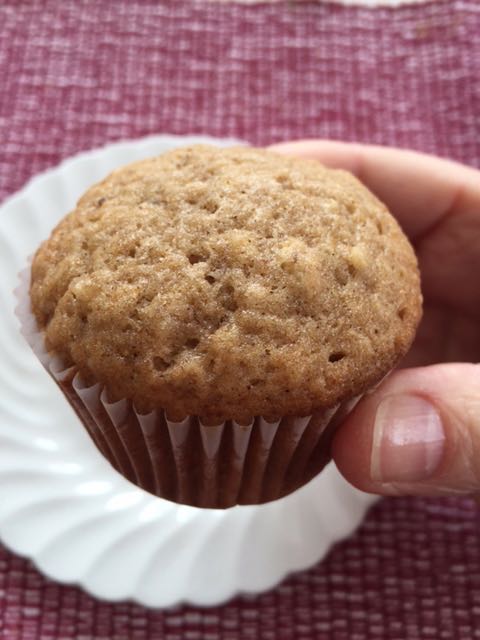
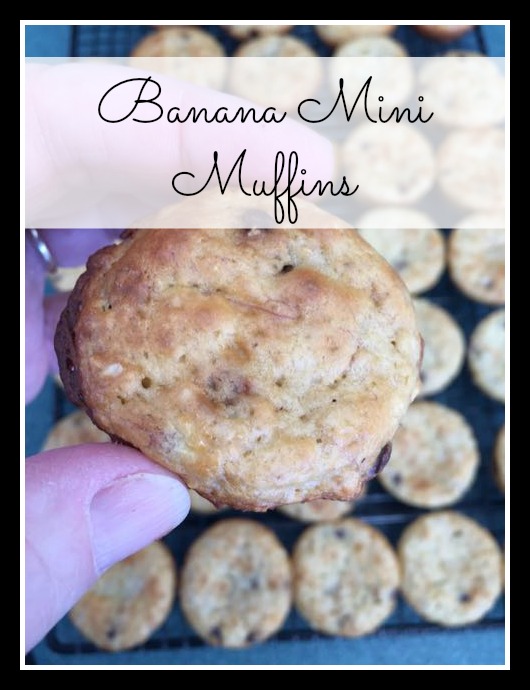
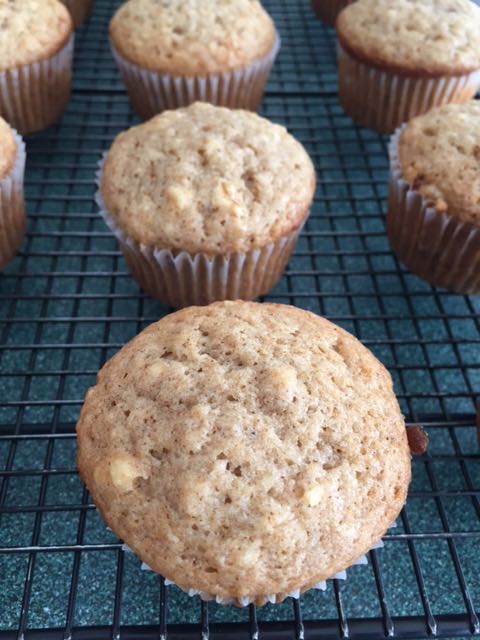
If you like you can sprinkle with cinnamon-sugar. Muffins sprinkled with cinnamon-sugar sounds like a wonderful idea but I’ve yet to remember to sprinkle them with the sugar and they are perfectly delicious without it! Makes about two dozen muffins.Applesauce Muffins

Let the muffins cool before packaging them up to put in your freezer. I freeze them in groups of four which is then perfect for my husband and I. Of course I’ve now used up the applesauce I had, but my freezer is now filled with muffins! Luckily we have company coming next week and these will be perfect to serve with our breakfast or of snacking on with a cup of tea in the afternoon!

Design a site like this with WordPress.com
Get started