Curried Chicken with Apples

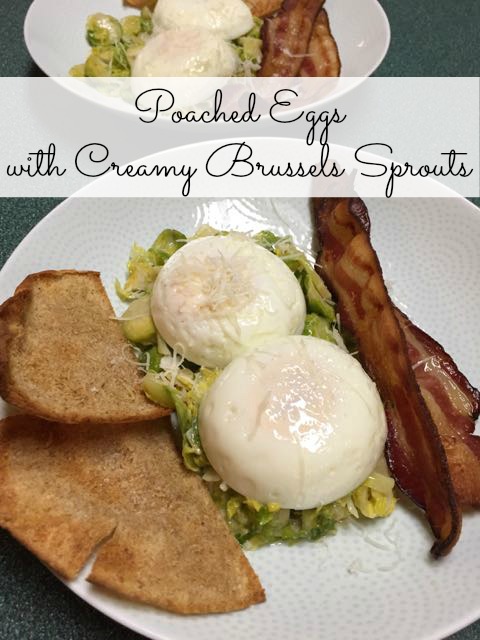
If you’ve never tried curry, this curried chicken with apples and mango chutney is a delectable imitation. When purchasing your curry powder be sure to read the labels as there are numerous types that pack varying degrees of heat. I recently  changed brands of curry powder without checking the labels and was quite surprised how much stronger my new curry powder was! This Curried Chicken is a perfect mid-week dinner. It takes very little time to prepare this curried chicken and it comes together quickly. If you have leftovers you can spoon the cold chicken mixture onto crisp lettuce leaves for a cool and tasty curried chicken salad lunch.Curried Chicken

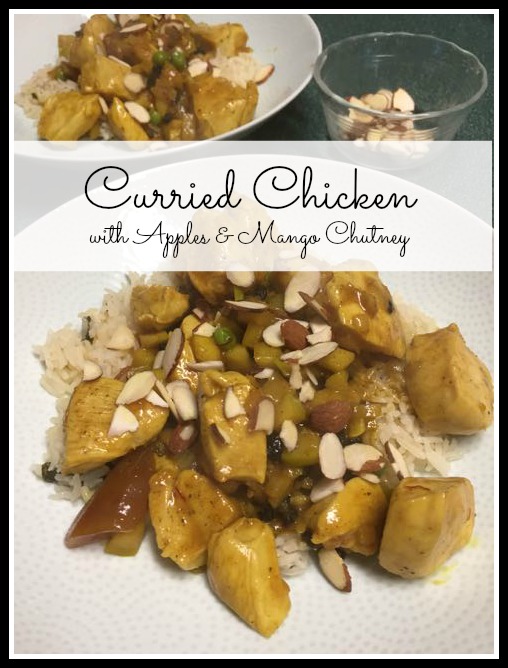
Curried Chicken with Apples and Mango Chutney

Ingredients:

2 tsp oil
1 ½ pounds boneless chicken breasts cut into 2 inch pieces
½ tsp salt
¼ tsp pepper
1 Granny Smith apple, unpeeled, cored and chopped
1 onion, chopped
1 tsp minced fresh ginger
1 garlic clove, minced
1 Tbsp curry powder
½ cup mango chutney
¼ cup currants
¼ cup chicken broth
¼ cup half and half
1 Tbsp chopped parsley
2 Tbsp slivered almonds
3 cups cooked rice

Directions:

Heat the oil in a large nonstick pan. Add the chicken and sprinkle with the salt and pepper. Sauté until browned, about 6 minutes. Transfer to a plate.

In the same pan add the apple, onion, ginger and garlic. Cook until the apple and onion are tender, about 6 minutes. Stir in the curry powder; cook for another few minutes.Curried Chicken 
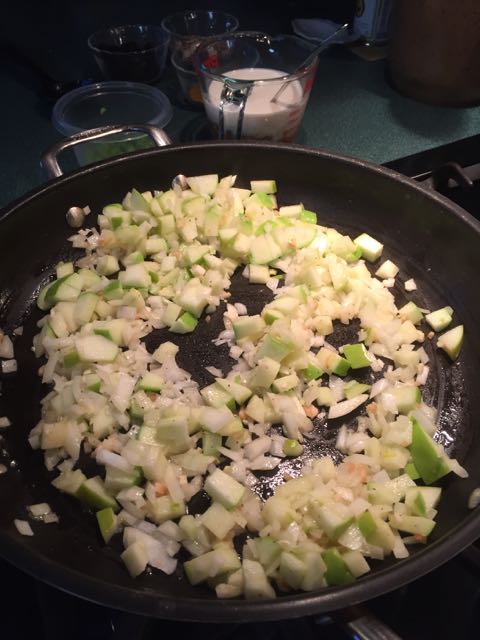
Add the chicken, chutney, currants, broth, half and half and parsley. Bring to a boil then simmer uncovered until the flavors are blended and the sauce thickens slightly, about three minutes. Curried Chicken
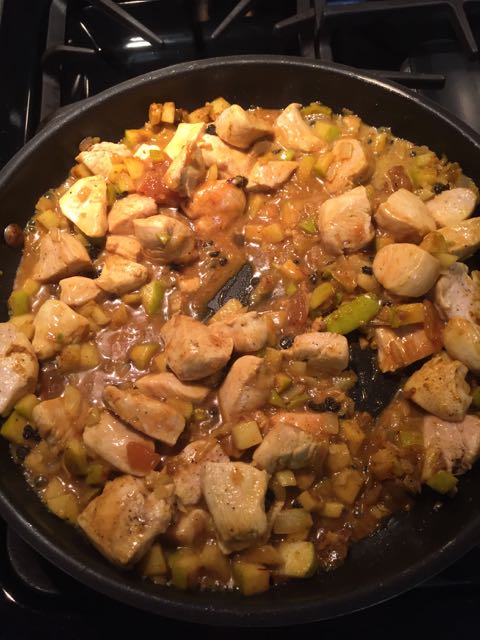
Sprinkle with the almonds and serve over rice.Curried Chicken

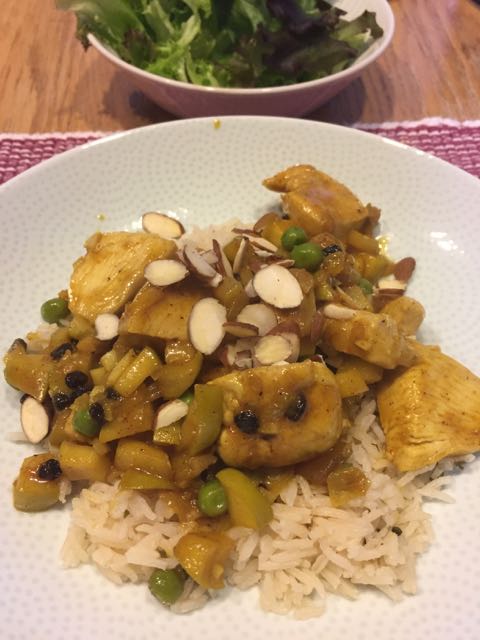
Next time you’re short on time plan to make this delicious chicken curry, you’ll be glad you did. The added bonus is that if you have leftovers you’ll have a lunch to enjoy the next day!

Guilford, Connecticut – Out and About

Recently we traveled to Guilford, Connecticut to visit my mother-in-law. She had a bathroom she wanted painted so we decided to help her out. It is always fun to head to Connecticut from Vermont especially this time of year. We left warm temperatures and melting snow and arrived to bare ground and even warmer temperatures!Guilford, Connecticut


Not only does my mother-in-law live within walking distance of everything but living in town means I can get my ten thousand steps in and see so much! I’ve shared pictures of Guilford before; remember the pictures of the town agricultural fair that I took? Today the streets are quiet, not much going on. Being school vacation week I imagine many families have headed further south to enjoy some really warm weather.Guilford, Connecticut


Guilford, Connecticut was founded in 1639 and is considered by some to have the third largest collection of historic homes in New England, with important buildings from the 17th, 18th, and 19th centuries. There are five historic house museums including Dudley Farm and the Henry Whitfield House (1639), the oldest dwelling house in Connecticut and the oldest stone house in North America. The Comfort Starr House (1645–46) is one of the oldest wooden framed private dwellings in Connecticut, and one of the few houses remaining of the original signers who settled Guilford.. The majority of these old homes are built within walking distance of the town green. I love these beautiful old homes. Many have been updated but the original features are kept intact. The older homes in town all have a plaque on them with the date the home was built.Guilford, Connecticut 
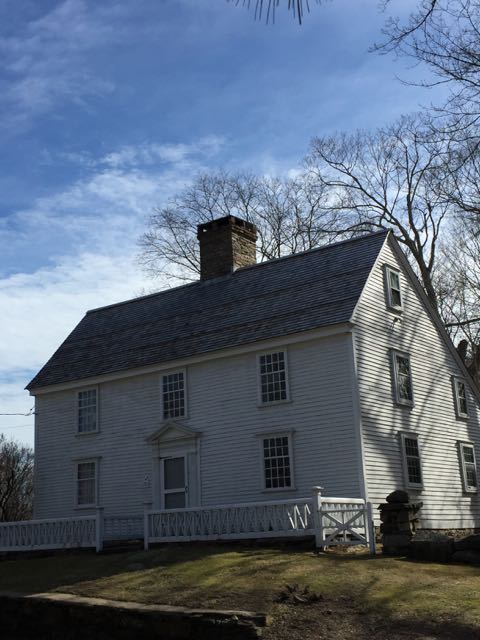
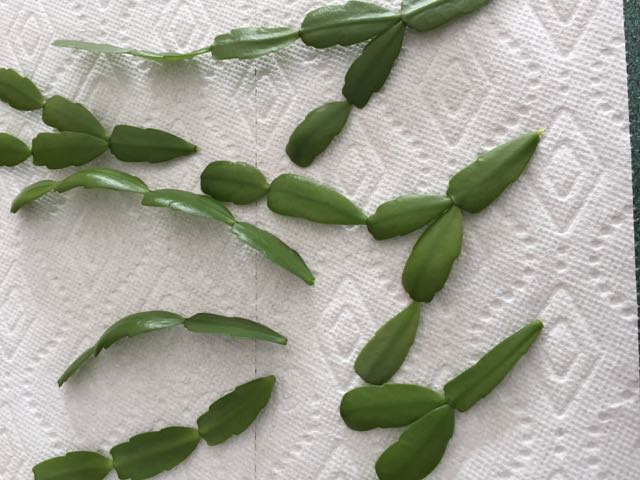
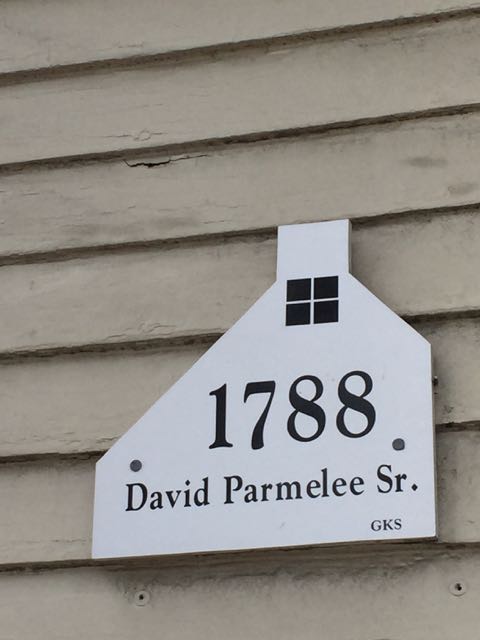
So much history as you walk around town.
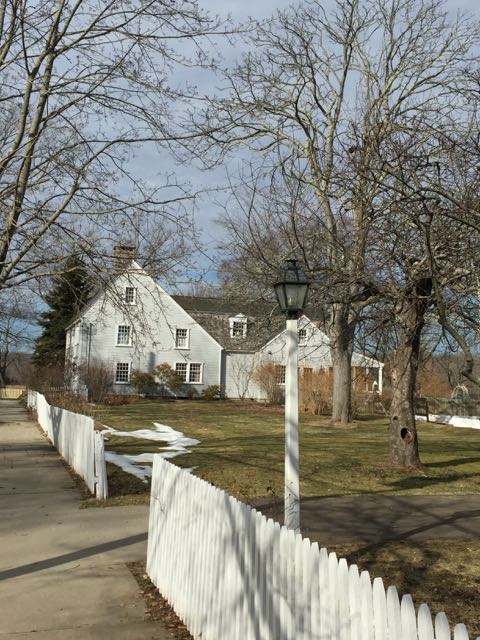
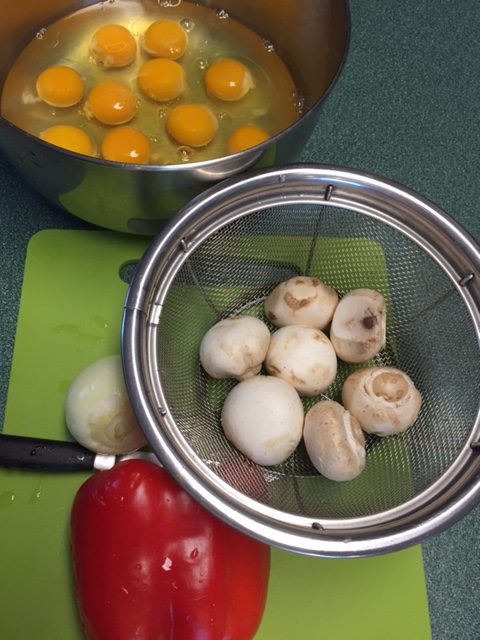
Guilford, Connecticut


My favorite place to walk is down by the water. No activity on the water today it was flat and calm. I grew up in Guilford, Ct so I have many fond memories. My grandparents lived in town on the water and my summers were spent sailing and swimming. One thing I miss living in Vermont is the salt water.Guilford, Connecticut


There is also wonderful hiking in Guilford and an extensive trail system called Westwoods Trails. The trail system has approximately 39 miles (63 km) of trails with features such as: caves, lakes, streams, rivers, and interesting rock formations. The preserve extends across land owned by the Guilford Land Conservation Trust. The trails are accessible for walking, running, and mountain biking. My mother was very involved in the Guilford Land Conservation Trust and helped preserve many acres of land which is now enjoyed my many.Guilford, Connecticut


This was a wonderful town to grow up in and it is still a wonderful place to live and to visit. I am so thankful that my mother-in-law still lives here and we can come visit. I’m going to take advantage of the spring like weather and get as many walks in as possible before heading back to Vermont where we still have snow!Guilford, Connecticut

10 Tips To Sell Your Home More Quickly

We are about to re-list our home with a new realtor. Hopefully this is the year we see a sale! Setting the right price and making an excellent first impression are both essential to attracting buyers so we can sell our home. Here are 10 tips to sell your home more quickly.Selling Your Home Quickly


10 Tips To Sell Your Home More Quickly

  1. The most important tip is to price it right from the start. After interviewing three realtors we chose the realtor that we thought would do the best job and price the house to sell. We don’t want to list high with the thought that we can lower the price later. If we price it too high many buyers may stay away thinking we’re not serious or we’re not willing to negotiate.


  1. We want to make a good first impression from the minute they drive in the driveway. It’s still too early to plant flowers or make sure the lawn is mowed but we can make sure the snow is shoveled and the path to the house is clear and the deck is free of snow.


  1. The Interior and Exterior should be clean and updated. We painted the exterior of the house in the fall and repainted the steps to the house. All the walls on the inside have been freshly painted and the carpeting was new two years ago. We have updated the light fixtures in the bathroom to give it a more updated look. The only thing we didn’t do is update the kitchen but the new owners will have to have something to do to make the house their own!10 Tips To Sell Your Home More Quickly


  1. As you know we have been packing and de-cluttering since the house first went on the market. The fewer things that are in the house the more open it will look. We have removed all the knickknacks and excess furniture. We have also taken down all the family photos so prospective buyers can envisions their family in the house. The only thing left to do is hire a cleaning service to do a deep cleaning.


  1. The rooms are all staged to show how they are supposed to be used; the office looks like an office, the family room looks like a family room. We do not have any odd rooms in our house where someone might wonder what it could be used for. The rooms are clean and spacious.10 Tips To Sell Your Home More Quickly


  1. We plan to make the property easy to show. We will be flexible and allow the prospective victors to visit when it is convenient for them. We also plan to leave the house when it is shown so the would be buyers can feel free to move about without feeling like intruders. This will give them the opportunity to discuss the pros and cons between themselves.


  1. We no longer have any pets but if we did we would remove them during a showing. When a prospective buyers is looking at a house they shouldn’t even know that a pet lives there.Pugs, dogs


  1. Before we even hire our new realtor we will discuss with him where the house will be listed. We want to make sure the house is listed on Zillow, Trulia and Realtor.com and that the realtor will make good use of Facebook as well. The more exposure the house has, the more likely that we’ll find the right buyer.


  1. The listing should have top-notch photos. We actually rented a camera lens to take excellent interior shots. The realtor is welcome to use them or take shots of their own. Most homebuyers start their search online and decide which homes they want to look at based on the photos.10 Tips To Sell Your Home More Quickly


  1. Make sure the listing also includes photos of nearby recreation and area attractions. We have to remember that we not only selling our home we are selling a lifestyle.10 Tips To Sell Your Home More Quickly


By following these tips you should be able to sell your house more quickly. Of course real estate markets vary drastically depending on where you live. Here in Vermont sales are slow and it is a buyers market meaning there are lots to choose from.


Spring is the most popular home-buying season. The weather is good, and families with children can make a smooth transition before the new school year starts.


Scrambled Egg Muffins

Muffin Monday: Scrambled Egg MuffinsScrambled Egg Muffins

Technically scrambled egg muffins these aren’t really muffins in the traditional sense but you do cook these scrambled egg muffins in a muffin tin so I am sharing them on Muffin Monday! The original recipe is from one of my favorite Beachbody cookbooks, the Fixate cookbook. I shared a few recipes from this cookbook before including the Beef Stew with Sweet Potatoes.Fixate Cookbook

Scrambled Egg Muffins are very flexible and you can add whatever ingredients you’d like. If you’re not a fan of mushrooms and red peppers substitute chopped broccoli florets and shredded carrots. Or if you don’t like peppers add spinach and chopped mushrooms. You could even add a little chopped ham if you wanted a little more protein. They are also good with a little cheese added. The variations are endless! Top each egg muffin with a little salsa for an extra kick.

Scrambled Egg Muffins

Scrambled Egg MuffinsIngredients:

12 large eggs
Salt and Pepper
1 cup chopped mushrooms
1 medium red pepper, finely chopped
2 scallions thinly sliced.

Directions:

Heat your oven to 375 dress F. Lightly coat a twelve cup muffin tin with cooking spray. Place the eggs in a large bowl and whisk to blend. Season with salt and pepper if desired.

Add in your mushrooms, pepper and scallions and mix well. Evenly pour the egg mixture into the muffin cups.Scrambled Egg Muffins 
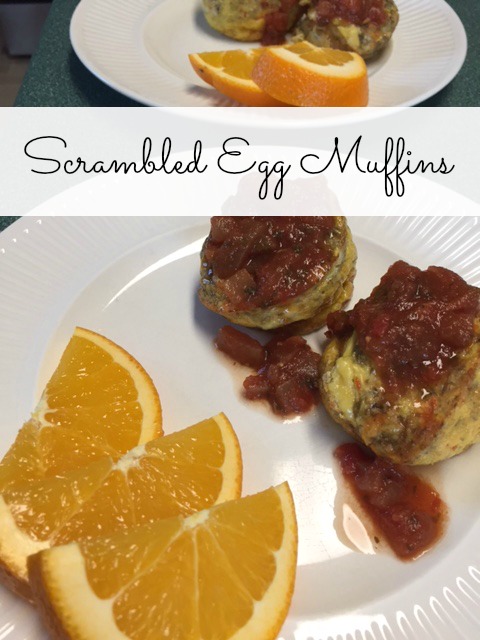
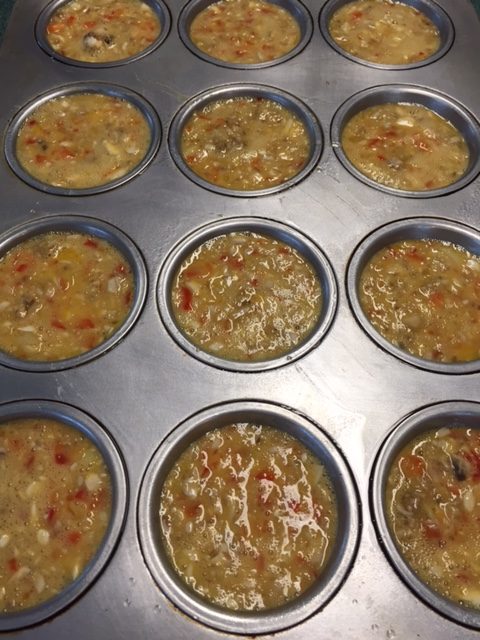
Bake for 15-20 minutes or until a toothpick inserted into the center of the cup comes out clean.Scrambled Egg Muffins 
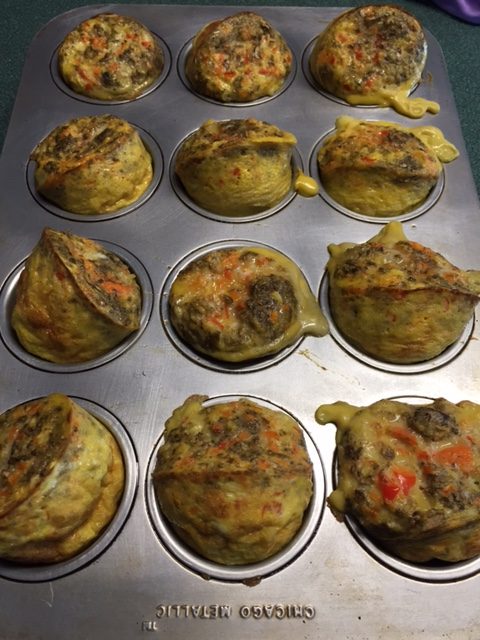
Serve warm with a tablespoon of salsa.Scrambled Egg Muffins

I have frozen these egg muffins with good result. Take them out of the freezer and pop in the microwave for a quick breakfast or snack. Have you made egg muffins before? What is your favorite combination?Scrambled Egg Muffins

Note: This post does contain affiliate links as I am a Beachbody coach. Thanks for checking the links out!

Pork, Bean and Kale Soup

I have an ongoing goal to eat healthier and make good food choices. It’s not always easy but my goal is to eat right 80% of the time! I have a wonderful cookbook called Eating Well in Season – the Farmers’ Market Cookbook. The recipes are divided into seasons of the year and focus on what food is fresh during each season. If you are looking for a hearty winter soup, this pork, bean and kale soup is perfect. It’s delicious and nutritious and uses foods you can find in your farmer’s market this time of year.Hearty Winter Soup

Pork Bean and Kale Soup

Ingredients:

1 tsp olive oil
1 pound pork tenderloin, cut into one inch pieces
¾ tsp salt
1 medium onion, chopped
4 cloves garlic, chopped
2 tsp paprika
¼ tsp crushed red pepper
1 cup white wine
4 plum tomatoes, chopped
4 cups chicken broth (reduced sodium)
1 bunch kale, ribs removed and chopped (about 8 cups)
1-15oz can cannellini beans rinsed

Directions:

Heat oil in a heavy Dutch oven. Add pork, sprinkle with salt and cook until no longer pink on the outside, about 2 minutes. Transfer to a plate with tongs, leaving juices in the pot.hearty winter soup

Add onion to the pot and cook, stirring often until just beginning to brown, 2-3 minutes. Add garlic and crushed red pepper, stirring constantly until fragrant, about 30 seconds. Add wine and tomatoes increase heat to high and stir to scrape up any browned bits. Add broth and bring to a boil.

Add kale and stir until it wilts. Reduce heat to maintain a lively simmer and cook, stirring occasionally until the kale is just tender, about 4 minutes. Stir in beans, the reserved pork and any accumulated juices; simmer until the beans and pork are heated through, about 2 minutes.hearty winter soup

This hearty winter soup makes about 6 servings.

Propagating an Aloe Plant

For some reason I have the perfect conditions to grow an aloe plant. The Aloe Vera plant is a popular houseplant with medicinal properties. The sap from the leaves has wonderful topical benefits, especially on burns and sunburns. I think I first started growing aloe plants when we lived in Florida over twenty years ago! These plants are an ideal addition to your home, and they are very easy to care for. In fact not only are they easy to care for, but propagating an aloe plant is also extremely easy.Propagating an Aloe Plant


My plant does so well that I find myself passing along baby plants to my friends. You might wonder how I do this. While you can actually grow an aloe plant from a leaf cutting it is much easier and more successful to propagate from offsets or “pups” .Propagating an Aloe Plant


Aloe vera is a succulent and as such, is related to the cactus. Cacti are fairly easy to propagate from cuttings, but aloe vera cuttings, with their high moisture content, rarely become viable plants. Rooting an aloe vera plant leaf seems like it should work, but all you will get is a rotten or shriveled leaf.


It is much easier to share this wonderful plant by removal of offsets. This is a simple process that anyone can easily do. If you look carefully at your aloe plant you will notice little aloe plants (offsets) forming off the mother plant. As a general rule the offset should be about 1/5 the size of the parent plant and should have several sets of true leaves.Propagating an Aloe Plant


When the offset is large enough remove the dirt from around the base. When you remove the offset you want to make sure it has a complete root system attached.Propagating an Aloe Plant


Plant the newly removed offset in a dry cacti-potting mix or make your own with one part potting soil and one part sand. Allow it to sit for one week and then water the soil. After this you would care for the aloe vera pup the same way you would the mother plant.Propagating an Aloe Plant


To successfully grown an aloe vera plant remember that the plant is a succulent and does well in a dry environment. They should be planted in a cactus potting soil mix and should have plenty of drainage. They do not like standing water. They also need bright light and do best in south or west facing windows.


Now you can not only grow your aloe plant successfully but you now know that propagating an aloe plant is easy and you can pass the aloe plant pups off to your friends!Propagating an Aloe Plant

Making a Move – Things To Consider

No our house hasn’t sold but moving, packing and de-cluttering is on the forefront these days. There are so many things to consider when making a move! I’m a planner and a list maker and although it will be many months before we’re actually making a move I thought I would gather my thoughts and think about the things to consider when making a move.Making a Move


We no longer have children at home so one thing we don’t have to think about is schools! My husband also works from home so trying to find a location near a place of employment is also something we don’t have to think about.


Top of the list is sorting and purging your belongings. We have been in this process for the last year. We are currently going through old slides! Between my husband and I we have reels of old slides and then boxes of loose slides. It’s tedious work but every evening we sort through a couple of reels tossing most of the slides but keeping the few treasures we come upon. It’s funny because as a teenager and in my early twenties I took so many scenic photos and very few photos of people. The scenic shots are pretty but how many photos of flowers and marshes do you want to keep?Preparing for a move


Anyway going though every room of your house and deciding what you’d like to keep and what you’d like to get rid of is time consuming. However when you’re paying for the move yourself you want to make sure that you’re moving exactly what you want and need and nothing extra! I have a box for items I want to sell and another box for items to donate. We’ll be having another yard sale this summer.


Now is also the time to do a little research regarding moving companies. What are the options? I called many of the bigger firms only to be told they don’t service our area. Guess we’re a little rural! Get an estimate in writing from each company and make sure it has a USDOT (US Department of Transportation) number on it if you are moving to a different state.


Now you’re beginning to collect a bit of information and it would be a good idea to use a binder or folder to keep track of everything – all your estimates, your receipts, and an inventory of all the items you are moving! I’m trying to keep an inventory of everything I’ve already packed but sometimes I’m not so organized and just write something like “cookbooks” on the box! I’m doing my best!planning a move


If you do have school age children go to your children’s school and arrange for their records to be transferred to their new school districts. This should be done about two months before you move.


Six weeks before you move you want to start collecting boxes and other supplies such as tape, bubble wrap, and permanent markers.Making a Move


Start using up things that you don’t want to move, like frozen or perishable foods and cleaning supplies.Making a Move


By now you’ve figured out where you are moving. Check the room dimensions of your new home, if possible, and make sure larger pieces of furniture will fit through the door. We have an extremely tall grandfather’s clock. When we’re looking at new homes we’re always looking to make sure there is a tall entry wall where the clock will go!making a move


Take steps now to ensure that you have an organized move. Stay tuned, as I will be posting another article on what to do in the weeks before a move! Hopefully I will follow all these suggestions myself and we’ll have a very organized move!

Poached Eggs with Creamy Brussels Sprouts

I have to start this post with the fact that if you are not a fan of Brussels sprouts you probably won’t like this recipe. However, creamy Brussels sprouts and eggs may seem like a surprising combination, and in this version they make a perfect pair. Plus the addition of bacon makes everything yummy! We have enjoyed this recipe for both breakfast and dinner. We love enjoying breakfast for dinner so I have to say that’s my favorite time for this delicious recipe. If you are enjoying this meal for breakfast it’s a good way to get a vegetable in!Poached Eggs with Creamy Brussels Sprouts

Poached Eggs with Creamy Brussels Sprouts

Ingredients:

8 slices of bacon
Homemade Pita Chips
2 Tbsp butter
1 large shallot, diced
1/3 cup water
4 cups medium Brussels sprouts, trimmed and sliced thinly
2/3 cup heavy cream
Salt and pepper to taste
8 large eggs
Parmesan cheese as a garnish

Directions:

Cook the bacon either in the oven or on the stove. Let drain and set aside.

While the bacon is cooking melt the butter in a large saucepan. Add the shallot and cook until softened, about 2 minutes. Add the water, cream and Brussels sprouts and cook, stirring occasionally, until the Brussels sprouts are just tender, 5-7 minutes. Don’t overcook. Set aside until your eggs are poached, but keep warm.Poached Eggs with Creamy Brussels Sprouts

As the Brussels sprouts are cooking poach your eggs. We have a wonderful egg poacher which I use all the time. You can also poach your eggs in simmering water to which 1 tsp of vinegar has been added. Break the eggs gently into a small bowl first being careful not to break the yolk. Then gently slide each egg into the simmering vinegar water. Poach until the whites are completely opaque but the yolks are still soft, about 3-4 minutes. Use a slotted spoon to remove the eggs from the water.

When the eggs and Brussels sprouts are done place a spoonful of the Brussels sprouts on your plate and top with the poached eggs. Place the homemade Pita chips and bacon around the edge and garnish with the Parmesan cheese. Enjoy!Poached Eggs with Creamy Brussels Sprouts

If you are a fan of Brussel sprouts you will love this wonderful combination!Poached Eggs with Creamy Brussels Sprouts

Propagating a Christmas Cactus

Propagating a Christmas Cactus
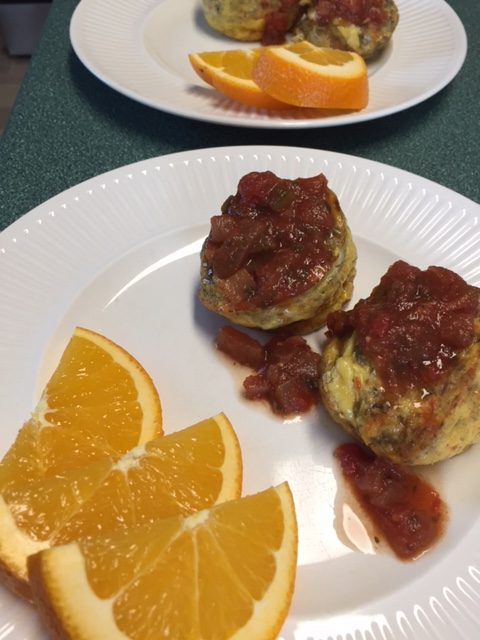
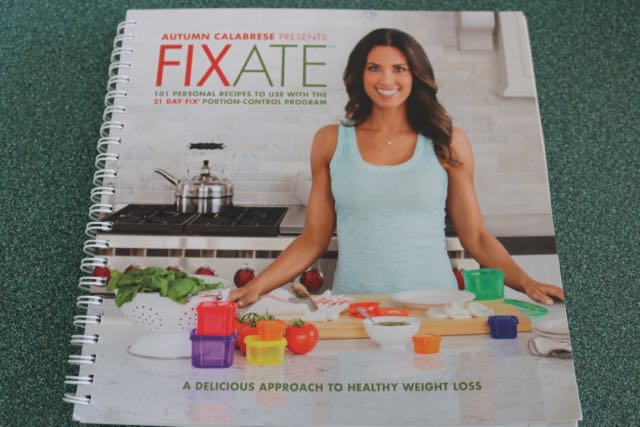
Did you read my post on moving houseplants? If so you know that I can’t move all of my large plants with me. Instead I plan to propagate my Christmas cactus and have a much smaller pot to take with me. Propagating a Christmas cactus is very easy. This plant makes a great holiday gift for friends and family, so knowing how to propagate and grow Christmas cactus can give you extra plants to share with your friends!Propagating a Christmas Cactus


The first step is to simply take a short, y-shaped cutting from the stem top. The cutting should consist of at least two or three joined segments. Make sure all the cuttings are from healthy foliage.Propagating a Christmas Cactus

Allow the cutting to dry a few hours before potting it up for rooting, this will help to avoid any potential stem rot from excessive moisture.Propagating a Christmas Cactus


Once the cutting has dried for a couple of hours place the segment in a most peat and sand soil mix. Insert the segment about a quarter of its length below the soil surface. Place the pot in a well lit area, avoiding direct sunlight.Propagating a Christmas Cactus


Water the cutting sparingly at first to prevent rot. After two or three weeks the Christmas cactus cutting should begin to show signs of growth at the tips of its leaves. Once the cutting has rooted, it can be transplanted into a pot with loose potting soil. The cutting may wilt a little, which is normal and will eventually subside.Propagating a Christmas Cactus


Propagating a Christmas cactus is easy and can be very rewarding. Now you will have an inexpensive gift to give others during the holidays! My cutting is from a very large plant that belonged to my husband’s grandmother! I think everyone in the family has a plant started from cuttings! I’m happy to now have a smaller plant to move with us to our new home.

Cranberry Vanilla Muffins

Monday Muffins: Cranberry Vanilla Muffins


Friday I shared my recipe for Cranberry Orange Scones and today I share a different recipe for Cranberry Vanilla Muffins! What better way to celebrate Valentine’s Day than with a delicious muffin? In this recipe half a vanilla bean is ground right into the sugar to dominate the flavor of the muffin. Use those frozen cranberries in the freezer or try dried cranberries to whip up a batch of these delicious Cranberry Vanilla Muffins.Cranberry Vanilla Muffins


Cranberry Vanilla Muffins


Ingredients:


Batter:


½ vanilla bean, cut into small pieces

1 cup sugar

½ cup butter

2 large eggs,

2 cups of flour

2 tsp baking powder

¼ tsp salt

½ cup milk

2 ½ cups fresh cranberries coarsely chopped


Topping:


2 Tbsp sugar

½ tsp nutmeg


Directions:


Preheat oven to 375. Line 12-14 muffin cups with paper linters.

Prepare the batter. Place the vanilla bean and sugar in a blender or food processor and process until the vanilla bean is ground into tiny flecks.

Using an electric mixer, cream the vanilla sugar with the butter in a small mixing bowl until smooth. Add the eggs, one at a time, beating well after each addition.

Mix together the flour, baking powder and salt. Add the dry ingredients to the creamed mixture alternately with the milk, mixing until smooth and fluffy. Fold in the cranberries.

Divide the batter between the muffin cups, filling each one almost full. Mix together the sugar and the nutmeg for the topping and sprinkle generously over the muffins.Cranberry Vanilla Muffins 
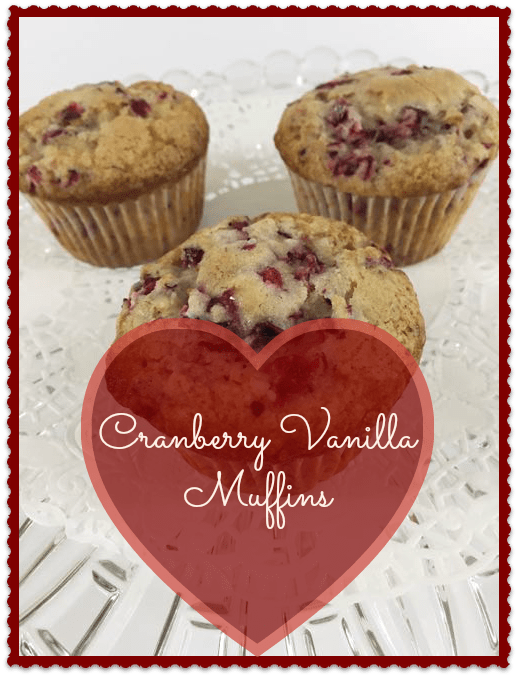
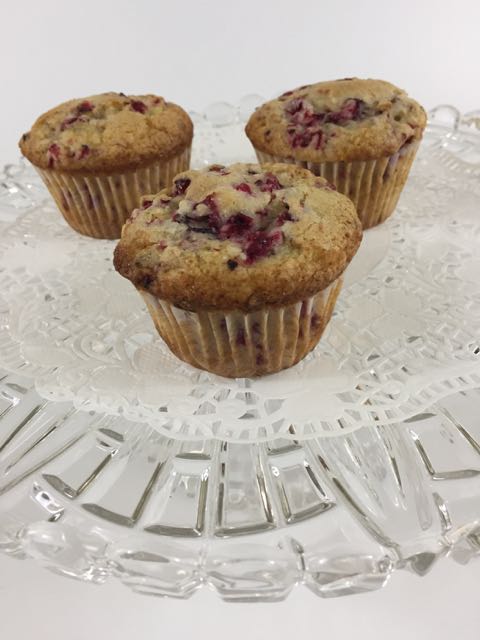
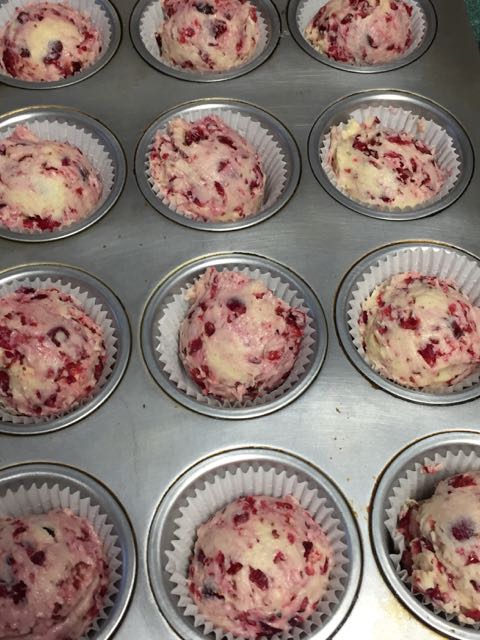
Bake until puffed, light golden brown and a toothpick inserted in the center of each muffin comes out clean, about 25 minutes.Cranberry Vanilla Muffins 
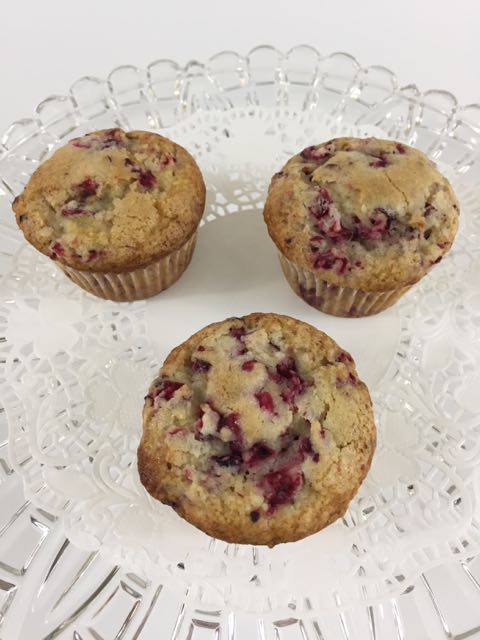
Serve the muffins warm or at room temperature.Cranberry Vanilla Muffins 
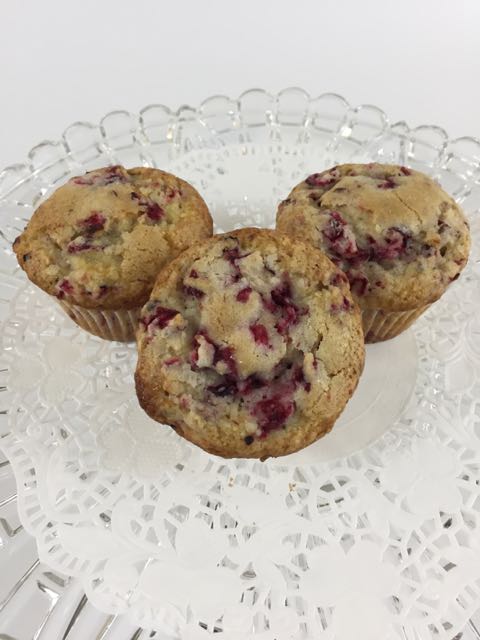
Makes about 12-14 muffins.Cranberry Vanilla Muffins

Design a site like this with WordPress.com
Get started