Minestrone Soup Mix

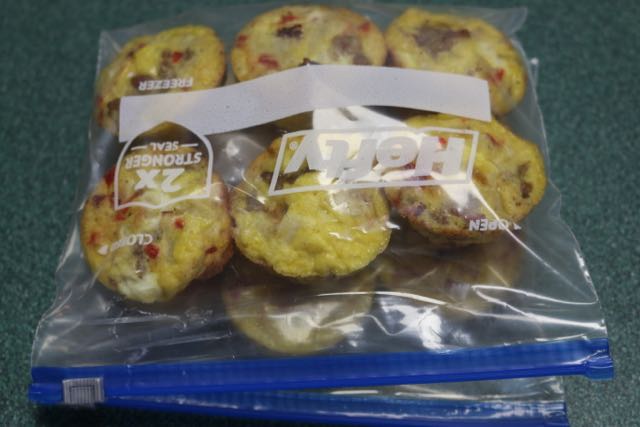
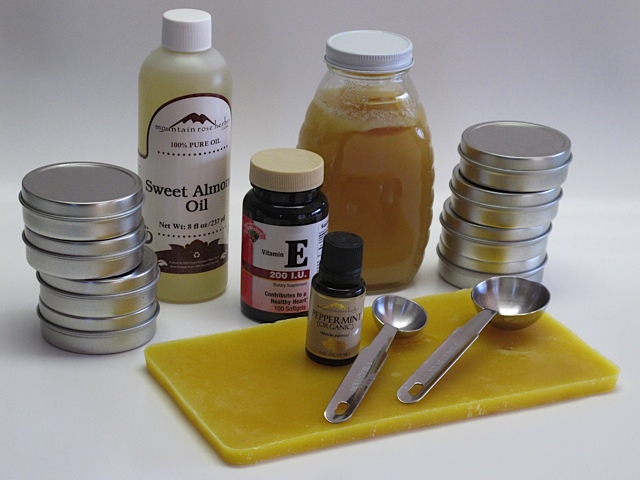
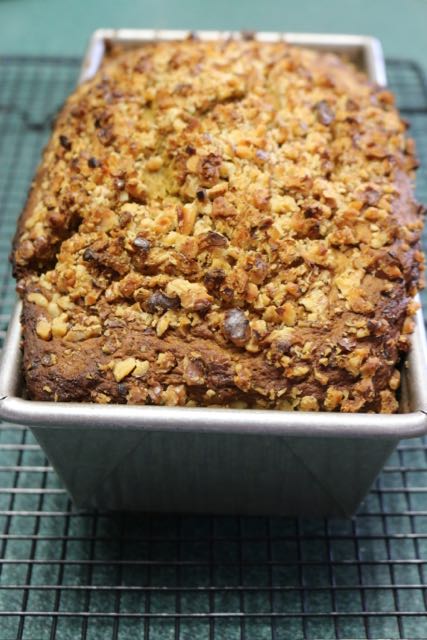
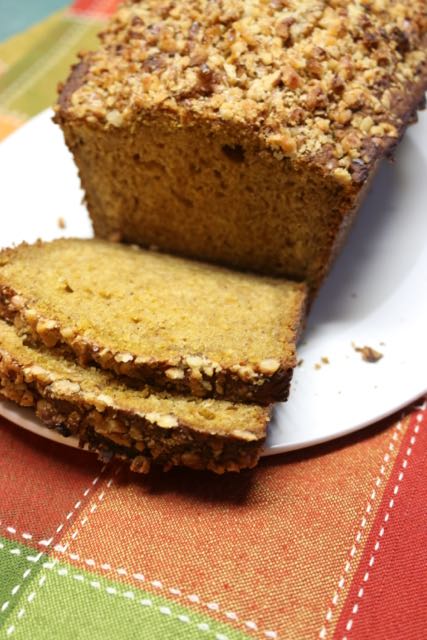
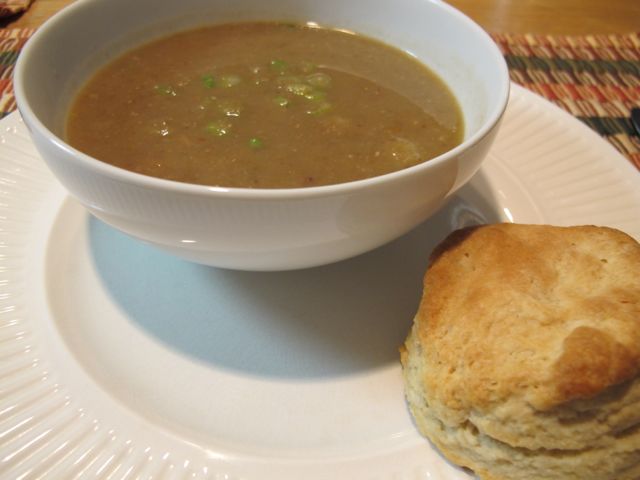
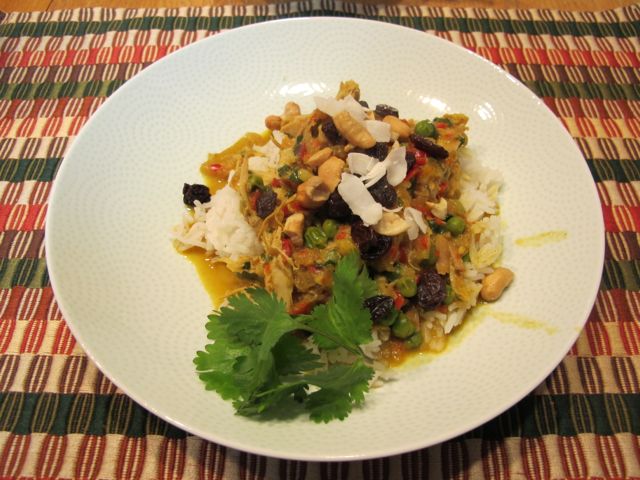
Do you enjoy giving homemade gifts? As the holidays approach I try to think of gifts that I can make myself that might bless others. One favorite idea is homemade gift jars. You can fill jars with all sorts of gift ideas – cookie mixes, brownie mixes, or soup mixes. One of my favorites is a Minestrone Soup Mix. It makes four gift packages and when presented in a jar with a cute tag makes a wonderful gift. Most of the ingredients you probably have on hand in your pantry.
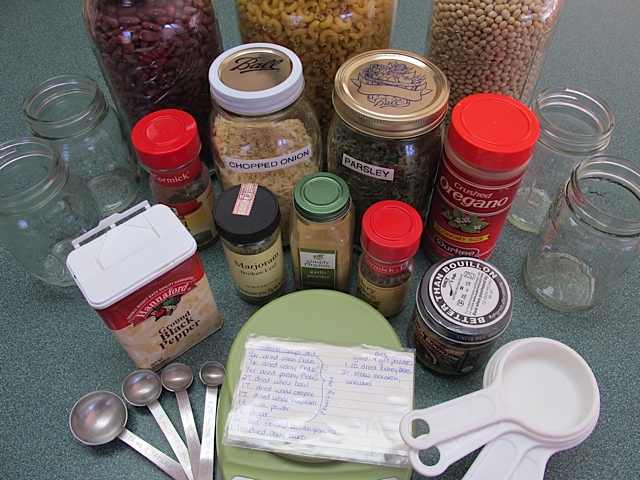
homemade gifts, soup in a jar, minestrone soup, prudent pantry, prudent living

Minestrone Soup Mix

Flavoring Mix Ingredients:

½ cup dried onion flakes
½ cup dried celery flakes
¼ cup dried parsley flakes
2 Tbsp basil
1 Tbsp dried oregano
1 Tbsp dried marjoram
1 tsp garlic powder
1 tsp pepper

½ cup beef-flavored bouillon granules

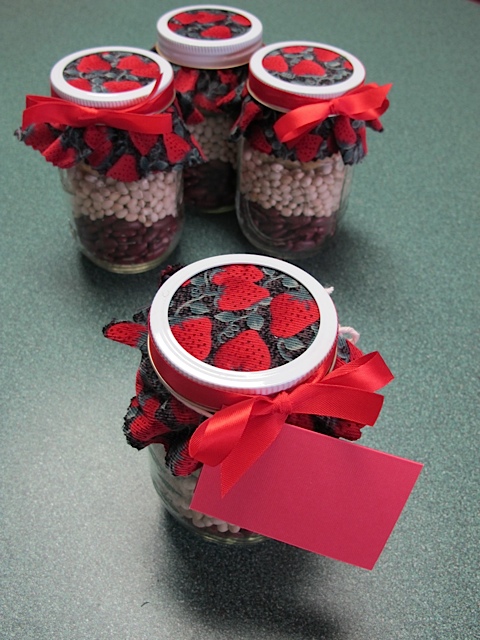
1 pound dried navy beans
1 pound dried kidney beans
2 cups elbow macaroni, uncooked

Directions:

Combine the first 8 ingredients and divide evenly into 4 gift packages. Add 2 Tbsp of the beef flavored bouillon granules to each package.

herbs, soup mix, prudent living

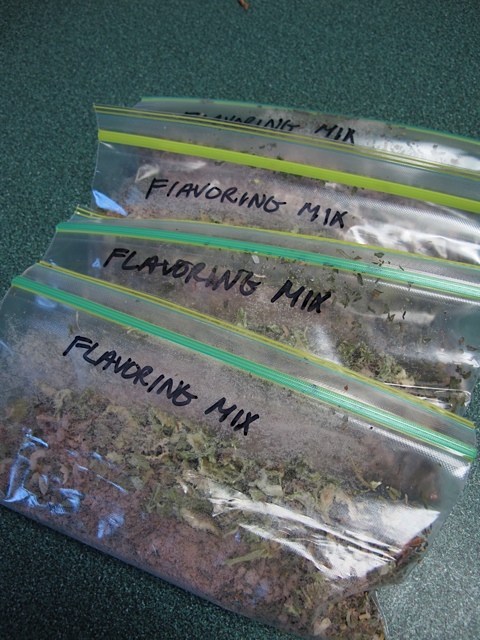
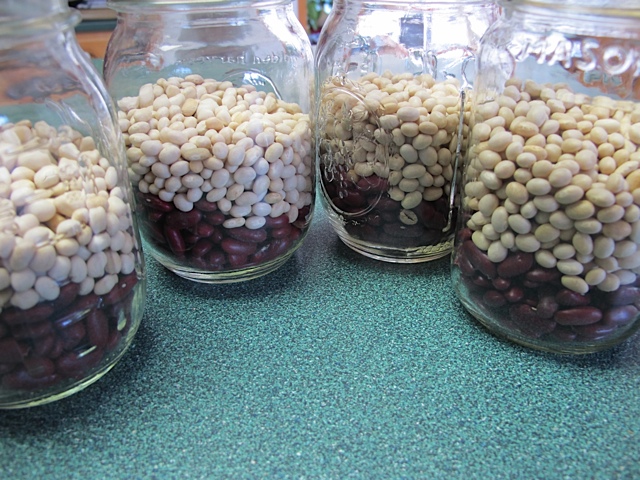
Label and seal.  Combine navy beans and kidney beans and divide into 4 gift packages. Label and seal.

dried beans, soup mix, gift in a jar

Place ½ cup of macaroni into 4 gift packages.

macaroni, soup mix, pantry

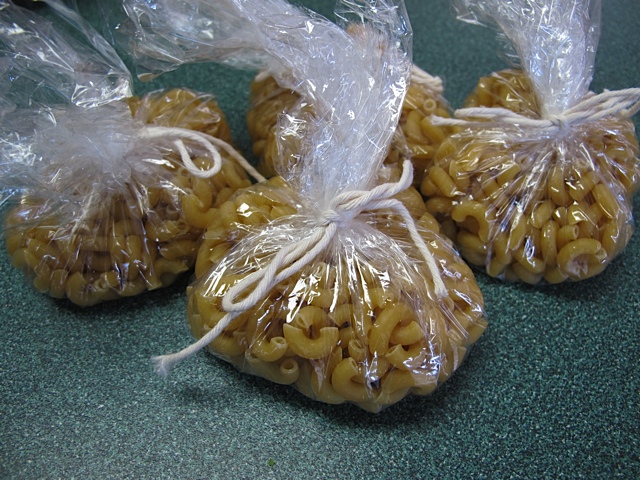
Label and seal the gift jars. Present one package of herb mix, one package of bean mix and one package of macaroni with a copy of the recipe for Minestrone Soup. You can layer the ingredients  in a jar or decorate a brown bag and include the ingredients in the bag.

soup in a jar, soup mix, pantry

To each jar or bag attach the following recipe:

Minestrone Soup

1 pkg of bean mix
3 quarts of water
1 pkg herb mix
1 carrot, chopped
2/3 (4oz) of chopped lean cooked ham
1 (14.5oz) can stewed tomatoes, undrained
1 pkg macaroni

Directions:

Sort and wash beans; place in a Dutch oven and cover with water, two inches above the beans. Soak for 8 hours. Drain beans; add 3 quarts of water, herb mix, carrot and ham. Bring to a boil; reduce heat and simmer for two hours, stirring occasionally, until the beans are tender. Add tomatoes and macaroni, cook 20 minutes or until macaroni is tender. Serve hot.

Recipe Box: Scrambled Egg Muffins

I’ve seen a lot of recipes for Egg Muffins online, however this is the way we like to make them! They can be made ahead and frozen for a quick breakfast when you are running out of time. Just pop them in the microwave and reheat!

Scrambled Egg Muffins

½ pound pork sausage (or use ground turkey for a healthier version!)
12 eggs
½ cup chopped onion
¼ cup chopped pepper (red or green)
½ tsp salt
¼ tsp garlic powder
½ cup shredded cheddar cheese
¼ tsp pepper

In a skillet brown the sausage and then drain. In a bowl beat the eggs and then add the onion, peppers, salt, pepper and garlic powder. Stir in the sausage and cheese. Spoon 1/3 capfuls into your grease muffin cups.

Ready for the oven.
Ready for the oven.

Bake at 350 for 20-25 minutes. Let cool on a rack.Let cool on a rack.

Enjoy immediately.

Scrambled Egg Muffins

Or freeze to enjoy later!

Freeze to enjoy later.

Ancient Seeds – Gete Okosomin

As you know we spent the month of October in Keystone, South Dakota. We met a lot of interesting people including a man named David who works with Native Americans. He had a wonderful story to tell us about a squash called Gete Okosomin.Gete okosomin

The seeds of the Gete Okosomin were discovered in 2008 during an archeological dig on a Menominee reservation near Green Bay, Wis. The seeds were found in a clay ball, used for storing seeds. These squash seeds eventually were given to Winona LaDuke, a longtime advocate for native food sovereignty. She called the squash Gete-okosomin, an Anishinaabe word that roughly translates to “really cool old squash”.  Gete okosominThe White Earth Land Recovery Project grew fifty of them, and now have seeds to share with Native communities across the North Country. Now the squash is served to elders, children, and used for ceremonies at White Earth.Gete okosomin
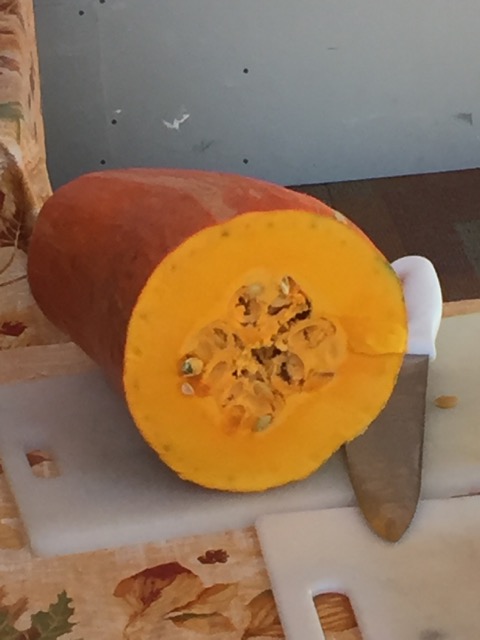
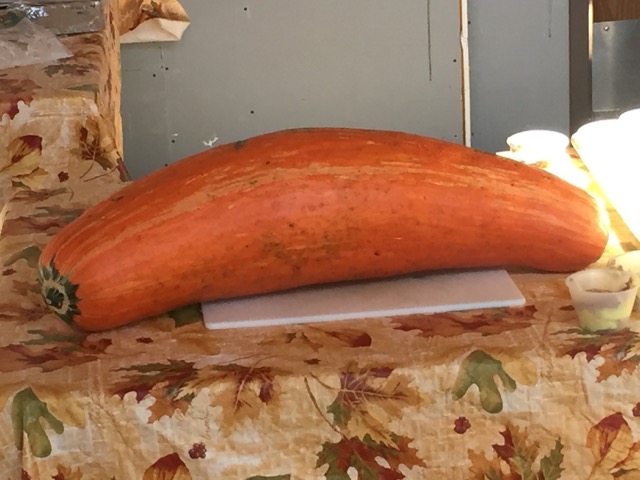
The vines of the squash can grown to over 25 feet long and the squash themselves can grow up to three feet long and 18 pounds.

David was given some of the seeds and had to opportunity to grow them himself.

Gete okosomin
Gete okosomin

He had brought one of his squash with him to Keystone. The squash was cooked up and shared one night. This pre-Colombian squash is delicious: hints of melon, terrific texture, and abundant flesh.Gete okosomin 
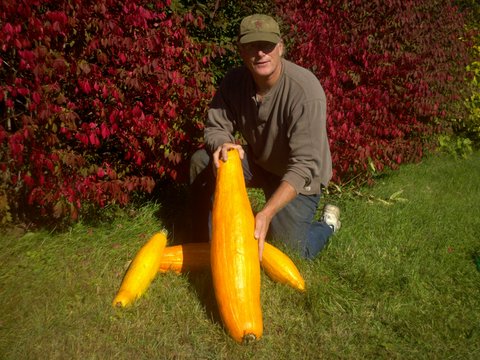
There was plenty for all to enjoy and the seeds were dried and shared with everyone who attended the Keystone Training.Gete okosomin seeds
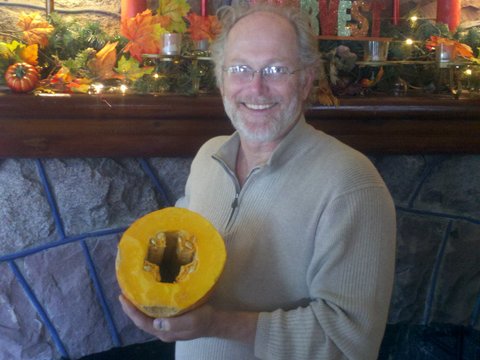
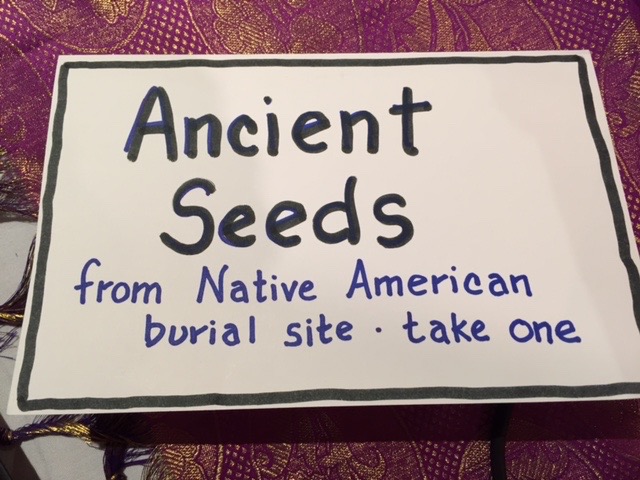
Stories of seed savers are so interesting. I love hearing how certain varieties of seeds have been saved for hundreds of years. I am so honored to have been given some of these special seeds and will grow them carefully to preserve the purity of the seeds. I have only six seeds but I can’t wait to try growing them in our Vermont garden next year.

For those that are interested there is an update to this post HERE. As well as this article which was sent to me.

Homemade Lip Balm So Easy

As you know I love giving and receiving homemade gifts. As we enter into the busy holiday season one of the gifts I like to make is homemade lip balm. I make lip balm every year and give some away and keep enough to keep me supplied. I just love it that much!

I purchase these cute little tins from Rose Mountain Herbs and with a homemade label your gift looks very professional.

home remedies

The recipe is simple and the lip balm can be mixed up in no time. I use local honey and our own beeswax! We haven’t had bees in a while but we still have a good supply of beeswax. The beeswax gives the lip balm a beautiful color.

lip balm, homemade creams, prudent living

The vitamin E is squeezed out of the Vitamin E capsules; you get about 3 drops out of one capsule.

Homemade Lip Balm

Ingredients:

6 Tbsp almond oil
2 tsp honey
4 tsp beeswax, grated
5 drops vitamin E oil
5 drops peppermint essential oil
8 – ½ oz lidded pots

Directions:

In a double boiler, melt almond oil, honey and beeswax together. I used a tin can placed in water.

Remove from heat, allowing mixture to cool slightly. Add vitamin E and peppermint oils and stir until well blended. Spoon into tins and allow to cool before covering.

lip balm

Warning! If you make this once you will love it so much you will want to make it every year!

Pumpkin Nut Loaf Cake

I love the holidays and pumpkin bread is just one of those treats that everyone enjoys having around Thanksgiving. This recipe is called Pumpkin Nut Loaf Cake only because it is has a consistency almost like a cake.  It smells wonderful and tastes even better!

Pumpkin Nut Loaf Cake

Ingredients:

2 large eggs
2 cups sifted cake flour
2 tsp pumpkin pie spice
2 tsp baking powder
1 tsp salt
½ tsp baking soda
1 can (15oz) unsweetened pumpkin
1 cup dark brown sugar
½ cup heavy cream
2 Tbsp butter, melted
½ cup chopped walnuts

Directions:

Arrange a rack in the middle of the oven and preheat the oven to 400. Lightly coat a 9×5 inch loaf pan with cooking spray.

To make the batter stir the flour, pie spice, baking powder , salt and baking soda together in a large bowl. Whisk together the eggs, pumpkin, brown sugar, cream and melted butter in a large glass measure. Pour into the flour mixture and mix until just moistened.

Pour the batter into the prepared pan and top with the chopped nuts.

Top batter with chopped nuts.

Cover the cake loosely with foil that has been lightly spayed with oil. Bake for 25 minutes.

Top with foil

Removed the foil and continue to bake for another 20-25 minutes or until a wooden pick inserted in the center comes out clean. I cooked it a bit longer than 25 minutes! Cool in the pan for 5 minutes, then invert onto a rack to cool completely.

Pumpkin Nut Loaf Cake

Store  the cake tightly wrapped in plastic. Makes one loaf. This loaf also freezes well.

Pumpkin Nut Loaf Cake

Green It Up with Hardy Houseplants

I love to garden. During the spring and summer I enjoy spending as much time as possible outside in my garden. During the fall and winter months I like to keep my house green with various houseplants. Every home can be improved by a little greenery. Plants clean the air, calm the senses and bring life and personality to a room. Some houseplants require more work than others to keep them healthy and green. Any plant will turn brown if ignored but I enjoy the plants that will thrive under almost every circumstance.

The plants that work well in our home are the following.

Peace Lily or Spathiphyllum
Too often overlooked, this sturdy plant has glossy leaves with white “flowers” which are actually callalike spathes on slender stems. The Peace Lily usually blooms in the winter, but flowers can often appear any season. The best feature about this plant is it’s lovely foliage and easy care. This plant doesn’t like to dry out nor does it like to be wet. My Peace Lily does fine if I water it once a week. The Peace Lily does so well in our house I find I have to divide it every so often!spathuphyllum tango, houseplants, repotting

Aloe
The aloe has thick fleshy leaves. The clear gel from the aloe leaves can be used to treat wounds, skin infections and burns. I enjoy the plant because it is relatively carefree. I water it once a week or so and it does very well. At times it does so well that I have to divide the plant! I find I have to divide my aloe every few years!

Aloe Vera Plant
Aloe Vera Plant

Christmas Cactus or Schlumbergera bridgesii 
Seems like a complicated name for a very uncomplicated plant! There are many varieties and the blooms vary from white, to pink, to red. Very easy to take care of. Cool nights and short days induce budding in the fall.Thanksgiving cactus

Wax Plant or Hoya carnosa
I have always had a Hoya. This plant has long stems that work well when you train them to grow over a hoop of wire or put the plant in a hanging basket. The leaves are dark green and glossy. Clusters of fragrant waxy whitish pink flowers appear in the summer and the plant may continue to bloom throughout the autumn. They like direct sun but not scorching midday sun. It likes to be watered frequently but allow it to dry out between watering.

flowers
Hoya Blooms

I’ve had an assortment of houseplants over the years. Depending on where we lived and the amount of sun we had coming in the house would depend on which plants did well. In our current home we have beautiful south facing windows as well as nice west facing windows. Each of these plants have found a special spot in my home and do quite well.

Deck Update

Three years ago we decided to paint our deck with a special product to extend the life of the deck. I wrote a post about the product, which you can read HERE. You may remember that after 11 years our deck needed some attention!

deck, frugal tip
The deck after sanding and scraping.

My husband did some extensive research and found a product called ArmorGarage. They advertised it as a permanent solution for outdoor wood, concrete decks and porches. It’s called “Deck Renew It Coating” and they claimed it would restore the beauty of your decks and never chip or peel off. Here is the before and after picture.

stain, paint
Deck Before and After

Since then I’ve had a few inquiries about how the deck is holding up. I thought I would give you all an update.deck update
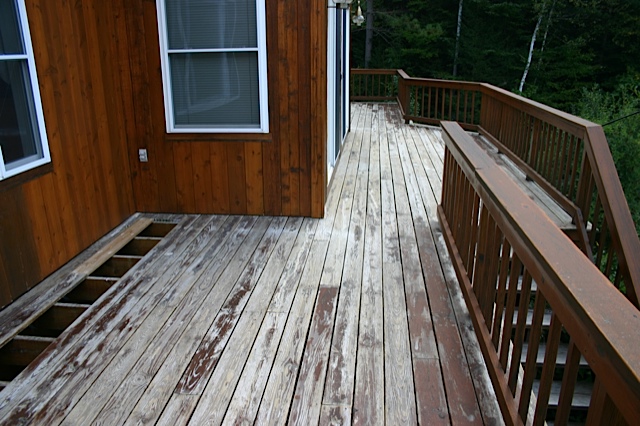
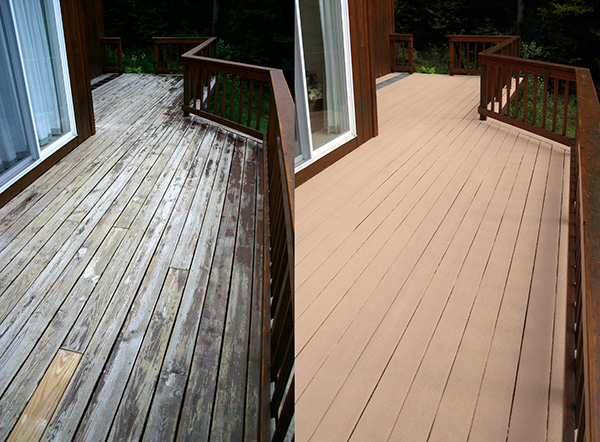
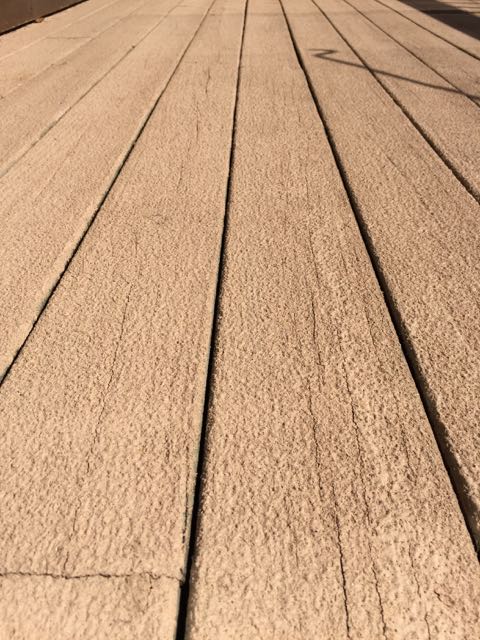
Our deck is large and is south facing which means it gets a lot of sun during the summer. One thing I really enjoy about this product is the deck surface does not get hot! You can walk on the surface in bare feet during the height of a hot summer day and not burn your feet!

Our deck also gets a lot of snow! We keep it shoveled but during the winter it still gets a lot of snow on the surface and then using a snow blower or shovel the snow is removed.

We got a lot of snow!

For the most part the deck surface has held up very well. As you can see from the close up photos there are a few cracks that are starting to appear.cracks in deck
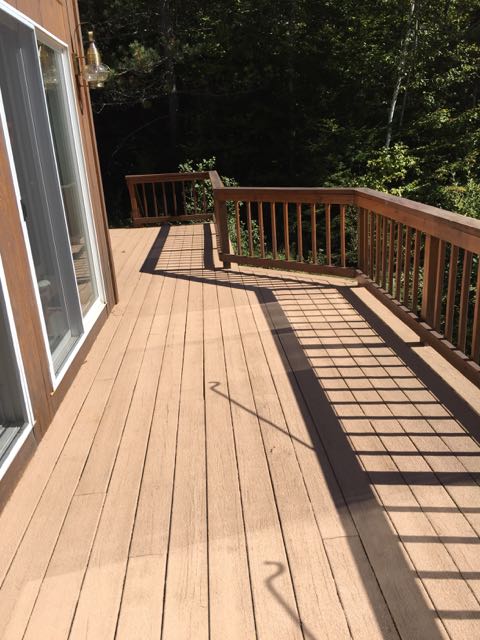
Along the edge in one place the paint is actually chipping off! This is only happening in one spot along the edge.Paint chipping in one spot.
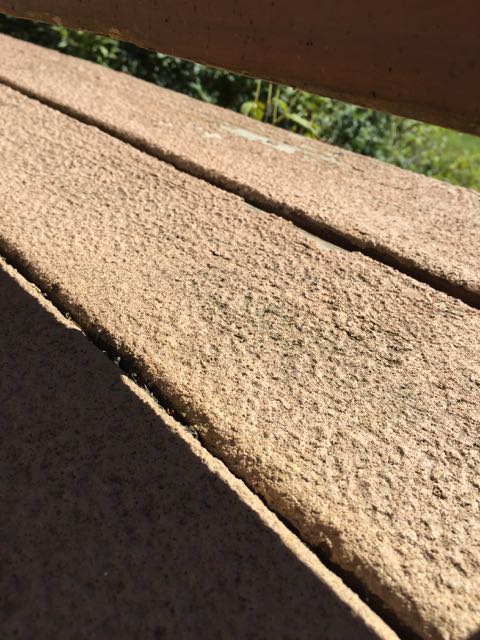
The deck could also use a power wash as in some spots it has collected some dirt, mostly from the birds! We hang several bird feeders during the winter and the birds like to scatter the seeds on the deck!deck

My husband decided to touch up the few areas that were chipping and was amazed to find the paint was still viable and the chips were easily repaired.

Overall we are extremely satisfied with this deck product. Rather than replacing our deck three years ago we have extended the life of the deck and it will probably be several more years before we go ahead and replace the wood! We would highly recommend this product. The paint is expensive, but not nearly as expensive as a new deck. It’s not slippery when wet, and it doesn’t get as hot as the stained deck used to. It won’t last forever, but it should give your deck many more years of use before the boards have to be replaced.

Avoid Waste- Upcycle Your Leftovers

A heel of bread here, a nubbin of celery there, these are often items that go bad before they can be used up. Learn how to handle them and you’ll achieve total leftover dominance! Leftovers may dry out as solids soak up the liquid over time. Resuscitate them and change the flavor by adding a different liquid. You can bolster the dish by adding a fresh ingredient and a new herb. Or puree it so it’s texture goes from chunky to smooth.

Add stock to your casserole and serve as a hot soup. This works well for casseroles that contain rice or beans. I have a favorite casserole I like to make that is basically sausage, lentils and tomatoes. To make a delicious soup I add a container of lentil soup. It’s delicious!

Lentil Soup
Lentil Soup

Make a stir-fry using leftovers. Just refry with a new ingredients and add some salad dressing. Thin with a sauce and serve over pasta, lentils or grains. I think stir-fries are one of the best ways to use up leftovers.Five Spice Pork Stir Fry

With leftover chickens or pork it is best not to reheat too often or the meat will dry out. Instead chop up the left overs and add to soups, stews or pasta dishes. I love using a jar of curry sauce over leftover chicken. Add some chopped carrots and make a whole new dinner!

Chicken or Turkey Curry

Have some leftover celery in your crisper drawer? Chop and mix into green salads, slice the celery into thin sticks for a quick snack or add to your next soup!

Irish soup. homemade
Irish Yellow Broth

There are endless ways to use up leftovers. Keep an eye on what’s in your fridge and don’t let food go to waste!

Pineapple Casserole – So Good

My mother-in-law is an excellent cook and has introduced me to many wonderful recipes over the year’s. Pineapple Casserole is one of those delicious casseroles that makes an excellent side dish. Maybe you want to serve it over the holidays. It goes wonderfully with ham. I’ve also served it with fish and it was amazing. As you can see from the photo we almost finished it up before I remembered to take a photo!

Whether you are serving this recipe for your Easter dinner or just as a side dish during the week it will be a hit. Whenever I make it there is seldom leftovers to worry about!

Pineapple Casserole

Ingredients:

½ cup sugar
3 Tbsp flour
3 eggs
20 oz can crushed pineapple, unsweetened
4 slices of bread, cubed
1 stick butter, melted

Directions:

Combine the sugar, flour and eggs in a medium size bowl.  Add the crushed pineapple with juice (don’t drain the pineapple).

casserole topping, prudent living


Mix the melted butter with the cubed bread and add the cubed bread to top casserole. Top casserole with the bread crumbs.

Bake 350 for one hour. Serve with your main dish.

Casseroles, Easter

As you can see it was a big hit!

home cooking, pineapple, bread

Exploring Yellowstone

Friday we left Keystone, South Dakota and headed west, our destination was Portland, Oregon. It was a beautiful day for a drive although we experienced high winds along the highway! We stopped for the night in Livingston, Montana just an hour north of the north entrance to Yellowstone. There was snow in the forecast  but we decided to head to Yellowstone and do a little exploring. We were cutting it kind of close as the park closes for the winter November 2 which was just a few days away!

Saturday the weather was overcast but it wasn’t raining or snowing! It was a beautiful drive into Yellowstone. Very hard to capture it on film but the scenery was incredible.Yellowstone National Park 
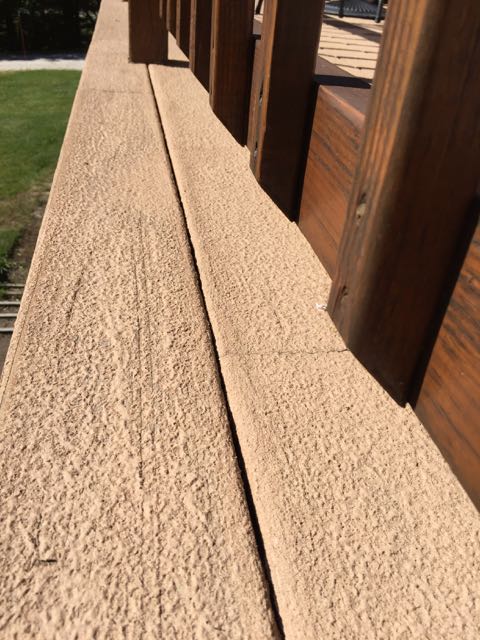
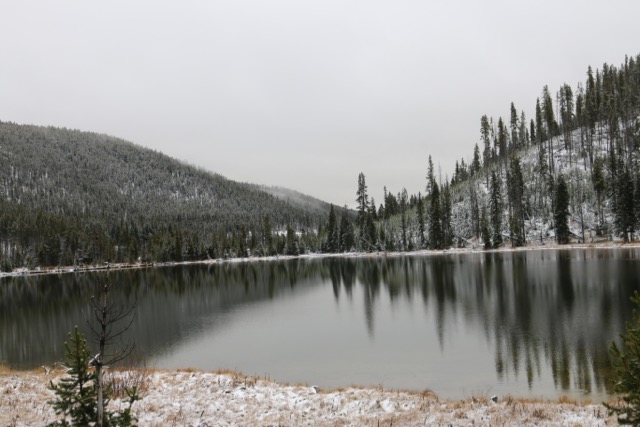
Snow capped mountains all around us. As we headed toward Old Faithful we stopped at every place on the map where there was something special to look at.Yellowstone National Park 
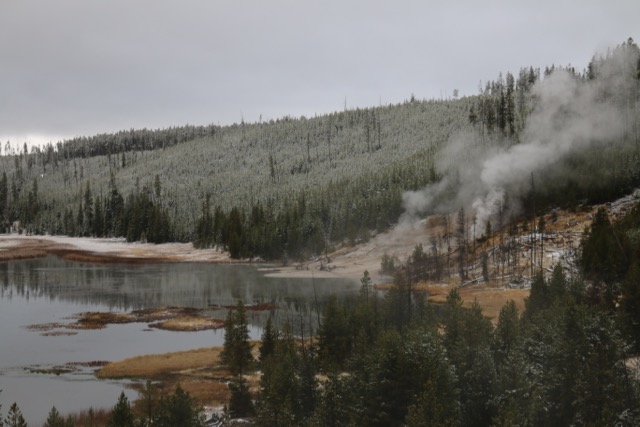
It was so cold that everything was steaming. Almost looked like forest fires!Yellowstone National Park 
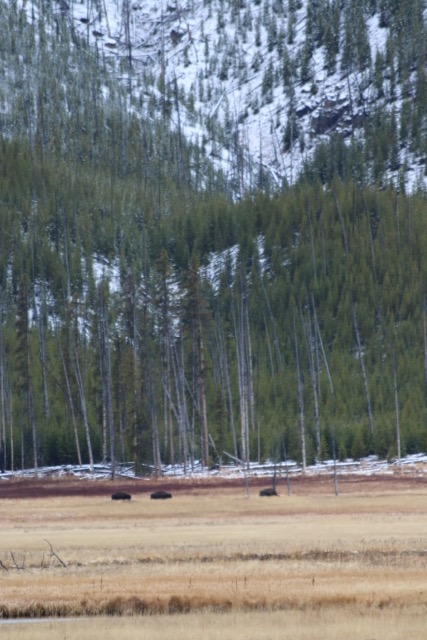
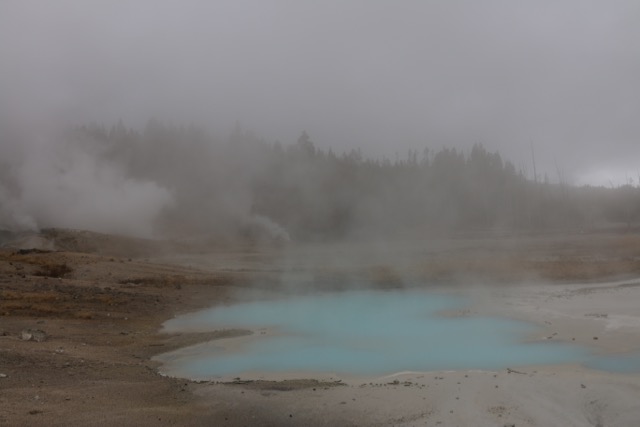
We saw numerous bison.Bison 
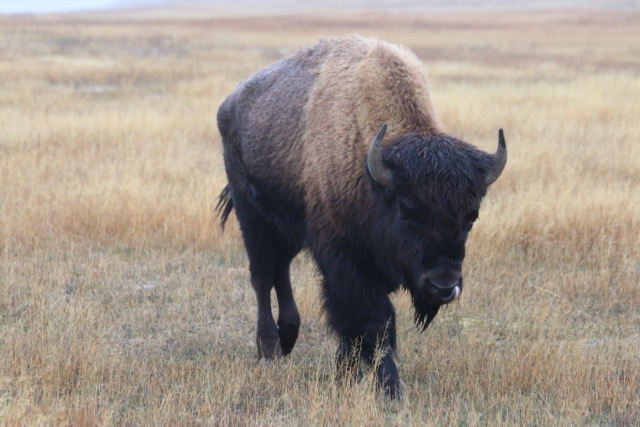
We also saw this coyote or young wolf chasing mice in the field.Young wolf 
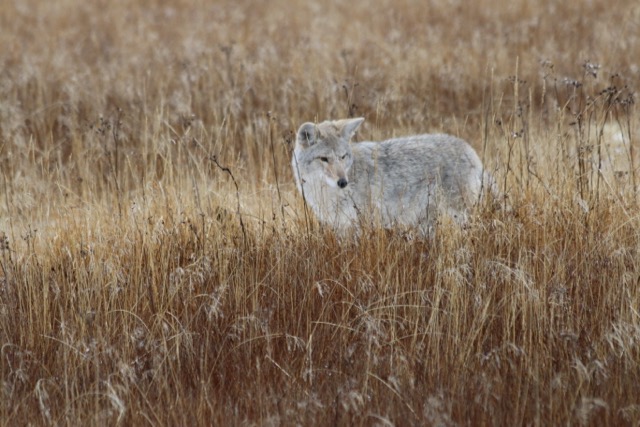
He had no fear of us and eventually crossed right in front of the car!Young wolf 
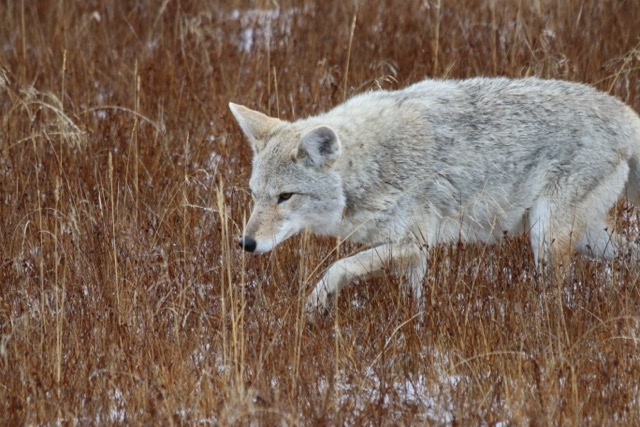
There was also elk feeding along the road.Elk 
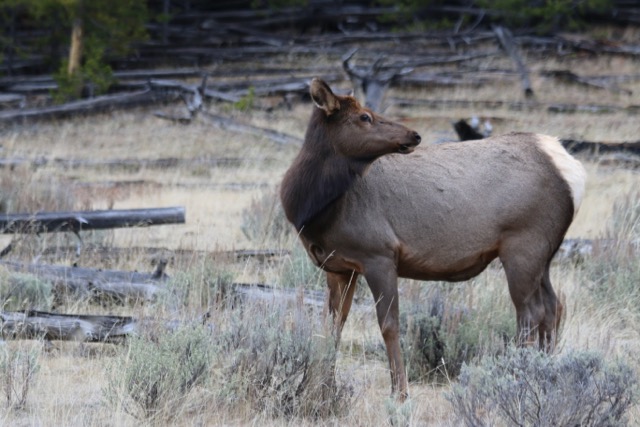
It was a wonderful day, very few people in the park even around Old Faithful! Old Faithful 
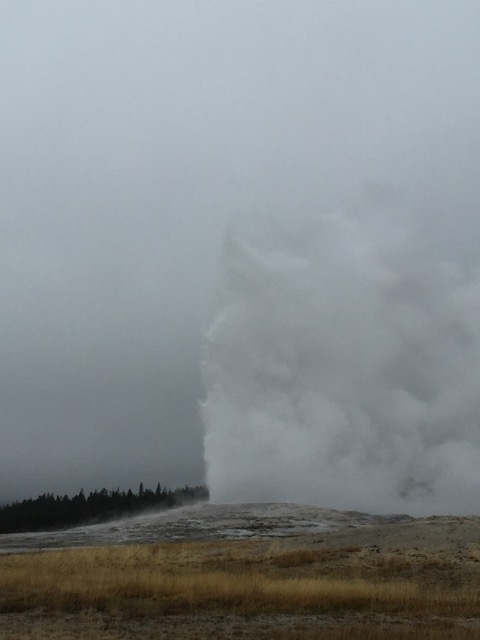
We spent about six hours in the park before heading on. We still had miles to go before we reached Portland!Yellowstone National Park

Design a site like this with WordPress.com
Get started