Tuna Tostadas Unusual but Delicious

Tuna Tostadas is one of those recipes that you may look at the list of ingredients and think “no way”! It’s an unusual combinations of flavors. However proceed with an open mind and give it a try, you’ll be glad you did.

We usually enjoy this recipe for dinner but you could also cut them into wedges and serve as an appetizer if you wanted. either way it’s bound to be a hit and enjoyed by all!

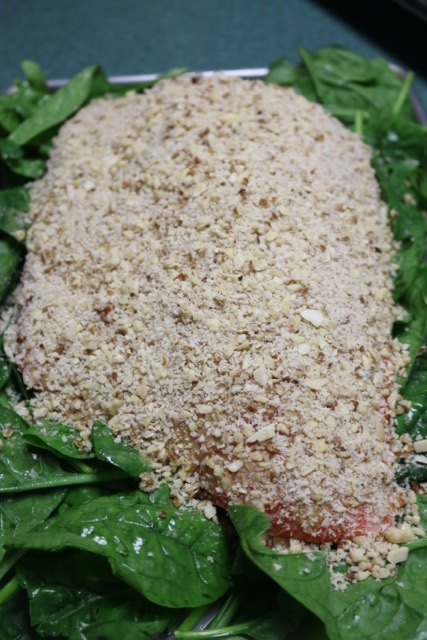
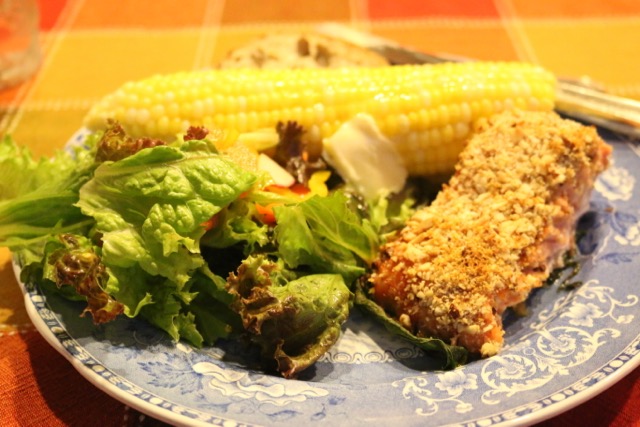
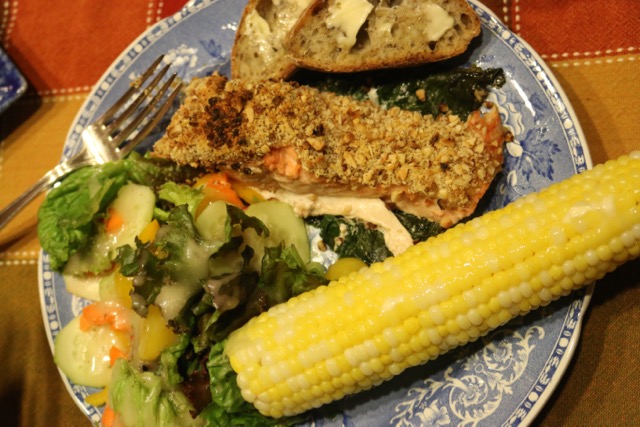
Tuna Tostadas – Unusual but Delicious

Ingredients:

1 – 6oz can of tuna, drained
1 Golden Delicious apple, chopped
1 dill pickle, minced
¼ cup mayonnaise
1 Tbsp liquid from the dill pickle jar
1 tsp Dijon mustard
Pinch tarragon
Pinch of pepper
¼ cup oil
4 large flour tortillas
1 1/3 cup shredded lettuce
1 ½ cup grated cheddar cheese

Directions:

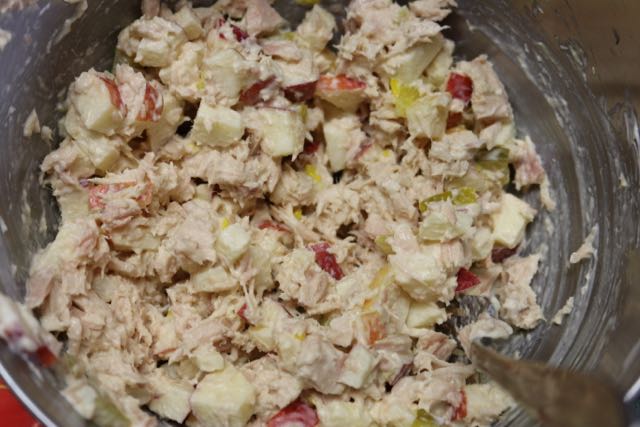
Flake the tuna into a bowl. Add the chopped apple and pickle and toss the ingredients lightly. Add mayonnaise, pickle juice, mustard, tarragon and pepper. Mix well. Cover and refrigerate.

Combine ingredients and refrigerate.

While the tuna mixture is chilling preheat the broiler. Heat ¼ cup oil in a large pan. Fry tortillas one at a time until golden brown, about one minute on each side. Drain on paper towels. Arrange tortillas on a large baking sheet. Sprinkle each tortilla with some lettuce. Divide the tuna mixture evenly amount the tortillas. Top with the cheddar cheese.

Ready for the oven.

Run the tortillas under the broiler just until the cheese melts, about one minute.

Tuna Tostados

Serve hot and enjoy!

Tuna Tostados

Makes four servings.

Planting Garlic in the Fall

We’re getting ready to go on a big adventure this fall. More about that later, but as we get ready to go away many of the chores include the garden. It’s such a busy time of year. Children heading back to school, vegetables to be harvested from the garden and it’s also time to plant the garlic. Here in Vermont we plant garlic in the fall and harvest it in late July.garlic bulbs, garlic sets, garden

I love growing garlic here in Vermont. It is one of the more satisfying plants to grow. Once the garlic bulbs are planted there is really not much more you have to do until it’s time to cut the scapes! Plus I always seem to have a wonderful and abundant crop of garlic that lasts until the following season.

Planting garlic is very easy. Prepare your garden bed. Prepare your garden bed.
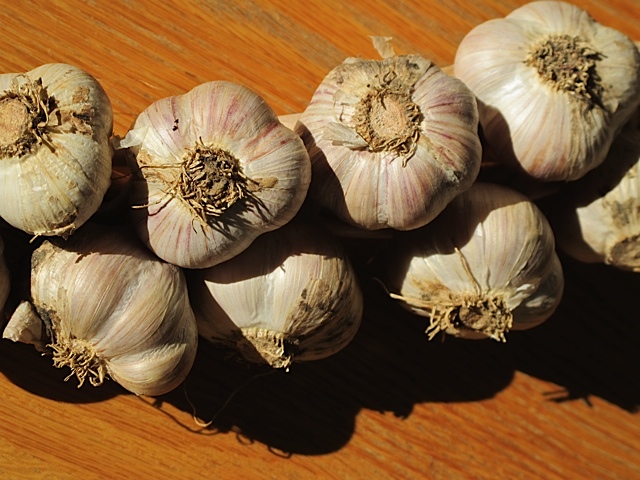
Break the garlic bulbs into individual cloves.Individual garlic cloves 
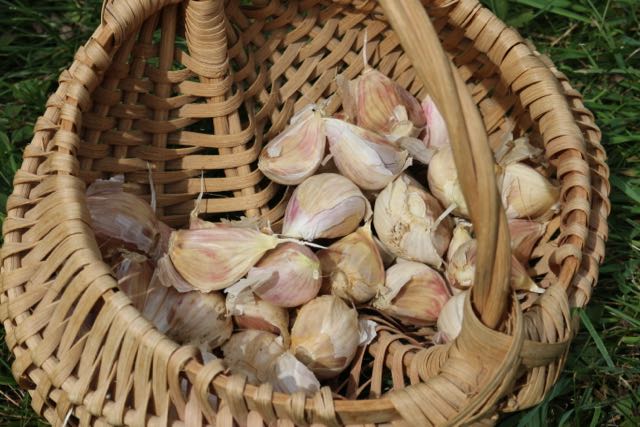
I plant hard necked garlic which does extremely well for me.

Plant each clove about 4 inches into the soil, about 5-6 inches apart.Plant garlic evenly Cover lightly with soil. They should be far enough into the soil so the frost doesn’t push them up. Once the garlic is planted mulch the garden bed with straw.Cover the bed with straw 
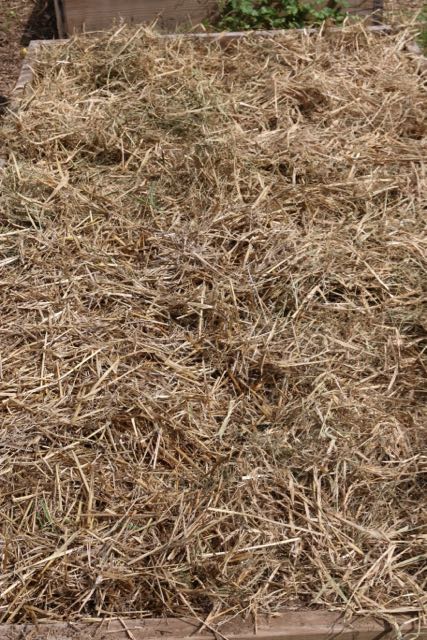
Nothing else to do but wait until next summer when it’s time to harvest! In the meantime I’ll be enjoying the garlic I harvested this year!garlic bulbs, garlic sets, garden

Have you tried growing garlic in your garden?

Mozzarella in Minutes

If you are at all interested in making cheese you should try making mozzarella! In thirty minutes or so you can have a fresh batch of mozzarella and you don’t need any special equipment other than some rennet, citric acid and cheese salt and of course milk! If you want to try making your own cheese this is the cheese to try as you can have a batch of Mozzarella in minutes!

mozzarella, homemade cheese

Mozzarella in Minutes

Ingredients needed:

1 ½ tsp citric acid dissolved in ½ cup cool water
1 gallon milk (you may use skim but the yield will be lower and the cheese drier)
¼ rennet tablet diluted in ¼ cup cool, un-chlorinated water
1 tsp cheese salt (optional)

mozzarella, cheese making, prudent living

Directions:

While stirring, add the citric acid solution to the milk at 55F and mix thoroughly. Heat the milk to 90F, stirring constantly. Remove the pot from the heat and slowly stir in the diluted rennet with an up and down motion for about 30 seconds. Cover the pot and leave undisturbed for 5 minutes.

Check the curd, it should look like custard with a clear separation between the curd and whey. If the curd is too soft, or the whey is too milky, let set for a few more minutes. Cut the curd with a knife that reaches all the way to the bottom of your pot.

Place the pot back on the stove and heat the curds to 110F, gently moving the curds around with your spoon.  Remove from the heat and continue to sir slowly for 2-5 minutes. (Stirring the full minutes results in a firmer cheese)

curds, whey, homemade cheese

Forming the cheese:

Scoop out the curds with a slotted spoon and put into a 2 quart microwaveable bowl. Press the curds gently with your hands, pouring off as much whey as possible. Reserve the whey.

Microwave the curds on high for 1 minute. Drain off excess whey. Gently fold the cheese over and over (like kneading bread) with your hands or a spoon. This distributes the heat evenly throughout the cheese. Microwave two more times for 35 seconds each, add salt to taste after the second time. After each heating, knead again to distribute the heat.

Knead quickly until it is smooth and elastic. When the cheese stretches like taffy it is done. When the cheese is smooth and shiny, roll it into small balls and eat while warm. Or place them in a bowl of ice water for ½ hour to bring the inside temperature down rapidly. Best eaten fresh, but if you must, cover and store in the refrigerator.

mozzarella, homemade cheese

Yield: ¾-1 pound

homemade cheese, mozzarella

This recipe and my other cheese recipes are from the book Home Cheese Making by Ricki Carroll. An excellent book for beginner cheese makers.

Zucchini Fettuccine Alfredo

I love using my spiralizer to create zucchini noodles. I use the noodles is all sorts of ways. Sometimes I use zucchini noodles in place of pasta when serving spaghetti and meatballs. I also love this Chicken and Zucchini noodle recipe I found on the Lean Green Bean blog. This Zucchini Fettuccine Alfredo is another way to use zucchini noodles instead of pasta.

Chicken and Zoodles

I’ve recently been experimenting to create a Fettuccine Alfredo using zucchini noodles and a light sauce. This extra light Alfredo sauce for pasta gets its silkiness from fresh ricotta and grated Parmesan cheese. I think it’s a winner! Perfect all by itself of serve a s a side dish with grilled steak.

Zucchini Fettuccine Alfredo

Ingredients:

3-4 zucchinis sliced into noodles (or use a spiralizer)
2-3 cloves garlic, chopped
1 cup of ricotta cheese
½ cup finely grated Parmesan cheese
¼ cup chopped fresh basil leaves
salt and pepper to taste

Directions:

Prepare your zucchini. either use a spiralizer or a sharp knife to create zucchini noodles.Spiralized Zucchini 
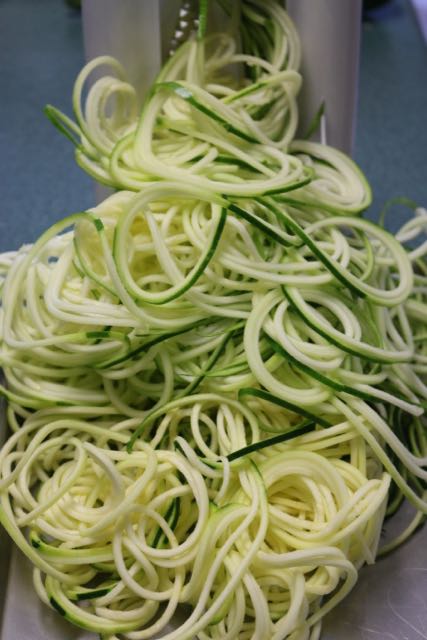
Once the zucchini is spirlaized place it in a colander and lightly salt.Ingredients

Allow the zucchini to sit for 15-20 minutes to remove some of the water from the zucchini. Give it a quick rinse and squeeze dry with paper towels.

Spray a large pan with cooking spray and add the zucchini and the garlic. Cook until the zucchini tender but not soft. Remove the noodles and set aside. Add the ricotta and the ½ cup of Parmesan to the pan, stir until smooth. Add the zucchini back to the pan. Add the basil and season with salt and pepper.Zucchini Fettuccine 
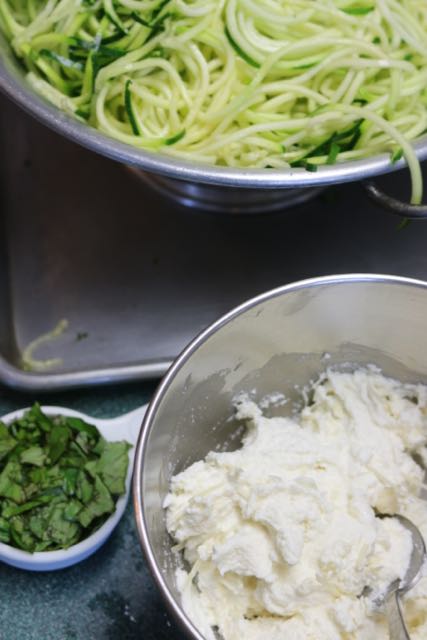
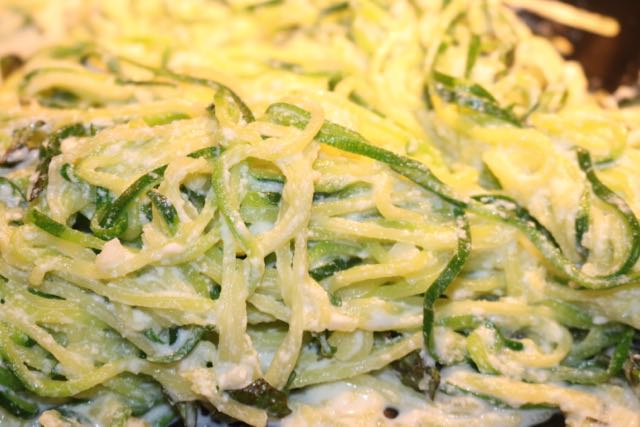
Serve immediately. Delicious!

Zucchini Fettuccine
I am so impressed by how delicious zucchini noodles are I have been using them in all sorts of recipes. I am not missing my pasta at all!

Saving Your Tomato Seeds

This year I grew some amazing little yellow tomatoes, called Snow White Cherry Tomatoes.Cherry Tomatoes 
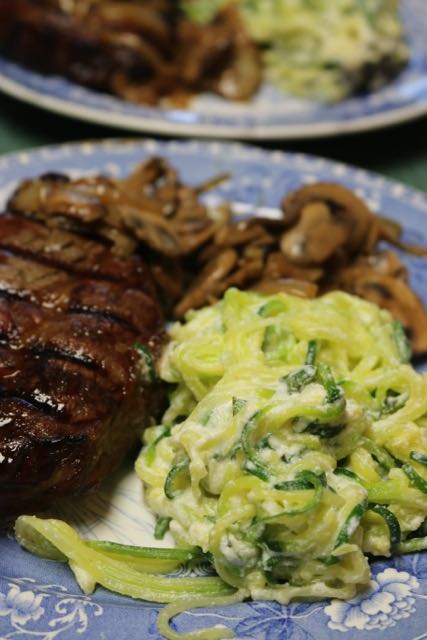
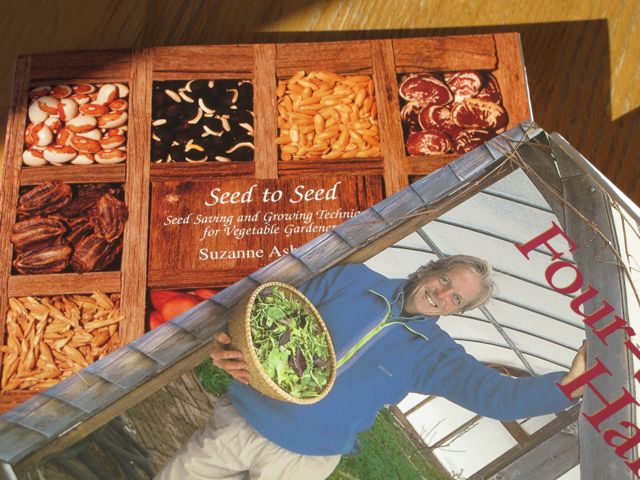
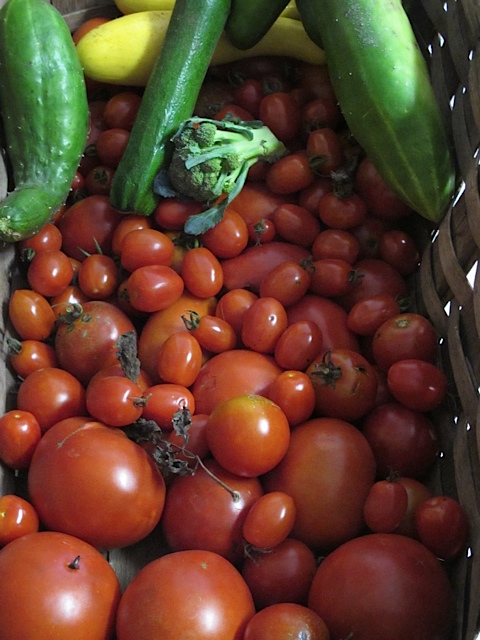
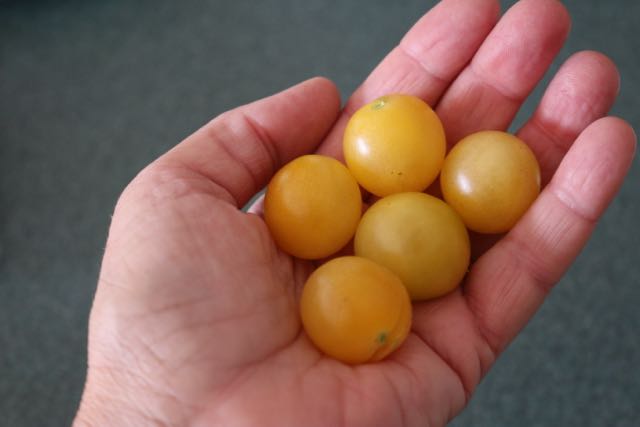
They were an heirloom cherry tomato and so tasty. I decided to save the seeds. Did you know that Tomato seeds are one of the easiest seeds to save other than beans! Most tomato plants will not cross with another tomato due to their retracted styles. (Remember those plant parts from Biology?)

The first step in saving tomato seeds is to cut the tomato in half.Cut the tomatoes in half.

Squeeze the tomato into a container, I used a pint size mason jar.

To aid in the seed separation I added about a cup of water to the tomato mixture.tomato seeds

Each tomato seed is encased in a gelatinous sack. The gel in these sacks contains chemicals that inhibit seed germination. This is why the seeds don’t sprout while in the tomato! In nature the tomatoes fall off the plant and begin to rot. Eventually the fruits totally rot away leaving the seeds on the surface ready to sprout when the conditions are right.

In my cup of tomato seeds and water a layer of fungus will grow across the surface.Fungus on surface 
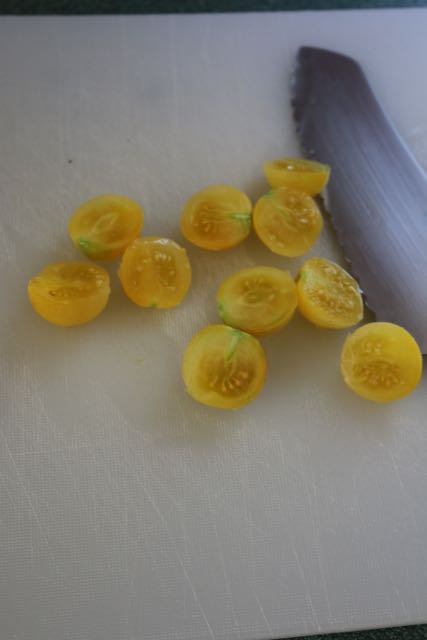
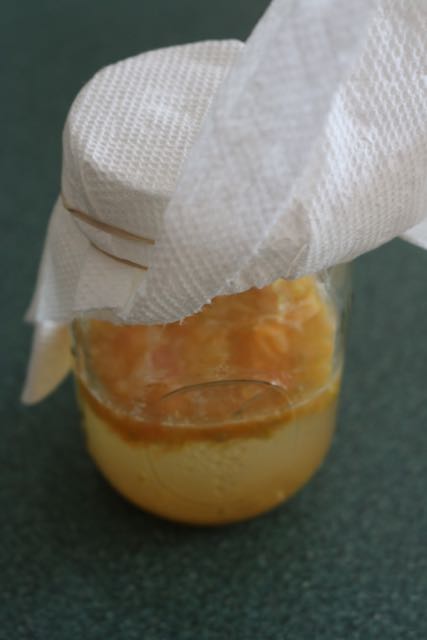
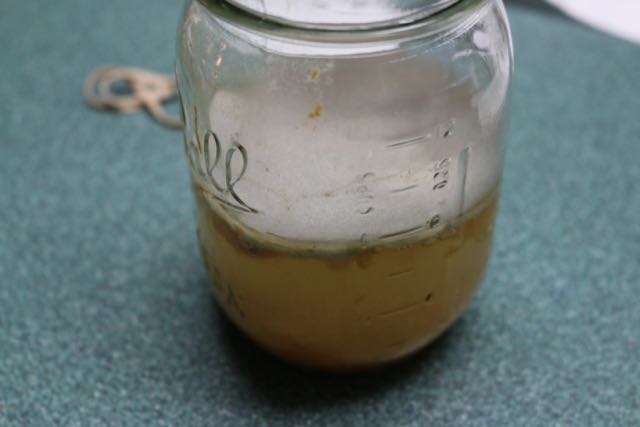
Once the mold is growing across the surface I pour the seeds, liquid and fungus into a strainer. The seeds are washed clean by rubbing the mixture against the strainer under running water. Once the seeds are washed clean place them in a coffee filter or on a paper towel. Tomato seeds tend to stick to paper towels, the coffee filters work better at wicking away the moisture and allowing the seeds to completely dry.drying tomato seeds

Once the seeds are dry store them in a container in a cool, dark place.Be sure to label your seeds! In the spring you will have your own tomato seeds to grow!The tomato seedlings are doing just fine.
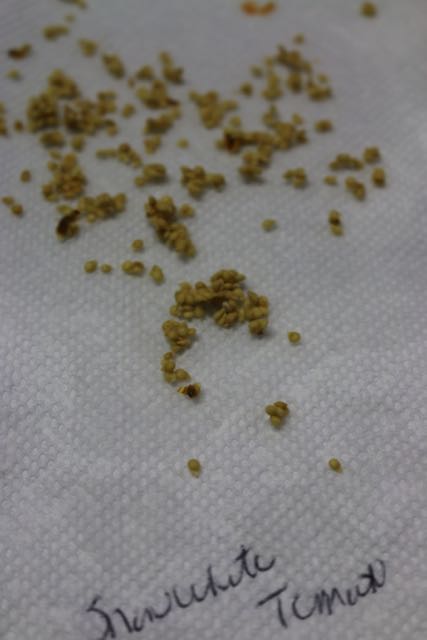
Linked to many of my favorite blog parties (see side bar). Also linked to:
”Wildcrafting

Turning Takeout into Make In

If you live in a populated area, there are probably numerous places that serve or deliver cheap, fast takeout food. If you’re juggling a busy schedule, chances are you take advantage of these services at least a couple times a week.

However convenience comes at a price. Spending $10 on dinner may seem economical, but that one dish is worth a fraction of the cost in ingredients. The price tag of that one dinner can translate into hundreds of dollars over the course of a year. Not to mention the packaging and disposable containers, and the food is usually higher in fat, calories and salt than just about anything homemade!Don't worship money!

If you want to save money start with a time out on take out and make it yourself. What is your favorite take out? Is it pizza, stir-fry or curry? These are all easy meals to make even for a beginner cook. The key is to plan ahead and stock your pantry or freezer with the right ingredients. Before you make your regular trip to the grocery store check your pantry and stock up on what you need. An occasional trip to an ethnic market may be in order, but it will be worthwhile.

You can buy some wonderful jars of curry sauce. All you need to do is add some vegetables and meat and you have an instant dinner. Here are a few steps to get started on “make-in” dinners.

Chicken or Turkey Curry

Think ahead about which dishes you eat out most often. Look up recipes for the foods you tend to order. Focus on recipes that are fast and easy.I love family recipes.

Stock your kitchen with the necessary ingredients. Do you need fish sauce? Coconut milk? Buy enough so you have them on hand for when you need them.pantry, prudent pantry, well stocked

Make the freezer your best friend. Slice up ingredients and tuck them away in a small freezer container so they are ready when you need them.

If you love Asian or Indian food consider purchasing a rice cooker. It will ensure perfect gains at practically zero effort.

Consider using your slow cooker. That way you can put the raw food in before you leave for work and come home at the end of the day with a delicious meal waiting.beef, stock

For a quick homemade pizza purchase a pre-baked pizza shell. Work with frozen pizza dough or learn to make pizza dough. Homemade pizza can be a very quick meal and fresh always tastes better than take out!

Sausage and Pepper Pizza

Liver Treats For Riley

Last year we purchased ¼ cow for our freezer. One of the packages of meat we got was the beef liver. Since neither my husband nor I are very fond of liver I decided to make Liver Treats For Riley, our Boston Terrier. This was a simple recipe I found which I thought I would try. You can mix up a batch and store it in the freezer for as long as three months. Be warned as it is a bit nasty chopping up liver in a food processor!

Liver Treats For Riley

Ingredients:

1 pound of sliced beef liver
¼ cup water
1 small box of corn muffin mix

Directions:

Preheat your oven to 350 degrees. Spray an 8.5 x 11 inch baking pan with cooking spray.

Grind the liver in a food processor one slice at a time. Add a little water with each slice so you end up with a liquid.

Thoroughly combine the muffin mix and the liver liquid in a large bowl.

Pour the liver mix into the prepared pan.

Liver treats ready for the oven.

Bake until the middle springs back at your touch, 20-25 minutes.

Cool and cut into small cubes. I think Riley approves!

Liver treats

I split the treats into two batches, both stored in an airtight container. One went into the refrigerator to use immediately and the other went into the freezer for later use. Riley absolutely loves these treats!

Store in an airtight container.

Organ meat, while good for your dog, is too rich to be given in large amounts.

Roasted Tomato Sauce

As the harvest season dies down an we get ready to head into fall one of the sauces I love to make is Roasted Tomato Sauce. We use it on our pizzas and it is a great way to use up the variety of tomatoes still coming in from the garden.

tomatoes, sauce

Roasted Tomato Sauce is a simple recipe. The recipe calls for 4 pounds of tomatoes, and I have to admit I just cut up enough tomatoes to fill my 11×14 pan. Remove the core from the tomato and chop them up. You can use any type from Roma to cherry tomatoes.

To the cut up tomatoes add one coarsely chopped onion, ¼ cup of fresh herbs of choice or a smaller amount of dried herbs. I’ve been adding a mixture of dried Italian herbs to the tomatoes. I also add 3 large garlic cloves, chopped. To the mixture add 1/8 cup of olive oil and salt and pepper to taste. Stir the whole mixture and place it in a preheated 450 degree oven. Roast for 70 minutes without opening the oven door.

pizza sauce, prudent pantry, Roasted Tomato Sauce

Remove from the oven, let cool and run through a food mill.

sauce, tomatoes, prudent living
Sometimes I cook the sauce down to thicken it.

prudent pantry, Roasted Tomato Sauce

This recipe I do not can, instead I place 2 cups of sauce in freezer containers and it is ready for our homemade pizza! 2 cups is just enough for 2 pizzas.

pizza, tomato sauce

Saving Lettuce Seeds

Often I speak about saving money, but today I want to talk about saving lettuce seeds! In June we went away for two weeks. My garden had all been planted and I had some wonderful Butter Crunch lettuce that was coming along nicely. It just wasn’t ready to pick yet.

When we got home the lettuce had bolted.Bolting lettuce 
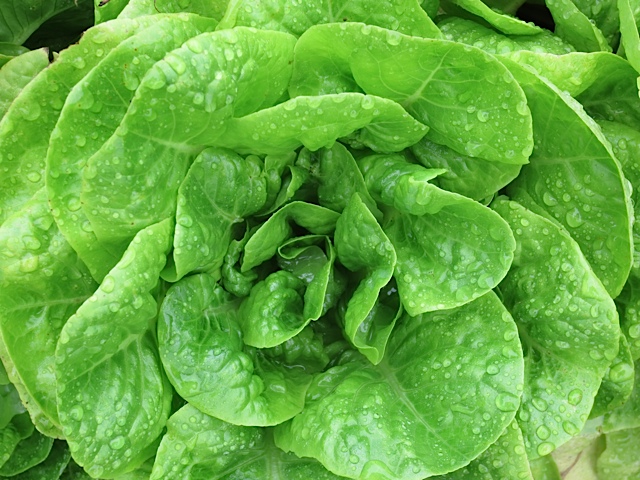
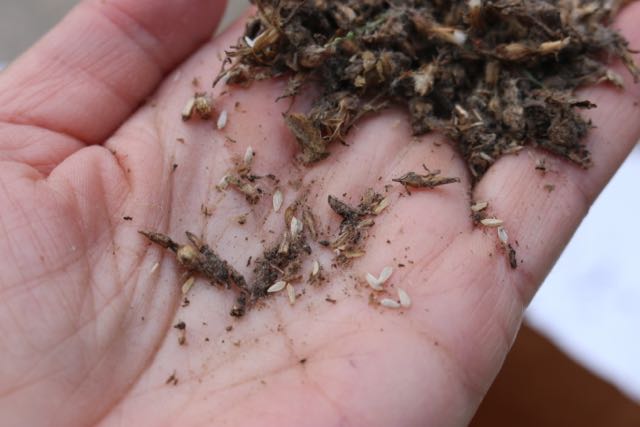
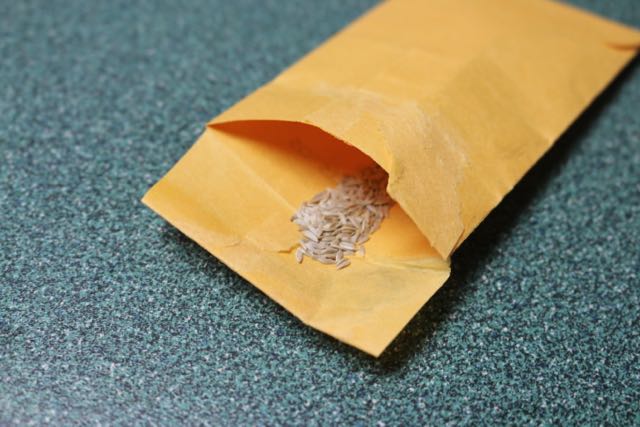
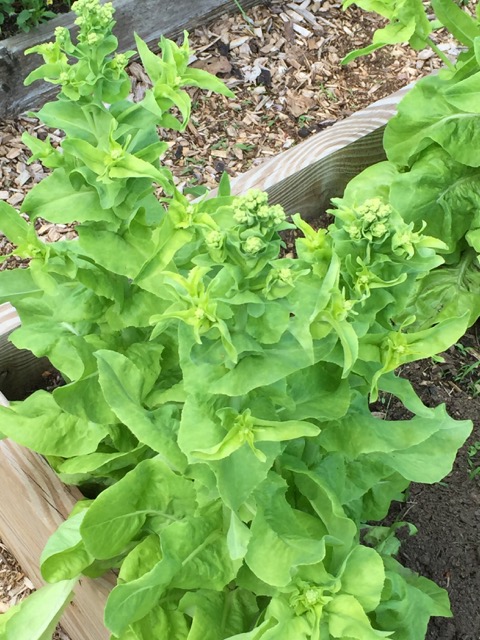
Rather than pick it and feed it to the chickens I decided to let it go to seed and collect the seeds. Because the plants were isolated and I didn’t have any other lettuce going to seed I didn’t worry about cross-pollination. Lettuce is an inbreeding plant. Lettuce flowers form in heads of 10-25 individual florets. Each floret is one celled and produces one seed. Lettuce seeds ripen irregularly and are ready for harvest from 12-24 days after flowering. The easiest way to collect the most seeds is to shake the seed heads daily into a large grocery bag that is then stored in a dry area.

Seed head in paper bag

More than half of the seed volume will be white lettuce feathers and chaff.

Tiny lettuce seeds among the chaff.

It is best to use a fine mesh screen to separate the seeds.

Lettuce seeds will remain viable for three years when stored in a cool, dry, dark location. I have a bunch of little envelopes that are perfect for storing seeds. Be sure to label your seeds!

Storing lettuce seeds

Hopefully next year I will plant these lettuce seeds and enjoy a nice harvest!greens, garden

If you are interested in learning how to save seeds one of the best books around is Seed to Seed by Suzanne Ashworth.

Be inspired to garden year round or save your seeds.

Linked to many of my favorite blog hops (see link in sidebar) also linked to:
”Wildcrafting

Nut Crusted Salmon

I love finding new ways to enjoy Salmon. Usually we cook it on the grill but in this recipe the salmon cooks in the oven. I adapted this recipe from a recipe I found on Taste of Home. This Nut Crusted Salmon can be prepared ahead which makes it a perfect dish to serve for company. You can prepare the salmon and then refrigerate until ready to put in the oven.

Nut Crusted Salmon

Ingredients:

1 pound of fresh baby spinach
1 ½ pounds of salmon
1 tsp. olive oil
3 Tbsp. honey
3 Tbsp. Dijon mustard
¼ cup panko breadcrumbs
2 Tbsp. sliced almonds
2 Tbsp. chopped pecans
¼ cup mayonnaise

Directions:

Place the spinach in a 13 x 9 inch baking dish that has been sprayed with cooking spray. Top with the salmon. Drizzle oil over the spinach.

Combine honey and mustard. Remove 2 Tbsp. of the mixture and brush over the salmon. Place the panko crumbs, almonds and pecans in a small food processor; cover and process until ground. Press the nut mixture onto the salmon.

Salmon ready for the oven

Stir mayonnaise into the remaining honey mixture. Refrigerate until serving.

Bake the salmon, uncovered, at 450 for 18-22 minutes or until the fish flakes easily with a fork.

Nut crusted salmon

Drizzle with the reserved sauce. Serve with brown rice. Makes about 6 servings.

Nut crusted salmon

Side note: Remember that sauce I made with the extra honey-mustard? Well I made it, put it in the refrigerator to chill and did’t think of it again until after we finished the salmon… The salmon was very good but I’ve tried it with the sauce and it was even better!

Design a site like this with WordPress.com
Get started