The Garage Smells Like Garlic!

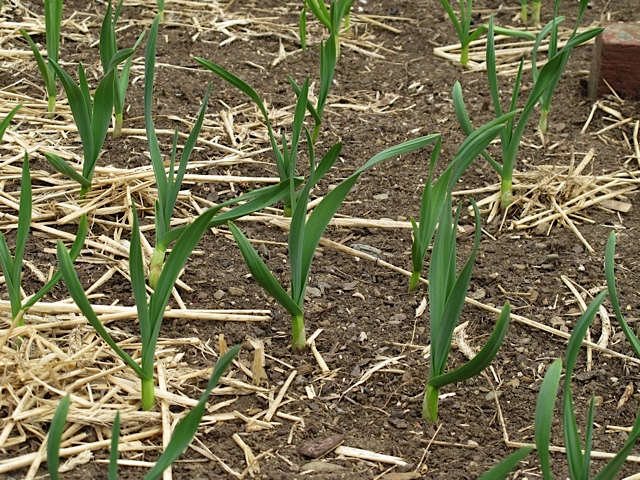
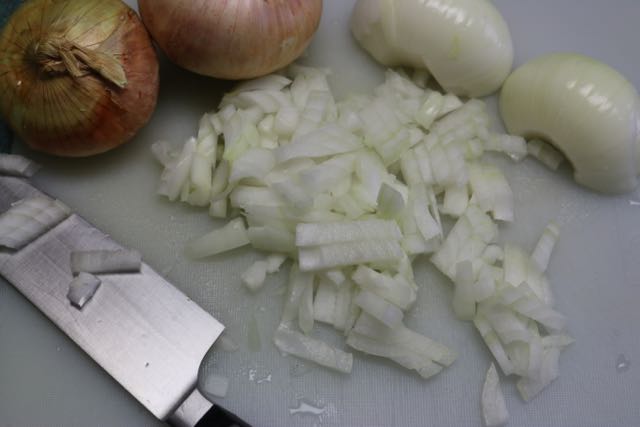
I have been growing garlic every year for a while now. I have great luck with it and manage to grow enough to just about last us all year! You can read about planting garlic here. I usually plant my garlic in early September. It then has time to establish itself before the cold weather sets in.

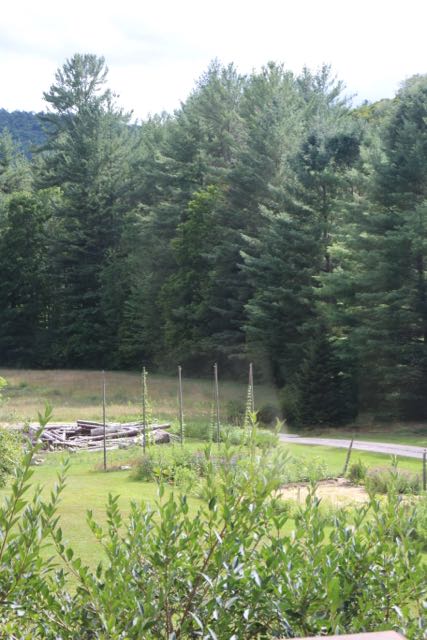
In the spring the garlic is one of the first crops to peek through the hay.

bulbs, vegetable garden
Garlic

I keep an eye on it and when the garlic scapes form I cut them off.

harvest, garlic, prudent living
Garlic Scapes

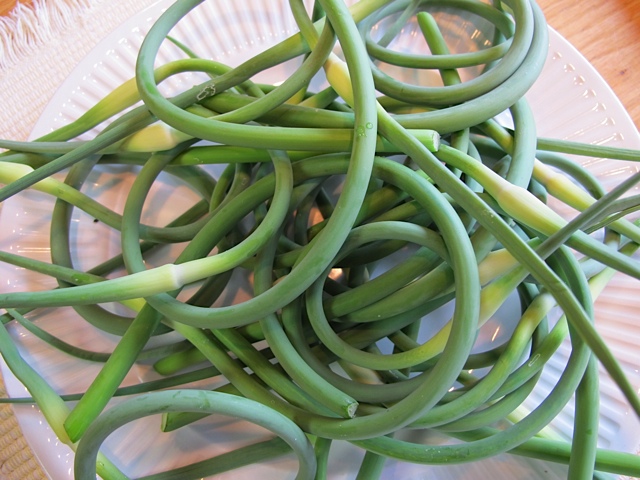
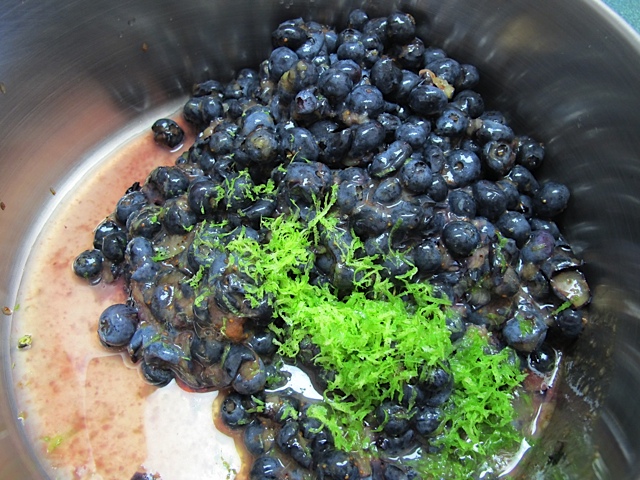
I’ve used the scapes to make garlic scape pickles, garlic scape pesto and even garlic scape scampi! Yes we love our scapes and we love our garlic.

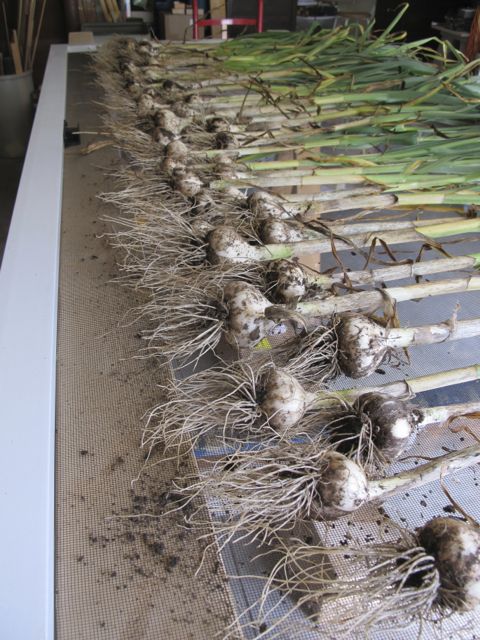
In August I keep an eye on the garlic, when the tops start to turn brown it is time to harvest. Like last year I was concerned because the stalks seems skinny and I wondered how big the bulbs would be. I did not have to be concerned because as soon as I pulled the stalks I was pleased. The bulbs were all good sized!Nice size garlic bulbs.

After I brushed off all the dirt I set up the garlic in out garage on an old window screen. I will let it dry for a few days before I braid it.

Garlic drying
Garlic drying

Once the garlic in braided I will hang it to dry in our garage.

garlic bulbs, garlic sets, garden
Garlic bulbs braided together.

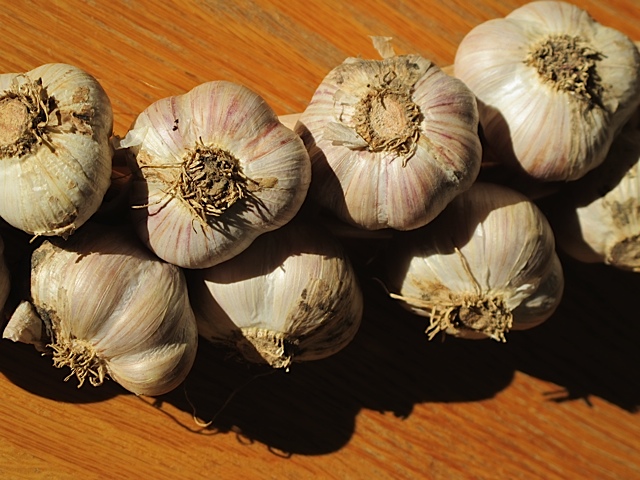
I think our garage will smell like garlic for a while!

My Favorite Window Cleaner

Summertime is a perfect time to clean your windows. Do you have a favorite window cleaner? We have a lot of glass in our house and I am very particular about what I use to clean the windows. The last thing I want is a cleaner that will streak the windows! And finding dirty windows was not a problem!dirty window

One of the first products I began to make myself was a window cleaner. A good friend shared her recipe years ago and I’ve been using it ever since! With just several basic products you probably already have in your home you can make a window cleaner that really does get your windows clean! In researching various homemade window cleaners I found there are two main recipes; one uses vinegar and the other ammonia. I’ve been using the one with ammonia, I decided to make three and compare.window cleaners

Window Cleaner #1: This can be made right in your spray bottle. Mix ½ tsp dish detergent, 3 Tbsp vinegar and 2 cups of water. Shake it up and use like any commercial variety.Cleaner #1

Window Cleaner #2: This can also be made in your spray bottle. Combine 3 Tbsp ammonia, 1 Tbsp vinegar and 2 cups of  water.

My Favorite Window Cleaner #3: This can also be made right in your spray bottle. Combine ½ cup ammonia, ½ cup isopropyl rubbing alcohol and ½ cup water.Cleaner #3

What an interesting experiment! I made all three versions and I have to say I still love our favorite mixture. I think the rubbing alcohol helps to dry the window quickly without any streaking. However, that said the other two versions also worked well. It was hard to find three dirty windows exactly the same. So this wasn’t the most scientific experiment! However, I was pleased with the end result. In trying out all the various cleaners I ended up with a lot of clean windows!Clean window


The one thing I can say it that it’s a lot cheaper to make your own cleaner than to buy it at the store!Make your own window cleaner!

Linked to some of my favorite link parties!

Nancy On The Home Front
<div align="center"><a href="https://nancyonthehomefront.com" title="Nancy On The Home Front"><img src="https://nancyonthehomefront.food.blog/wp-content/uploads/2020/02/99301-button_170x170-copy4.jpg" alt="Nancy On The Home Front" style="border:none;" /></a></div>


Vegetable Summer Rolls

Have you ever tried making your own summer rolls? These vegetable summer rolls are very easy to make and you can use lean ground beef or ground turkey breast instead of the pork. Before trying this recipe we had never used rice paper wrappers although we have made egg rolls before. The rice paper wrappers are soaked in water for a minute or so to make them pliable. You can prepare the filling earlier in the day, which makes the preparation very quick. In no time at all you can be enjoying a nice refreshing dinner, especially enjoyable on a hot summer night!

Vegetable Summer Rolls

Ingredients:

2 tsp oil
1 small red onion, minced
1 Tbsp minced fresh ginger
½ pound ground lean pork
2 Tbsp dry sherry
1 Tbsp soy sauce
1 Tbsp fish sauce
1 Tbsp lime juice
1 Tbsp raisins, minced
½ tsp black pepper
1 Tbsp minced fresh cilantro
1 cucumber, seeded and cut into matchstick thin strips
1 small yellow bell pepper, cut into matchstick thin strips
1 small red pepper, cut into matchstick think strips
8 (9 inch round rice paper wrappers)

Vegetables for Summer Rolls

Directions:

First make your filing:
Heat the oil in a skillet over medium heat. Add the onion and ginger; cook, stirring occasionally until the onion is softened. Add the pork and cook until the meat is browned about 5 minutes. Add the sherry, soy sauce, fish sauce, lime juice, raisins and pepper, stirring until the liquid is almost evaporated, about ten minutes. Transfer the filling to a bowl and let cook. Stir in the cilantro.

Now to assemble the rolls. Working with one wrapper at a time, dip the rice wrapper in a bowl of hot water and place on your counter or on a clean towel. Place 2 Tbsp of filling and ¼ cup of vegetable mixture on the center of each wrapper. Fold in the sides and then roll up to completely enclose the filling.Rolling the rolls 
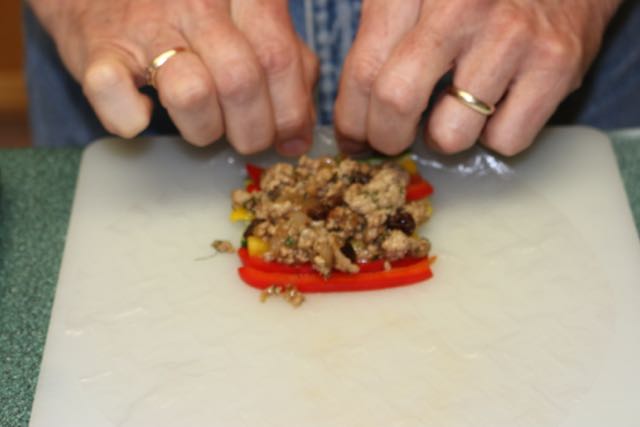
Transfer to a large plate and cover with plastic wrap to prevent drying. Repeat the process until you have made a total of 8 rolls.

Vegetable Summer Roll

We love to serve these with sweet chili sauce!

Vegetable Summer Roll

Nancy On The Home Front
<div align="center"><a href="https://nancyonthehomefront.com" title="Nancy On The Home Front"><img src="https://nancyonthehomefront.food.blog/wp-content/uploads/2020/02/99301-button_170x170-copy4.jpg" alt="Nancy On The Home Front" style="border:none;" /></a></div>

Where is the summer going?

I can’t believe we’re well into the first week of August already! We have a big adventure planned for this fall and the list of things to be completed before October first is a bit overwhelming. More about that later. In the meantime we’re making progress with the wood. My sister was here this past weekend and she helped us get everything that was split all stacked. So the process of cutting, splitting and stacking can begin again.Wood progress.

Remember how behind I’ve been on my weeding, well I’m not quite caught up but I did get my winter squash finally weeded. Sure feels good. My plants are not huge but they are covered with flowers!Weeded squash patch!

Also encouraging to see the tiny Brussels sprouts coming along.Brussels sprouts

Blueberries are in abundance this year! Even our late bearing bushes are just covered!Blueberries

Wishing my tomatoes would turn red. I’ve picked a few cherry tomatoes but there are lots more to come.Green tomatoes

The zucchini and yellow squash are finally coming in.Yellow squash

Signs of fall are everywhere. There are pods on the milkweed.Milkweed pods

Golden rod is in full bloom.Goldenrod

The purple bee balm is blooming everywhere. The hummingbirds just love it!Bee Balm

I love summer and I love fall. Just wish summer wasn’t so short here in Vermont. Not too many more days to cool off in the stream!Our little stream.

Linked to some of my favorite link parties!

Nancy On The Home Front
<div align="center"><a href="https://nancyonthehomefront.com" title="Nancy On The Home Front"><img src="https://nancyonthehomefront.food.blog/wp-content/uploads/2020/02/99301-button_170x170-copy4.jpg" alt="Nancy On The Home Front" style="border:none;" /></a></div>


Thrifty Appliances

The fewer appliances you have, the less it will cost you to operate them. That being said there are certain appliances such as refrigeration and heat that we really don’t want to live without. The key is to make sure you are using your appliances efficiently.

If you are in the market for new appliances, look for energy and water saving models; if you need to work with what you currently own, follow a few simple guidelines and you will notice a savings right away.

When ice starts forming in you fridge or freezer defrost it right away.

Time to defrost the freezer!

When you leave town turn the refrigerator to its lowest setting.

Set to lowest setting when you are away.

When your appliances are not being used unplug them. Most appliances use electricity even when they’re not used but are plugged in.

When not being used unplug your appliance!

Keep your appliances clean, vacuuming the coils on the back of the fridge every six months will make it run more efficiently. Vacuum your radiators regularly to make sure all the heat’s coming through. Our coils are on the bottom of our refrigerator and the dust can build up quickly!

Keep the coils clean!

Insulate your leaky windows, use duct tape and heavy plastic or purchase some weather stripping to insulate around leaky window, doors or air conditioning units in the winter.

Try air drying your clothes and dishes. A little known fact is that the clothes dryer can actually suck heat out of the house in the winter.

Air dry clothes instead of always using the dryer!

Keep your freezer full. When a freezer is full it’s also energy efficient.Full Freezer 
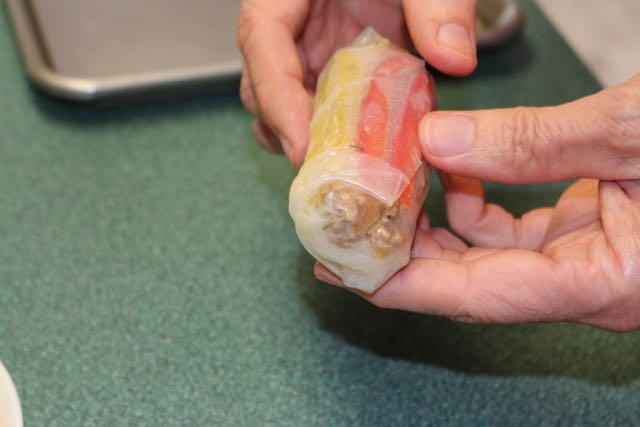
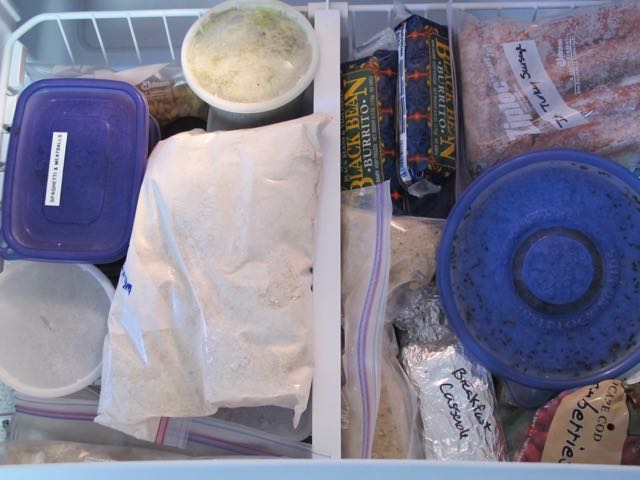
Don’t have enough to fill the freezer? You can also pour water into empty milk jugs and place them in your freezer to take up space.

By taking these simple steps you can assure that your appliances are running as efficiently as possible and you are not wasting any money!

How do you save money with your appliances?
 

Linked to some of my favorite link parties!

Nancy On The Home Front
<div align="center"><a href="https://nancyonthehomefront.com" title="Nancy On The Home Front"><img src="https://nancyonthehomefront.food.blog/wp-content/uploads/2020/02/99301-button_170x170-copy4.jpg" alt="Nancy On The Home Front" style="border:none;" /></a></div>


Our Favorite Blueberry Jam

We have a bumper crop of blueberries this year!

Abundant Blueberries!

Seems like I can go out and pick berries every other day and come in with a bucket full. Not only do we enjoy eating them but nothing beats the taste of blueberry jam on homemade toast in the middle of winter. Brings back memories of picking those wonderful blueberries on a sunny, warm summer day.Blueberries

This recipe is a slight variation of regular blueberry jam; it has a hint of lime in it. The lime makes the jam taste so refreshing. This recipe makes about six 8-ounce jars. Perfect for stocking your pantry or for gift giving!

Blueberry Lime Jam

4 ½ cups crushed blueberries
Grated zest and juice of 1 large lime
1 package of regular powdered fruit pectin (1.75oz)
5 cups of granulated sugar

Before you start prepare your canner, jars and lids.

In a large, deep stainless steel saucepan, combine berries, lime zest and lime juice.

jam, prudent pantry, prudent living
Blueberries, lime zest and lime juice.

Whisk in pectin until dissolved. Bring to a boil over high heat, stirring frequently. Add sugar all at once and return to a rolling boil, stirring constantly. Boil hard, stirring constantly for 1 minute. Remove from heat and skim off foam.

jam, prudent pantry
Cooking Jam

Ladle hot jam into hot jars, leaving ¼ inch headspace. Remove air bubbles and adjust headspace, if necessary by adding hot jam. Wipe rim. Center the lid on jar. Screw band down until resistance is met, then increase to fingertip-tight.

Place jars in canner, ensuring they are completely covered with water. Bring to a boil and process for 10 minutes. Remove canner lid. Wait 5 minutes, then remove jars, cool and store.

preserves, blueberries
Blueberry Lime Jam


Linked to some of my favorite link parties!

Nancy On The Home Front
<div align="center"><a href="https://nancyonthehomefront.com" title="Nancy On The Home Front"><img src="https://nancyonthehomefront.food.blog/wp-content/uploads/2020/02/99301-button_170x170-copy4.jpg" alt="Nancy On The Home Front" style="border:none;" /></a></div>


Pineapple Chicken Skewers

You may have read my posts on Are You Ready For A Challenge? or What Does It Mean To Eat Clean? My husband and I are now working out together everyday and are doing our best to eat healthy. Pineapple Chicken Skewers was an example of a recipe thetas good for you and tastes delicious!Blueberry & Chicken Salad

I was so excited when I heard about the new Fixate Cookbook by Autumn Calabrese.Fixate Cookbook 
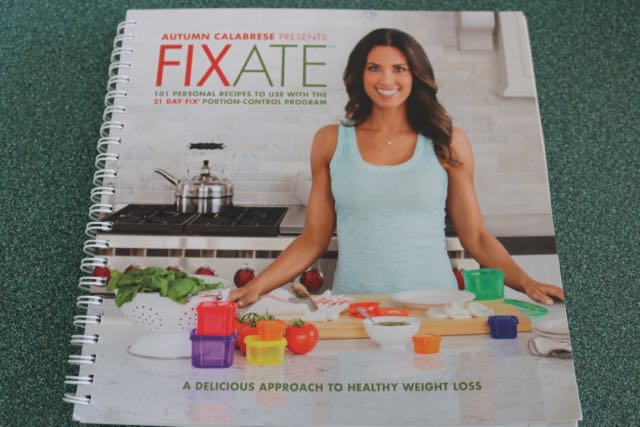
Autumn is a celebrity fitness trainer; a busy mom and I just love her 21 Day Fix fitness program. I love the cookbook. It has over 101 mouthwatering recipes for breakfast, lunch and dinner.

The first recipe I made was Pineapple Chicken Skewers. They were delicious!Pineapple Chicken Skewers

Pineapple Chicken Skewers

Ingredients:

1 pound of chicken breast cut into 16 one inch pieces
¼ cup reduced sodium tamari soy sauce
2 tsp sesame oil
2 tsp fresh grated ginger
1 (8oz can) pineapple chunks, drained
1 medium red pepper, cut into 16 one inch chunks
½ large red onion cut into 16 one inch chunks.

Directions:

Place the chicken in a bowl and add the soy sauce, oil and ginger. Mix well and refrigerate for at least 30 minutes to marinate.

Preheat your grill. While the grill is heating place a piece of chicken, pineapple, pepper and onion onto a metal (or soaked bamboo) skewer. Repeat so that each skewer has two pieces of each ingredient. Discard the marinade that contained the chicken.

Ready for the grill.

Grill the skewers for 4-5 minutes on each side or until the chicken is cooked. Serve immediately.

The best thing about this recipe is that Autumn has suggestions as to how to use the leftovers up in a salad! If you are interested in ordering a cookbook you can click here! this link will take you to my Beachboy website, click on shop and you will find the cookbook. Only $19.95. It would be a great addition to your collection and help you enjoy some delicious healthy meals!

Pineapple Chicken Skewers

Disclosure: This post contains affiliate links and I will be compensated if you make a purchase after clicking through my links.

Linked to some of my favorite link parties!

Nancy On The Home Front
<div align="center"><a href="https://nancyonthehomefront.com" title="Nancy On The Home Front"><img src="https://nancyonthehomefront.food.blog/wp-content/uploads/2020/02/99301-button_170x170-copy4.jpg" alt="Nancy On The Home Front" style="border:none;" /></a></div>

Cleaning Your Garden Tools With Tea

Recently I read an article about cleaning your tools with tea.Black tea 
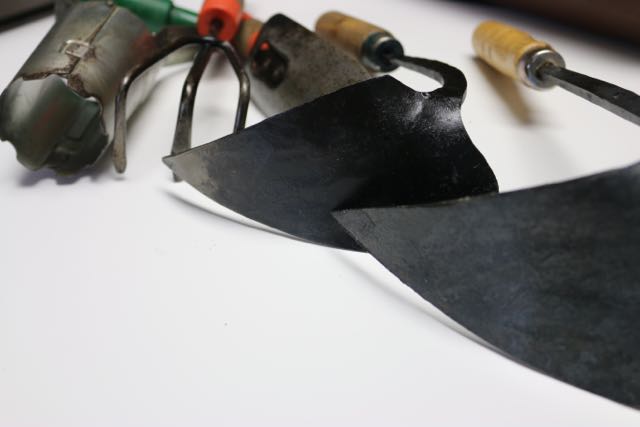
Apparently you can soak rusty tools in a bucket of cooled black tea and then wipe them clean with a cloth.Batch of tea

It was too intriguing not to try! First I made a large batch of black tea. I made enough to fill a bucket. I made probably about a gallon. After the tea was cool I found my worst looking rusty garden tools and left them to soak in the tea.Tools soaking in tea

The article didn’t say how long to let the tools soak but I decided to leave them in the tea for several hours. Did it work??Cleaned tools

I have to say my tools came out very clean! I wiped them all down and while I was at it I spray painted the wooden handles with a bright blue paint! That way they will be easy to spot when I lay them down!Blue handles!

Ideally your garden tools should be cleaned regularly. After each use would be great, but who remembers to do that? At the very least they should be cleaned before putting them away for the winter. Clean tools work more effectively, are easier to keep clean, and they last longer.

Linked to some of my favorite link parties!

Nancy On The Home Front
<div align="center"><a href="https://nancyonthehomefront.com" title="Nancy On The Home Front"><img src="https://nancyonthehomefront.food.blog/wp-content/uploads/2020/02/99301-button_170x170-copy4.jpg" alt="Nancy On The Home Front" style="border:none;" /></a></div>

DIY Convenience Foods

If pre-sliced mushrooms make it possible for you to cook up a batch of homemade mushroom soup then they are a thrifty buy. But when you have a free half hour or so, try to get in the habit of making your own convenience items. All you need is a sharp knife (or a food processor) and some storage bags or containers.

Here are a few ideas to get you started.

Baby Carrots.
Homemade baby carrots are not going to look like the cute little shapes you et at the store but you can make a small carrot stick that will taste exactly the same way and have the same snack-ability factor. Peel the carrots and trim away the ends. Cut the carrots in half lengthwise and cut the pieces into sticks. Store the pieces in a Ziplock plastic bag in the vegetable bin for up to a week.

DIY Baby Carrots
DIY Baby Carrots

Celery Sticks.
Rinse and dry the celery ribs. Cut them in half or thirds lengthwise. Cut into “sticks” of any length you prefer. Store the pieces in a Ziploc plastic bag in the vegetable bin for up to a week.

Celery Sticks
Celery Sticks

Sliced Mushrooms.
Cut away any tough stems. If the mushrooms are dirty us a soft brush or a paper towel to brush away the dirt. If you rinse the mushrooms, they’ll need to be used with a day. Slice the mushrooms and wrap the slices in a paper towel. Place the towel-wrapped package in a Ziploc plastic bag. Store in the vegetable bin for 3-4 days.

Sliced Mushrooms
Sliced Mushrooms

Shredded Cabbage
Cut the cabbage into quarters and discard the tough core. Using a long, sharp knife cut the cabbage into thin shreds. Store the shreds in a Ziploc plastic bag in the vegetable bin for up to four days.

Shredded Cabbage
Shredded Cabbage

Chopped Onions
Peel the onions and chop them. Refrigerate in a Ziploc bag or a container with an airtight lid. Store them in the vegetable bin for up to four days. Chopped onions can also be frozen in a Ziploc freezer bag for up to a month.

Chopped Onions
Chopped Onions

Shredded Cheese
Use a food processor, to shred hard cheeses. Soft cheese can be shredded by hand. Store the shreds in a Ziploc bag in the refrigerator up to a week or in the freezer for longer. Sometimes pre-shredded cheese at the supermarket is cheaper than whole cheese, so be sure to compare costs. I often buy a large bag of shredded mozzarella from our local co-op, come home and divide it into smaller bags and store in the freezer.

Shredded Cheese
Shredded Cheese

Set aside some time this week to prep and it will save you time in the days ahead!

Linked to some of my favorite link parties!

Nancy On The Home Front
<div align="center"><a href="https://nancyonthehomefront.com" title="Nancy On The Home Front"><img src="https://nancyonthehomefront.food.blog/wp-content/uploads/2020/02/99301-button_170x170-copy4.jpg" alt="Nancy On The Home Front" style="border:none;" /></a></div>


Why Be Thrifty?

You make a good income and you’re not really concerned about money so why be thrifty?Frugal tip, prudent living

First lets go back to the meaning of thrifty. Though the word calls to mind the frugal use of resources and careful spending, its first definition in the Oxford English Dictionary implies a healthy dose of the good life: “The fact or condition of thriving or prospering; prosperity, success, good luck.” The noun thrifty originated from the verb thrive. Thrive has meant “to grow or to flourish, with a clear sense of prosperity.” Thriving – which suggests hearty and healthy living is a challenge and a skill.

The noun thrift takes its positive implications from these origins, but in recent times it has come to refer more to “economical management, economy; sparing use or careful expenditure of means.”

In other words the practice of thrifty isn’t solely about saving money; it’s also about living well.Nothing more refreshing than a dip in the lake!

Cutting back on your impulse spending will help you control your budget. But it will also help you take more pleasure in a much-needed vacation. Cooking thriftily will lower your shopping bills. And it may give you more time with your family and possibly even improve your health.Family dinners encourage conversation.
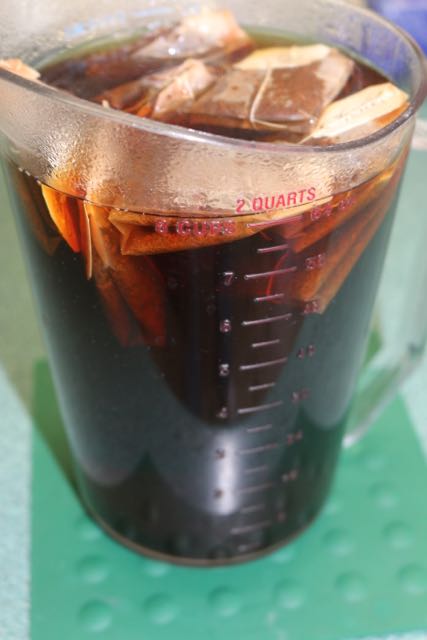
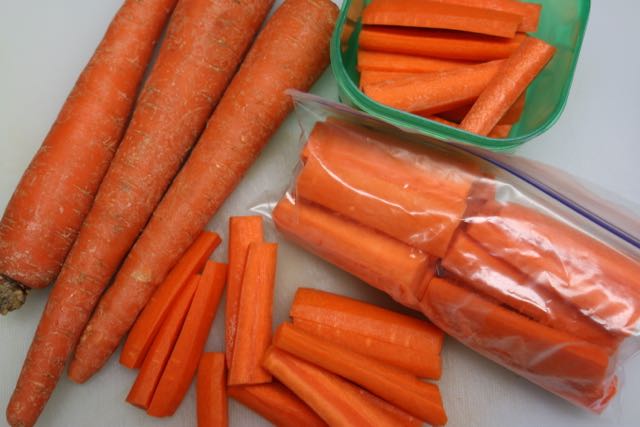
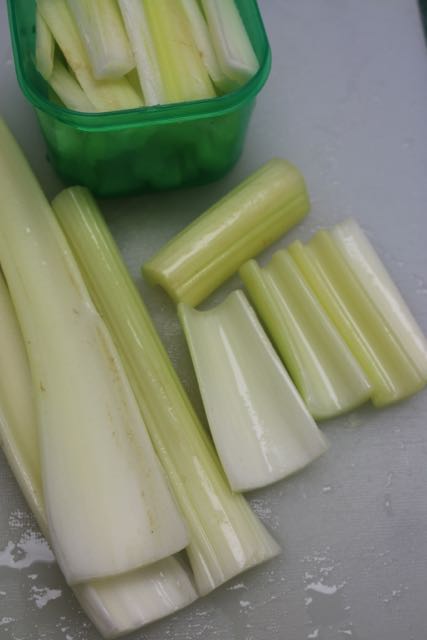
When you go thrifty, money isn’t the only thing you’ll save. You’ll also be going green. Reducing waste means you’ll be buying less and putting less garbage in the landfill. Buying in bulk will get you better prices and will cut down on packaging made and thrown away.

In the long run, thrifty, for those who have learned to practice it, results in freedom and, makes independence possible. When eliminating waste from our lives, when living within our means, when preparing ourselves for the possibility of radical reversals of fortune in an unknown future, when behaving, in short, thriftily, we have the good feeling that we are living a well ordered life, and that is because this is exactly what we are doing!

Linked to some of my favorite link parties!

Nancy On The Home Front
<div align="center"><a href="https://nancyonthehomefront.com" title="Nancy On The Home Front"><img src="https://nancyonthehomefront.food.blog/wp-content/uploads/2020/02/99301-button_170x170-copy4.jpg" alt="Nancy On The Home Front" style="border:none;" /></a></div>
Design a site like this with WordPress.com
Get started