Eating Healthy: Sweet Chili Glazed Chicken with Quinoa Pilaf

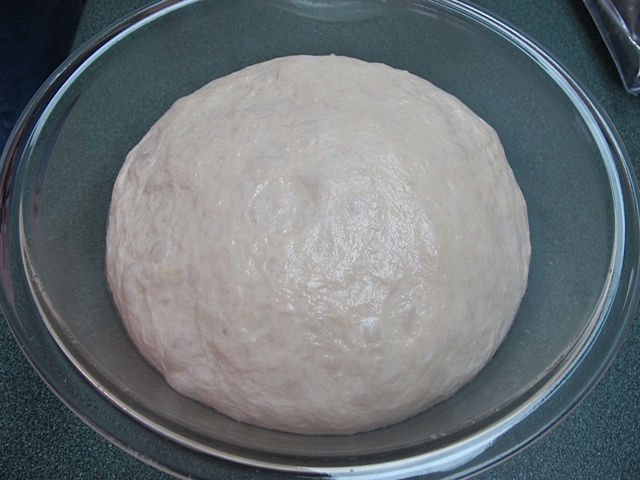
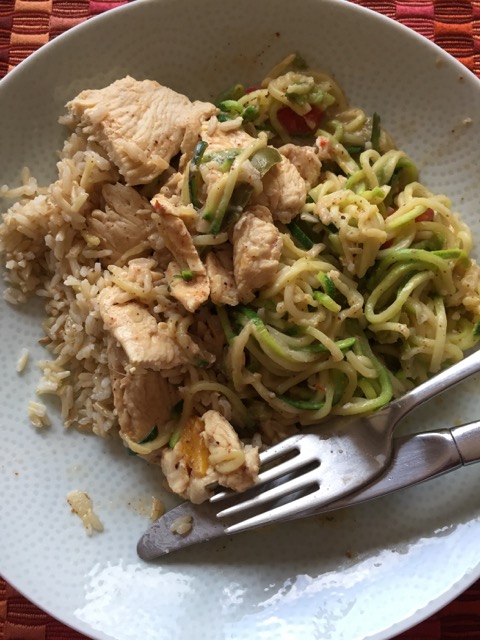
I am always looking for healthy recipes that we can incorporate into our meal plan. This recipe was adapted from a Weight Watchers recipe I found years ago. We’ve bene enjoying it ever since. It is even good as leftovers the next day!

Ingredients:

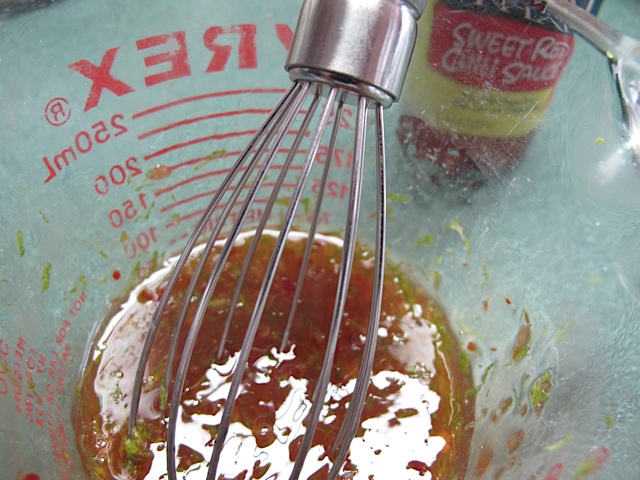
¼ cup sweet chili sauce
2 tsp grated lime zest
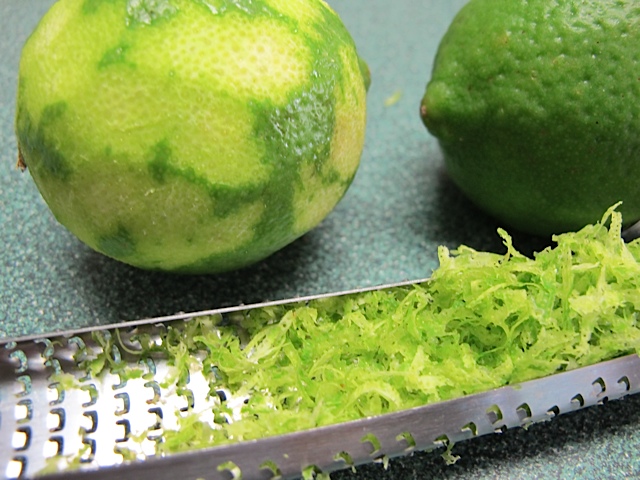
lime, zester
lime zest

1 tsp lime juice
2 tsp olive oil
2 scallions, thinly sliced

green onions, home cooking
thinly sliced scallions

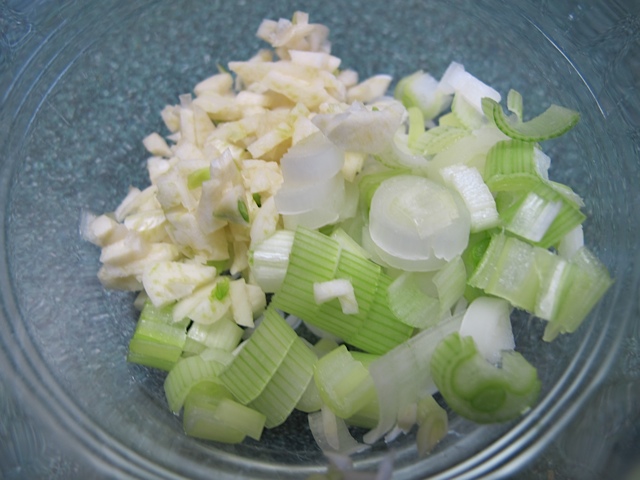
1 garlic clove, minced
½ tsp ground cumin
2 cups chicken stock
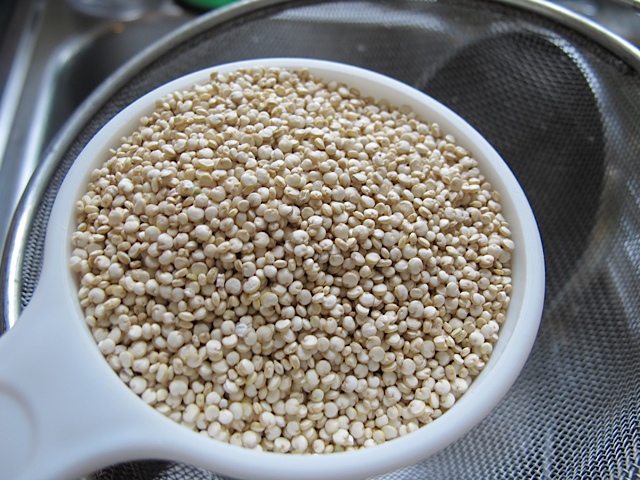
1 cup quinoa, rinsed

grains, quinoa
quinoa

2 Tbsp dried currants
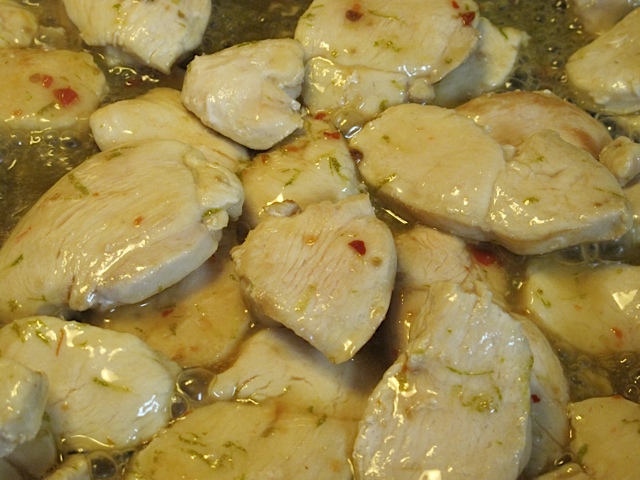
1 lb boneless chicken breasts, thinly sliced
½ tsp salt

To make the glaze combine the chili sauce, lime zest and line juice in a small bowl.

chicken, prudent living
Sweet-Chili Glaze

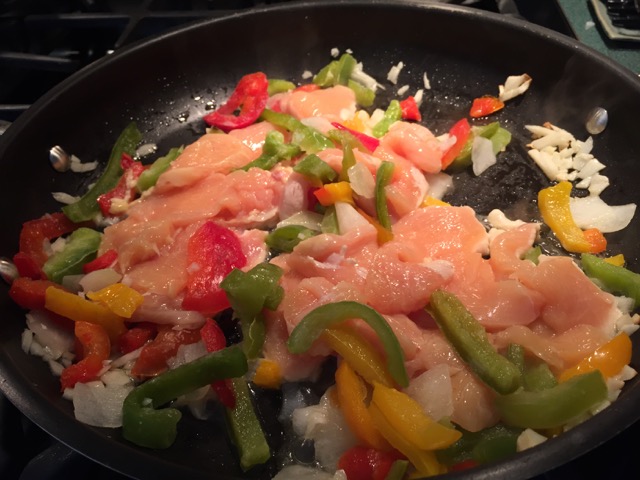
To make the pilaf, heat oil in a medium saucepan over medium high heat. Add the scallions, garlic and cumin. Cook, stirring constantly, until fragrant, about 30 seconds. Add stock, quinoa and currants; bring to a boil. Reduce heat and simmer covered, until quinoa is tender and liquid is absorbed, about 20 minutes. Remove from heat and keep warm.

Meanwhile, sprinkle chicken with salt. Spray a large nonstick skillet with nonstick spay and set over medium high heat. Add chicken and cook, turning frequently and basting with glaze, until chicken is cooked through, about 6 minutes.

chicken, chili
Sweet Chili Glazed Chicken

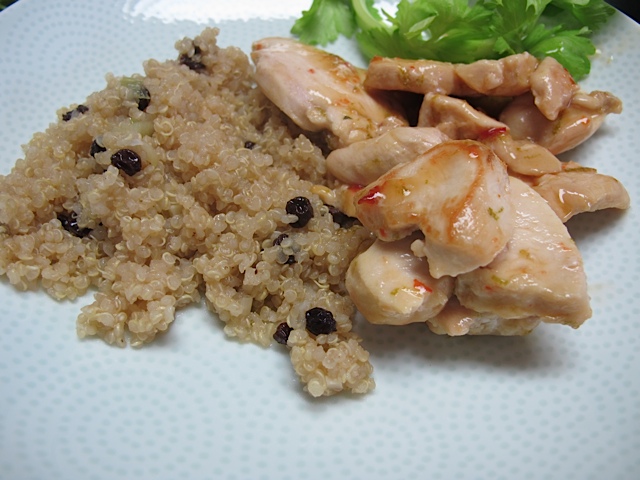
Serve immediately with pilaf.

pilaf, chicken
Quinoa Pilaf with Sweet Chili Glazed Chicken

Linked to some of my favorite link parties!

Nancy On The Home Front
<div align="center"><a href="https://nancyonthehomefront.com" title="Nancy On The Home Front"><img src="https://nancyonthehomefront.food.blog/wp-content/uploads/2020/02/99301-button_170x170-copy4.jpg" alt="Nancy On The Home Front" style="border:none;" /></a></div>

Making Progress

Despite the fact that my garden is still full of weeds I am making progress little by little. I finally got my most neglected flower bed weeded and mulched.  I am so pleased with how it looks now!Mulched GardenThe Black Eyed Susans are everywhere! I let them be as I love having a bit of color cascading over our steps!Black Eyed Susan 
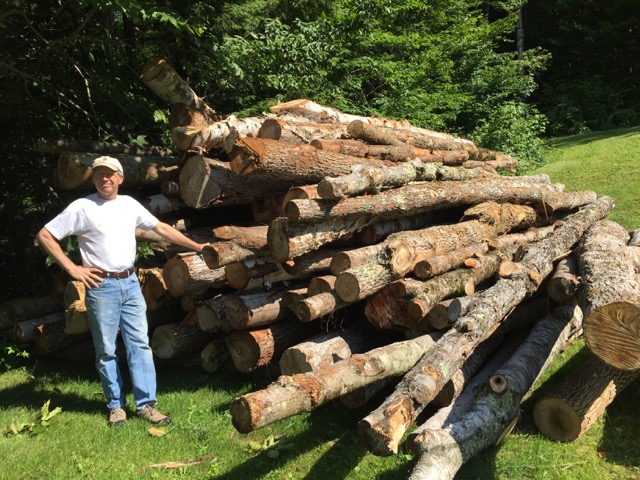
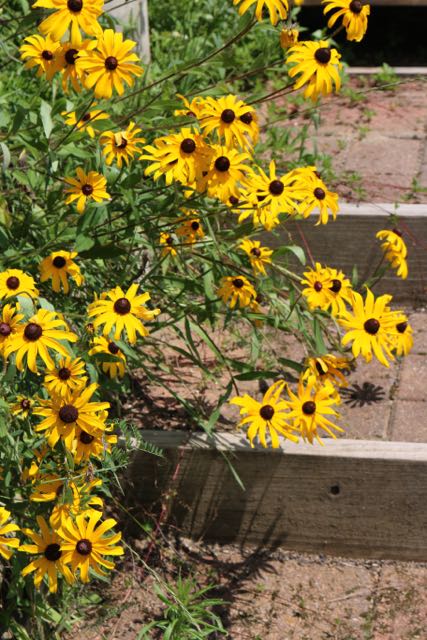
Remember that large pile of wood? We’re slowly making progress! Next step is to get the splitter out, I don’t use the chain saw but I do help with the splitter!Making progress on the woodpile! 
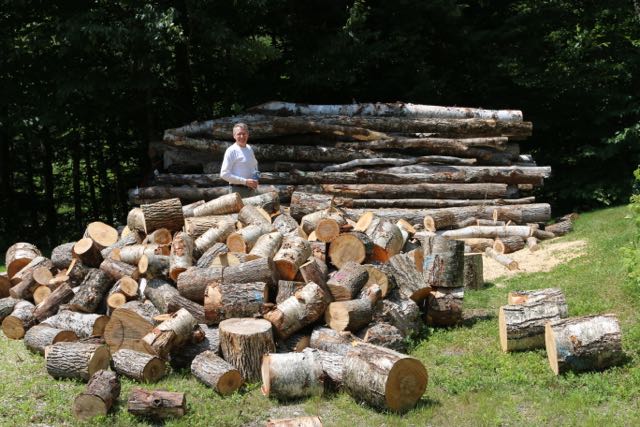
The vegetable garden is doing well! We have a bumper crop of blueberries this year.Blueberries 
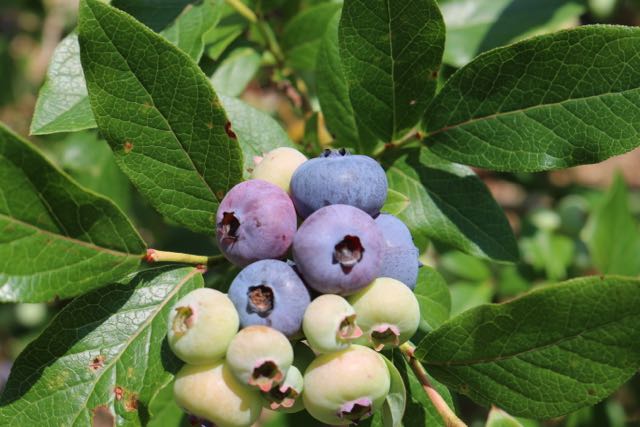
I still find an occasional strawberry as well.Strawberries
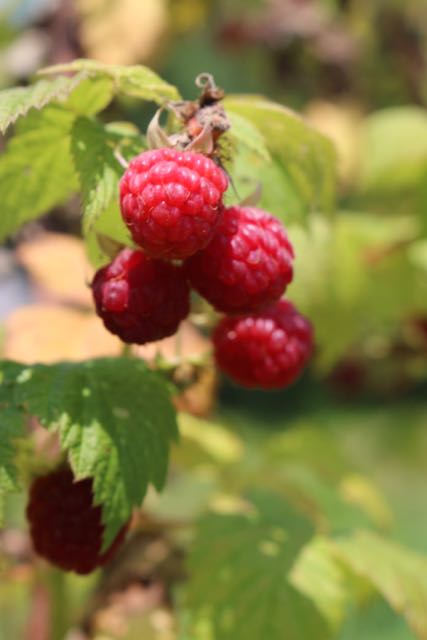
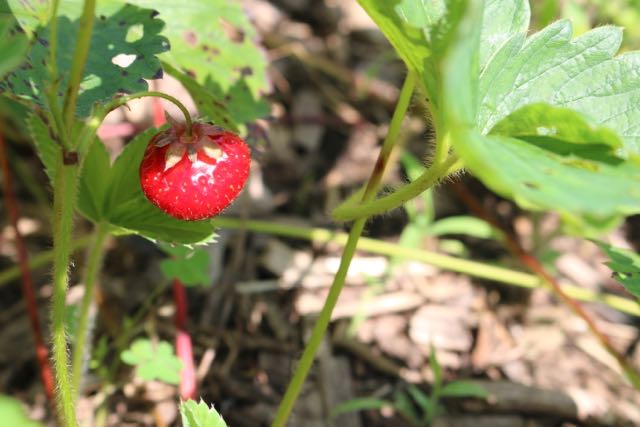
I think I mentioned the raspberry bushes we transplanted this year? They are doing well and have even blessed us with raspberries!Raspberries Very pleased to see some peppers on the pepper plants!Peppers 
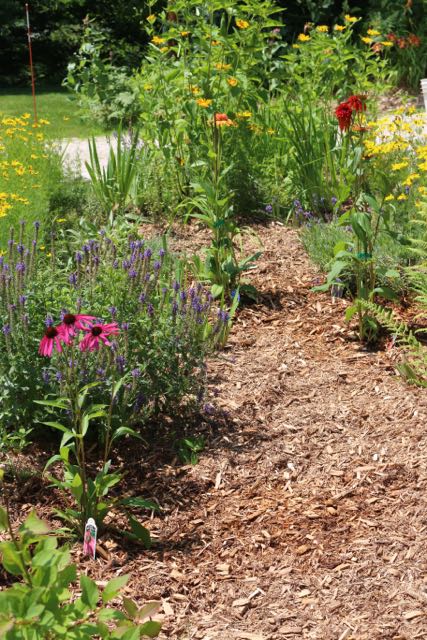
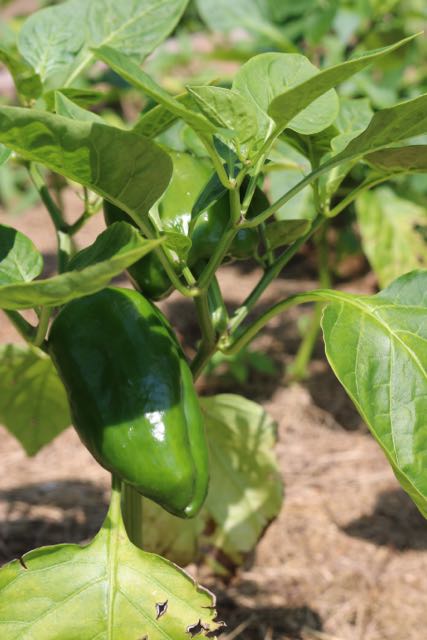
Still lots of weeding to get the vegetable garden under control but we’re starting to enjoy the harvest despite my poor weeding! Also enjoying my daylily bed.Day Lilies 
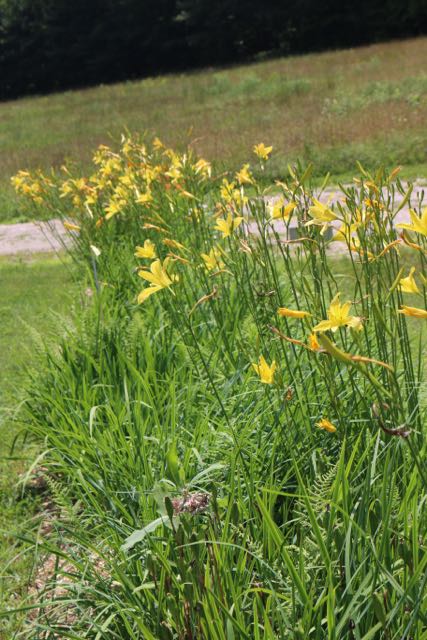
It runs along side our driveway and these yellow day lilies have the most heavenly smell.Day Lilies
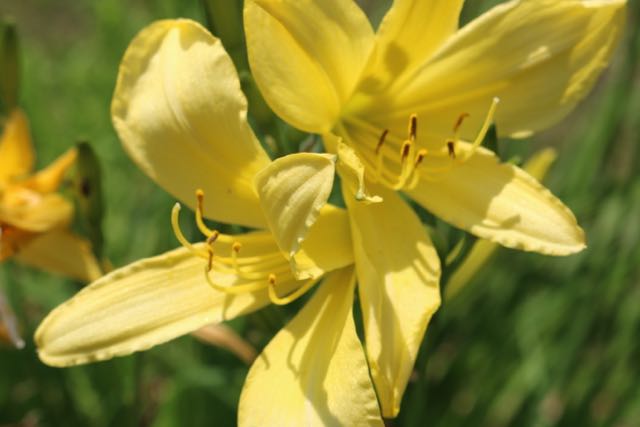
What’s blooming in your garden this week?


Linked to some of my favorite link parties!

Nancy On The Home Front
<div align="center"><a href="https://nancyonthehomefront.com" title="Nancy On The Home Front"><img src="https://nancyonthehomefront.food.blog/wp-content/uploads/2020/02/99301-button_170x170-copy4.jpg" alt="Nancy On The Home Front" style="border:none;" /></a></div>

Managing Your Finances In This Electronic Age

Everywhere you look there is new technology to keep up with. At times it can be overwhelming but if you take a deep breath all this technology can also help you. Today I am going to discuss how I have been managing our finances in an electronic age.

When we were first married 35 years ago no one had a computer or a smart phone but our bank at the time made it possible for us to call in and pay our bills over the phone. We were on such a tight budget we gave it a try as the service was free and we were able to save on stamps! The only requirement was a touchstone phone!

Since then the technology has come a long way! I use Quicken to keep track of all our accounts online. Everything from the checkbook to our credit card accounts are listed and with a swipe of the mouse I know exactly how much money is in the bank or owed on a certain card.

Quicken 2005 Premier Home & Business
(Photo credit: Wikipedia

I’m not as tech savvy as I could be however as I don’t have any of our accounts linked to our Quicken account. One of these days I’ll get there but for now I go online and can check out the various accounts such as our phone bill or electric bill by going to the various websites. Payments are made online whenever possible. I can even check out our investments online.

The smart phone has made it even easier than ever to keep track of your cash, send payments and even send cash to your friends if you owe them money. Venmo is just such an app. Venmo allows you to pay anyone instantly using money you have in Venmo or link a bank account or debit card. When we owe money to our children they can have it instantly without having to mail a check or transfer money from one bank account to another. Our kids use it all the time.Venmo

There are other online services if you want to keep track of your budget. Mint is a great service to help you to manage your cash flow, budgets and bills from one place.Mint

Having a smart phone has also made it easier to deposit checks. No longer do you have to drive to the bank. Instead you can take a photo of your check and deposit it remotely. For those of us that live a distance from the bank this is a wonderful time saver.TD Bank

No matter how you manage your money in this electronic age you want to keep track of it somehow whether it be on paper or online. Personal Capital is another way to help you keep track of all your accounts at once to make managing your net worth easier. You want to know where your money is going so you can keep an accurate budget and save for the future.money

Linked to some of my favorite link parties!

Nancy On The Home Front
<div align="center"><a href="https://nancyonthehomefront.com" title="Nancy On The Home Front"><img src="https://nancyonthehomefront.food.blog/wp-content/uploads/2020/02/99301-button_170x170-copy4.jpg" alt="Nancy On The Home Front" style="border:none;" /></a></div>


Chicken and Zoodles

One of my favorite blogs is called The Lean Green Bean, such a creative name. Lindsay’s focus is on healthy eating and fitness. She is a Registered Dietitian so she knows what she’s talking about! On her blog you will find healthy recipes, nutrition information, tips for new moms, workouts and more! I have made a lot of her recipes, but recently she posted a recipe called Zoodles with Chicken and Spicy Almond Butter. This is a low-carb, high in protein recipe. It looked amazing and I had pretty much everything I needed to make this delicious and healthy chicken and zoodles meal.

First a little back-story. Over a year ago my daughter introduced me to her vegetable spiralizer.spiralizer She used it all the time and just raved about it. I decided to order one for myself. You can find them on Amazon for a reasonable price. You could also use a sharp knife or a vegetable peeler and get similar results. Well I received the gadget and it sat in my closet for a year until I went and spent a week with my daughter. She is still using her spiralizer almost everyday. I came home and got mine out of the closet and have been using it ever since! So when I saw this recipe for Chicken and Zoodles I had to try it.

For the detailed recipe click here.Simple Ingredients

Basically you spiralize your zucchini, sprinkle with some salt and drain. While the zoodles are draining proceed with the rest of the recipe.Chicken and Zoodles
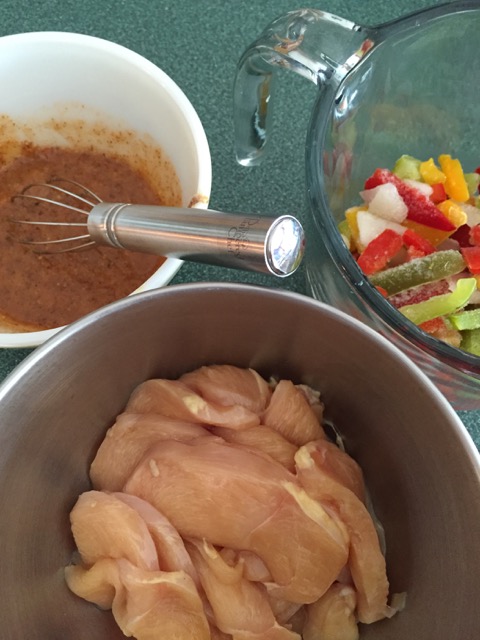
Add the zoodles at the last minute just before your sauce.Chicken and Zoodles

It was delicious and sure to be a summertime favorite especially when I start getting zucchini from my garden!

Chicken and Zoodles

Thank you Lindsay for sharing such an amazing recipe!

Nancy On The Home Front
<div align="center"><a href="https://nancyonthehomefront.com" title="Nancy On The Home Front"><img src="https://nancyonthehomefront.food.blog/wp-content/uploads/2020/02/99301-button_170x170-copy4.jpg" alt="Nancy On The Home Front" style="border:none;" /></a></div>

Enjoying July!

The days in July are full. Not only are my gardens in need of continual weeding, but we finally got our load of firewood delivered and it’s ready to be cut, split and stacked! Every free moment from now until the pile is done will be spent on this project!wood

However, we can’t spend every minute working and sometimes you just have to take an afternoon off and relax. Either by cooling off in a lake.Nothing more refreshing than a dip in the lake! 
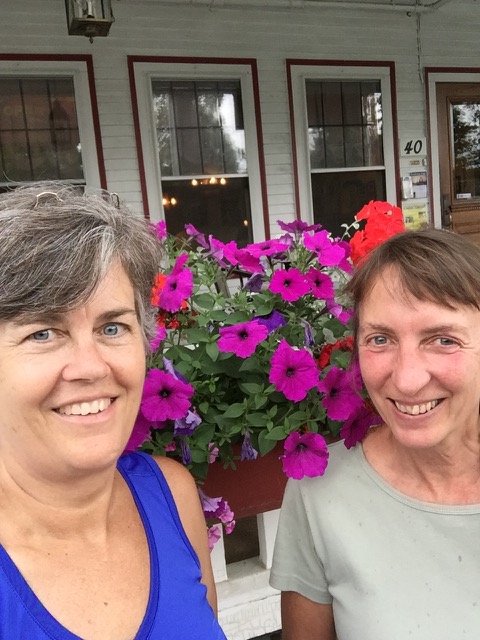
Or by spending the afternoon with a good friend. My friend Dianna and I meet several times a year. We’ve known each other forever!

We've been friends forever!
We’ve been friends forever!

We usually enjoy a nice lunch, browse through a bookstore and explore a new nursery. Yesterday was our day. After all you won’t always remember the wonderful day you had weeding in the garden, but you will remember the time spent with dear friends.friends

I love the nurseries in Vermont. We’d actually been to this nursery before, Morning Star Perennials & Nursery located in Rockingham, VT.

Morning Star Perennials & Nursery

Just like the last time we visited this nursery two years ago, it was one of those July days where one minute the sun is trying to shine through and the next minute it is raining. This nursery is passionate about caring for their organically grown perennials, trees and shrubs. There was quite a selection of various plants both for shade gardens and full sun gardens.nursery 
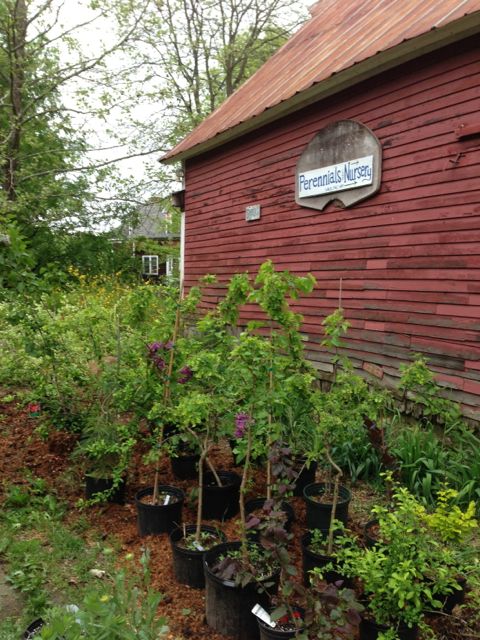
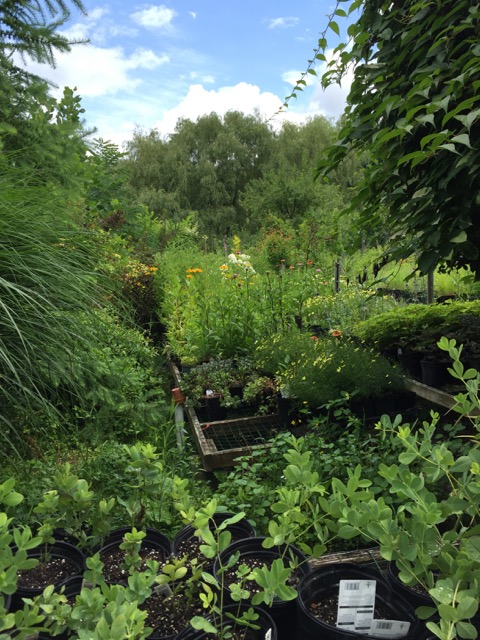
Everywhere you looked there were plants in various stages, being transplanted, cuttings being started, to plants in full bloom.plants

The owners, Laurie and Scott Bolotin are very helpful and full of information. Don’t you just love their simple sign!sign

It was so hard not to come home with a full cart of plants!Plants to take home.
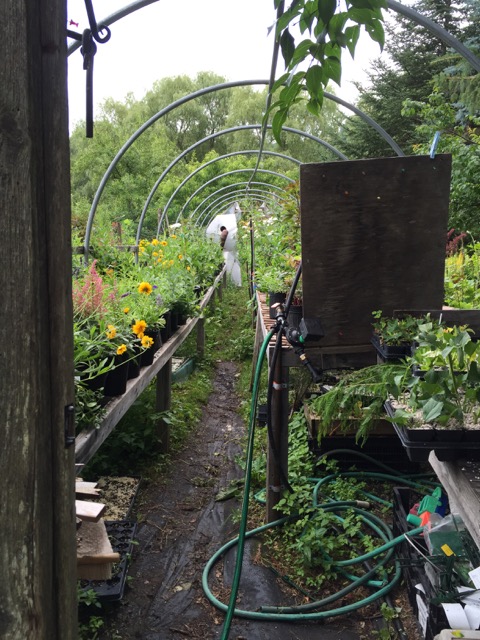
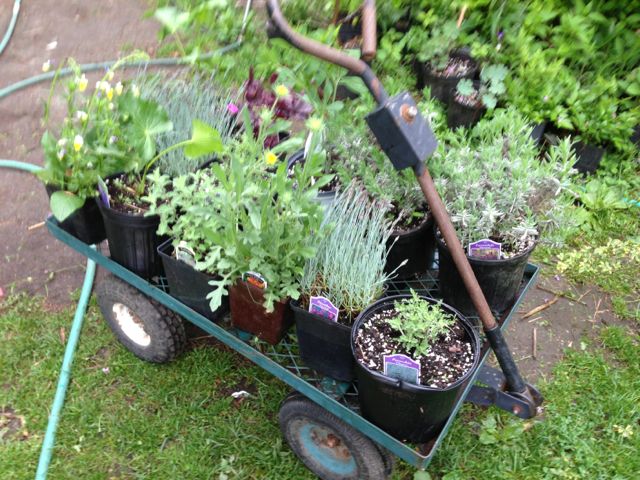
In the end I limited myself to three varieties of Echinacea (Coneflower).Echinacea
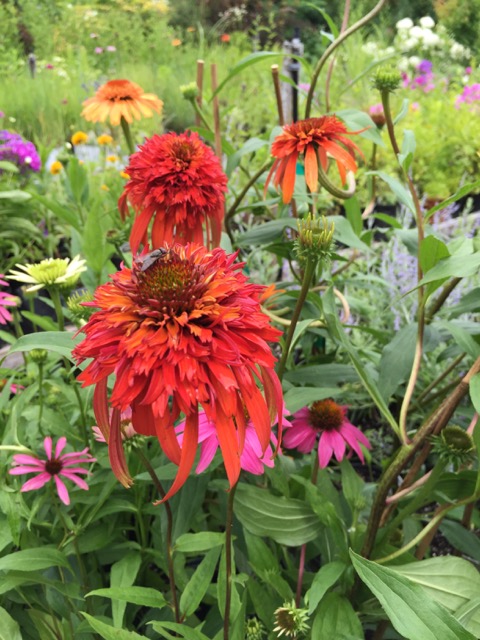
I just love the colors!EchinaceaYou can guess what I’ll be doing today, finding just the right spot to transplant these flowers into my garden! It was a wonderful day as always. I just love that Dianna and I have been friends for so long that we just pick right up where we left off on our last time together! Can’t wait for our next adventure!path

Linked to some of my favorite link parties!

Nancy On The Home Front
<div align="center"><a href="https://nancyonthehomefront.com" title="Nancy On The Home Front"><img src="https://nancyonthehomefront.food.blog/wp-content/uploads/2020/02/99301-button_170x170-copy4.jpg" alt="Nancy On The Home Front" style="border:none;" /></a></div>

Tips for a Healthier Life

We all want to be healthy and live a healthier life. There are many simple steps we can take to do this.

Beware of liquid calories. When you drink a sugary beverage, you don’t feel as full as if you had eaten the same calories from solid food. Studies show that people consuming sugary beverages don’t compensate for their high caloric content by eating less food, thus resulting in weight gain!soda

A simple rule to remember is one Lewis First, MD and Jerry Larrabee, MD suggest to parents. This advice would be good for us all to head. Their daily remedy calls for a “5-2-1-0” prescription. That is 5 servings of fruits and/or vegetables, two hours or less of screen time, one hour of exercise and no sugar-sweetened beverages.

Understand the natural sugars vs the added sugars. Soda is the number one primary sour e of added sugars in Americans diets. Added sugars are those that don’t occur naturally in food or beverages. The Dietary Guidelines for Americans advise that you limit intake of added sugars as they cause weight gain and can prevent you from eating more nutrient rich foods.

Avoid fruit juice, even though fruit juice has more nutrients, it still contains as much sugar and calories as soft drinks!

Here are several ways you can save calories by making healthier choices.

Instead of drinking a medium café latte made from whole milk (265 calories) try a small café latte made with fat free milk (125 calories).Cafe Latte
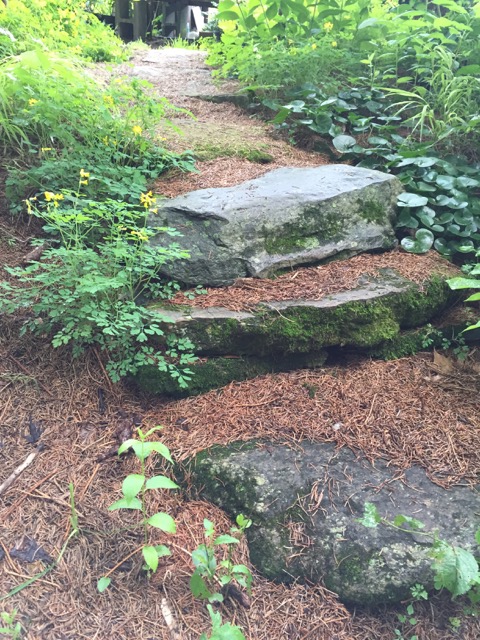
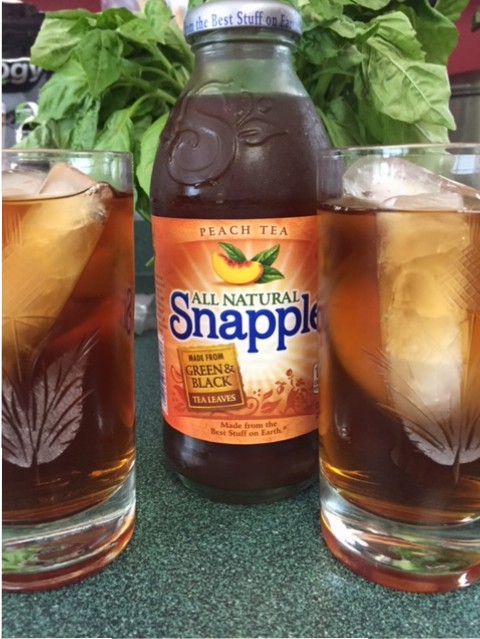
Instead of drinking a 20oz bottle of non-diet cola with your lunch (227 calories) drink a bottle of water. (0 calories)

Instead of drinking a 16oz sweetened lemon iced tea from the vending machine (180 calories) enjoy a sparkling water with natural lemon flavor (0 calories) or brew your own glass of iced tea.

At dinnertime instead of drinking a 12oz glass of non-diet ginger ale with your meal try a plain glass of water or one with a slice of lemon or lime (0 calories).

With just these simples steps you will save yourself over 670 calories!


Linked to some of my favorite link parties!

Nancy On The Home Front
<div align="center"><a href="https://nancyonthehomefront.com" title="Nancy On The Home Front"><img src="https://nancyonthehomefront.food.blog/wp-content/uploads/2020/02/99301-button_170x170-copy4.jpg" alt="Nancy On The Home Front" style="border:none;" /></a></div>

Safe Stripping

It’s not what you think! So called “safe” strippers are a good place to turn for refinishing your wooden antiques, They don’t irritate your skin, their fumes aren’t damaging to your health, and their contents aren’t flammable or explosive – though, of course, rags and residue must be disposed of safely.

We currently have two projects in the works. A set of antique wooden twin beds that have been painted pink (yes pink!) and then red and an antique fireplace mantle that I plan to turn into a headboard for our queen-size bed.

The twin beds are the first project. Most of the paint has been removed and I am down to the final steps.

The tools and materials needed to complete this project are fairly simple. Newspaper or something to catch residue stripper; a container to hold the stripper; brush for application, plastic wrap; scraper; coarse and medium steel wool; coarse stripping brush, rags, soapy water; denatured alcohol, lacquer thinner or paint thinner.

Tools assembled. ready to start!
Tools assembled. Ready to start!

1. Set up a workstation. Since I like to work standing up I used some old saw horses and put a frame on top to hold a head board and a foot board at the same time. I put newspaper on the floor to catch any reside that drips. I used an old paint container to hold the stripper.

Pour stripper into a smaller container.

2. Apply the stripped liberally, brushing on a thick coat. You now have time to do another small project as the directions say to let the stripper formula stay in place for ½ hour. It may need to sit longer.Apply stripper liberally. 
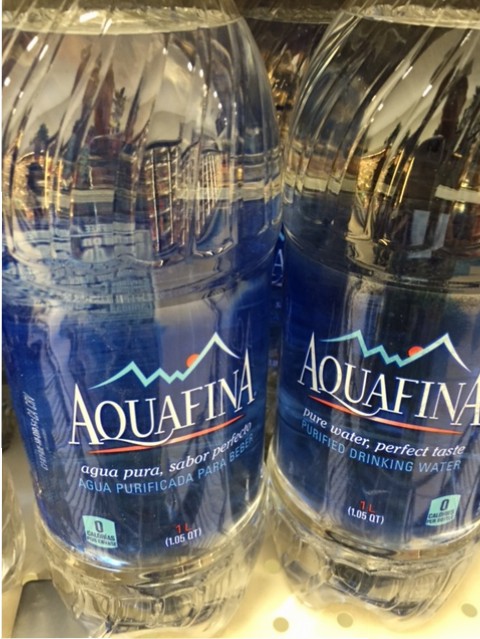
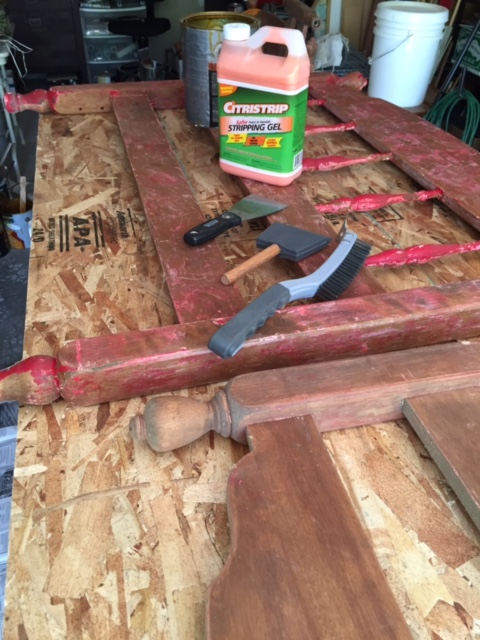
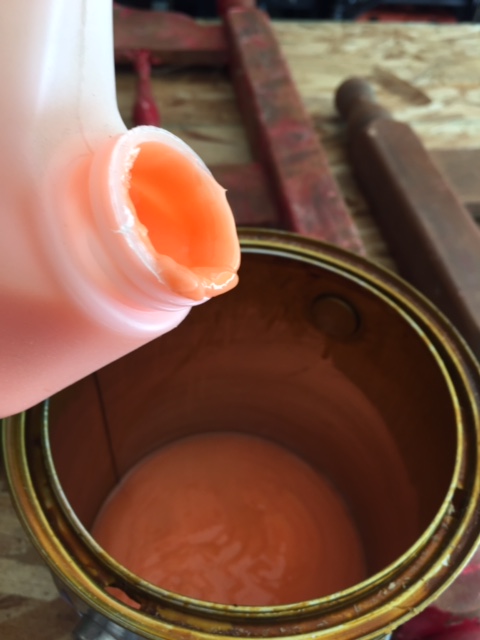
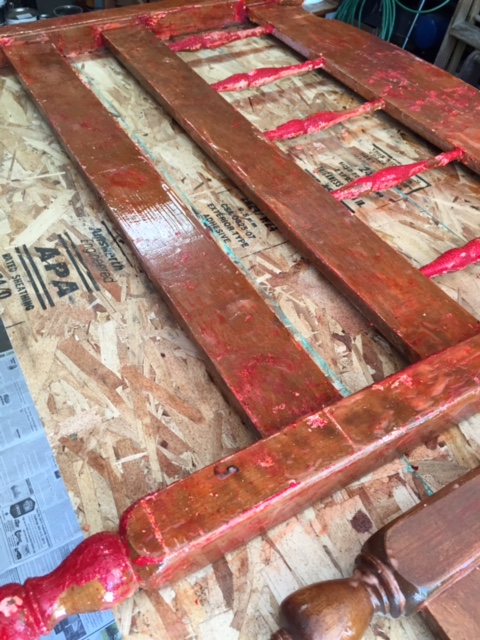
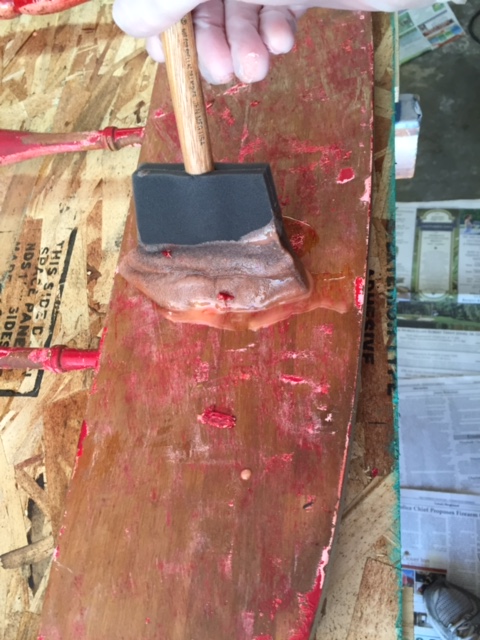
If you are removing thick paint a simple trick is to cover the surface with a skin of plastic wrap. Follow the directions on your brand of stripper for the correct time.

Let sit for ½ - 24 hours!
Let sit for ½ – 24 hours!

3. After the stripper has had time to do it’s job, scape off the loosened finish. Use coarse steel wool or a stripping pad and the stiff-bristle stripping brush to remove the residue from the nooks. Repeat this process it there’s more finish to remove.

4. Fourth step. Scrub down the piece with rags soaked in soapy water (unless the directions on your band of stripper advise otherwise).

Bed frames ready for finally sanding.

5. Do one final cleanup with medium steel wool and solvent (the alcohol or thinner). Let the piece dry thoroughly.

6. Finish the piece with a clear varnish or whatever stains you have choosen.

I was hoping to have the bed finished before I wrote this post. The frames still need a finally sanding before the stain and final coat of varnish is applied. Stay tuned for an update!

Linked to some of my favorite link parties!

Nancy On The Home Front
<div align="center"><a href="https://nancyonthehomefront.com" title="Nancy On The Home Front"><img src="https://nancyonthehomefront.food.blog/wp-content/uploads/2020/02/99301-button_170x170-copy4.jpg" alt="Nancy On The Home Front" style="border:none;" /></a></div>

Sausage and Pepper Pizza On The Grill

If you’ve been reading my blog for a while you may remember the awesome gift I gave my husband one year. It was an attachment for the Weber grill that turned your grill into a pizza oven. It’s called a Kettle Pizza. I’ve always wanted an outdoor pizza oven and I figured this was the next best thing. One of the best pizzas we’ve made on the grill is a sausage and pepper pizza!

kettle pizza, grilling

Every summer we put it to good use. We haven’t perfected the pizzas on the grill yet but we’re getting close. My husband is an expert pizza maker, he’s got the crust down to a science. First he makes the dough and allows it to rise. While it’s rising he gets all the other ingredients ready.

Pizza ingredients

While the dough was rising we followed the directions and built a fire in the grill. Adding some wood to the charcoal gives you a very hot fire.

Building a fire in the Weber

Eventually the thermostat registered hot!

grilling, pizza

As soon as the pizza “oven” was ready the pizza was formed.

Forming the dough.

First a little homemade pizza sauce.

pizza, recipe

Followed by sausage, fresh red peppers, a few roasted red peppers and a couple of hot peppers.

Sausage and Pepper Pizza

Then some mozzarella cheese, a little Parmesan and the pizza was ready to go in the oven.

Into the oven!

Since the oven is so hot the pizza cooks rather quickly, 5-6 minutes. The trick is keeping an eye on it and occasionally giving it a spin so it cooks evenly.

Ready to eat!

It was delicious and we’re already thinking of which pizza we’ll try next.

Sausage and Pepper Pizza

Maybe a Clam and Bacon Pizza or maybe a Tomato Basil. So many choices!

Here is the simple recipe we use for the crust.

Pizza Crust

Ingredients:

2 cups flour
1 ¼ tsp instant yeast
¾ tsp salt
1 Tbsp olive oil
About ½ to ¾ cup warm water

Directions:

Combine the dry ingredients in a mixing bowl. Stir in the olive oil. Stir in the warm water, you may not need all of the water so add slowly. Turn the dough onto your work surface and knead until smooth and shiny. Place the dough in a covered, oiled bowl to rise until double in bulk.

pizza, recipe box, prudent living

Turn dough onto a floured surface to shape your pizza.Form pizza dough.

If your dough doesn’t want to stretch let it rest a few moments and try again. Once the dough is shaped, add a little sauce, spread lightly. Add your cheese and toppings. Bake in the oven or in your Kettle Pizza Oven and enjoy!

Linked to some of my favorite link parties!

Nancy On The Home Front
<div align="center"><a href="https://nancyonthehomefront.com" title="Nancy On The Home Front"><img src="https://nancyonthehomefront.food.blog/wp-content/uploads/2020/02/99301-button_170x170-copy4.jpg" alt="Nancy On The Home Front" style="border:none;" /></a></div>

8 Garden Tools I Can’t Live Without

I love to garden! I also love my favorite gardening tools and there are 8 tools I just can’t live without! Want to know what they are?

A Red Wheelbarrow
My garden is a bit of a walk from the house and my wheelbarrow is the perfect “tool” to carry everything in. We actually have two wheelbarrows, a larger blue one and this red one. I love the smaller size of the red wheelbarrow, when it is full of rocks from the garden I can actually empty it without hurting my back! It seems I am often pulling rocks from the garden here in Vermont, even after working the soil for over 15 years!

gardening, garden tools
Trusty wheelbarrow

My White Bucket
While this is hardly a tool I use it all the time. This bucket has so many uses; I use it to carry all my tools in. I can turn it over and sit on it when working in the garden. I can even use it for filling with small rocks to empty in the above wheelbarrow! The chickens also appreciate it if I fill it with weeds to empty in the chicken yard! When the chickens see a white bucket they know to come running!

gardening, tools
White Bucket

Weeding Tools
These three weeding tools are the ones I use all the time. I have an abundance of weeds and these tools are invaluable. One website called the narrow one on the left a Cape Cod Weeder. It works well for edging a garden bed as well.  The wider one on the right is perfect for those really suborn weeds. It is called a Korean Weeder. It was a gift from my aunt and uncle and I think of them every time I use it. The third tool in the middle is a small cultivator, in fact I think it was actually a tool my mother passed along to me. It’s perfect for cultivating the soil around your plants. I have a long handled version as well, which is perfect for those days when you just don’t feel like getting down on your hands and knees!

weeding tools
Small gardening hand tools.

Hoe
Every gardener needs a hoe! It has so many uses from cultivating the soil to planting. I often use the edge of it to make rows to plant my seeds

tools, garden
Long handled Gardening Tools.

Kneeling Pad
As I get older I appreciate having a kneeling pad more and more! It gives my knees a little break and makes the hard ground just a little more comfortable! It has also been used for various other projects such as sanding the deck! this one came from Gardener’s Supply and I’ve had it forever!

Gardeners Supply, gardening
Kneeling pad

Gloves
I don’t mind working in the dirt without gloves but when I wear gloves I have two favorites. One pair is made of leather and is from the company WomansWork, they are designed for women’s hands and last for ever!

gardening gloves
Woman’s Work Gloves

My other pair of gloves I picked up at the hardware store, nothing fancy but leather on one side and breathable fabric on the other. I usually wear out my gloves and have to pick up a new pair each year. This pair seems to be working really well plus I love the color!

gloves, gardening
Gardening Gloves

Linked to some of my favorite link parties!

Nancy On The Home Front
<div align="center"><a href="https://nancyonthehomefront.com" title="Nancy On The Home Front"><img src="https://nancyonthehomefront.food.blog/wp-content/uploads/2020/02/99301-button_170x170-copy4.jpg" alt="Nancy On The Home Front" style="border:none;" /></a></div>

Becoming a Handy Woman or Man

Being handy is a matter of following simple directions – a combination of common sense and practical get-down-on-your-hands-and-knees experience. With the right tools and some basic know-how, you can cut way back on those emergency repair calls and enjoy the distinct satisfaction of self-sufficiency.

Follow these simple guidelines to ensure that your handiness doesn’t become foolhardy and expensive!

Adopt the physician’s creed: do no harm! There’s no sense in trying to take apart a bathroom faucet is you can’t tell a washer from a valve seat. A botched job may seriously complicate the plumber’s task and turn your attempt at thrift into a nasty surprise!plumbing

Be realistic. Very intelligent people sometimes believe they can figure out anything, given the inclination. But electrical wiring in not logic or psychology. Learn how. Don’t try to wing it!electrical wiring

Make a friend at your hardware store or home supply outlet. The staff members in these places are great resources for information on which tools and materials are right for your project, and the good ones will give you tips on doing the job. If you’re out to pick an expert’s brain, plan your visit for a weekday.

Read the directions. They may be written in pidgin, but the directions for the tool, adhesives or replacement part can keep you out of trouble. Ditto for diagrams.

Own a real toolbox. You may need more than the few tools you stuff ito your junk drawer. Get yourself a divided toolbox and start filling it with real tools. If you assemble a basic toolbox you’ll be equipped to tackle just about anything that needs fixing!Tool Box

Linked to some of my favorite link parties!

Nancy On The Home Front
<div align="center"><a href="https://nancyonthehomefront.com" title="Nancy On The Home Front"><img src="https://nancyonthehomefront.food.blog/wp-content/uploads/2020/02/99301-button_170x170-copy4.jpg" alt="Nancy On The Home Front" style="border:none;" /></a></div>
Design a site like this with WordPress.com
Get started