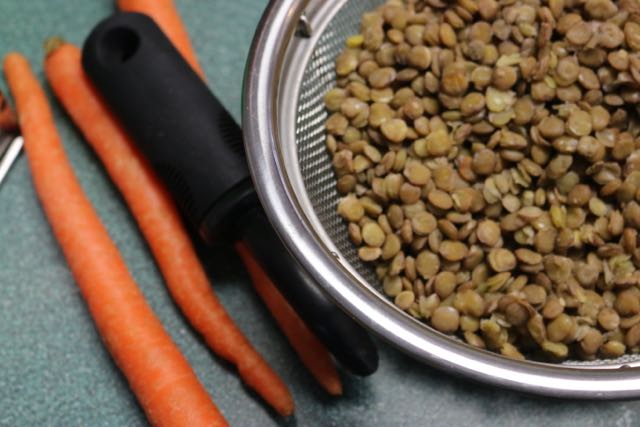
Right now I am watching what I eat and making healthy choices. I am also following the 21 Day Fix which is an incredible program of teaching you portion control, healthy eating and exercise. If you want more information let me know and I will point you in the right direction! Recently I made this Lentil Salad with Goat Cheese, which was delicious. It makes four servings so you can enjoy it for two meals, if there are two of you! I’m already thinking ahead to summer and how good this salad would be in a lettuce wrap! You may notice I totally forgot the goat cheese! Tasted delicious anyway!
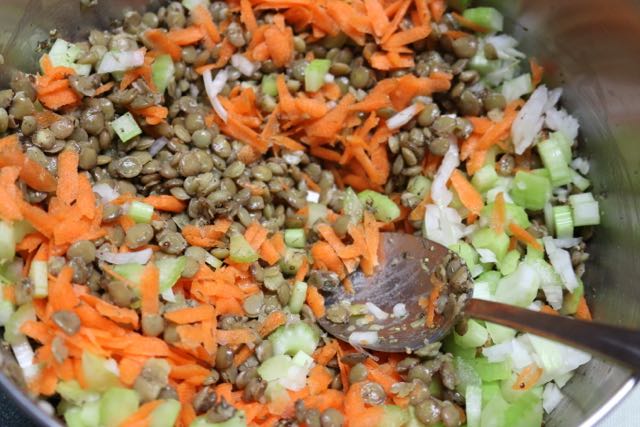
Lentil Salad with Goat Cheese
Ingredients:
6 cups of water
1 cup of green lentils, rinsed and drained
¾ tsp salt
2 celery stalks (can include the leaves), diced
2 carrots, shredded
1 small onion, minced
3 tbsp white wine vinegar
2 Tbsp fresh dill
1 Tbsp olive oil
1 Tbsp Dijon mustard
½ tsp black pepper
3 ounces goat cheese, crumbled
Directions:
Bring the water, lentils and ½ tsp salt to a boil in a large saucepan. Reduce heat and simmer, uncovered until lentils are tender. About 15-20 minutes. Drain and transfer to a large bowl to cool.
Add celery, carrots, onion, vinegar, dill, oil, mustard, pepper and remaining ¼ tsp salt and stir to combine.
Just before serving add the goat cheese or serve it without the goat cheese, either way it’s delicious. Serve chilled or at room temperature.
Do you live in an area of the country with a short growing season? If you are interested in having your own vegetable seedlings you will have to start your seeds indoors. After reading last week’s post on Time To Plant Seeds you will know how to figure out when to start your seeds indoors. It’s very important not to start your seeds too early or you will end up with very leggy seedlings to transplant into your garden!
I always look forward to this time of year, we may still have snow on the ground outside but in just 8-10 weeks I will be transplanting my seedlings into the garden!
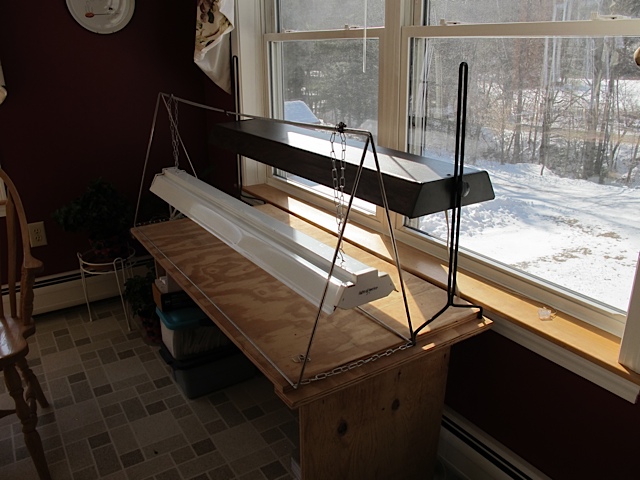
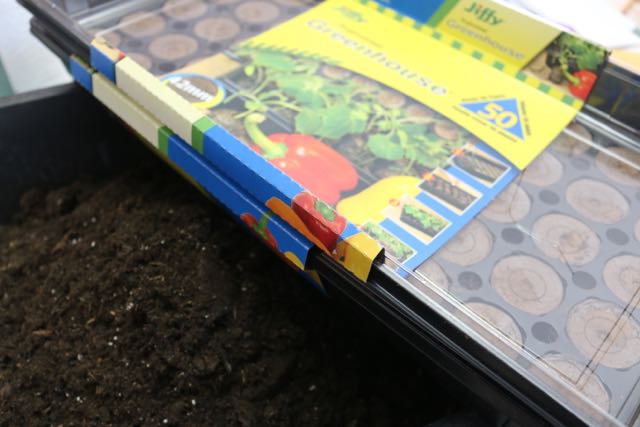
My seed starting set up is fairly simple. I would love to have a greenhouse but instead my husband made me a wonderful grow table. It just fits my two grow lights and when placed in front of our kitchen window it seems to work just fine as a spot to start my seedlings.
Seed starting set-up.
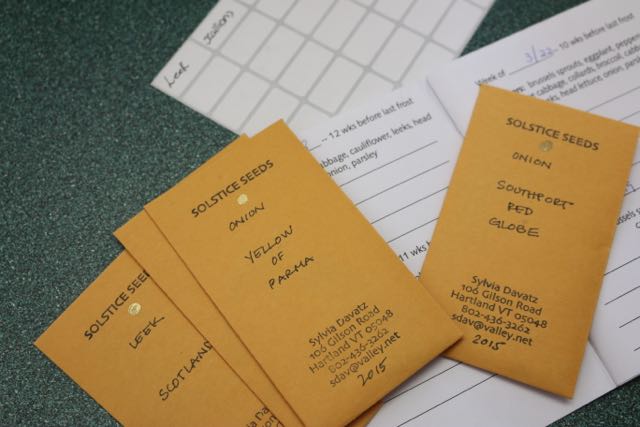
As mentioned last week, I keep track of what seeds I start and when they were planted. I also mark the containers so I can keep track of my seedlings.
Keeping track!
Since last week I have started my onion and leek seeds. In another week I will be starting my peppers and tomatoes. I usually use small containers to start my seeds but this year I will also be using another type of seed starting container as well.
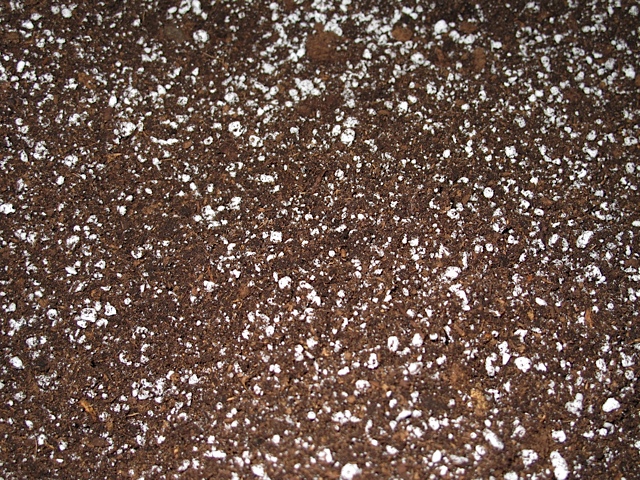
I have mentioned before that I make my own seed starting mixture. If you missed that post you can find my “recipe” HERE.
Homemade seed starting mixture.
One rule of thumb is to plant the seeds 2-3 times as deep as the seed is wide. Leek and onion seeds are rather small and are pretty much sprinkled on the top of the soil.
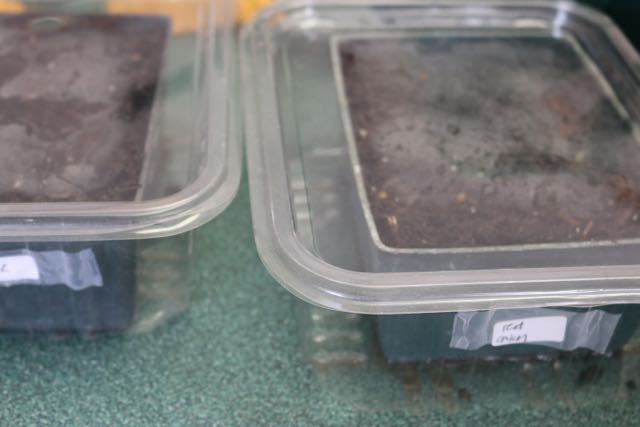
Once my seeds are planted I make sure the soil is moist. One way to do this is to fill a plastic bin with water and float the pot in it until the surface is damp. I then label each container with the date and the name of the plant. This will help me keep track of how many days it took the seeds to germinate and will also help me when it comes time to plants the vegetable plants in the garden. I may be able to tell leeks from broccoli but it is very important to keep track of the variety of peppers and tomatoes.
Seeds planted.
Cover the seeds with a plastic or glass cover to create a mini greenhouse. You need to keep the seeds warm; a heating pad may be necessary. You do not need a grow light until the seeds sprout. Once you see the first seed sprouting remove the cover and place under your grow light. Keep a close eye on the seedlings, as you don’t want them to dry out.
It’s a wonderful feeling to finally have some seeds planted. I will continue to plant more as the weeks go by. Won’t be too long before I’ll be able to be outside working in the garden!
Do you currently live o two incomes? Could you imagine only living on one income? Perhaps one of you wants to stay home with your young children or maybe you’d like to go back to school. The decision to go from two incomes to one begins with a detailed look at your household finances. Carefully look through your numbers again and again to determine where you can cut back.
There are ways to cut back on your expenses, live on less or live differently from the way you are now. It’s not about how much money you earn but it’s about how you spend the money you do earn. How much do you spend and how much you keep will determine how successful you will be.
First of all look at where your money goes. This will not be an easy task but you will need to track your expenses for three months or so. Keep track of what you spend during the day, what payments are made and what they are for. Then organize your expenses into categories. Use a computer program like Quicken. This will help you organize and total your categories. Use your checkbook register as well. You want to come up with a monthly estimate of all your expenses. Your categories will include your mortgage, insurance, utilities, child care, payments for credit card loans or car loans, gas, groceries, clothing, medical, home and car maintenance, charity, savings and miscellaneous.
Once you have figured out your current budget you can determine how much of a cushion you have. The next steps are to determine whether your expenses are needs or likes and write that down next to each column. Figure out which expenses are work related and trim those first. For example if you will no longer need childcare eliminate that expense. Some likes that could be eliminated are health club memberships, extra cable channels, frequent eating out and fancy vacations. Think of fun ways to exercise at home, watch less TV and eat at home more often.
Now look at your needs category. This is a harder area to tackle but also an area with the largest saving potential. Would you be willing to trade your car in for lower car payments? If you have a fancy car maybe you could even sell it, pay off the car loan and buy an inexpensive second hand car. Can you refinance your mortgage? Saving on groceries is another great area. If one parent is at home they might be willing to shop the sales and cook from scratch. Reduce your utilities by using the dryer less, adjust your thermostat and reduce cell phone services.
Continue going over your budget and your numbers until you are confident your family could survive and even thrive on one income. Having one parent at home can help create a cohesive family lifestyle in the midst of todays rushed and media distracted lifestyles. If this is your dream, work hard on your budget worksheet to make it happen. It will be worth it.
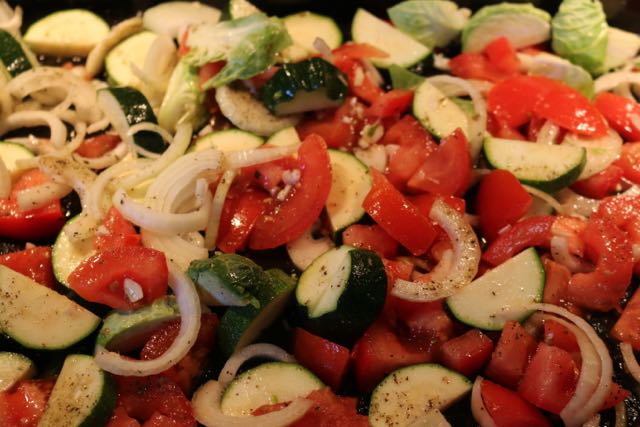
I love roasted vegetables and I love poached eggs. I never thought about combining the two until recently. This Baked Eggs with Roasted Vegetables is such a delicious and healthy meal. My husband, who was a bit skeptical, enjoyed them as well! This recipe serves 2-4 depending on the size ramekins you use.
Baked Eggs with Roasted Vegetables
Ingredients:
1 pound of tomatoes, cut into chunks
1 red or yellow pepper, cut into 1 inch pieces (or use Brussels sprouts)
1 zucchini, quartered and cut into 1 inch pieces
1 onion, halved and sliced
2 large garlic cloves, minced
2 tsp oil
½ tsp Italian seasoning
½ tsp salt
¼ tsp pepper
4 large eggs
¼ cup grated Parmesan cheese (op)
Directions:
Preheat the oven to 400 degrees. Spray your baking pan with nonstick spray. Place all vegetables in a large bowl and drizzle with olive oil. Toss to coat. Place the vegetables in your prepared pan. Roast for about thirty minutes or until the vegetables are crisp tender.
Spray 2-4 ramekins with nonstick spray. I used two larger ramekins for the two of us. Divide the vegetables into the ramekins. Make a well in the center of each cup.
Carefully break an egg into each cup. I put two eggs in each cup. Sprinkle with the cheese, which I forgot. Place the cups on a baking sheet and bake until the eggs are set, about 20-25 minutes. Serve hot.
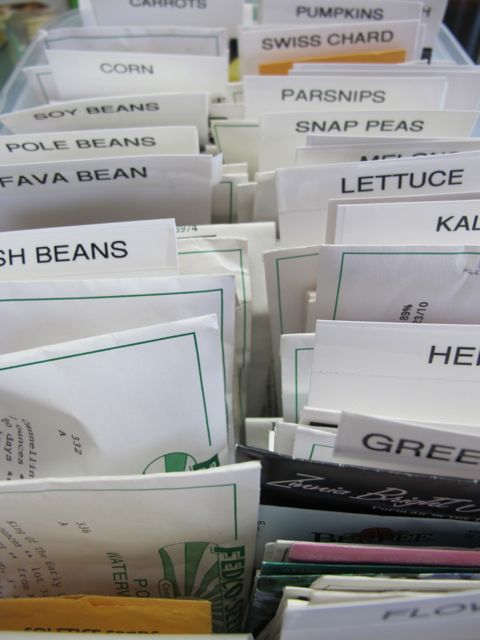
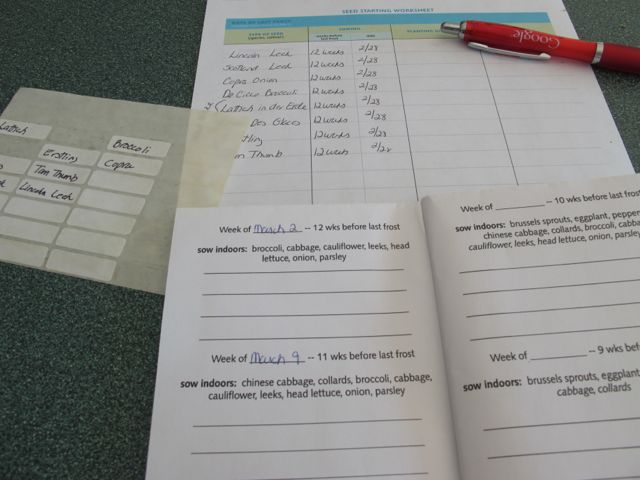
Monday I wrote that Organization is Key. I find that this is especially true when getting ready to start my seeds! I have a large container of seeds, some that I have purchased this year and many other leftover packets from the last couple of years. How do I know which seeds to plant when?
Going through the old seeds.
If you go online there are many sources to help you answer this question. Baker Creek Heirloom Seeds has a great page to help you. They have placed various vegetables into groups depending on how many weeks before the last frost these vegetables should be started indoors. Leeks and Onions should be started 12 weeks before your last frost date. Peppers, eggplants and tomatoes should be started 8 weeks before the last frost date and cucumbers, pumpkins and squash should be started 3 weeks before the last frost date.
The back of each seed packet will also give you this information. All seed packets indicate the optimum sowing time based on the average last spring frost date. You can also check the new Plant Hardiness Zone Map from the USDA, which will give you an idea, of what plants will thrive in your area.I usually download a little booklet from Little House in the Suburbs to help me stay organized. I can fill in which seeds I plan to start and when and also make notes as to when they sprouted etc. I am very careful to label my containers of seeds and keep track of what I plant when!
Techniques to keep track of your seedlings.
How do you find out the last spring frost date for your area? There are several sites online that can give you this information. Dave’s Garden has a page where you just enter your zip code and it will tell you. For On The Home Front we are almost guaranteed that we will not get frost from June 3 through September 17th! Our frost-free growing season is around 129 days. I do not usually transplant my seedlings in the ground until Memorial Day weekend. Even with waiting we will often have a very cold night where I have to cover the seedlings in the garden!
Seed viability is another thing to think about before starting your seeds. If you are using seeds left over from a previous year it is a good idea to check the viability of the seeds. An easy way to do this is to take 10 seeds and place them on a dampened paper towel. Moisten the paper towel and lay it over the seeds. Place the covered seeds in a zip lock plastic bag and store in a warm, dark place such as a cupboard. Check it occasionally to make sure it is still moist. After a week check the seeds to see if any have sprouted. By using ten seeds you can convert the viability to a percentage. If all 10 seeds have sprouted you have 100% viability. If only 6 sprouted the percentage drops to 60%. If the viability is low you may just have to plant more seeds or get a new packet of seeds.
Check my video on the seed viability test I did on some pepper and tomato seeds.
This week I will be planting some leek seeds. I have had very good luck with leeks in the past. Next week I’ll be mixing up some more seed starting soil. Be sure to check in next week for my soil starting mixture!
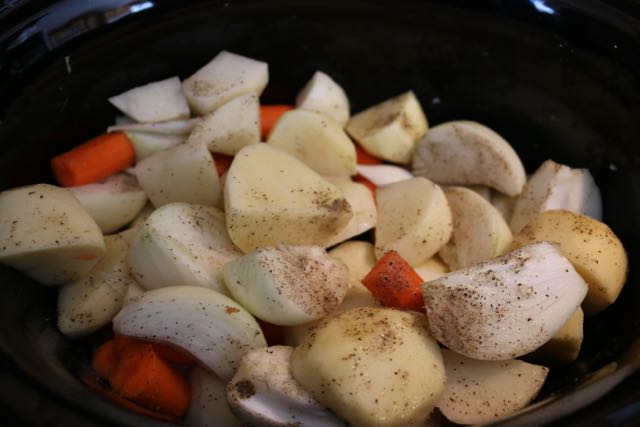
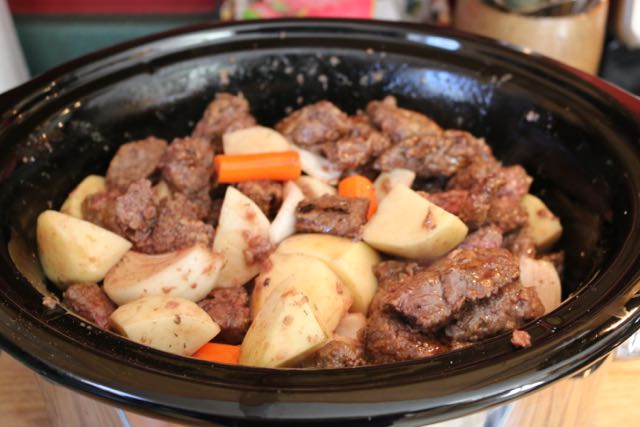
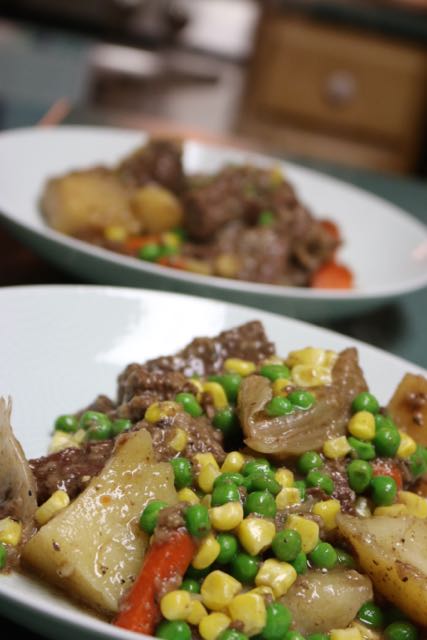
Sometimes you just want a simple, tasty meal that you can throw in the crockpot in the morning and by dinnertime you have a delicious meal to enjoy. With my Mom’s Crock Pot Beef Stew you can do all the work in the morning and have a tasty meal waiting for you at the end of the day.
Mom’s Crock Pot Beef Stew
Ingredients:
6 medium potatoes, I like to use Yukon Gold
4 medium carrots, cut into 1 inch pieces
3 medium onions, quartered
salt and pepper
1 cup flour
2-3 pounds of beef chuck, fat trimmed and cut into 1 inch pieces
2 Tbsp olive oil
1 ½ cup homemade beef broth
2 tsp thyme
2 cups frozen peas, defrosted
2 cups frozen corn, defrosted
Directions:
Combine the potatoes, carrots, onions and 1 tsp salt and ½ tsp pepper into your 5-7 quart slow cooker. Stir well to distribute the salt and pepper.
Add 2 tsp salt, 1 tsp pepper and the flour to a large plastic bag and mix well. Add the meat to the flour mixture and toss to coat. Heat the oil in a large skillet over high heat. Add the meat and brown on all sides. Transfer the browned meat to the slow cooker. Add the broth to the skillet and scape up any bits from the bottom of the pan. Transfer the contents of the skillet to the slow cooker and add the thyme. Cover and cook on low for 8 hours or until the meat is tender. Add the peas and corn and cook for an additional 1 hour.
The houseplants have been tended to, the seeds have been ordered and I’m just counting the days until spring. Here in Vermont, like many other places has been experiencing a very cold and snowy winter. I will admit I love the change of seasons and I really try to take advantage of our beautiful winter days. Saturday I was invited on a snowshoe hike with two good friends of mine. It was a cold blustery day but the snow was beautiful. The hike was a bit steep.But the view from the top was worth it, even if it was only 14 degrees and windy. We did not stay long!Sunday was an absolutely beautiful day. We had gotten another 7-8 inches of snow Saturday night and after church my husband and I decided to go snowshoeing. How blessed we are to be able to walk out our door and into the woods!If you are snowshoeing on our property you soon realize that once you get going you are heading up, up, up!The snow was deep so it was a very good workout!
The way down was just as beautiful!I’m counting the days until spring but in the meantime I’m going to enjoy this winter!
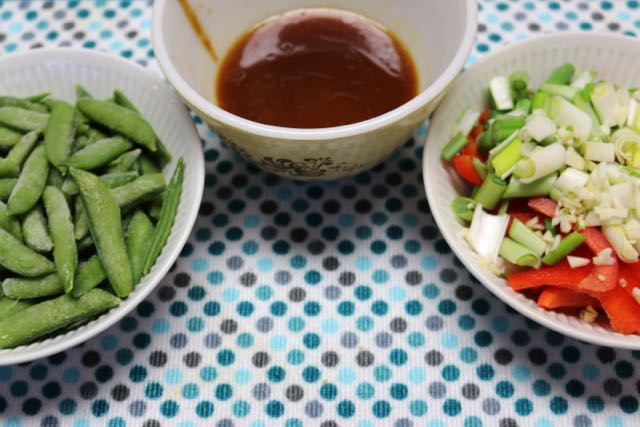
I love a delicious dinner that comes together in under ½ hour. When you’ve had a busy day and all of a sudden it’s dinnertime this beef and veggie stir-fry can be put together quickly and in no time at all you will have a healthy, delicious dinner on the table.
Beef and Veggie Stir-Fry
Ingredients:
½ cup homemade chicken or beef broth
2 Tbsp hoisin sauce
1 tsp cornstarch
½ tsp sesame oil
2 tsp oil
1 pound sirloin steak, trimmed and thinly sliced
4 scallions, cut into 1 inch pieces
1 cup snow peas
1 red pepper, thinly sliced
2 garlic cloves, minced
Pinch of red pepper flakes
Directions:
Mix together the broth, hoisin sauce, cornstarch and sesame oil in a small bowl until smooth.
Heat a wok over medium high heat. Add 1 tsp of oil (peanut or olive oil) and swirl to coat the wok. Add the beef and stir fry until browned about three minutes.
Transfer the beef to a plate.
Again heat the wok over medium high heat. Add 1 tsp of oil (peanut or olive oil) and swirl to coat the wok. Add scallions, peas, pepper, garlic and red pepper flakes. Stir-fry until the vegetables are crisp tender.
Stir the cornstarch mixture and add to the wok. Stir until the sauce bubbles and thickens, about a minute. Return the beef to the wok, stir everything together until heated through.
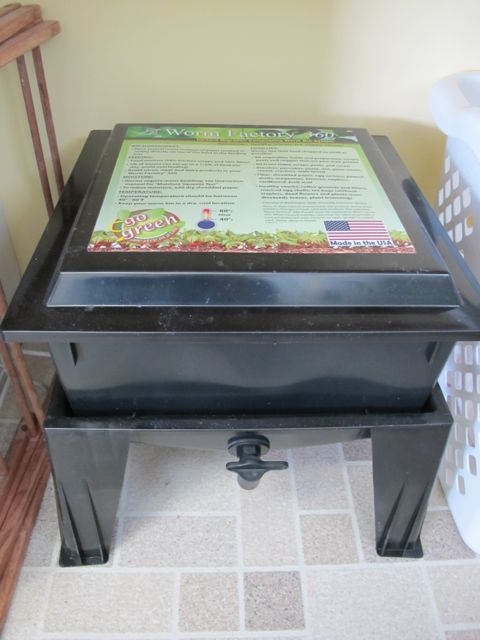
It’s been in operation for over a year now and is doing quiet well. During the warmer months I move the whole worm farm outside into a protected area where it is under the eves of the house. However during the winter months I move the container into our garage. Our garage is actually heated so although it is cool is never goes below 45 degrees even on the coldest day. The worms are kept as close to the wall of the house as possible and seem to be doing fine.
I added another tray a while ago and the worms have pretty much moved up into the new tray and judging from the fullness of that tray I think it’s time to add another one.
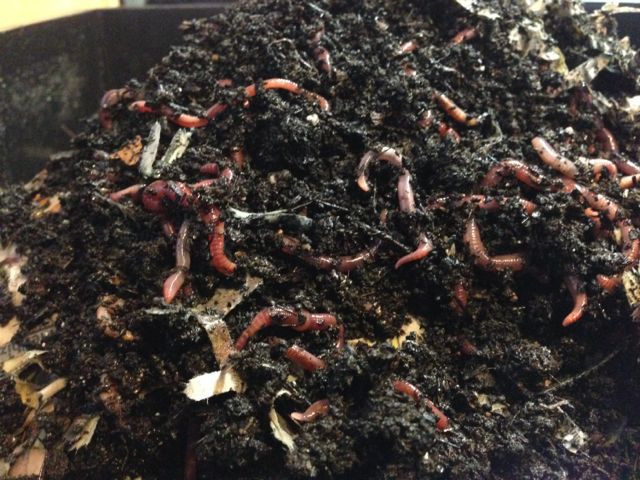
Red Wigglers!
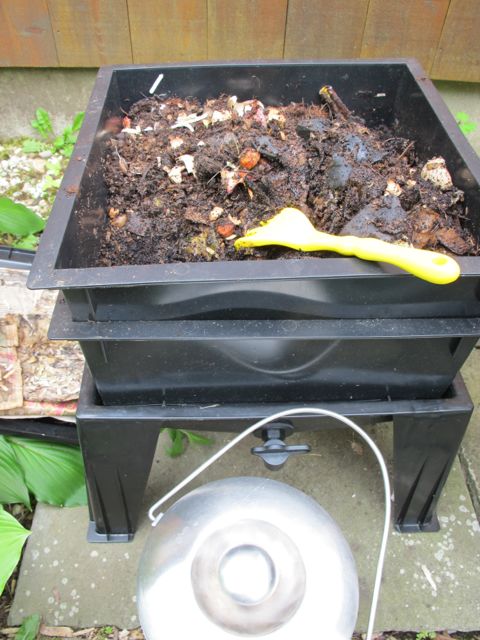
The worms are always moving upwards and the top tray is usually full of new food without much decomposition.
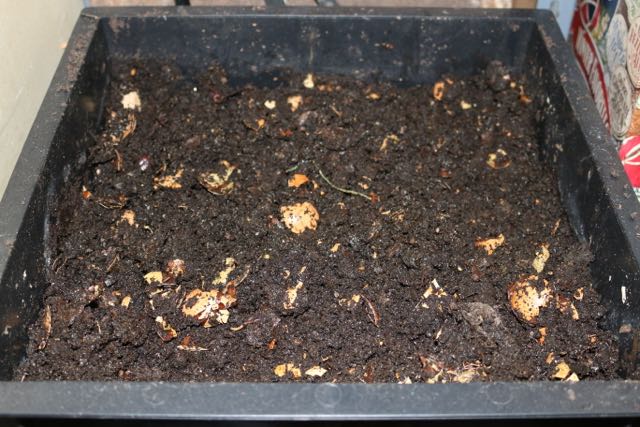
Close up of the processing tray
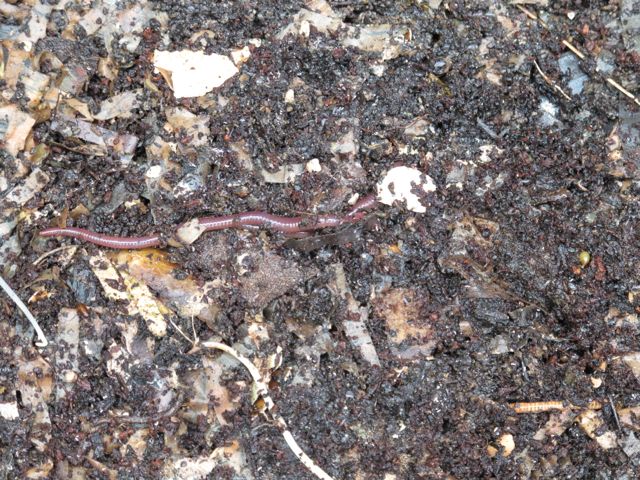
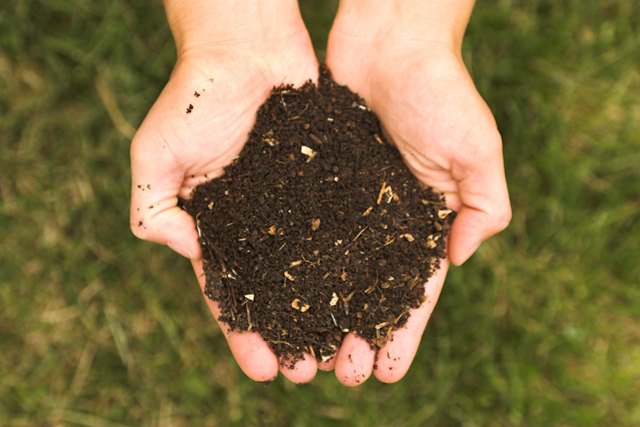
The lower trays are known as processing trays, the dirt is very dark and the majority of the food is broken down. Eventually the bottom tray will be the finished compost. It is dark and moist and crumbles in your hand.
This is the soil you can use as a fertilizer by just adding a little bit around the base of your plants. You can also mix two parts of potting soil to one part of the vermicompost and use it as an enriched potting soil.
We continue to compost all winter, our outdoor compost bin not only gets full but it is completely frozen and very little if any composting is taking place. I enjoy being able to use the kitchen scraps to feed the worms during the winter and know that beautiful compost is being created!
When we had two dogs I made dog treats more often.
Purtie and Gracie, both greatly missed.
Now that we only have one dog (my daughter’s Boston Terrier) I don’t make treats as often.
Riley, the Boston Terrier
However this week we were out of dog treats and Riley expects one when she comes in from doing her business. I really didn’t feel like making a special trip to the store so I made a batch of Peanut Butter Biscuits for her. We had one happy dog!
Peanut Butter Biscuits
3 cups whole wheat flour
1 cup cornmeal
1 cup of oats, uncooked
1 cup of hot water
¼ cup of olive oil
2 eggs, lightly beaten
3-4 Tbsp peanut butter
In one bowl combine peanut butter, hot water, oil and eggs. Mix until smooth. In another bowl combine the dry ingredients. Pour the wet ingredients into the dry ingredients and mix until dough forms. I used my stand mixer, which worked well for this.
Knead the dough on a floured surface and roll out to an inch thickness. Cut your shapes out. I used a bone shaped cookie cutter. Place the shapes on a lightly greased or non-stick cookie sheet.
Ready for the oven!
Bake at 400 degrees for 20-30 minutes or until firm to the touch. Let cool until hard.