Using Lemon Juice and Honey for Colds, Coughs and Sore Throats

We all have our favorite uses for lemon juice and honey, but did you know it could be used to help with colds, coughs and sore throats? That’s right next time you feel a little under the weather try some of these remedies.Lemons

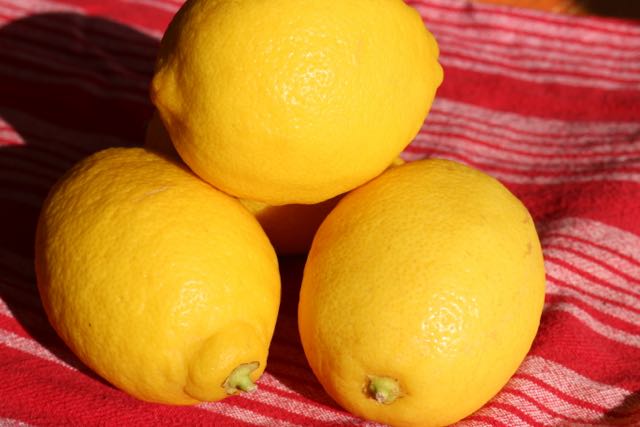
Sip this warm elixir to reduce a fever. Combine 1 ½ teaspoons for Cream of Tartar, ½ teaspoon lemon juice, 2 ½ cups warm water and ½ teaspoon of honey. Drink slowly.

Make your own cough syrup by mixing 4 tablespoons of lemon juice, 1 cup of honey and ½ cup extra virgin olive oil. Heat, stirring vigorously. Take 1 teaspoon every 2 hours.

Try this nighttime cough suppressant. Bring 2 cups of water to a boil. Stir in 2 sliced lemons, ½ teaspoon ground ginger, 2 tablespoons of honey and 2 tablespoons of sugar. Bring to a boil again; reduce hear and simmer until the mixture becomes a thick syrup. Take 1-2 teaspoons after the mixture cools.Lemon cough suppresent

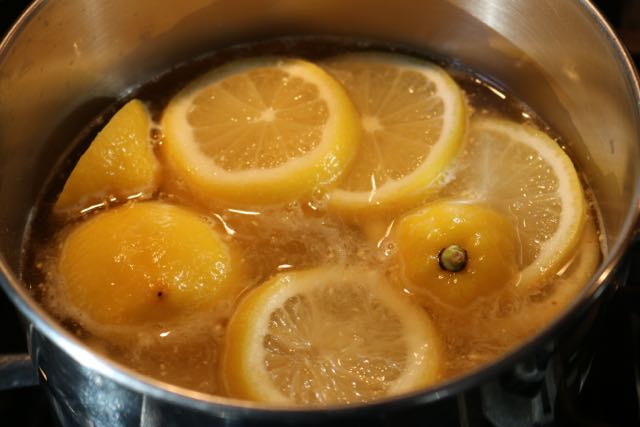
Honey promotes the flow of mucus and is great for coughs. Mix 1 tablespoon of honey with 1 cup of hot water and a teaspoon of lemon juice. Sip for relief.Warm water and lemon.

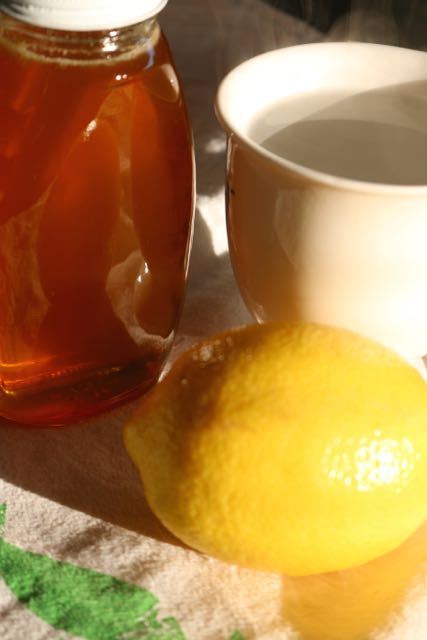
Drink a cup of tea mixed with lemon juice and honey to soothe a sore throat.Tea, lemon and honey.

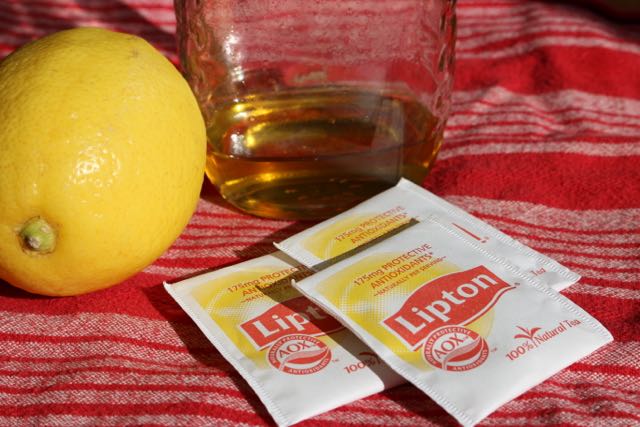
Lessen the pain of a sore throat with this drink. Mix 3 tablespoons of lime juice, 1 tablespoon of pineapple juice and 1 teaspoon of honey in a glass of water.

Make a healing potion for bronchitis. Slice an onion into a bowl, cover with honey and let stand overnight. Take 1 teaspoon of the liquid 4 times a day.

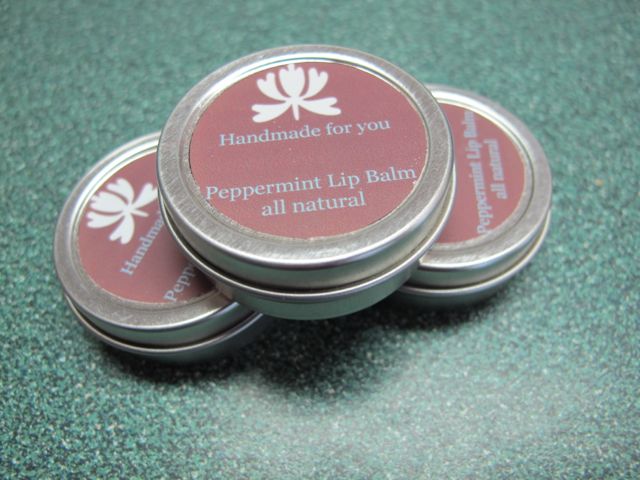
Honey mixed with lemon has always been a favorite of mine. I hope these remedies give you some relief! I am not a doctor so if your symptoms continue be sure to seek out the advice of your doctor!lemons
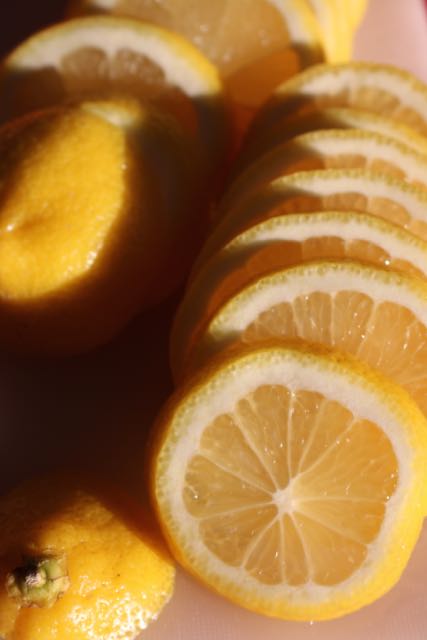
Linked To: InspireMeMondays, TheGatheringSpot, HearthAndSoulHop, You’reGonnaLoveIt, CornFreeEverydayLinkParty, PennyPinchingParty, WildcraftingWednesday, RivertonHousewives, LovelyLittleLinkParty, HomeMatters, WhatToDoWeekends, SimplyNaturalSaturdays, FlashbackFriday, MotivationMonday, InspireMeMondays,

Delicious Oatmeal Pancakes

My husband and I are working on eating healthy at every meal. For breakfast we eat a lot of oats, either in the form of my homemade granola or in hot oatmeal. I decided to change things up and make some oatmeal pancakes for variation. These delicious oatmeal pancakes are very hearty and make a perfect Saturday morning breakfast. Serve with fresh blueberries and maple syrup and you have a hearty breakfast fit for a king!


Oatmeal Pancakes

Delicious Oatmeal Pancakes

1 cup oats
½ cup flour
½ cup whole wheat flour
1 Tbsp sugar
1 tsp baking soda
¼ tsp salt
1 egg, beaten
2 cups buttermilk
2 Tbsp coconut oil
1 tsp vanilla

In a large bowl combine the oats, flours, sugar, baking soda and salt. In a second bowl combine the egg, buttermilk, coconut oil and vanilla. Stir the buttermilk mixture into the dry ingredients, just until moistened.

Using a ¼ cup measure pour the batter onto a hot griddle that has been sprayed with oil. When the bubbles form on the top carefully flip and cook the second side. Serve with berries and yogurt, homemade blueberry syrup or best with pure maple syrup! Makes about 4 servings but can easily be doubled. Like the buttermilk pancakes I make, these delicious oatmeal pancakes can also be frozen to enjoy later.

Oatmeal Pancakes

February Brings The Snow

I know many of you are sick of winter already and tired of all the snow and cold weather we’ve been getting.Jack Frost I love all the seasons except mud season! To me February means we’re finally getting some good snow and the temperatures are a little warmer. My garden is slowly disappearing under all the snow we’ve been getting. It’s going to be a long time before we’re enjoying any meals at the picnic table.Picnic Table

My husband and I try to get out and snow shoe whenever possible. We are lucky as we can just walk out our door and put our snowshoes on and go out into the woods. I love snowshoeing through the woods when the snow is coming down and it is so quiet.snowshoeing I also enjoy those beautiful blue sky days when everything is crisp and clear.snowshoeing

We have an abundance of birds that flock to our feeders this time of year. The bird book is always close at hand so we can identify the various birds. The nuthatches are here every day no matter what the weather!Nuthatch We’ve also had a large flock of Redpoles and mixed in are a few of their northern cousins the Hoary Redpoles! They are very skittish and it’s hard to get a picture of them.

Red Poles
Redpoles

Last year I made some bird treats for Valentine’s Day and hung them in the tree. Guess I’d better get busy if I plan to make them again this year!Valentine Treats

I hope wherever you live you are enjoying this short month of February. The days are getting longer and it won’t be long before spring is here and we’re back outside in the garden! In the meantime I’m enjoying the snow!snowshoeing

Linked To: GardenTuesday, OutdoorWednesday, HomesteadBlogHop, TuesdaysWithATwist, ThursdayFavoriteThings, FromTheFarm, HomeMatters, ChainLinkyClimb, MotivationMonday, CleverChicksBlogHop

Frugal Tips: Cleaning a Burnt Pot

Some of you may know that my sister and I run a vacation rental home. The small house sits on property adjacent to ours.Vacation RentalFor the most part it’s worked out very well. We are located near several ski areas and we have a good flow of renters using the house during the winter to ski. Usually the renters respect the house and treat it well but every once in a awhile we’ll get some renters that leave the house in terrible shape.rental house

Several weeks ago we had just such renters. Not only did they leave the house a mess but they set off firecrackers inside the house!Evidence of firecrackers If that wasn’t enough they left two pots so badly burned with caked on food I thought we would have to throw them out!dirty pots in the sink

However after doing some searching I found several suggestions for cleaning burnt pans.dirty pots

The first suggestion was to soak the pan overnight with some dish washer detergent overnight. That did not work.

Second suggestion was to use equal amounts of white vinegar and water. First you fill the bottom of the pan with your water and then add the vinegar.Soak the pot in vinegar and water Bring the pot to a boil. Remove the pot from the heat and add 2 Tbsp of baking soda, expect some fizzing! Empty the pan and scour as normal. If there is still some stubborn marks you can make a paste of baking soda and a couple of drops of water. Leave the paste in place for a while and then clean as normal.

I was amazed that I was able to clean the pot! Cleaned potHopefully the next tenants will leave the house in better shape!

Linked To: WWHOP, HomesteadBlogHop, WakeUpWednesday, WildcraftingWednesday, ThinkTankThursday, SimpleLivesThursday, SimplyNaturalSaturdays, MotivationMonday

Recipe Box: Shrimp & Corn Chowder

You may have guessed that I love shrimp! I had a bag of frozen shrimp and decided to make shrimp and corn chowder,  a perfect meal for all the cold weather we’ve been having! This is one of those quick meals that only takes about a half an hour to make!Shrimp & Corn Chowder

Shrimp & Corn Chowder

2 Tbsp butter
2 leeks, chopped
1 fennel bulb, chopped
Salt and pepper to taste
2 Tbsp flour
1 8oz bottle of clam juice
3 cups milk
1 pound potatoes, peeled and cut into cubes
¾ pound shrimp, cooked and peeled
10 oz frozen corn
2 Tbsp fresh parsley
2 Tbsp fresh lemon juice

Heat the butter in a large saucepan and add the leeks, fennel, salt and pepper.Sauté leeks & fennel. Cook until the vegetables are tender, about 5 minutes. Stir in the flour. Add the clam juice, milk and potatoes and bring to a boil. Reduce heat and simmer for about 12 minutes. Stirring occasionally.Shrimp & Corn Chowder Stir in the shrimp and the corn and cook until the potatoes are tender and the shrimp and corn are heated through.Shrimp & Corn Chowder Stir in the parsley and the lemon juice and serve hot!

Shrimp & Corn Chowder

Linked To: TheWeekendRetreat, FridayFlashBlog, PinJunkiePinParty, FoodieFridayAndEverythingElse, FridayFavorites, #FoodiueFridayDIY, FreedomFriday, WhatToDoWeekends, WeekendPotluck, RealFoodFriday, LHITS DIY, PrettyPintasticParty, FlashbackFriday, BestRecipes&DIYProjects, CleverChicksBlogHop, HappinessIsHomemade, MunchingMondays, FlourMeWithLove, What’dYouDoThisWeekend, LinkUp#69, MerryMonday, MotivationMonday, FatTuesdayInspireMeMondays, TotallyTalentedTuesday, HearthAndSoulHop, TuesdaysTable, TheGatheringSpot, You’reGonnaLoveIt, TickleMyTastebuds, TastyTuesday, #TastyTuesday#91, RealFoodWednesday, WonderfulWednesday, RivertonHousewives, CreatAndShare, WakeUpWednesday, CreateItThursday, LovelyLittleLinkParty, FullPlateThursday, SimpleLivesThursday, My2FavoriteThingsOnThursday


Waiting For Spring

During most of the year you will find me outside, usually in the garden during the gardening season.In the garden! In the winter I try to get outside as much as possible. There is nothing I enjoy better than a beautiful blue-sky day to venture out on my snowshoes. We are blessed to be able to walk out our door and into the woods.On my snowshoesI am also an avid reader. I always have more than one book that I am reading.  During the winter months is when I do the most reading.

Love To Read MonthSince February is “Love of Reading Month” I thought you might like to see a few of the books that I’d like to read this winter.books

Mindscape by Timothy Z. Witmer is not a book about gardening but instead it is a book on “What to Think About Instead of Worrying”. I am reading this book in a small group I am in at our church and am really enjoying it.Mindscape

Mud Season by Ellen Stimson is the next fiction book I will be reading. It sounds like a fun read – the story of how one women’s dream of moving to Vermont raising children, chickens and sheep and running the old country store pretty much led to one calamity after another.Mud Season

Are you a fan of Joel Salatin? I am, I would love to take a trip to Virginia and visit his Polyface Farm.Polyface_Farms_sign I recently started his book, Folks this ain’t normal. A farmer’s Advice for Happier Hens, Healthier People and a Better World. So far I am really enjoying how he writes.Joel Salatin

Winter is also the time when I read about other peoples’ gardens and how they do things. As our garden is moving toward raised beds I want to be better at growing more in less space. The All New Square Foot Gardening should help me do just that. The author Mel Bartholomew has been teaching his proven Square Foot Gardening for over twenty five years! I’m sure I’ll learn something new.Gardening Books

Another technique I’d like to learn more about is Straw Bale Gardening. Last year I purchased the book by Joel Karsten on Straw Bale Gardening. Never found the time to read it. However when Joel talks about a method to grow vegetables anywhere, earlier and with no weeding I want to learn more!

For Christmas my husband gave me the book called The Complete Book of Essential Oils & Aromatherapy. Yes, I want to learn more about essential oils. I have used them in the lip balm I’ve made and the hand lotion I have made. However I am sure I am just scratching the surface and have a lot more to learn.Essential Oils

As you may be able to tell I have many more books that I want to read then I will actually get to reading. As the saying goes, “So many books, So little time.” How true.

Are you a reader? What books have you been reading this winter?

Linked To: GardenTuesday, OutdoorWednesday, HomesteadBlogHop, SimpleLivesThursday, FlashbackFriday, LHITS DIY, FromTheFarm, TuesdayGardenParty

Making Your Own Wool Dryer Balls

Last year I was lucky enough to win a box of dryer balls.

prudent living, frugal tips
Woolzies Dryer Balls

I was a little skeptical at first, I had never even heard of dryer balls!

prudent living, frugal tips
Dryer Balls

Dryer balls are an eco-friendly alternative to dryer sheets and liquid fabric softener. Would they really help my clothes dry quicker with less static? Yes they do! They decrease the drying time, which saves you money on your utility bills. Unlike dryer sheets, wool dryer balls can be used over and over again. Wool dryer balls can be used for cloth diapers keeping them soft and chemical free. I loved the dryer balls and despite the fact that they often end up inside a sleeve or a pant leg I use them every time I dry a load in the dryer.

How hard could it be to make them myself? After searching the Internet I found several ways to make them. You can use yarn. What a perfect use for those small leftover balls of yarn I have in my yarn box!Leftover Yarn They are very easy to make this way. Just begin wrapping your yarn around your fingers like you would when making a ball of yarn for knitting. The only difference is that you actually pull the yarn tight! Make the ball about the size of a tennis ball. Use a needle or a crochet hook to tuck the loose end.

Use a needle to tuck in the loose end or yarn.

Make about 4-6 balls. Using an old panty hose leg put the balls inside the pantry hose and tie a string or a knot between each ball.Yarn balls Throw the whole thing into a load of wash. Wash the whole thing with a hot wash cycle with a cold rinse. Dry in with your laundry using the hottest dryer setting! Check to see if your balls have felted, you may have to repeat several times, the strands should not separate on the balls.

Finished Dryer Ball
Finished Dryer Ball

You can also make wool dryer balls using roving. I actually used some wool roving I won from Clearwater Farms!Roving I used some extra pieces of wool I use to braid rugs to start the balls.wool scraps I took a few strips and wrapped them around each other into the shape of a ball.Balls made with wool scraps I then covered the wool scraps with the wool roving.  I also made a few covered with yarn over the wool scraps. Once the balls were about the size of a tennis ball I repeated the steps above. After running the balls through the wash twice they were well felted and ready to be used as dryer balls!

Dryer ball using the roving.

Have you ever used dryer balls? Do you make them yourself? I think I got carried away!Dryer ballsLinked To: TheGatheringSpot, TotallyTalentedTuesday WWHOP, PennyPinchingParty, WildcraftingWednesday, WonderfulWednesday, WakeUpWednesday, CreateAndShare, HomesteadBlogHop, ThursdayFavoriteThings, LovelyLittleLinkParty, ThinkTankThursday, SimpleLivesThursday, MotivationMondayMy2FavoriteThingsOnthursdayLinkParty, LHITS DIY, FromTheFarm, FlashbackFriday, SimplyNaturalSaturday, BestRecipes&DIYProjects, HappinessIsHomemade, CleverChicksBlogHop, HappinessIsHomemade, MerryMonday

Shrimp and Asparagus Stir-Fry

Did you ever have one of those days where you want to make a meal with whatever you have in the refrigerator/freezer? Shrimp and Asparagus Stir-Fry is one of those meals. I had some asparagus on hand and a yellow pepper and some fresh basil, all the ingredients I needed to make this delicious and healthy meal. It went together very quickly with very little prep!

Simple Ingredients

Shrimp and Asparagus Stir Fry

Ingredients:

½ pound shrimp, peeled and deveined
2 Tbsp reduced sodium soy sauce
1 Tbsp ginger, minced
1 pound asparagus, trimmed and cut into 2 inch lengths
1 Yellow pepper, cut into strips
2 garlic cloves, minced
1/8 tsp red pepper flakes
2 tsp oil
½ – 1 cup lightly packed fresh basil leaves, chopped

Directions:

Toss together the shrimp, 1 Tablespoon of soy sauce and the ginger in a bowl.

Add a tsp of oil to a large skillet or wok. When hot add the asparagus and the pepper and stir-fry until crisp tender, about 5 minutes.Stir fry asparagus and pepper. Stir in the garlic and pepper flakes and stir-fry for another 20 seconds. Transfer to a plate.

Add the 2 tsp oil to the wok and add the shrimp mixture. Stir fry until the shrimp are done, about 3 minutes.Stir fry the shrimp Add the asparagus mixture and the remaining 1 Tbsp soy sauce and stir fry until heated through.Shrimp & Asparagus

Remove the shrimp and asparagus from the heat and add the basil. Serve hot over rice. Makes 2 servings!

Shrimp & Asparagus

I’d like to say this was good as leftovers but there wasn’t any left!

No leftovers tonight!

Transplanting Your Hoya

More snow this week, too early to start seeds indoors so my attention is on my houseplants. For the most part they are all doing pretty well. Remember the bay plant I transplanted? It is very happy sending off new leaves and really growing!

Bay Plant
Bay Plant

My rosemary, which I brought inside for the winter in getting too big! The amaryllis I was given for Christmas has eight blooms!Amaryllis Even the orchid continues to send out blooms!

flowers
Orchids

I have one plant that is not doing well, my poor Hoya. Ideally Hoyas should be transplanted every two years or so. I can’t even tell you when the last time I paid any attention to my Hoya! However it’s been drying out much too quickly and I noticed a few yellow leaves. This plant is not looking very happy.

First I gathered everything I would need; fresh potting soil, some newspaper and the plant.Clean pot & Old Plant

I carefully removed the Hoya from it’s pot. It’s not too root bound but the pot did have a total of four Hoya plants in it!Hoya root bound Since I will be putting the plant back in the same pot after dividing the plant I cleaned the pot with a scrub brush dipped in a mixture of 10% bleach and 90% water.

I then filled the bottom inch of the pot with an equal mixture of potting soil and vermiculite. The roots were carefully placed in the center of the new pot. Then I filled in around the roots with more potting soil, vermiculite mix.

Hoya repotted
Hoya repotted

The Hoya was careful watered to settle the soil and more soil was added. The Hoya is now back in it’s favorite spot in our south west facing kitchen window where is gets at least three hours of sun. Hopefully it won’t be long before it starts flowering again!

flowers
Hoya Blooms

Linked To: GardenTuesday, OutdoorWednesday, ThursdayFavoriteThings

Reposting Peppermint Lip Balm

This is one of my favorite products that I make at home. It is something I make every year. I love it that much!

I have also given the lip balm as gifts before. I purchased these little tins from Rose Mountain Herbs, which are the perfect size.

home remedies
Perfect size for lip balm.

The recipe is quite easy and mixes up in no time at all.

I used some of our local honey and our own beeswax, which we still have on hand from when we raised our own bees. It gave the lip balm a beautiful color.

lip balm, homemade creams, prudent living
Ingredients for Lip Balm

The vitamin E is squeezed out of the Vitamin E capsules; you get about 3 drops out of one capsule.

Here is the recipe:

6 Tbsp almond oil
2 tsp honey
4 tsp beeswax, grated
5 drops vitamin E oil
5 drops peppermint essential oil
8 – ½ oz lidded pots

In a double boiler, melt almond oil, honey and beeswax together. I used a tin can placed in water.

Remove from heat, allowing mixture to cool slightly. Add vitamin E and peppermint oils and stir until well blended. Spoon into tins and allow to cool before covering.homemade remedies

Be warned, you will get addicted to this lip balm. I know I am! Making it is now on my annual “to do” list!

lip balm, prudent living
Peppermint Lip Balm

Linked To: PennyPinchingParty, WildcraftingWednesday, WonderfulWednesday, SimplyNaturalSaturdays

Design a site like this with WordPress.com
Get started