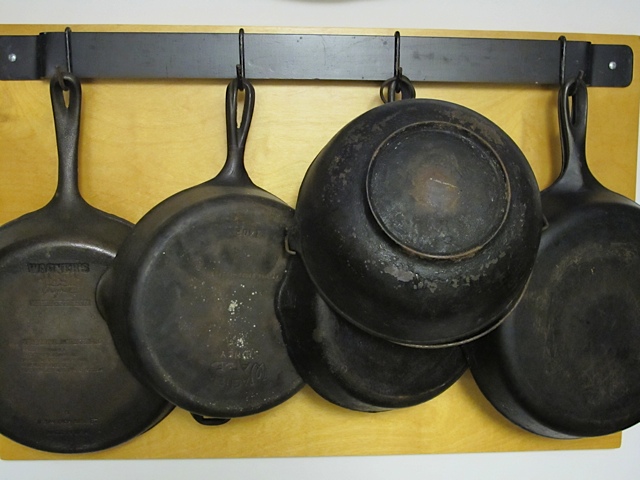
I have a wonderful collection of cast iron. Some pieces I have inherited from my mother while other pieces I have been luckily enough to spot at yard sales. I even have an old cast iron muffin tin! I love them all and each has a specific purpose from cooking up a pot of soup to roasting nuts.
Cast Iron Collection
The pieces I have found in yard sales have often needed to be restored. It’s a rather easy process. Use a nonmetallic scrubber to removed the rust. Wash with a mild dish soap, rinse well and dry with a clean towel.
Does your cast iron pan need a face lift?
Then I re-season the surface by coating it both inside and out with an unsalted vegetable shortening.
Put the greased skillet upside down on a foil covered baking sheet and bake at 350 degrees for an hour. Let cool and remove the excess grease with a paper towel.
To prevent rust in the first place, never soak your cast iron in water or put it in the dishwasher! Also do not scrub with metal scouring pads or harsh cleaners. Put a paper towel, paper plate or round coffee filter between stored pans to absorb moisture.
If you take good care of your cast iron it will last forever and you will be passing it down to your children someday!
I love entertaining. Inviting friends over to join us for a meal is one of life’s simple pleasures. Much as I love to entertain I also like to enjoy our company and don’t want to spend the whole time they are with us in the kitchen! I am often looking for dinner ideas that will allow me to serve a delicious meal but enjoy the time with our friends at the same time. This savory beef curry with rice recipe was perfect. I could make the curry ahead of time and reheat when we were ready to eat!
This is also one of those recipes you try once and it ends up in the recipe box to make again and again. The original recipe came from the website epicurious.com. I made a few changes and it is delicious!
Savory Beef Curry with Rice
Ingredients:
2 pounds of beef stew meat
3 Tbsp oil
2 large onions, chopped
6 whole cloves
2 cinnamon sticks
1 bay leaf
¼ tsp dried crushed red pepper
1 ½ cups of coconut milk
28oz can of tomatoes
3 Tbsp Major Grey chutney
3 Tbsp lime juice
2 Tbsp fresh ginger, peeled and minced
1 ½ Tbsp curry powder
½ tsp salt
Hot cooked rice
Directions:
Sprinkle the beef with salt and pepper. Heat 2 Tbsp of the oil in a large heavy pot over high heat. Add beef and brown on all sides, about 7 minutes.
Use a slotted spoon to transfer to a plate.
Heat the remaining 1 Tbsp oil in the same pot over medium-high heat, Add onions and sauté until tender and brown. Return beef to the pot and add cloves, garlic, cinnamon sticks, bay leaf and dried red pepper. Stir for one minute. Stir in the coconut milk, tomatoes, chutney, lime juice, ginger, curry powder and ½ tsp. salt and bring to a boil. Reduce heat and simmer until the beef is tender, about 2 hours.
Uncover and increase heat to medium. Boil stew until the juices are slightly thickened. Serve over rice. This dinner also freezes well if you have any leftovers!
It is going to be a few months before I am able to get outside and work in my garden again. It will be at least another month before I can start seed inside. In the meantime what’s a gardener to do?
I actually enjoy this quieter time of year and there is nothing I enjoy more than sitting by the woodstove with a cup of tea and my favorite seed catalogs!
When I first started gardening my main resources for seeds were the larger more commercial catalogs. As the years have gone by I now focus on heirloom seed suppliers and if I can find a local seed supplier that’s even better!
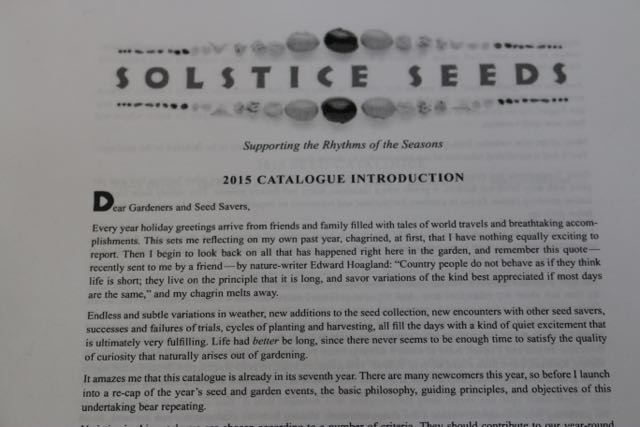
Several years ago I took a six month long seed saving class offered by a woman who runs a small seed saving business. Not only was the class informative but I was able to see first hand how Sylvia works hard to save her seeds and provide her customers with seeds that will grown in Vermont!
I have to say that Sylvia’s seed catalog, Solstice Seeds is by far my most favorite catalog. I know that all the seeds offered in this catalog were grown less than twenty miles from my home! I have wonderful results with Sylvia’s seeds and will continue to order from her. The numbers of seeds offered increase each year. Sylvia does not have a web site but if anyone is interested I’d be glad to send you a pdf of her catalog. Just contact me!
If there are seeds that I can’t find in the Solstice Seed catalog there are other catalogs that I also enjoy. Fedco Seed catalog is from Maine. It is a no frills catalog printed on black and white paper with no color photos. The descriptions are excellent and I have also had good results planting their seeds. Our local co-op places a group order each year where I get a 20% discount. Fedco prices are excellent to begin with and when you add the 20% discount they can’t be beat!
Another favorite Vermont Catalog is the High Mowing Organic Seeds catalog. I just love shopping local and supporting other Vermont businesses.
Have you followed the Baker Whole Seed Catalog? They are in their 18th year of business and have the most wonderful seed catalog. Last year they planted around 2000 varieties at their Missouri farm! All the seeds they sell are heirloom varieties. Their 2015 catalog is by far the best, full of big colorful photos. It’s fun to see what all these heirloom varieties look like especially since both the Solstice Seed Catalog and the Fedco Seed Catalog are black and white and do not offer any photos.
One last catalogs worthy of mentioning is the Seed Savers Exchange catalog. although not local, it is a catalog full of heirloom and open pollinated seeds. For 40 years the Seed Savers Exchange has been in the forefront of the heirloom seed movement, working with gardeners and seed savers to preserve our garden and food heritage.
Do you start your own seeds for your garden or do you purchase local plants? I love looking through the catalogs and planning my next garden!
I’m curious, how many of you have a current first aid kit in your home?
Every family should keep a first aid kit at home and in their car. I have to admit when we had small children I was very good about keeping a current first aid kit on hand. We always had what ever you would need for small injuries. Now that our children are grown it’s time I updated our emergency kit and got it up-to-date!
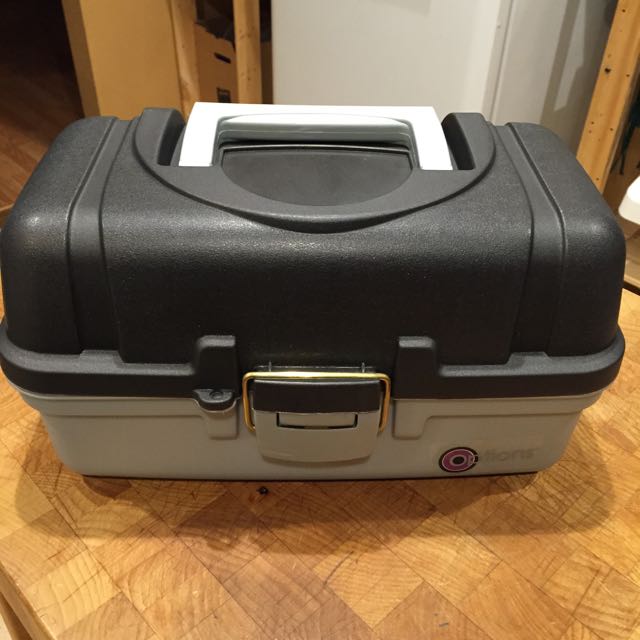
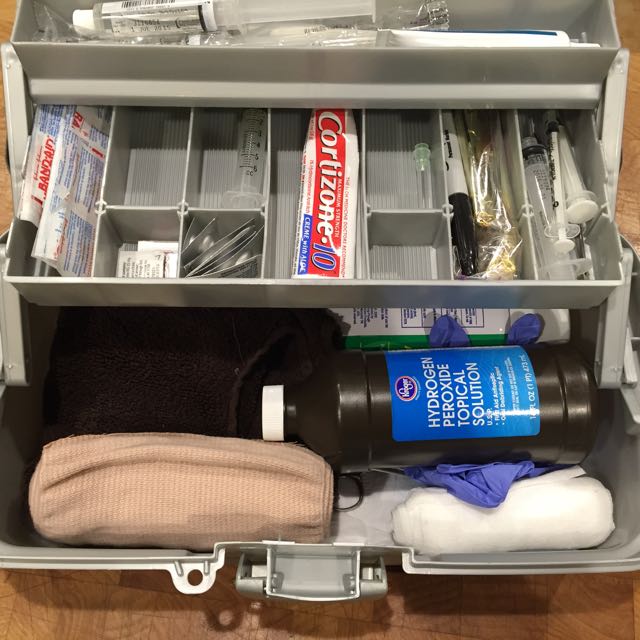
You don’t need to buy a pre-made first aid kit. You can keep your supplies in a tackle box or other suitable container, which you can lock. If you have small children in the house or grandchildren that come to visit it needs to be childproof!
Your first aid kit can be kept in a tool box.
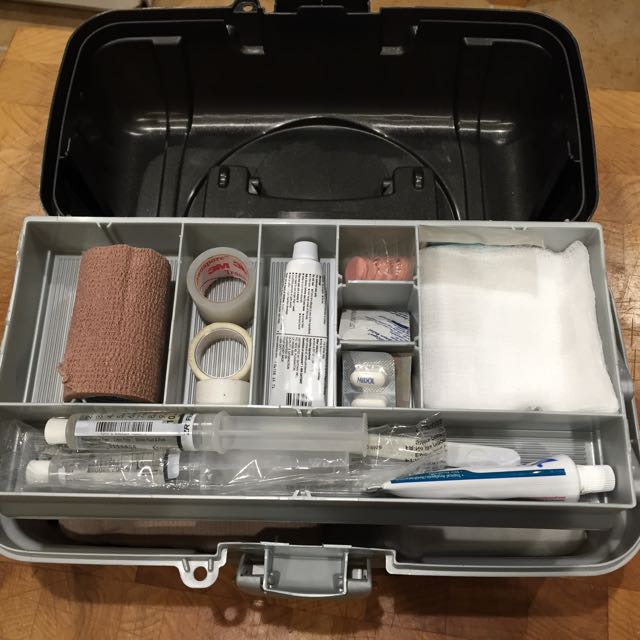
I asked my daughter, who is a nurse, what she kept in her first aid kit.
Top shelf, things you will use most often. Starting from the left: Coband or Ace bandage–something that will help cover a wound, keep it secure, that’s why I include tape as well, small drawers for some meds: pepto for tummy, nasal decongestant and DayQuil, I also keep Anti-itch/hydrocortisone and gauze. Keep Normal saline somewhere in your kit. I use small flushes which can purchase online. GREAT for flushing a wound an eye and keeping small doses on hand.
Top shelf tool box.
Second drawer: band aids, BENADRYL!! Must have, can help nip a reaction when it starts, I also have some syringes, but most importantly a sharpie, use it to outline areas of redness or inflammation to determine if they get worse. In the bottom I keep more gauze, wraps, gloves, aloe and hydrogen peroxide. Also a brown wash cloth for big bleeds. It can keep someone from passing out from the site of blood.
Second drawer of tool box.
Here are a few
items that are suggested for your home first aid kit:
1-2 rolls of adhesive tape for bandaging
Small, adhesive strips
Bar of plain, un-perfumed soap for washing wounds
Liquid acetaminophen for infants and small children
Chewable acetaminophen for older children
Regular aspirin or acetaminophen for teens and adults
One ounce bottle of syrup of ipecac (to induce vomiting)
A thermometer
Scissors
Flashlight with extra batteries
Chemical ice pack
Emergency phone numbers; including your physician, hospital and local poison control hot line.
For a more fully stocked first aid kit add the following:
1-2 rolls of elastic bandages
cotton balls and cotton swabs
Antiseptic cream (for minor cuts and burns)
Petroleum jelly (for blisters, chafing and chapping)
Calamine lotion
Sunscreen
Safety pins
Tweezers
Snakebite kit
Tongue depressors (to use as splints for injured fingers and toes)
Anaphylaxis kit for severe allergy
Backup supply of prescription medication.
Now that we all know what to put in our first aid kits that’s make a resolution to make sure we all have a current first aid kit in our home! do you have any other suggestions as to what you should have in a first aid kit?
When we were busy raising our four children I made bread at least once a week. Our children really did not like store bought bread and much preferred my bread. I would bake three loaves at a time and freeze two to eat later. Sometimes this didn’t work so well as one loaf would get eaten right out of the oven. You have to admit there is nothing better than fresh baked bread still warm from the oven.
Now that it is just my husband and I at home we don’t eat as much bread. In fact I stopped baking bread all together thinking we could just buy some whenever we needed bread. You know what? I have to admit, my kids were right, store bought bread just isn’t as good. So I am back to baking our own bread once again.
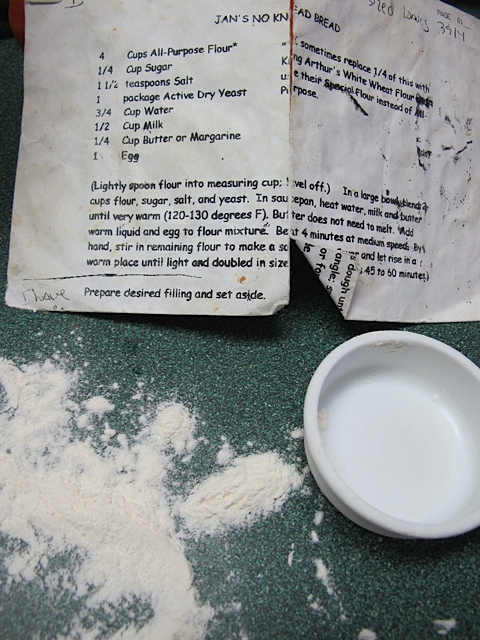
I still make three loaves at a time and freeze what we aren’t going to eat. I often cut a loaf in half and just keep a half a loaf out. We’re so much happier enjoying our own homemade bread once again! Here is our all time favorite recipe. A friend of mine shared this fabulous no fail bread recipe with me years ago. I’ve made a few changes but basically haven’t changed it much. I grind my own hard white wheat berries and usually add a little King Arthur bread flour. I also use my Kitchen Aid to mix the dough.
My well worn original recipe!
Nancy’s Delicious Homemade Bread
4 cups all-purpose flour*
¼ cup sugar (or other sweetener such as honey)
1 ½ tsp salt
1 pkg active dry yeast
¾ cup water
½ cup milk
¼ cup butter
1 egg
In a large bowl blend 2 cups flour, sugar, salt and yeast. In saucepan, heat water, milk and butter until very warm (120-130 degrees F). Butter does not need to melt. Add warm liquid and egg to flour mixture. Beat 4 minutes at medium speed. By hand, stir in remaining flour to make a soft dough. Cover and let rise in a warm place until light and doubled in size. It usually takes 45-60 minutes.
Let dough rise about an hour before forming into loaves.
Stir down dough. On a floured surface, form dough into a loaf and place in a greased loaf pan. Cover and let rise in a warm place until light and doubled in size.
Dough formed into loaves, ready to rise again.
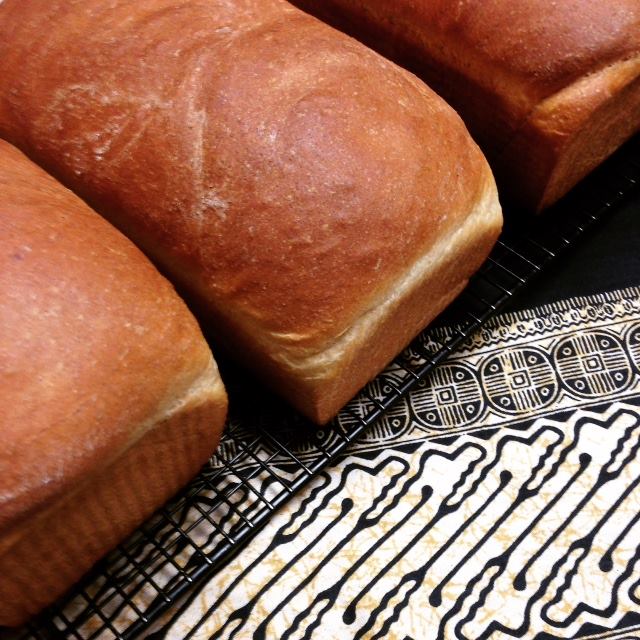
Preheat oven to 350 degrees. Bake 30-35 minutes or until golden brown. Can brush with melted butter. Serve warm or cool. Makes one large loaf or two smaller loaves.
Delicious Homemade Bread
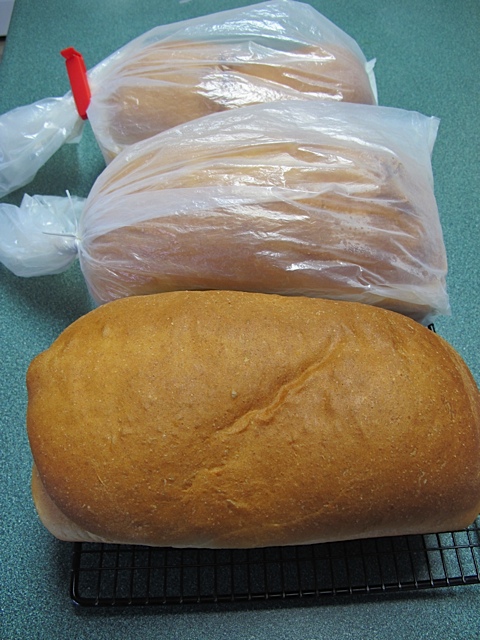
Freezes well.
We usually keep one loaf to eat and freeze the other two.
*I usually double this recipe to make three large loaves. I use 4 cups of freshly ground flour and 4 cups of King Arthur Bread Flour.
We’re in the midst of winter here in Vermont. The days are cold and the garden is buried under snow. It’s a good time to look back over the photos I took over the last year and plan for the year to come. It seems like the years fly by so quickly. Trying to enjoy each moment is key!
January
In January I lost my mom, in between her time in the hospital and then planning her service there were numerous trips to Connecticut.
January was also a very cold month as evidenced by the frozen webs under the eves!
February February brought the snow, even the chickens weren’t interested in going outside!
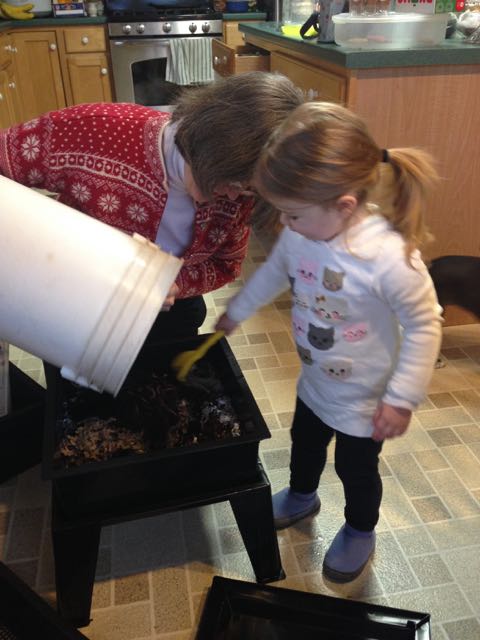
It was a good time to work on establishing my worm composter! I had a little help from my granddaughter.
March March is a snowy month. The compost bins were buried.
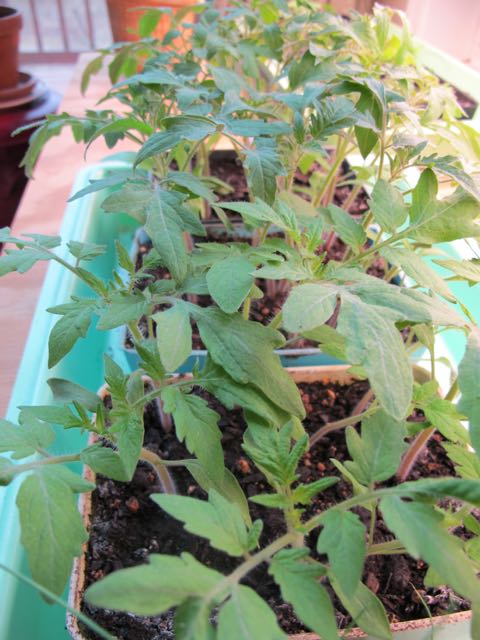
Inside there was color!
April By April I started my seeds and they were off to a good start.
There was finally less snow outside and the chickens were happy to be free ranging once again. Of course they like to keep an eye on what’s happening inside the house as well!
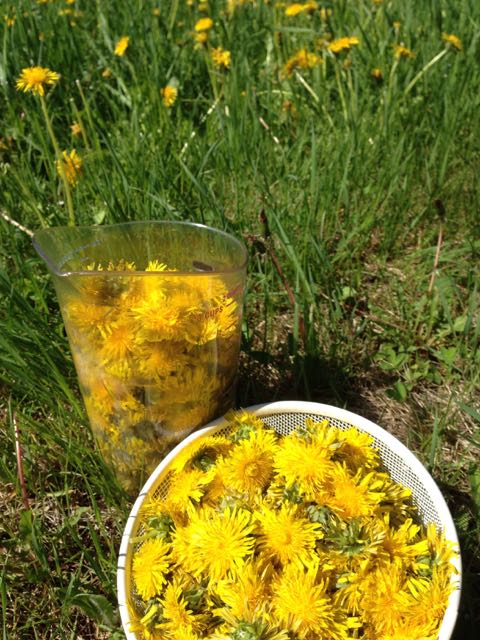
May May brought the first harvest, dandelions! We decided to try making some dandelion wine!
We also collected wild ramps from the woods, a delicious cross between a garlic and an onion!
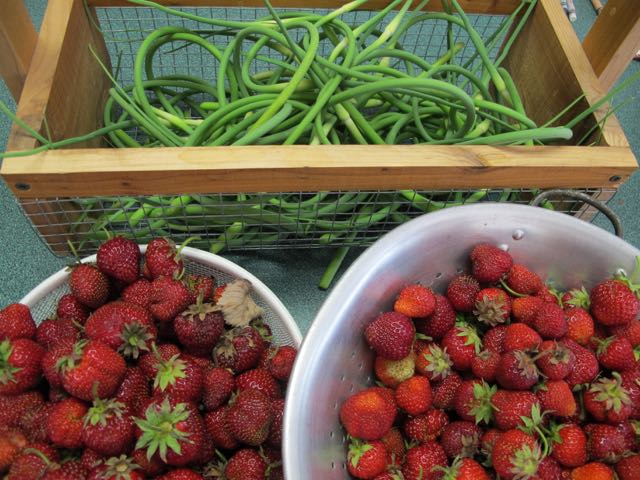
June The harvest continued! Strawberries and garlic scapes!
July The blueberries were finally ripe, we enjoy blueberries from July until the first frost!
August Harvest was in full swing.
September September brought cooler days and we usually get out first frost, such a short growing season here in Vermont! It also brought an abundance of zucchini, which meant zucchini cake!
October The time in the garden is going to an end, time to prepare the garden beds for winter and enjoy the beautiful Vermont colors!
The colors for fall are reflected everywhere.
November This past November we began a forestry project on our land. We had a forester come and walk the land and decide which trees would be removed to keep the forest healthy. The project will continue into March of this year.
When the weather is cold outside nothing is more comforting that a bowl of hot, delicious chowder. My favorite is Corn Chowder with just a hint of bacon! My mom used to make this corn chowder so I have been enjoying it for a long time! You don’t need to use heavy cream when making this chowder, I usually just use mile or fat free half and half. I hope you enjoy it as much as I do!
Corn Chowder
½ cup diced bacon
2 Tbsp butter
¾ cup chopped onion
¾ cup chopped celery
1 quart homemade chicken stock
2 cups diced potatoes
3-10 oz packages of frozen corn
1 cup heavy cream
Salt and pepper to taste
Sauté the bacon in butter until crisp and browned.
Add onion and celery; cook until vegetables are crisp tender.
Meanwhile, measure stock in large pot, add potatoes and cook until just tender.
Puree 2 packages of corn in the blender, using a little of the hot stock while blending. Add blended corn and whole kernels, sautéed vegetables and cream to soup pot.
Season to taste with salt and pepper. Heat to serving temperature. Enjoy!
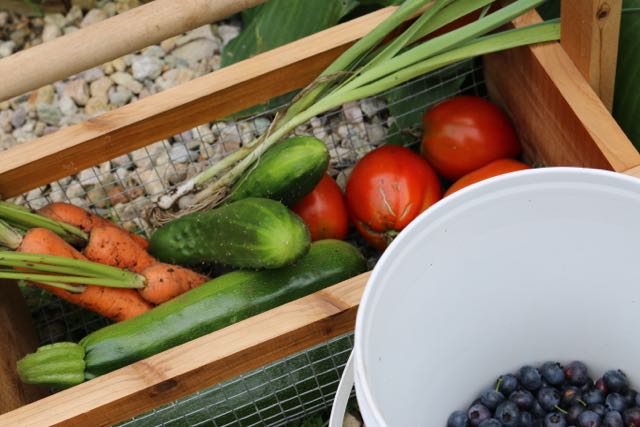
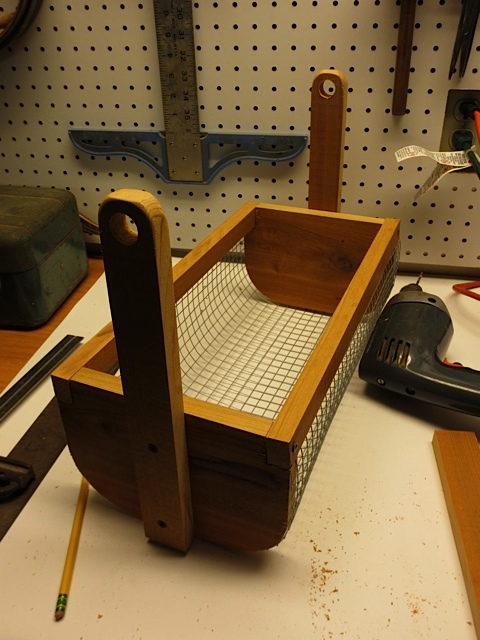
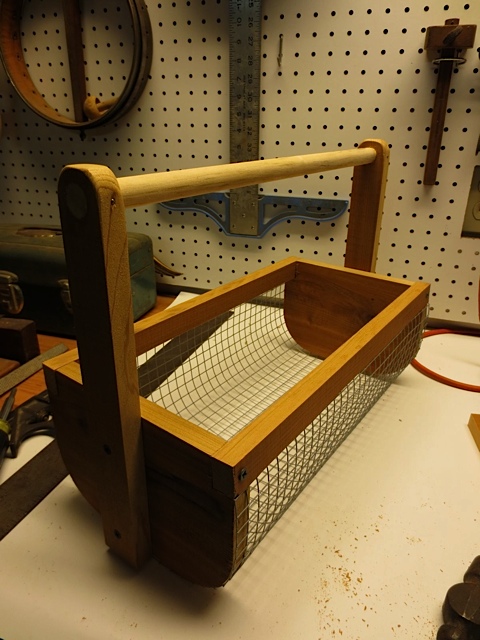
I am very lucky to have a wonderful husband who is very handy with tools. He was happy to make me my very own veggie hod! I love it and it is perfect for gathering vegetables from the garden.
An original On The Home Front Veggie Hod
First of all you may be wondering what a “hod” is! According to dictionary.com com a hod is a portable trough for carrying mortar, bricks etc., fixed crosswise on top of a pole and carried on the shoulder. I found these directions on runnerduck.com and thought it would be a perfect solution for carrying in vegetables from the garden. My husband took one look at the directions and decided to make a few modifications. Now I have my own custom made Veggie Hod! Here’s what you need from the original directions:
1 x 6 inch cedar 3 feet long
½ inch wire mesh 16 by 16 inches
¾ inch dowel
Carpenters glue
Nails
Staples
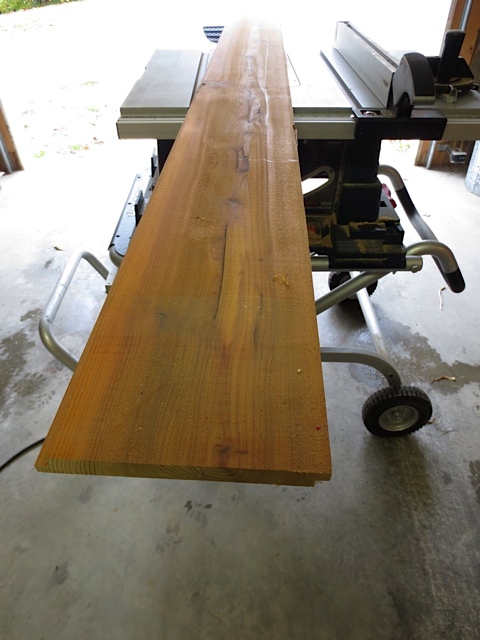
We had some leftover ¾ inch cedar siding that was perfect for the project.
Leftover Cedar Siding.
Cut the ends 5 ½” by 8”.
Cutting the ends.
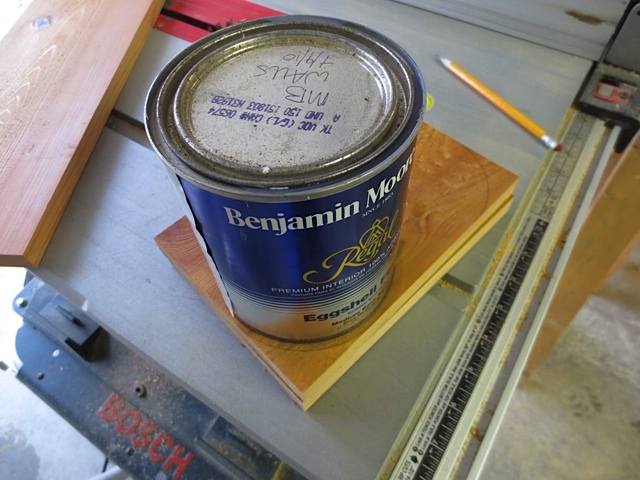
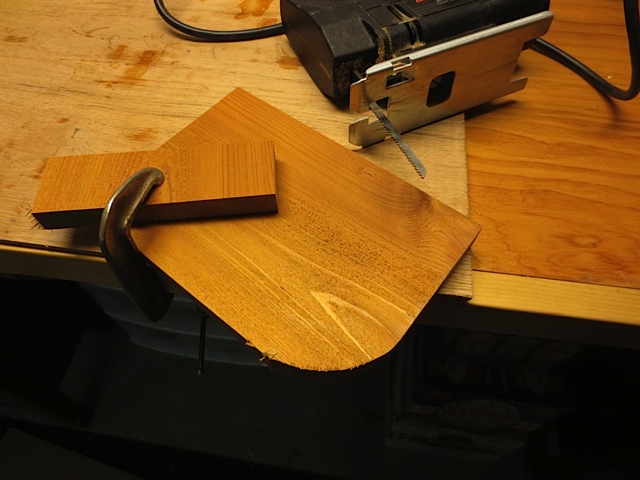
Radius the two bottom corners using a 1 quart paint can as a guide.
Using a paint can as a guide.
Using a band saw or jig saw (shown) cut the corner radius.
Cut the corner radius.
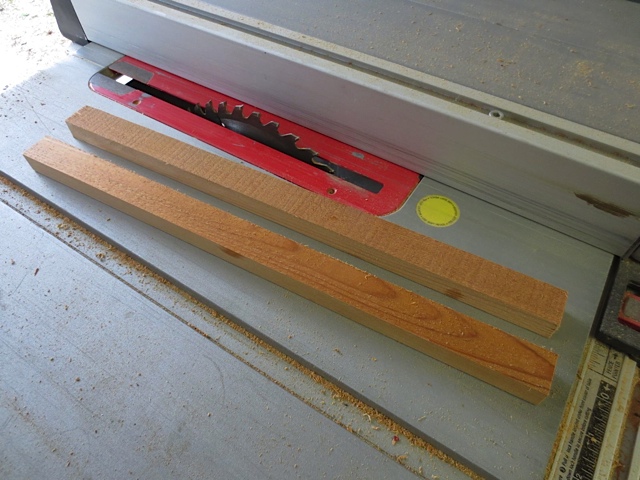
Cut the two side rails 1 by ¾ by 16 inches.
Cut the side rails.
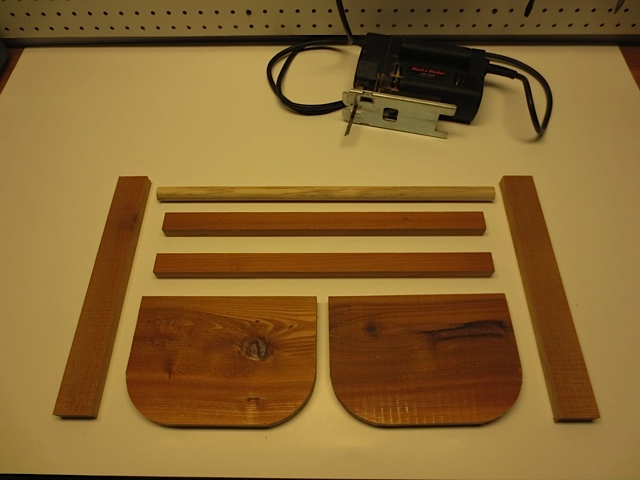
Veggie Hod wood parts list cut from ¾ inch cedar: 2 ends 5 ½ x 8″, 2 side rails 1 x ¾ x 16″, 2 handles 1 ½ x 12″, and a 3/4 inch dowel 17 ½ inches long.
Veggie Hod wood parts.
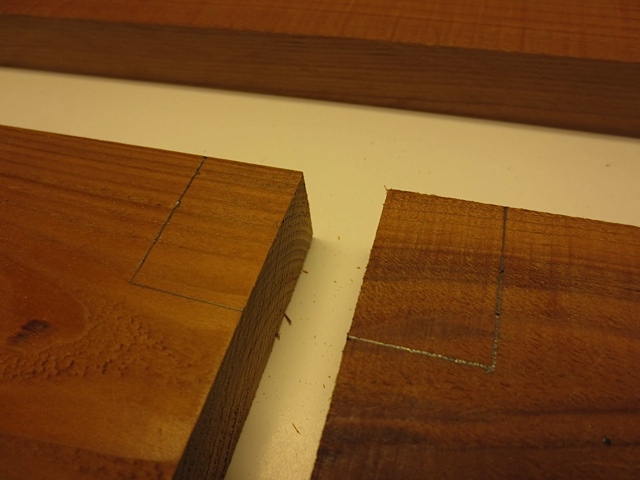
Cut a ¾ x 1 inch notch in each top corner of the end pieces for the side rails.
Marking the notch to cut.
End pieces rough cut and ready for sanding.
Ready for sanding.
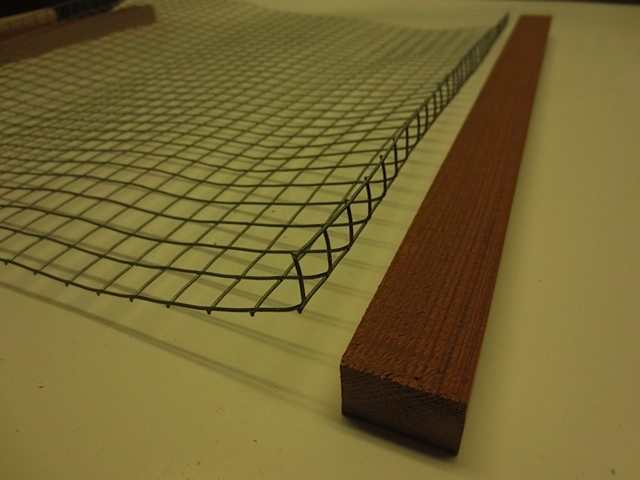
Cut the mesh 16 by 16 inches. Cut the wire very close to the cross wires to eliminate sharp, pointy wires. Bend one edge of the mesh 90 degrees, ½ inch in from the edge.
Cut the wire mesh.
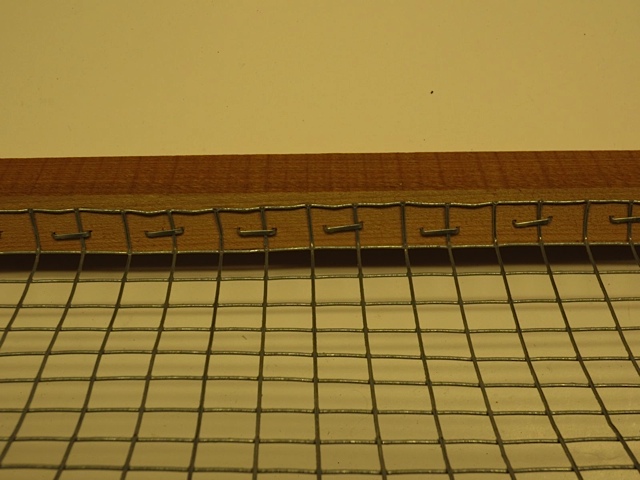
Staple that ½ inch edge to the bottom of one of the sides.
Staple the wire mesh.
Align the side in one of the end notches and wrap the mesh around to mark your bend point for the other side. When you have this mark bend the mesh 90 degrees and staple to the other sidepiece.
Staple 90 degree bent wire mesh edges to the bottom of each side rail.
Fasten the side rails to the end pieces with 1 ½ inch screws.
Fasten the side rail.
End pieces attached to side rails with wire mesh.
Ends attached,
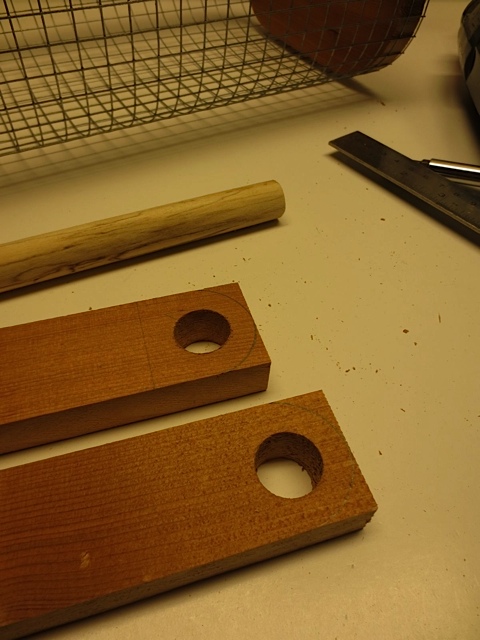
Drill ¾ holes at top end of handle. Draw out half-round for cut to finish.
Drill holes.
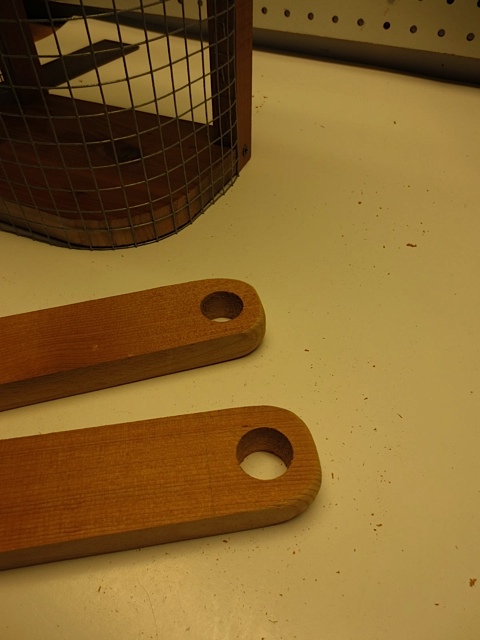
Handle ends shaped and finished.
Finished handles.
Attach handles to the center of each end piece with two 1 ¼ inch screws.
Attach handles.
Slide the dowel into the handles and mark any excess dowel length and trim off. Dab some wood glue into the handle holes and insert dowel. Tap a 1 inch brad through the handle into the dowel to secure.
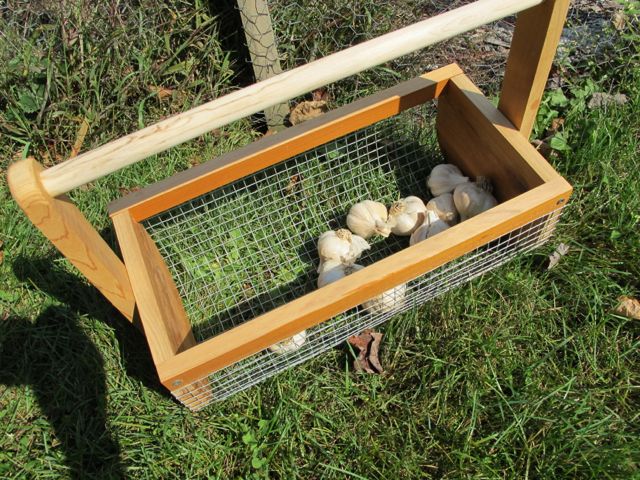
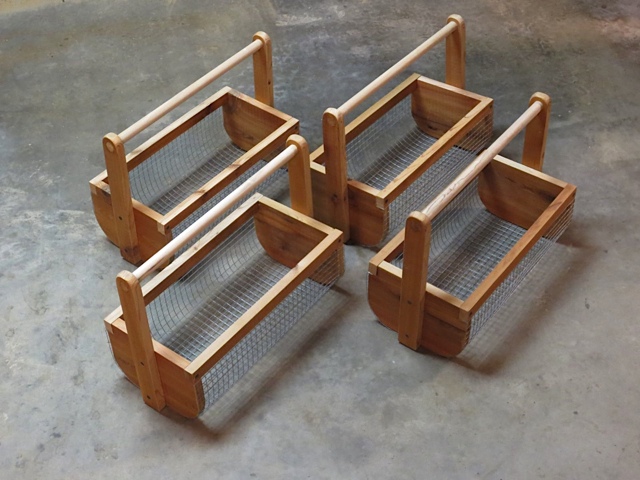
Veggie Hod
I can’t wait to use my Veggie Hod, it will be perfect for gathering the harvest from the garden, I’ll even be able to give the vegetables a quick wash before coming into the house.
Have you ever washed a wool sweater in the washing machine? Not on purpose of course, but one of those moments where you are in a hurry and your wool sweater accidentally gets tossed in the wash. Perhaps it even got tossed into the dryer and came out looking like a doll sweater? Did you know restoring a shrunken sweater is possible?
Last year I accidentally washed my son’s favorite wool sweater. The problem was that he has two gray sweaters; one can go into the wash while the other one must be hand washed. I was in a hurry and washed the wrong sweater. What to do? It was a beautiful sweater so I set it aside hoping to find something I could do with it.
A year later my girlfriend calls me up and tells me she did the same thing, washed her favorite wool sweater. Only she spent a little time on the Internet and found a solution!
You can soak the sweater in warm water and conditioner and the yarn will relax and return to it’s original shape. Was I ever skeptical! However, I love my son and it was worth trying to see if I could restore his favorite sweater to it’s original size. the sweater that I shrunk by mistake.
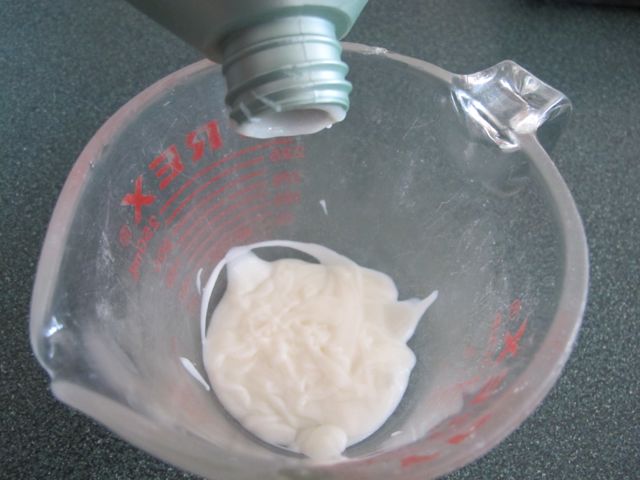
First put enough warm water in the sink to allow you to completely submerge the sweater. Add a bit of hair conditioner and mix it until it’s completely dissolved in the water.
I added a couple of tablespoons of conditioner.
Place your sweater in the water and make sure it is completely soaked and under the water. Let the sweater soak for 10 minutes.
Drain the sink while the sweater is still in it. Gently press the sweater to remove as much of the water as possible. Don’t squeeze the sweater or wring it out.
Remove the wet sweater and lay it on a thick, absorbent towel. Place the sweater in a cool room to air dry on the towel. The combination of the warm water, hair conditioner and cool air will unlock the wool fibers and allow you to restore the sweater. Yes, restoring a shrunken sweater is possible!
Gradually stretch the sweater back into shape as it dries. Gently pull a bit at a time to resize it. Let the sweater air dry until it is ready to wear.
I can’t tell you how pleased my son was to have his sweater back again! This is definitely a trick I will use again!
Friday’s are my favorite day of the week because I get to share a favorite recipe with you! In honor of the New Year I decided to share my top 14 recipes of 2014. If these recipes don’t make your mouth water let me know!