Blackberry Jelly

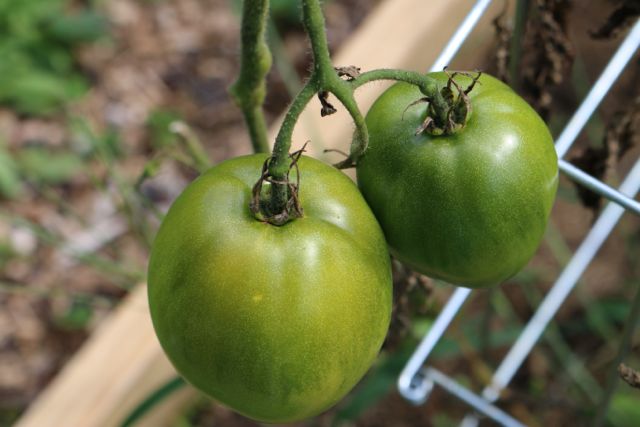
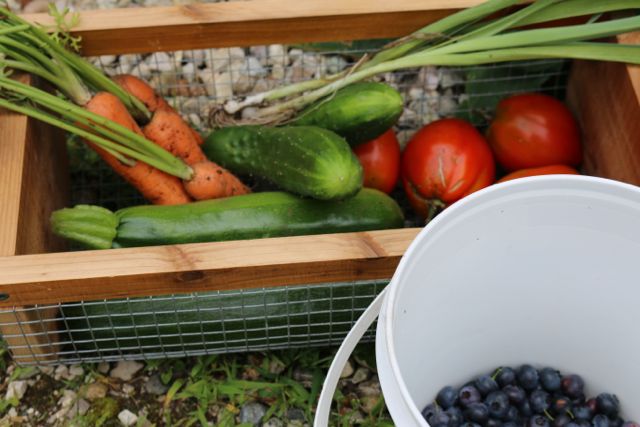
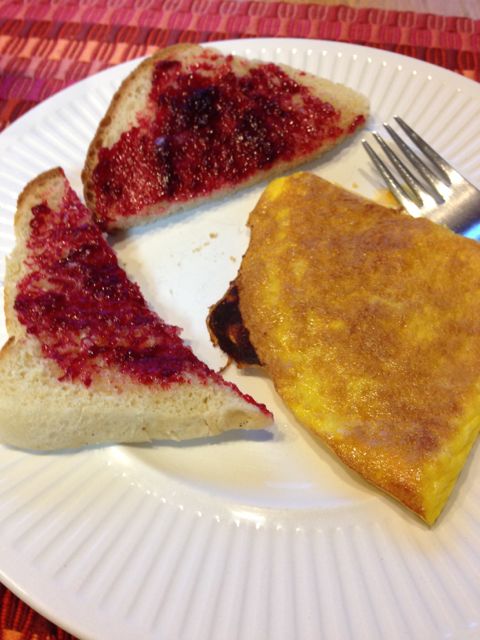
Funny when you have a lack of produce to harvest in one area you make up for it in other areas. For instance I am not having the best tomato harvest this year, however the wild blackberries have been wonderful. Our wild blackberries have a lot of seeds so I don’t like to make jam with them. What I do like to make is blackberry jelly.

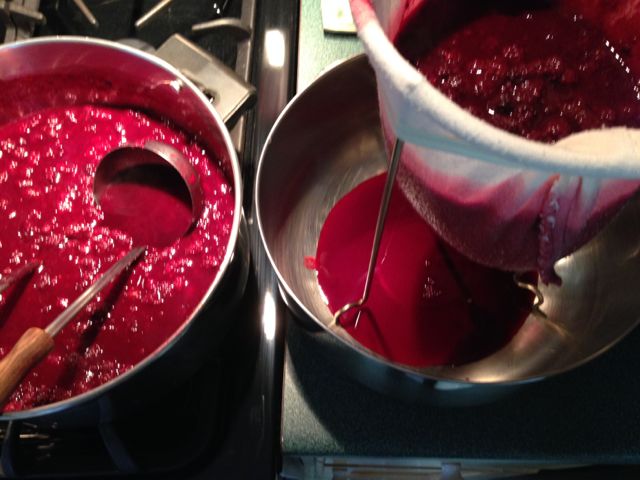
Making jelly is easy although a little more time consuming that making jam. First you need to get your juice for the jelly. Select your fruit and wash and stem if necessary. Slightly crush your fruit and measure. For each quart of prepared fruit you will need to add ¼ to ½ cup of water. Place everything in a large saucepan. Cover and simmer the fruit until soft. Stain the mixture through a damp jelly bag or several layers of cheesecloth. Juice may be used fresh, canned or frozen for later use.
Pure blackberry juice.

For Blackberry Jelly you will need the following:

Ingredients:

3 ½ cups fruit juice
1 pkg of powdered pectin
2 Tbsp lemon juice
5 cups sugar

Directions:

Combine the fruit juice, pectin and lemon juice in a large saucepan. Bring to a boil over high heat. Add sugar, and stir until dissolved.IMG_2097 
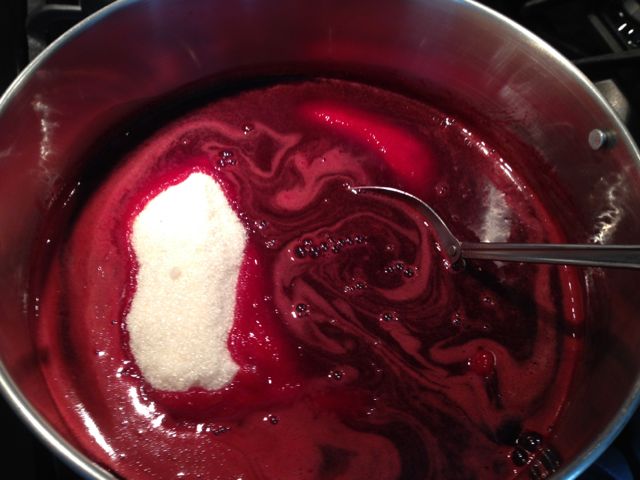
Return to a rolling boil and boil hard for one minute, stirring constantly. Remove from heat. Ladle hot jelly into your sterilized jars.

Ladle hot jelly into sterilized jars.

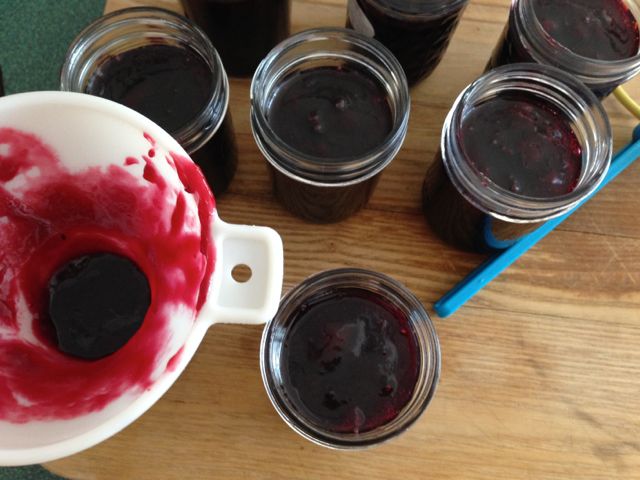
Process the jars for 5 minutes in your boiling water canner. Makes 5-7 pints.

Blackberry jelly, delicious on your morning toast!

Linked to: HomesteadBarnHop

Recipe Box: Morning Glory Muffins

I like to think that Morning Glory Muffins originated on Nantucket, at least that’s where I first had them. My husband’s grandmother had the recipe in her recipe box and I fell in love with them from the first moment I tried them.

recipe box, recipes, prudent living
Gram’s Recipe Box.

My original recipe had a lot of oil. This recipe is as adaptation of one from the King Arthur website. It’s a delicious whole-grain muffin full of fruits and vegetables. They are moist and just sweet enough. They are great for traveling and don’t need any enhancement of butter or jam. They also freeze well. I made them for the house full of company we had over Labor Day weekend and they were gone by the end of the weekend!

Morning Glory Muffins

½ cup raisins
2 cups whole wheat flour
1 cup brown sugar
2 tsp baking soda
2 tsp cinnamon
½ tsp ground ginger
½ tsp salt
2 cups peeled and grated carrots
1 large tart apple, cored and grated, I left the skin on.
½ cup shredded coconut (sweetened or unsweetened)
½ cup chopped walnuts
1/3 cup sunflower seeds
3 large eggs
2/3 cups coconut oil
2 tsp homemade vanilla extract
¼ cup orange juice

Preheat the oven to 375. Lightly grease a 12 cup muffin tin. In a small bowl, cover the raisins with hot water and set them aside to soak while you assemble the recipe. In a larger bowl, whisk together the flour, sugar, baking soda and spices and salt.assemble the dry ingredients Stir in the carrots, apple, coconut, nuts and sunflower seeds.Add the vegetables and coconut In a separate bowl, beat together the eggs, oil, vanilla and orange juice.Ingredients ready to assemble. Add to the flour mixture and stir until evenly moistened. Drain the raisins and stir them in. Divide the batter among the muffin tins, they will be full almost to the top, which is ok.

Into the oven they go!

I found the recipe made more than a dozen, I ended up with 20 muffins.  Bake the muffins for 25-28 minutes, until they are nicely domed. Let cool for 5 minutes in their pan on a rack. Then turn out of the pans to finish cooling.

Morning Glory Muffins

Store in an airtight container. they will stay fresh for several days or you may freeze them for longer storage. Enjoy, they are absolutely delicious!

Morning Glory Muffins


Linked To: FridayFlashBlog, WeekendReTreat, #FoodieFriday, FreedomFridays, PinJunkiePinParty, PintasticPinterestingParty, FoodieFriendsFriday, WeekendPotluck, FridayFavorites, LinkUp#50FoodieFriday, WhatToDoWeekends, FromTheFarm, RealFoodFriday, CleverChicksBlogHop, MeltInYourMouthMonday, MixItUpMonday, MerryMondayLinkParty, MunchingMondays, What’dYouDoThisWeekend, You’reGonnaLoveItTuesday, InAndOutOfTheKitchen, #PinterestFoodie, HearthAndSoulHop, FatTuesday, TheGatheringSpot, TheBackyardFarmingConnection, TuesdaysTable, TotallyTastyTuesdays, TuesdaysWithATwist, ShareYourStuffTuesdays, #TastyTuesdays, TickleMyTastebuds, RealFoodWednesday, WhimsyWednesday, WonderfulWednesday, #StopTheYuck, FreshFoodsWednesday, WonderfullyCreativeWednesday, RivertonHousewives, WakeUpWednesday, CreateItThursday, ThursdayFavoriteThings, LinkParty, FullPlateThursday, FoodieFriday

September in the Garden

Seems like I blinked and the summer flew by! After several days of July like weather this morning is nice and cool. I love the end of summer days when it is warm and sunny during the day but cool at night. Everywhere I look things are flowering, that last ditch effort to produce seeds before the cold weather sets in.leek chives

I don’t usually let my oregano flower but our neighbors bees seem to enjoy the flowers.

Flowering oregano
Flowering oregano

The late season blueberries are finally ripe and are so delicious. Maybe appreciated more now that we are nearing the end of the growing season.

Late season blueberries

There are still those last tomatoes waiting to turn red.

Waiting for those last tomatoes to turn red.

The corn is almost ready to pick, if the bears don’t get it first!

Corn almost ready to pick.

Garden beds are being cleared so I can get the garlic planted for next years harvest.

Time to plant garlic.

Still thankful for the fresh produce from the garden.

The days harvest.
The days harvest.

Trying hard not to notice the leaves changing color along the stream.

The leaves are beginning to change.

What’s it looking like in your garden?IMG_0407

Linked To: TuesdayGardenParty, GardenTuesday,  OutdoorWednesday, WildcraftingWednesday, FreshFoodsWednesday, WordlessWednesday, TheBackyardFarmingConnection, TuesdaysWithATwist


The Great Zucchini Hop

Overwhelmed with zucchini?

A large zucchini!
A large zucchini!

Looking for neighbors with unlocked cars so you can leave some zucchini in the front seat?

Abundant zucchini!
Abundant zucchini!

There are actually lots of wonderful ways to enjoy zucchini. Do you need a few new ideas?

Zucchini Quiche
Zucchini Quiche

Check out all of the great ideas here and share your recipes, growing tips, harvesting methods, and preservation instructions!


http://www.linkytools.com/thumbnail_linky_include.aspx?id=240869

Marvelous Blueberry Muffins

It’s been a good year for blueberries, not the best ever but our bushes have been supplying us with a good amount of berries. Usually we have enough to freeze and make jam but our early bearing bushes only gave us enough to enjoy and to make some of the most marvelous muffins!blueberries


Our late bearing bushes are covered with berries and are just beginning to turn blue. Hopefully we’ll get a good harvest before we see any signs of frost! We’ve already had some nights down in the 40s. I hope it doesn’t get any colder in the near future.

Late bearing blueberry bushes.

These blueberry muffins are another family favorite, delicious warm out of the oven or perfect for freezing to enjoy later this winter. The recipe makes 2 dozen so you can even eat half now and freeze half for later.

Blueberry Cream Muffins

4 eggs
2 cups sugar
1 cup vegetable oil (I used refined coconut oil)
1 tsp vanilla extract
4 cups flour ( I used 3 cups regular and 1 cup sprouted whole wheat flour)
1 tsp salt
1 tsp baking soda
2 tsp baking powder
2 cups sour cream
2 cups fresh blueberries

In a mixing bowl, beat the eggs. Add the sugar and while your mixer is going add the oil and vanilla. Combine the dry ingredients and add them, along with the sour cream, to the sugar mixture. Gently fold in the blueberries.

Gently fold in the blueberries.

Spoon into greased muffin tins.

Spoon batter into muffin tins.


Bake at 400 degrees for 20 minutes. Makes 2 dozen.

cinnamon, blueberry, muffins
Ready to eat or freeze!

Linked To: FridayFlashBlog, TheWeekendReTreat, FreedomFridays, #FoodieFriday, PinJunkiePinParty, FoodieFriday, FridayFavorites, WhatToDoWeekends, FoodieFriendsFriday, MixItUpMonday, MeltInYourMouthMonday, CleverChicksBlogHop, What’dYouDoThisWeekend, MerryMonday, MunchingMonday, LinkUp#49, TheGatheringSpot, HearthAndSoulHop, #PinterestFoodie, You’reGonnaLoveItTuesday, ShareYourStuffTuesdays, #TastyTuesdays, WWHOP, TuesdaysTable, TastyTuesday, RivertonHousewives, PennyPinchingParty, WonderfullyCreativeWednesdays, WakeUpWednesday, WhimsyWednesday, TickleMyTastebuds, #StopTheYuck, WonderfulWednesday, LinkParty, FabulouslyFrugalThursday, GreenThumbThursday, ThursdayFavoriteThings, CreateItThursday, ThinkTankThursday, FullPlateThursday

My Garden: Tomato Harvest

My garden hasn’t done extremely well this year and my tomatoes are not producing a huge crop. However I picked enough the other day to make some Roasted Tomato Sauce, which we use on our homemade pizza!

Be sure to use garden fresh tomatoes!

I like this recipe as you only need 4 pounds of tomatoes and they can be any type. Whenever I have a small amount of tomatoes that need to be used up I make this sauce.

Roasted Tomato Sauce

4 pounds of tomatoes, any type
1 onion, coarsely chopped
¼ cup of fresh herbs, chopped (your choice)
3 large garlic cloves, chopped
1/8 cup olive oil

Preheat your oven to 450 degrees. Remove the core from the tomatoes and chop the tomatoes, onions and herbs. Mix all the ingredients in a roasting pan. Roast for 70 minutes without opening the oven door.

Combine all the ingredients and place in a large roasting pan.

Remove from the oven.

Roasted Tomatoes
Roasted Tomatoes

Run the ingredients through a Foley mill or other strainer, to get a nice thick sauce.

Roasted Tomato Sauce

Divide into small containers and freeze.Pizza Sauce I do not can this sauce because of the oil. Each container is perfect for two pizzas!

pizza, recipe
Add sauce to the pizza.

Linked to: WildcraftingWednesday, RealFoodWednesday, TuesdayGardenParty, GardenTuesday, OutdoorWednesday, FreshFoodsWednesday, CreateItThursday, ThursdayFavoriteThings, GreenThumbThursday, FabulouslyFrugalThursday, ThinkTankThursday, FullPlateThursday, RealFoodFriday, DIY LINKY, HomesteadBarnHop, FatTuesday, TheBackyardFarmingConnection, TuesdaysWithATwist

Frugal Tips: Patching a Hole in the Wall

Now that we are empty nesters we are repainting some of our children’s bedrooms. As you might imagine there are various spots on the walls that need to be fixed before they can be repainted.

Holes in the wall.
Holes in the wall.

One of the simplest household fixes is patching a small hole in the wall. You don’t need to hire a professional you can do it yourself!

Another spot to be fixed.

First make sure that the hole or crack is not part of a larger structural problem or caused by a leak. In which case you should consult a professional. However if the crack or hole is due to someone banging a piece of furniture against the wall or hanging a hammock in their room,  you can repair it yourself.

Some holes are larger than others.

Beyond your basic tools, you will need to purchase a can of spackling compound

Some basic tools and speckling compound.

and a putty knife about an inch in width.

Other tools you may need.

You will also need some fine sandpaper.

You will need some sanding paper.

Scrape away any loose paint or plaster from the hole. Use a knife if necessary.

Scrape or cut away the loose material.

Scoop the spackling compound onto your putty knife and run the knife over your crack or hole.IMG_0386

Allow the compound to harden and then apply another layer of the compound. Continue applying compound until the crack or hole is completely filled.IMG_0388

When the final layer is dry, gently sand the repaired surface of the wall with your fine sandpaper until it is smooth.

Before painting your wall, use some primer or wall paint over the spot you have repaired. IMG_0389Now you are ready to repaint your room. Wasn’t that easy?

Linked To: PennyPinchingParty


Time To Make Dog Biscuits

Are you a dog lover? As we stock our pantries let’s not forget about our four legged friends!  We have been without a dog for the last two years. Not by choice, but we had been taking care of our daughter’s Boston Terrier while they were living abroad and when they returned to the states two years ago, Riley went back to live with them.

dogs, dog biscuits
Our granddaughter and Riley.

My daughter and her family have move again, this time to the west coast. They found a wonderful house to rent until they decide exactly where they want to settle so Riley is once again On The Home Front!

Boston Terrier, dogs
Riley by the river.

It’s been while since I made dog biscuits but with Riley under the roof it’s time.

This recipe has always been a favorite with our dogs and I like feeding Riley good, healthy treats. Today was a perfect dog to mix up a batch. I plan to freeze half of the batch as Riley is a small dog and it will take her a while to eat them all!

dogs, dog biscuits, frugal tips
Riley, the Boston Terrier

They smelled delicious as they were baking!

4 cups whole-wheat flour
2 cups oatmeal
½ to ¾ cups chunky peanut butter
2 ½ cups water

Mix all the ingredients, adding more hot water if necessary.

homemade dog biscuits
Whole wheat, oats and peanut butter

Knead well.

homemade dog biscutis
dough just about ready to roll out.

Roll out to ¼” thickness and cut into shapes with small cookie cutters.

cookie cutters, homemade dog biscuits
Dog biscuit cookie cutters.

Bake on a greased cookie sheet at 350 degrees for 40 minutes.

homemade dog biscuits
Biscuits ready to bake.

Turn off heat and let cool in the oven overnight.

I have to say they were a big success!

homemade dog biscuits, prudent pantry
Finished dog biscuits

Linked To: CleverChicksBlogHop, HomesteadBarnHop, YourGonnaLoveItTuesday, FatTuesday, WordlessWednesday, TuesdaysWithATwist, PennyPichingParty


Recipe Revisited: Amazing Overnight Waffles

Sometimes a recipe is just so good you have to share it more than once! As we get back into the school routine it’s nice to have a breakfast that you can mix up the night before.

Today’s recipe is a family favorite. If you haven’t tried overnight waffles you’ve been missing an awesome treat! I love this simple recipe; you mix up the majority of the ingredients the night before. In the morning you add the butter and an egg and the mix is ready to be turned into delicious waffles. What better excuse to enjoy maple syrup. I enjoy using this recipe when we have company. It makes for a delicious, easy breakfast in the morning without much effort on your part.

Amazing Overnight Waffles

2 cups all purpose flour
1 tsp yeast
1 Tbsp sugar
½ tsp salt
2 cups milk
6 Tbsp butter, melted
1 large egg
Nonstick spray
Butter for the waffle iron (op)
Waffle iron

Combine the flour, yeast, sugar and salt in a medium size bowl.IMG_4602-300x225

Add the milk and whisk until blended.

Cover the bowl tightly with plastic wrap and let stand overnight at room temperature.IMG_4605-300x225

In the morning the batter will have all sorts of bubbles on the surface.IMG_4606-300x225

Preheat the waffle iron and melt the butter. Beat the egg in a small separate bowl and beat it into the batter along with the melted butter. The batter will be quite thin.

Lightly spray the hot waffle iron on all surfaces with the nonstick spray and rub on a little butter. Add just enough batter to cover the cooking surface. Cook for two to three minutes, depending on your waffle iron. Do not over bake, as you want it crisp and brown, but not too dark.IMG_4607-225x300

Serve with your favorite toppings. Recipe can be easily doubled or tripled!IMG_4609-225x300

Serves three to four. These waffles also freeze well. Any leftover waffles I let cool on a baking rack and then wrap and place in the freezer.These waffles freeze well

Perfect to pop in the toaster on a busy morning!

Linked To: WeekendRe-Treat, FreedomFridays, WhatToDoWeekends, FoodieFriday, FridayFavorites, FoodieFriday, ThePinJunkie, WeekendPotluck, FoodieFriendsFriday, #GetHimFedFridays, FridayFavorites, MixItUpMonday, What’dYouDoThisWeekend, MeltInYourMouthMonday, LinkUp#48, MunchingMondays, MerryMondayLinkyParty, InAndOutOfTheKitchen, #PinterestFoodie, HearthAndSoulHop, YourGonnaLoveItTuesday, #TastyTuesday, TuesdaysTable, ShareYourStuffTuesday, TheGatheringSpot, WakeUpWednesday, WonderfulyCreativeWednesday, RivertonHousewives, WhimsyWednesday, WonderfulWednesday, #StopTheYuck, TickleMyTastebuds, TastyTuesday

My Garden: Growing a Laurus nobilis “Sweet Bay”

A year a go a friend of mine gave me a gift of a few bay leaves and told me she was growing her own bay plant in her living room! I’m always interested in what I can grow myself and the thought of growing my own bay leaves was intriguing! I found that Logees carries bay plants so I ordered one.

Sweet Bay are very slow growing but after a year my little plant is full of new growth and looking like it needs a new home.

Sweet Bay
Sweet Bay

The Laurus nobilis or sweet bay is best known as a seasoning. Did you know that the bay laurel is actually an evergreen shrub or tree that is native to the Mediterranean area? They can grow as tall as 60 feet. If I lived in zone 8-11 I could have my own bay hedge!

The bay can be kept small by pruning or by confining it in a container. In the spring, the bay has small yellow flowers, which will develop into purple berries in the fall. If you prune your plant it may mean less flowers and berries. I’m not interested in flowers or berries just the leaves for a seasoning.

The bay likes well-drained soil and can tolerate soil pH from 4.5 to 8.3. They also like to be cramped in their pot. Once I move my bay into a larger pot I shouldn’t have to worry about it for years. Since they are slow growing they don’t require a lot of food. Container grown bay is fed in the spring and maybe again mid-summer, with a balanced organic fertilizer like fish emulsion and kelp. It also helps to refresh the top couple of inches of soil each spring, being careful not to hurt the shallow roots.

Sweet Bay
Sweet Bay

Bay is drought tolerant, but appreciates regular deep watering. Always allow the soil to dry out between watering, so the roots don’t rot. But don’t let it sit for long periods without water.

Supplies for transplanting.

Since it likes the soil to be well drained a blend of one-half cactus mix and one-half potting soil works well, or add one part of sand to two parts of standard potting soil. Since I happened to have some cactus mix on hand I made a mixture of ½ cactus mix and ½ potting soil.Roots of the bay.

After moving the bay into a larger pot and giving it a good watering I think it looks better already!
Transplanted Bay Plant


Linked To: Tuesday GardenParty, GardenTuesday, OutdoorWednesday, FreshFoodsWednesday, WildcraftingWednesday, GreenThumbThursday, FromTheFarm, BackyardFarmingConnection

Design a site like this with WordPress.com
Get started