Creamy Spinach Enchiladas

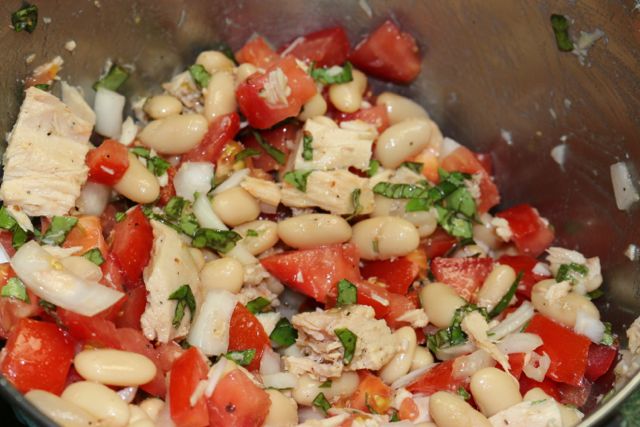
Several times a week we enjoy eating meatless meals. Finding a recipe that the whole family enjoys can often be a challenge. This delicious recipe for creamy spinach enchiladas feeds four but could easily be doubled. It’s just as good the next day for leftovers!

Creamy Spinach Enchiladas

Ingredients:

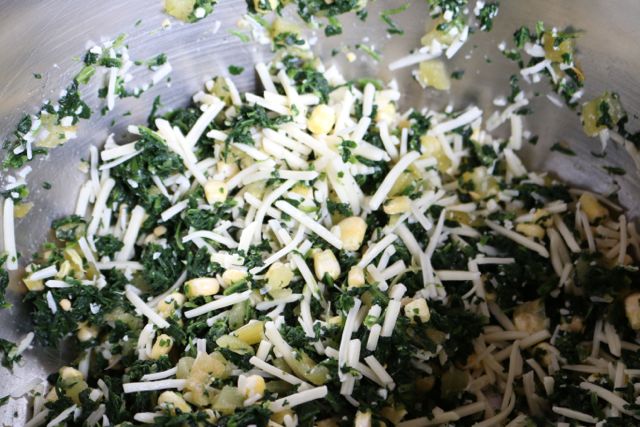
1 – 10oz pkg of frozen chopped spinach, thawed and squeezed dry
1 cup corn (fresh or frozen)
6 oz cheddar cheese, grated
2 – 4.5oz cans chopped green chilies
1 cup heavy cream
Salt and pepper
8 – 6” corn tortillas, warmed

Directions:

Heat your oven to 400 degrees F. In a medium bowl, mix together the thawed spinach, the corn, 1 cup of the cheddar cheese and 1 can of the chilies.

Combine filling ingredients.

In another small bowl, stir together the cream, the remaining can of chilies, ¾ tsp salt and ¼ tsp pepper.

Dividing the mixture evenly, roll up the spinach mixture in the tortillas. Works out to about 1/3 cup per tortilla.

Filling the tortillas.

Place the tortillas seam side down in a shallow baking dish. Top with the cream sauce and the remaining ½ cup of cheese. Cover with foil and bake until bubbling, 15-20 minutes. Uncover and bake until golden, another 10-15 minutes.

If you want you can fill the tortillas early in the day, cover and place in the refrigerator. Top with the cream sauce and remains cheese just before placing in the oven.

Don’t you just love a meal that doesn’t have a lot of fancy ingredients but instead can be made with ingredients you probably have on hand? This is one of those recipes and I usually always have these ingredients in our pantry and freezer. Plus it’s a recipe that the family enjoys.

Creamy Spinach Enchiladas

Enjoy!

Creamy Spinach Enchiladas

My Garden: Braiding Garlic

You may remember the abundant garlic harvest I had a few weeks ago. I finally got around to braiding it. I love the way braided garlic looks plus I can hang it in our garage for the winter and it does just fine. Our garage is actually heated so it stays cool but doesn’t freeze.

garlic harvest
garlic harvest

Braiding garlic is not hard and if you have any experience with braiding horse tails or French braids you will not have any problem at all.

First step is to brush all the dirt off the garlic and cut the roots off. You can use a toothbrush if you are picky about getting the dirt off. As you will see from my pictures I get most of the dirt off but not all.

Cutting the roots off.

You can find all sorts of directions and YouTube videos on line for more advice. Some say to soak the stems but I didn’t.

To start select three large bulbs of garlic lay them next to each other with the middle one slightly higher than the others. You can knot them together or tie with a twist tie or string. You will not see the twist tie, as it will be covered with other garlic.

Start with three garlic bulbs.

Add a 4th garlic and place the stem going down the center, Cross the stem leaf of the garlic head on the right over the 2 middle stem leaves so it lies between the stem leaf on the left and the middle stem leaves.

Place another garlic head, continuing with the next largest, on the right just above the existing bulbs so the stem leaf is in the middle overlaying the current middle stem leaf.

Cross the stem leaf that is on the left over the middle stem leaves to create a new middle.

Place another garlic head on the left just above the existing garlic heads so the stem leaf is in the middle overlaying the current middle stem leaf. You should now have 2 stem leaves on the left, 2 stem leaves in the middle and 2 stem leaves on the right.

Cross the 2 garlic stem leaves on the right over the middle stem leaves to become the new middle stems.

Continue this pattern by adding 1 garlic head at a time until you run out or have reached the length you want.

Continue braiding until you reach the desired length.

Tie off the top as close to the top garlic head as possible with a piece of twine. Create a loop for hanging.

Garlic braid hanging

It’s sounds more complicated than it is! I spent some time looking at videos and decided to just give it a try. I found it works best to work on a hard surface. I now have three garlic braids hanging up to use this winter! All of a sudden my abundant crop doesn’t look so abundant!

Garlic braids
Garlic braids

Linked To: TuesdayGardenParty, GardenTuesday, OutdoorWednesday, WildcraftingWednesday, FreshFoodWednesday, GreenThumbThursday, FertilizerFriday, HomesteadBarnHop, TuesdaysWithATwist, WWHOP, FatTuesday, BackYardFarmingConnecton

Budgeting a Family Vacation in Montreal

Planning a vacation with extended family members is not always that easy or that inexpensive. You need rooms for everyone and transportation to figure out and food to consider. My daughter and her family are about to move from the east coast to the west coast and we have been spending as much time as possible with them. We are really going to miss our daughter, her husband and our two grandchildren!

In the last few months my daughter made plans do things they had been putting off and one of her ideas was a weekend trip to Montreal! That sounded like fun, but how to plan such an adventure without it costing a lot of money?

Montreal
Montreal

First some sleuthing on Vacation Rental By Owners (VRBO.com) and HomeAway.com and AirBNB. My daughter found a wonderful four bedroom apartment within walking distance to Old Montreal. We invited my sister and her youngest daughter and made plans for a fun family weekend. When you have a place to stay with a kitchen you can create your own meals and not have to eat out at an expensive restaurant.

My husband and I drove up in a minivan with my daughter and her family. I made dinner and we had a cooler with various food items. After experiencing rush hour traffic Friday night we arrived in our apartment at dinnertime. The accommodations were perfect. The apartment was clean and although not well equipped with an abundance of cooking utensils we had enough to get by.

Our home for the weekend.

Saturday we were up early and decided to explore the city without a car. First we walked to a little café for breakfast, after all this was a vacation weekend and we didn’t want to eat all our meals in the apartment!

A perfect spot for breakfast!

After a delicious breakfast and the fun of figuring out what to order in French we set off for further exploring. It was wonderful to see the various city gardens with flowers and vegetables growing everywhere!

Finding beans in a raised bed!

We explored the largest park in Montreal and then continued our walking adventure and explored Old Montreal. We walked over 10 miles that day before finally taking a taxi back to the apartment. Yes we spent some money but not nearly what it would have cost if we had stayed in a hotel. We enjoyed time with my daughter and her family and my sister and niece. We all had such a good time that we are already talking about the next family vacation! Next time we want to include our other three grown children!

Family Trip to Montreal

Linked To: WWHOP, PennyPinchingParty, FabulouslyFrugalThursday, ThursdayFavoriteThings, ThinkTankThursday

Summertime Tuna Salad

I love cold salads on a hot summer day. This summertime tuna salad is easy to make and is a perfect light dinner or  a great lunch to take to the office. Trying to eat healthier? This salad is perfect, it can also be made ahead and enjoyed later in the day. Or double the recipe and take it to work for lunch.

Summertime Tuna Salad

Ingredients:

1 can (15oz) cannellini beans (drained and rinsed)
1 can (6oz) water packed tuna, drained
2 cups diced tomatoes
½ cup minced red onion
2 Tbsp chopped, fresh basil
1 Tbsp olive oil
2 tsp each red wine vinegar and lemon juice
1 tsp sugar
1 clove garlic, minced
½ tsp Dijon mustard
¼ tsp each salt and pepper

Directions:

In a large bowl, combine beans, tuna, tomatoes, red onions and basil.

In a large bowl, combine beans, tuna, tomatoes, red onions and basil

Stir the mixture gently to avoid smashing the beans. Set aside.
In a small bowl, whisk together the olive oil, vinegar, lemon juice, sugar, garlic, mustard, salt and pepper, this will be your dressing.

In a small bowl, whisk together the olive oil, vinegar, lemon juice, sugar, garlic, mustard, salt and pepper

Pour the dressing over salad and mix well.

Pour dressing over salad and mix well.

This Summertime Salad may be served immediately or chilled before serving.

Summertime Tuna Salad

Serves 4

Eating salads in the summer is so easy especially if you have fresh tomatoes and lettuce from your garden. Trying making this recipe with other canned beans for a different taste. Use chicken instead of the tuna. However you put this salad together it is the perfect summertime salad.

August’s Garden

This has been a hard summer for my garden, can only blame it on neglect. Neglect on my part. We’ve been away too many weekends this summer and you can tell when you look at my garden. I mentioned before that we were transitioning to raised beds. I was thinking of all the benefits of raised beds and did not consider the negative aspects. Number one being they need more water! Our soil is rather sandy and even with the addition of compost the soil tends to dry out. Having the garden beds raised seems to help the soil dry out even more. For next year I will have to make sure I have a better supply of compost in each bed and water regularly. I also muck the beds which does help but the tomatoes and peppers would definitely appreciate a constant supply of water!

Despite the time away from the garden I am being rewarded with an abundance of blueberries. We have early, mid and late season bushes so once the blueberries start producing we will have blueberries until our first frost! Sounds more impressive than it is as our first frost often comes in September! I do love walking out to the garden each day and picking blueberries!blueberriesThe beans are just coming in and it looks like we will have a good harvest.

Beans

Here is a prime example of garden neglect, can you see the weeds? If you look carefully you can also see the carrots coming along.Weeds & carrots

I planted a few leeks which usually do well in my garden. I’ve grown so many in the past I have learned you can freeze them and dehydrate them! I am looking forward to this year’s harvest.leeks

There are also a few beets coming along.beets

There is also the promise of tomatoes! I’ve just harvested my first few tomatoes this week. There are quite a few green tomatoes coming along.green tomatoes

August is my favorite month, I love the warm, sunny days and the cool nights. It’s a bittersweet time of year as you know fall is coming all too soon. For now I will enjoy my garden and the flowers!Black eyed susan

What’s going on in your garden this month?

Linked To: TuesdayGardenParty, GardenTuesday, OutdoorWednesday, WildcraftingWednesday, GreenThumbThursday, FromTheFarm, FridaysFlowerFlauntingGardens, HomesteadBarnHop, WWHop, TuesdaysWithATwist

Parmesan Pork Chops

We have an order of local beef arriving soon and it was necessary to clean out our freezer. Using up the meat we had on hand decided to make Parmesan Pork Chops. This recipe is equally as good with boneless chicken breasts – delicious! However this time I was using up pork chops, I have to say it was n excellent way to enjoy them!

Parmesan Pork Chops

Ingredients:

1 Cup Italian flavored bread crumbs
½ cup Parmesan cheese
½ tsp paprika
¼ tsp garlic powder
½ tsp salt
½ tsp pepper
6 boneless pork chops 1 inch thick
¼ cup olive oil
¼ cup butter, melted

Directions:

In a shallow bowl, mix together the bread crumbs, cheese, paprika, garlic powder, salt and pepper. Mix the ingredients together well.Combine ingredients for the crumbs.Add oil to a separate bowl. Dip the pork chops first in the olive oil, then in the bread crumbs, make sure the pork chops are coated well. Place pork chops on a parchment lines rimmed baking sheet or just a greased baking dish. Drizzle with melted butter.Parm. Pork chops Bake uncovered at 350 degrees for an hour or until the pork chops are tender. Serves 6.

Next time you have some chicken breasts or some pork chops on hand and you are trying to figure out how to use them up try this delicious recipe, you’ll be glad you did!

Parmesan Pork Chops

My Garden: Garlic

I’ve been keeping an eye on my garlic, knowing it was just about time to harvest it. Today was the day! The garlic was starting to die back.Garlic starting to die back.I was a little concerned because the stalks seemed a bit skinny and I wondered how the garlic would look. As soon as I started to pull up the stalks I was so pleased! Many of the bulbs almost filled my palm!Nice size garlic bulbs.

I love growing garlic, it does well in my garden, it’s easy to grow and produces an abundant harvest which gets us through until the next season.

An abundant harvest!After brushing as much dirt off as I could I set the garlic up on an old door screen to dry for a few days.Drying Garlic Then I will braid the garlic and hang it to dry in our garage.

garlic braid
(Photo credit: blurdom)

Our garage smells heavenly right now!

Linked to: TuesdayGardenParty, GardenTuesday, OutdoorWednesday, TheBackyardFarmingConnection, FromTheFarm, HomesteadBarnHop, TheBackyardFarmingConnection


Garlic Scape Pickles

Recently I harvested my garlic scapes. Garlic scapes are the green curly shoots that grow from hard-necked garlic plants. They are removed so the garlic plants will concentrate their growth energy into the bulbs. Garlic scapes can be used for many things especially garlic scape pickles!

harvest, garlic, prudent living

Garlic scapes can be used to make garlic scape pesto.

Garlic Scape Pesto
Garlic Scape Pesto

They are also good chopped up and added to a salad or used as a pizza topping. Have you ever tried Garlic Scape Scampi? Just delicious! Did you know you can also use them to make pickles?IMG_0265

This is another recipe from my favorite book, Preserving By The Pint by Marisa McClellan. I love the recipes because they are all geared toward small batch preserving, perfect for our household of two!

This recipe reminds me of a crisp garlicky dilly bean!

Garlic Scape Pickles

Ingredients:

8 ounces of garlic scapes
¾ cup cider vinegar
1 Tbsp pickling salt
1 tsp dill seeds
½ tsp black peppercorns
½ tsp red chili flakes

Directions:

Prepare your boiling water bath and 2 pint jars and two lids according to the directions that came with your canner.

Combine the vinegar, ¾ cup water and the pickling salt in a medium pot and bring to a boil.

Prepare your brine.

Cut your scapes into two inch segments. Add them to the pot of brine and stir for 30 seconds. Removed the pot from the heat. Divide the spices up evenly between the two jars and using a funnel add the scapes to each jar. Ladle the brine over the scapes leaving ½ inch headspace. Wipe the rims and apply the lids and process in your water bath canner for 10 minutes.

Remove the jars from the canner and let cool before storing in your pantry. Let these pickles cure for at least a week before eating.

Garlic Scape Pickles

Note: The recipe said to use jelly jars to can the pickles, in which case you would get two jars, I used a pint jar and got one jar!

Broiled Shrimp in Olive Oil and Spices

I love shrimp and I love a quick recipe for a delicious dinner. If you like shrimp this is one of those recipes you will find yourself  Broiled Shrimp in Olive Oil and Spices making again and again. In less than ½ hour, start to finish; you can have a delicious meal on the table. I usually start by cooking up some rice. While the rice is cooking you can make the shrimp and it will all be done at the same time. If you want you can mix up he shrimp and the marinade several hours in advance and refrigerated until ready to toss under the broiler.

Broiled Shrimp in Olive Oil and Spices

Ingredients:

2 pounds of shrimp, the larger the better
½ cup olive oil
2 tsp finely chopped garlic
2 Tbsp finely chopped parsley
1/8  tsp crushed red pepper
½ tsp dried oregano
2 Tbsp fine fresh bread crumbs

Directions:

Preheat your broiler to high. Split the shrimp down the backside, rinse and pat dry. Add the remaining ingredients to the shrimp and toss to coat evenly. Line a baking dish with foil and arrange the shrimp over it.

Ready for the oven.

Place the shrimp under the broiler, about three to four inches from the source of heat. Broil 5-6 minutes. It is not necessary to turn the shrimp as they cook.

Ready in minutes!

Makes four servings. This recipe can easily be halved as well. This recipe is also good served with pesto spaghetti squash!

Broiled Shrimp in Olive Oil & Spices

My Garden: Busy Days

I had hoped to harvest my garlic this week but it’s just not quite ready. Instead my daughter and our two grandchildren are visiting and we’ve been checking the garden out, picking blueberries and seeing what else is ripe. Fun days.

Fun days in the garden.

Photo Credit: Jessica Keating

Linked To: WhimsyWednesday, OutdoorWednesday, GardenTuesday, WildcraftingWednesday, FavoriteThingsBlogHop, RuraltyBlogHop, TheBackyardFarmingConnection

Design a site like this with WordPress.com
Get started