Perhaps when you think of tomato soup from a can you think of Campbell’s. Isn’t that what we grew up with? Comfort food at it’s finest is tomato soup served alongside a grilled cheese sandwich. It’s also a quick and easy meal. However, did you know you could make your own tomato soup? I have a wonderful recipe from my mother for a tomato soup that can be canned for later use. Perhaps you didn’t have a garden last year. You can also enjoy homemade tomato soup with ingredients you probably have on hand in your pantry.
Tomato Soup From a Can
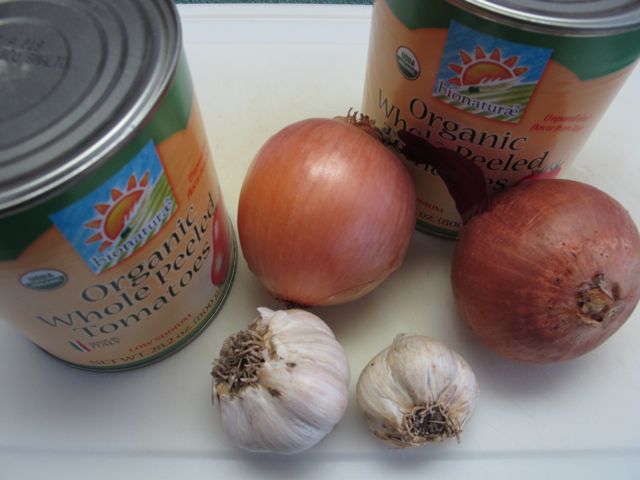
Ingredients:
2 Tbsp butter
2 Tbsp olive oil
2 Cups diced onions
1 Tbsp minced garlic
½ tsp ground allspice
6 Tbsp chopped fresh dill leaves (optional)
Salt and pepper to taste
6 cups of chicken broth
2 cans (28oz each) plum tomatoes, drained and chopped
1 tsp sugar
Directions:
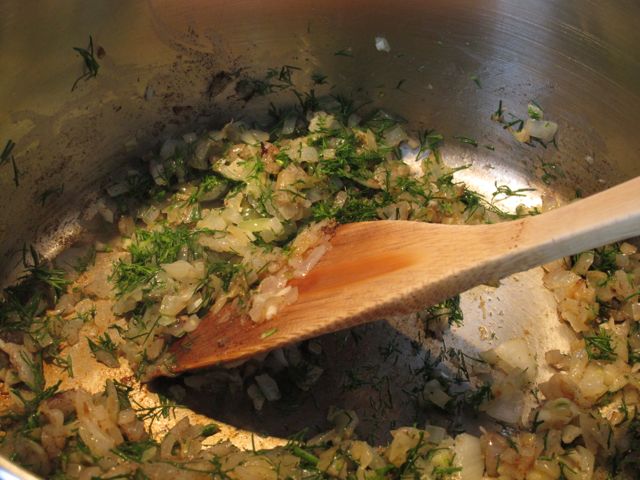
Melt the butter in the olive oil in a heavy pot over low heat. Add the onions and cook until softened, about 10 minutes. Add the garlic and cook for another three minutes stirring. Sprinkle the allspice over the onion garlic mixture and cook for another minute.
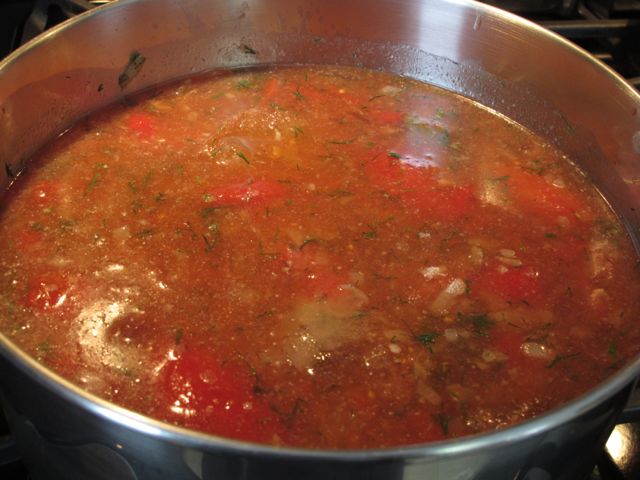
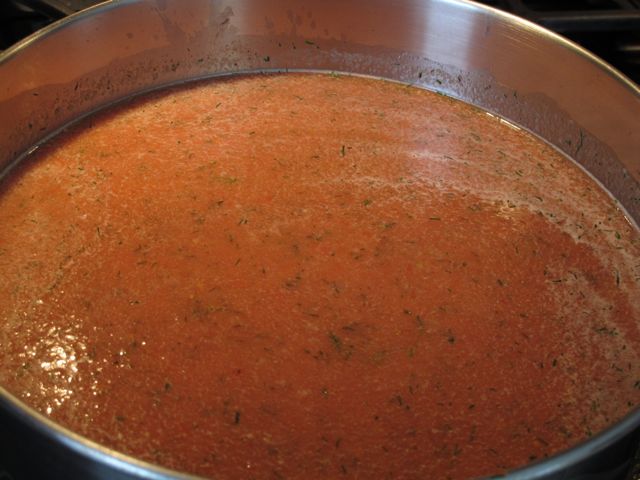
Add 4 Tbsp of the dill and season with salt and pepper.Continue to cook over low heat for another five minutes. Add the broth, tomatoes and sugar. Bring to a boil and then reduce the heat. Simmer, partially covered for 20 minutes and then remove from the heat.Puree the soup using an emersion blender.Add the remaining 2 Tbsp of dill. Serve hot or chill in the refrigerator to serve cold. I like it hot with a grilled cheese sandwich!
Recently I mentioned that oatmeal was a pantry staple I always had on hand. Another item you will always find in my pantry is wheat berries. Wheat berries, when stored properly, will last for years. You can grind them for flour, sprout them or even cook them for a hot cereal.
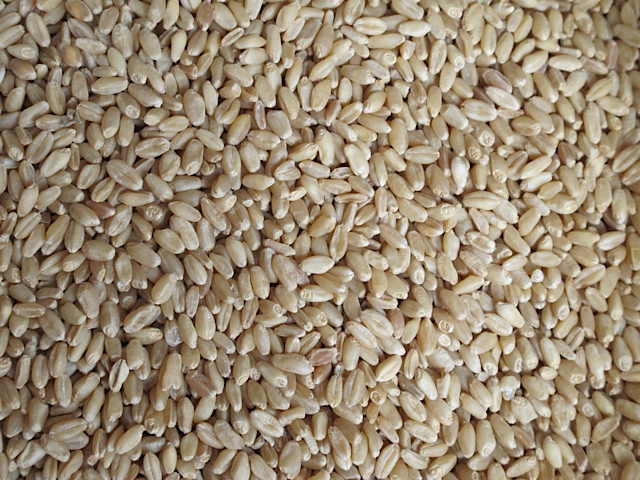
Hard White Spring Wheat Berries
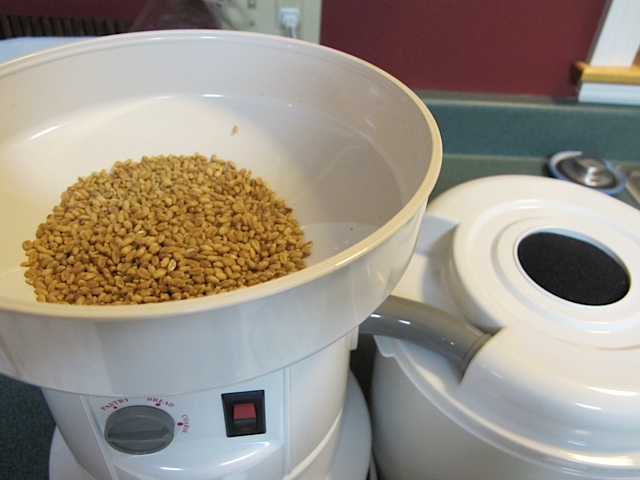
Unfortunately, once wheat is ground into flour, it will last only a few days without turning rancid, which is why regular store-purchased flour is heavily bleached and full of preservatives. I started buying wheat berries more than 15 years ago even though I didn’t own a wheat grinder. I had a friend that would grind the berries for me. Eventually I purchased a wheat grinder of my own and have been happily grinding my own wheat for years.
Grinding wheat berries.
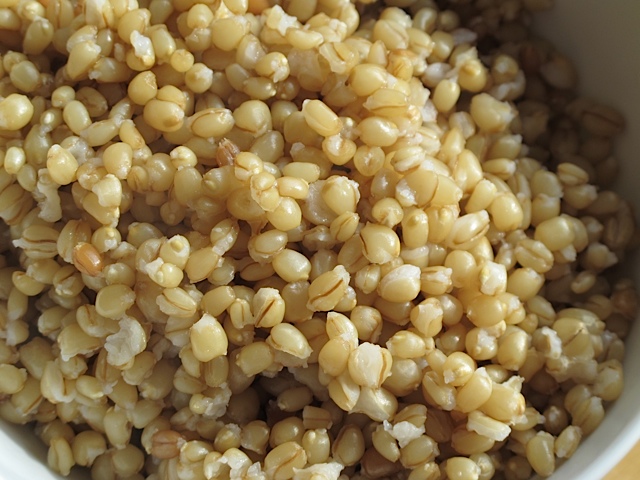
In addition to grinding wheat berries to make flour you can also enjoy them in other ways. When they are boiled, cooked wheat berries have a chewy bite and a nutty, earthy flavor. They can be eaten as a breakfast cereal with milk and cinnamon or added to a salad or a main dish. A cup of cooked wheat berries has about 300 calories and is packed with fiber, protein and iron. If you Google major cooking sites like the Food Network and search “wheat berries” you’ll find at least fifty tasty suggestions that incorporate whole wheat into soups, salads, sides and main dish casseroles.
Cooked wheat berries.
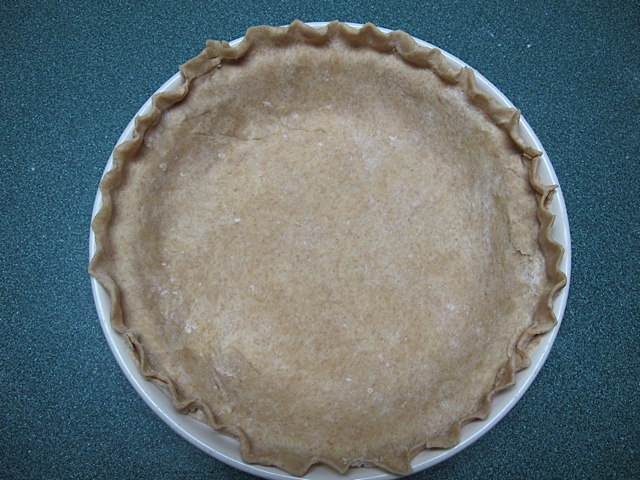
There are actually two types of wheat: hard and soft. The key difference between them is protein content. Where wheat is grown can determine protein content: Northwestern US and western Canada produce a hard wheat that’s very high in protein, while the southern US states grow a softer wheat with less protein. It is the protein that contains the gluten that allows bread and other baked goods to rise. Hard wheat is best for making breads and rolls. Since soft white wheat flour contains less protein it is typically used to create the buttery, crumbly texture associated with piecrusts, biscuits and cakes. Soft wheat flour intended for baking is often labeled pastry flour or cake flour, according to its primary use.
Soft Wheat Berries when ground makes a wonderful pie crust.
Pie crust formed.
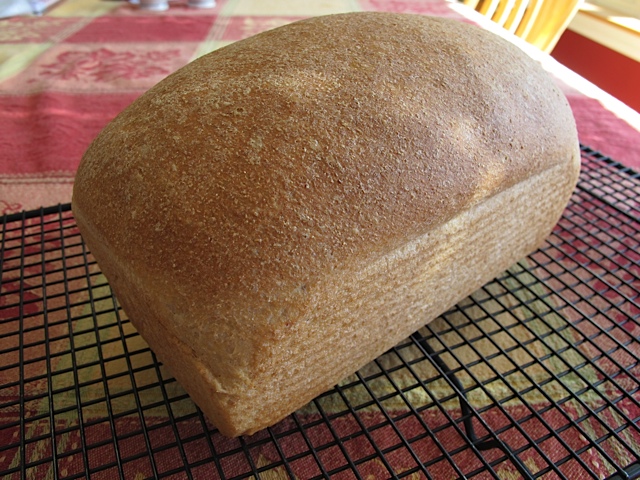
While the hard whet berries are perfect for bread making.
Whole Wheat Bread fresh from the oven!
Do you have wheat berries in your pantry? Which kinds have you cooked with?
Sometimes you just want to enjoy some comfort food. This is one of those recipes that isn’t fancy and doesn’t require an expensive cut of meat. Just simple home cooking.
Gram’s Country Fried Steak ‘n’ Gravy
3 cups of beef broth (preferably homemade)
All-purpose flour seasoned with garlic salt and pepper
2 eggs, beaten
Breadcrumbs, optional
1 pound cubed steak, cut into 3-4 smaller pieces.
3 Tbsp butter
1 ½ large onions
¼ cup flour
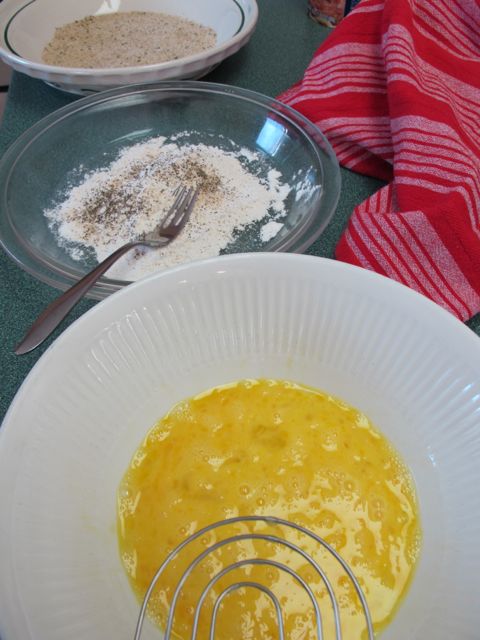
Place the flour, eggs and breadcrumbs into three separate bowls.
Eggs, flour and breadcrumbs.
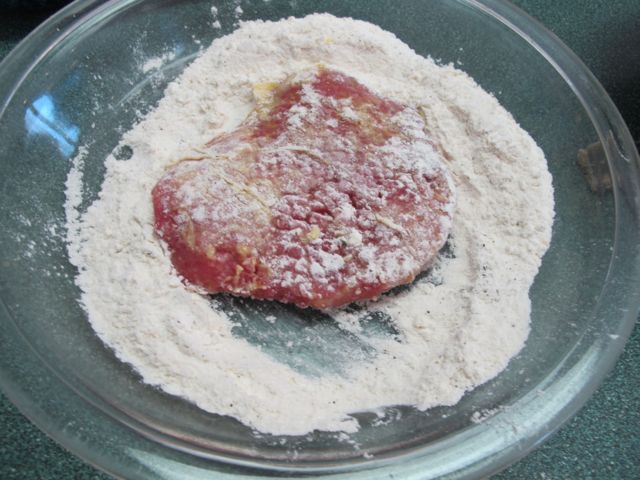
Coat the steak pieces with egg; then generously dredge both sides with flour, then with the bread crumbs.
Coat with egg, flour and bread crumbs.
In a deep frying pan, heat the butter then add the steak pieces. Fry until brown on both sides. Remove steaks from the pan.
Fry until brown.
Add diced onion and cook until the onions are lightly browned. Add the flour and stir to coat the onions. Then add your beef broth. Stir and heat until bubbly. Add seasonings to taste. Place the steaks back in the pan and cover with the gravy. Cover and simmer for 20 -30 minutes. Tastes great with mashed potatoes or noodles.
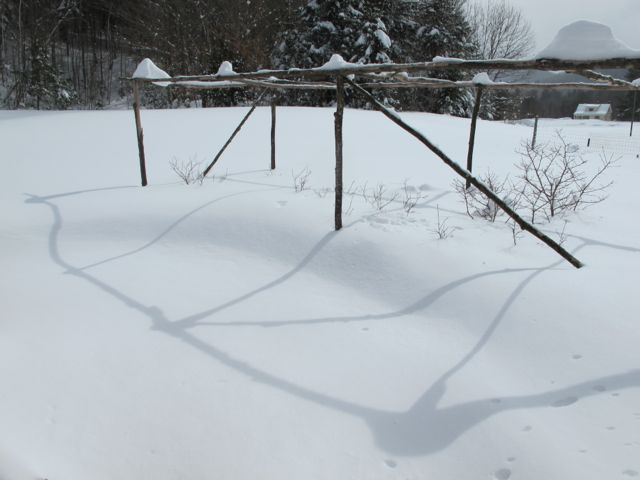
The calendar may say that it is spring but it sure doesn’t look like it here On The Home Front! In fact the first day of spring arrive along with five inches of wet, heavy snow that clung to every branch.
Snow! On the first day of spring.
I can’t even see the outline of my raised beds and the blueberry bushes are practically covered.
Blueberry bushes are covered!
Inside I do have some blooms to enjoy. The geraniums have made it though the winter and are bursting with color.
Geranium Blooms
My orchids have sent out another spray of blooms.
Orchid Bloom
Even my Cyclamen continues to bloom.
Blooming Cyclamen
The Hoya is happy to finally be in a hanging pot and is sending out numerous blooms.
Hoya Blooms
The seeds are planted and I’m awaiting the first signs of growth.
Waiting fro signs of growth.
It may not look like spring outside but it won’t be long before the snow is gone and the mountains are once again turning green! I can’t wait.
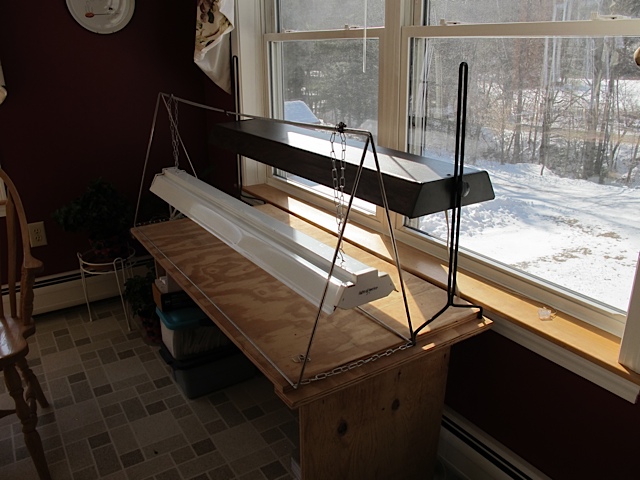
The seeds have been gathered; the potting soil is mixed up, I’ve told you what I plan to be starting indoors and now is the time to get started. I love reading seed catalogs and tend to get carried away with what I want to plant. However, I only have one simple growing table with two grow lights, so my space is limited.
Seed starting set-up.
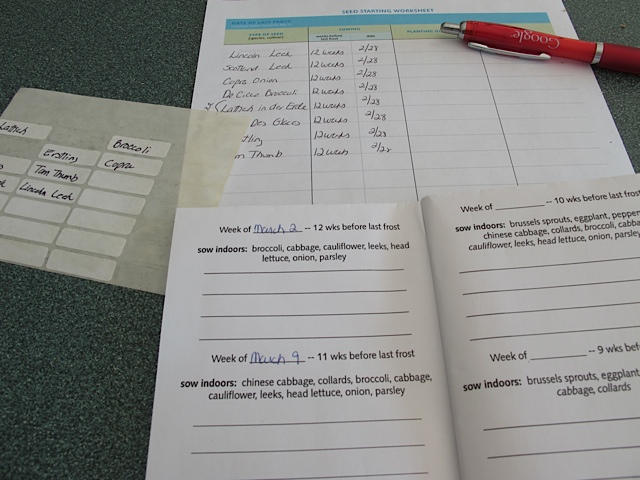
Organization is key when it comes to starting seeds. I keep a chart where I write down what seeds I will start and when to start them. If you search online there are various resources to help you stay organized. There are two downloads I have used in the past.
Seed starting charts
Little House in the Suburb has a little booklet you can put together. By determining your last day of frost you work backwards to determine what you should plant and when. I have also downloaded a seed-starting chart from Martha Stewart. It is basically the same information just on one sheet.
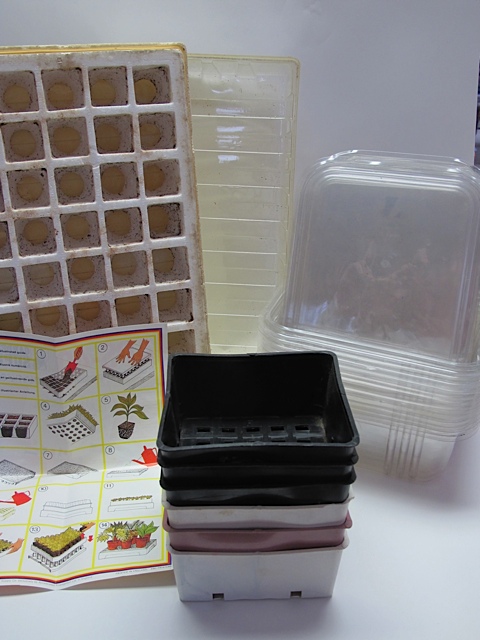
As I told you last week I will be starting peppers, tomatoes, eggplant and leeks this year. I have a collection of containers I use to start my seeds. The containers are re-used each year.
Various containers I use for seed starting.
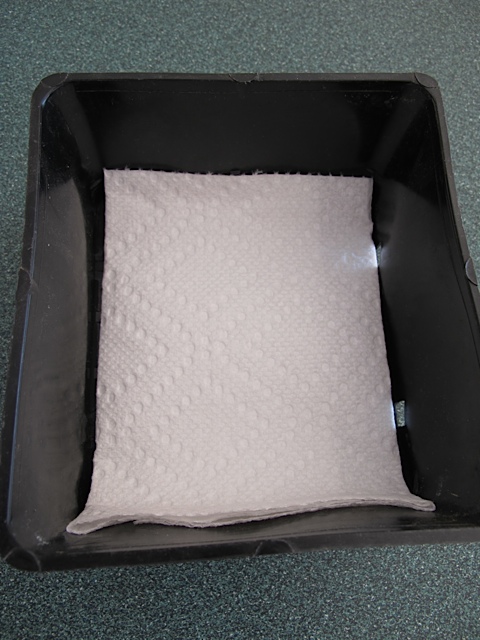
I place a small piece of paper towel in the bottom of each container. This keeps the soil mixture contained and by the time I need to transplant the paper towel will have dissolved.
Paper towel is used to contain the soil mixture.
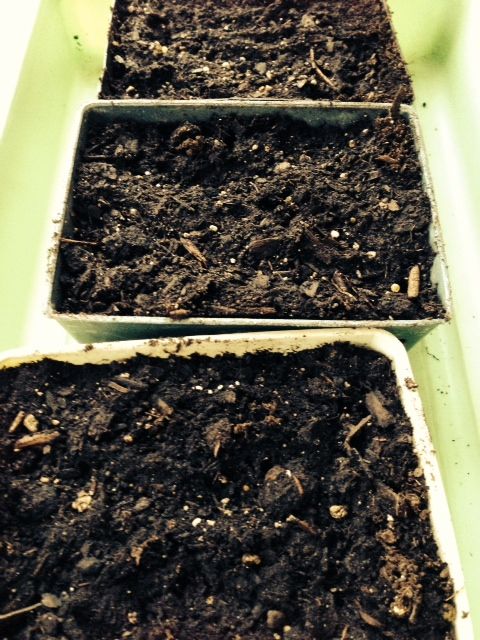
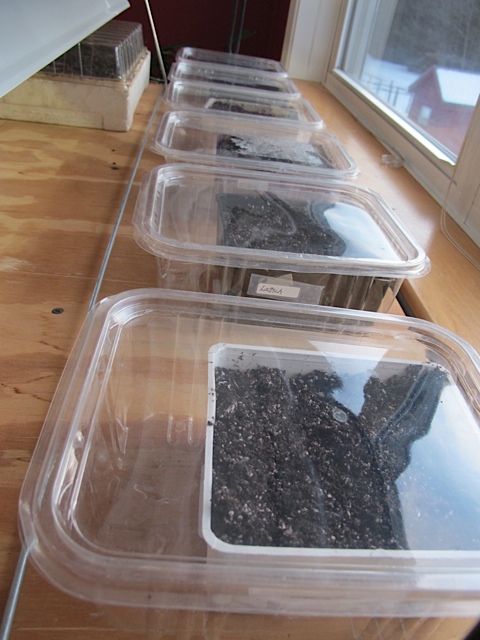
Using my homemade potting soil I fill the containers and moistened them slightly.
One rule of thumb is to plant the seeds 2-3 times as deep as the seed is wide. Leek seeds are rather small and are pretty much sprinkled on the top of the soil.
Container for the leeks.
Once my seeds are planted I make sure the soil is moist. One way to do this is to fill a plastic bin with water and float the pot in it until the surface is damp. I then label each container with the date and the name of the plant. This will help me keep track of how many days it took the seeds to germinate and will also help me when it comes time to plants the vegetable plants in the garden. I may be able to tell leeks from eggplant but it is very important to keep track of the variety of peppers and tomatoes.
Labels for seedlings.
Cover the seeds with a plastic or glass cover to create a mini greenhouse. You need to keep the seeds warm; a heating pad may be necessary. You do not need a grow light until the seeds sprout. Once you see the first seed sprouting remove the cover and place under your grow light. Keep a close eye on the seedlings, as you don’t want them to dry out.
Creating a mini-greenhouse.
It may still look winter outside, but once I’ve started my seeds I know that spring is coming. It won’t be long before I’ll be busy outside in the garden!
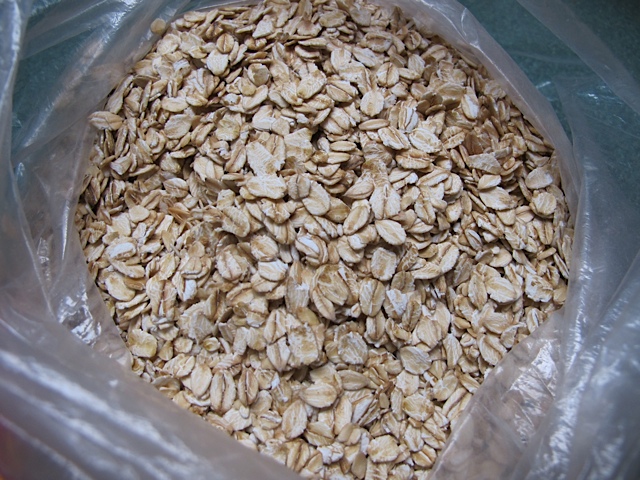
There are certain items that you will usually find in my pantry, one of my basic staples’ in oatmeal. I have rolled oats in my pantry. Oatmeal is one of the most popular hot cereals but it can be used in many other recipes. I use it to make granola, cookies, bread and even in soup. You can use oats as an extender in meat loaves. When ground oat flour makes rich thickeners for soups, gravies and stews. Oat flour will also add nutrition to your breads, muffins, crackers and desserts.
Oats are a wonderful pantry staple.
Did you know that you can use 25% oat flour in making bread and the natural vitamin E in oats will help keep your breads from going stale so quickly? It also has numerous health benefits such as lowering your cholesterol due to its soluble fiber content. Oats are also rich in the B vitamins, contain the anti-oxidant vitamin E and oats are mineral rich as well. Oats contain high levels of complex carbohydrates, which have been linked to reducing the risk of cancer and the better control of diabetes. Oatmeal is ground oat groats, it can also be ground oats, steel-cut oats, crushed oats or rolled oats. The process of heating produces a nutty flavor to the oats.
Perhaps you are familiar with instant oatmeal, which is precooked and dried, usually with a sweetener, and flavoring added. You can eat oats uncooked as in muesli or cooked as in porridge. It only takes about 10-15 minutes to cook regular rolled oats. Quick rolled oats, being thinner, cook much quicker in 2-3 minutes. The instant rolled oats are the least nutritious, you should think seriously about using them in your every day cooking habits. However you decide to eat oats you should definitely have some on hand.
You may wonder how long oatmeal can be stored? When properly stored, oatmeal lasts far longer than you might think.
Oats are much like barley with a hard outer shell that must be removed before it’s ready to eat. If you want to purchase oats you usually purchase them already hulled. Because of the antioxidants in oats, they are a good storing grain. For best storage conditions, pack them in airtight containers and store them in a cool place. Proper storage is the key to extending the shelf life of the oatmeal.. You do not want to create any moisture in the oatmeal. You can use the popular method of dry oven canning and your oatmeal will store even longer!
I use oats in many recipes. Here is a simple muffin recipe that I adapted from a recipe found on the epicurous.com website.
Oatmeal Muffins
1 cup old-fashioned rolled oats
1 cup buttermilk
1 large egg, beaten lightly
1/2 cup firmly packed light brown sugar
1 stick (1/2 cup) unsalted butter, melted and cooled
1 cup all-purpose flour
1/2 teaspoon salt
1 teaspoon baking powder
1/2 teaspoon baking soda
1/2 cup dried cranberries (mini chocolate chips would be good too)
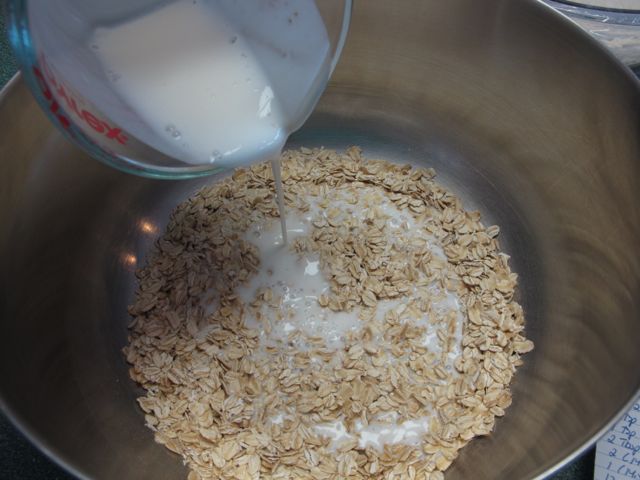
In a large bowl, combine oats and buttermilk and let stand 1 hour.
Combine oats and buttermilk.
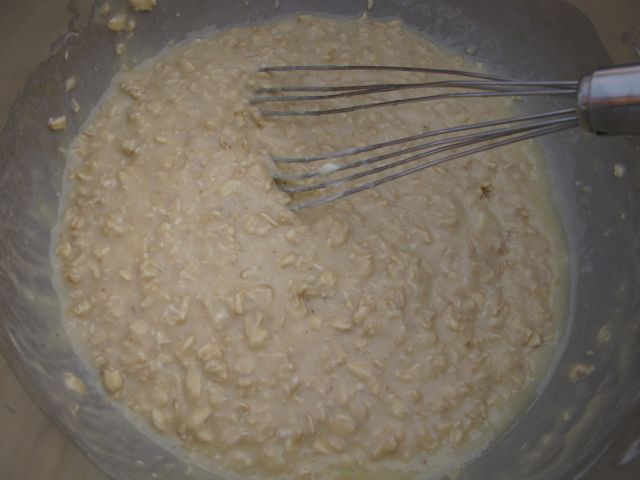
Preheat oven to 400°F and butter twelve 1/2-cup muffin tins. Add egg, sugar and butter to oat mixture, stirring until just combined.
Add egg, sugar and butter to oat mixture
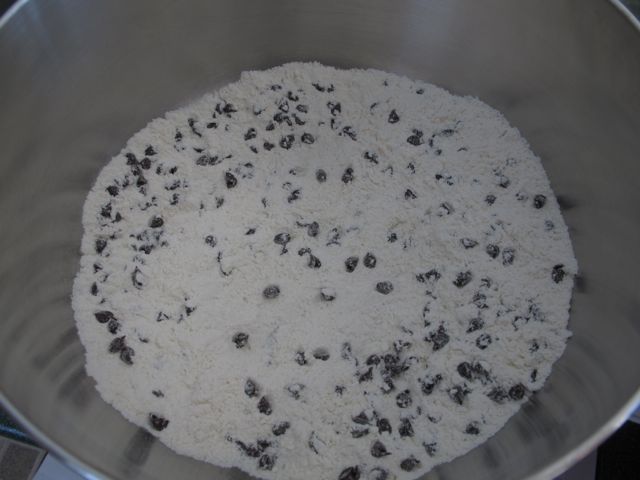
Into another large bowl, sift together flour, salt, baking powder, and baking soda and add to oat mixture, stirring until just combined.
Combine dry ingredients.
Fold in dried cranberries or chocolate cups. Divide batter evenly among prepared muffin tins. Bake muffins in middle of oven until golden and a tester comes out clean, about 20 minutes.
This week we had a huge blizzard! Looks like spring will be delayed by just a bit. It snowed for two days and it was so beautiful clinging to every little branch. So what to do when you are stuck inside really can’t do much outside? Make cookies! This Snickerdoodles recipe has been a family favorite for years. They are delicious, with a buttery cinnamon flavor. Perfect with your afternoon tea.
Snickerdoodles
Ingredients:
1 cup butter
1 ½ cup sugar
2 eggs, beaten
2 ¾ cup flour
2 tsp cream of tartar
1 tsp baking soda
½ tsp salt
1 ½ tsp cinnamon
½ cup sugar
Directions:
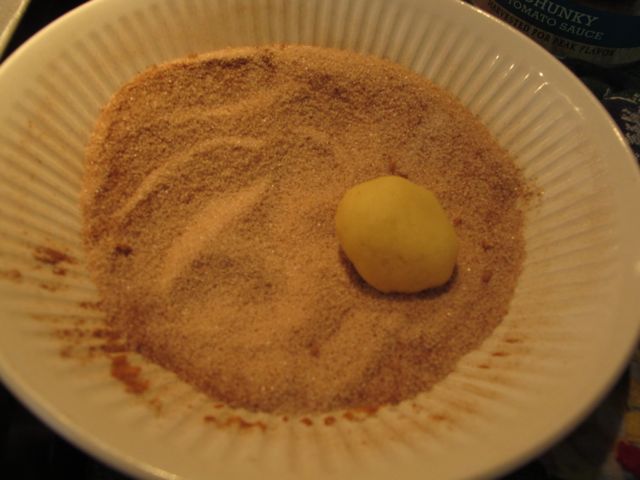
Cream the butter with 1 ½ cups of sugar in a large bowl. Add the eggs and continue beating. In another bowl combine the flour, the cream of tartar, baking soda and salt. Stir into the egg mixture. Refrigerate the dough for 30 minute. Position the rack in the upper third of your oven and preheat the oven to 400 degree. Mix the remaining ½ cup sugar and 1 ½ tsp cinnamon in a shallow dish. Shape the dough into 1 inch balls and rol the ballsl in the sugar mixture.
Arrange the cookie balls on your baking sheet and bake for 10-12 minutes. the cookies will be a light golden brown when done.
This recipe makes about 4 dozen delicious cookies.
Perfect with your afternoon tea.
These cooked are perfect for gift giving and for storing in your freezer. I have even sent these cookies in the mail with great success.
Next time you are looking for an old fashioned cookie that is bound to be a favorite with everyone try these Snickerdoodles, you’ll be glad you did!
Looking at our weather forecast you would not think that spring is right around the corner. My garden is still snow covered and our forecast is for another 16” of the white stuff! However my seeds have arrived and my potting soil is mixed up and ready and it is time to start my seeds indoors.
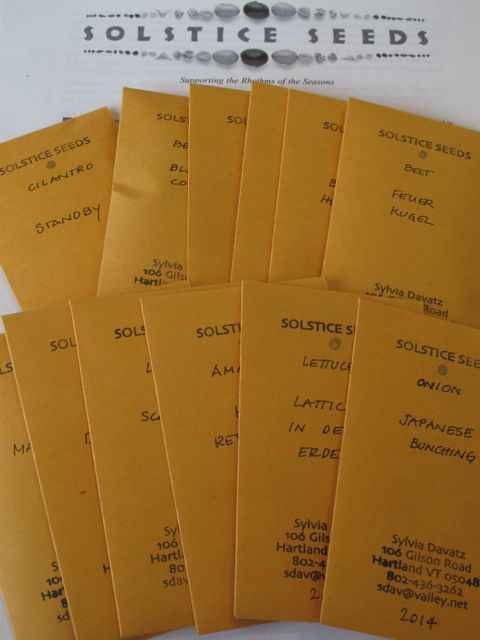
Sylvia’s heirloom seeds.
What are you planting this year. Here are a few of the seeds I will be starting early inside. Tomatoes and peppers are always started about 6-8 weeks before planting time. This gives the plants a time to get started and give you a better chance to have a good harvest.
The majority of my seeds that I ordered this year are all heirloom and come from Solstice Seeds; all the vegetables are grown locally and then the seeds are saved and available for purchase. I have confidence that these vegetables will do well in my garden since they were grown locally. This year I am growing three types of tomatoes.
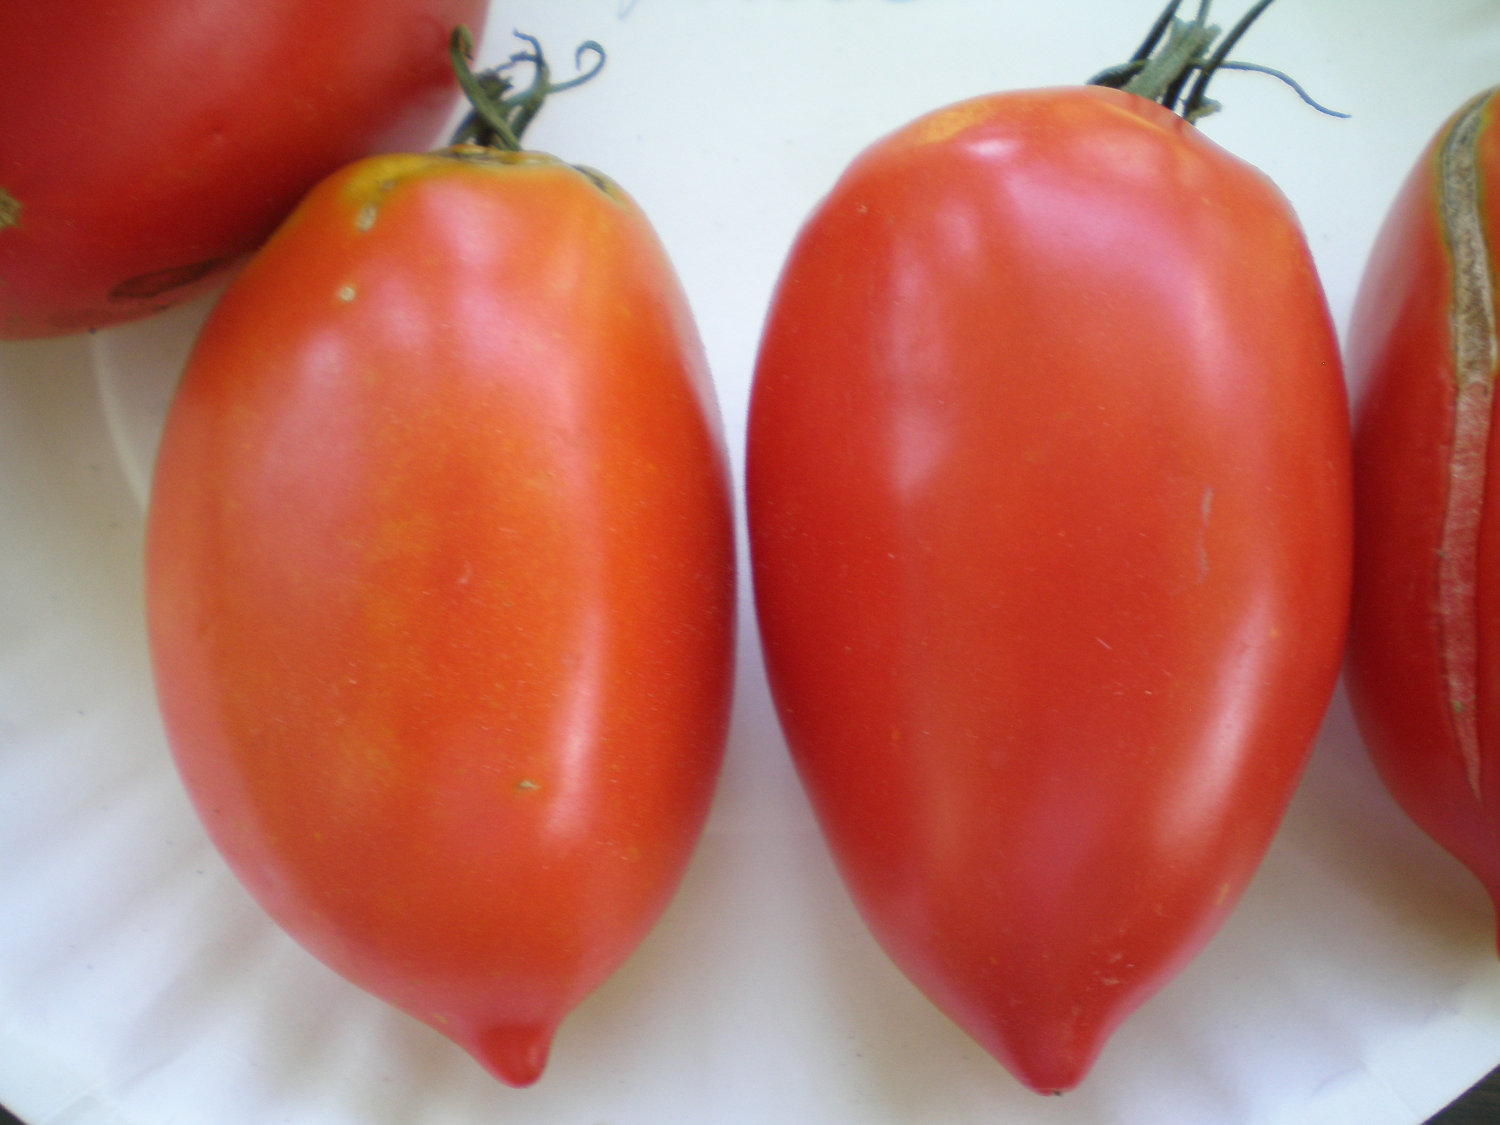
Amish Paste – this is one of our favorites. An heirloom form Lancaster, PA the tomatoes produced are acorn or heart shaped with a deep red color and an intense tomatoey flavor. The fruit is meaty with few seeds and is excellent for fresh eating or caning.
Amish Paste
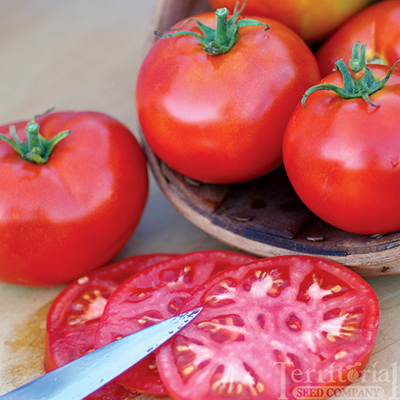
Burbank – This will be a new tomato for us this year. The fruit is medium sized round and smooth with good flavor and good drought resistance. Luther Burbank developed this tomato in 1915.
Burbank Tomato
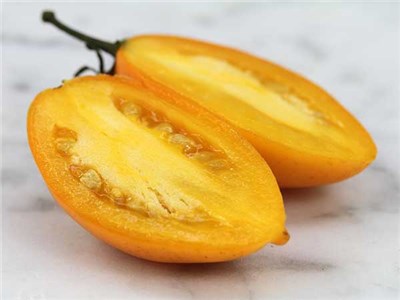
Orange Banana – These 3 oz plum tomatoes are very productive and adapted to a wide range of uses from drying to sauces to fresh eating. Unusually full and sweet flavor for a paste tomato. I am looking forward to trying these apricot colored tomatoes.
Orange Banana Tomato
I will also be starting an assortment of peppers.
Odessa Market Sweet Pepper – this is an heirloom pepper from Odessa on the Black Sea in the Ukraine. The plant has strong stocky stems and unique green leaves and grows rapidly and dependably. It usually sets 7-12 fruits per plant. The fruit is crisp, juicy and tasty.
Odessa Market Sweet Pepper
Peacework Sweet Pepper – This is an exciting sweet early bell pepper. The peppers have a good flavor and a full bodied sweetness.
Peacework Sweet Pepper
Boldog Hungarian Spice Pepper – This pepper is somewhat blocky but a slender paprika pepper with an intoxicating aroma and a touch of heat once dried and ground. The plants are robust and about 2-3 feet tall, bearing heavily close to the stems. Peppers start dark and then ripen to a rich reddish brown.
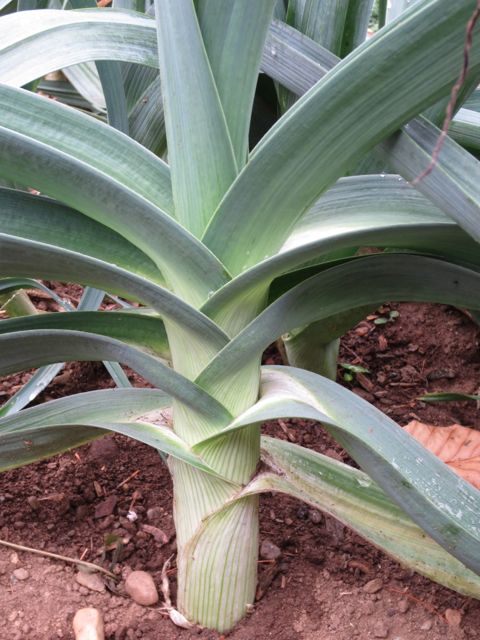
In addition to the tomatoes and peppers I will also be starting Leeks and Eggplant. I don’t usually have much luck with eggplant here in Vermont but I give it a try each year.
Scotland Leeks– I have grow these leeks before with an incredibly harvest. Scotland Leeks are a very sturdy heirloom winter leek with a fat, pure white shank and deep green leaves. They have an outstanding flavor and exceptional hardiness. I have to space them generously as they can achieve remarkable size!
Scotland Leeks
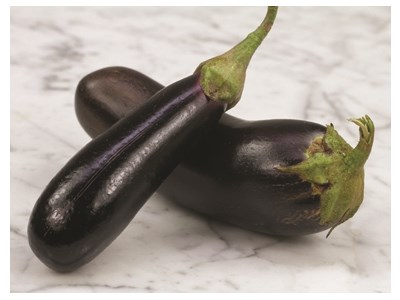
Diamond Eggplant is a Ukrainian variety brought back to the states in 1993 by Seed Saver Exchange co-founder Kent Whealy. The fruits are glossy, elongated, tapered, dark purple with a pale green flesh that is free of bitterness. Of the various varieties of eggplant that Solstice Seeds have grown this is the best performing. Hopefully it will do well in my garden!
Diamond Eggplant
What will you be growing in your garden this year?
The weather continues to be cold here in Vermont. This Pork and Hominy Stew recipe is perfect for those cold nights when you just want some delicious comfort food to warm you up. The recipe makes enough for six generous servings and also freezes well. It is also easy to double for a large crowd!
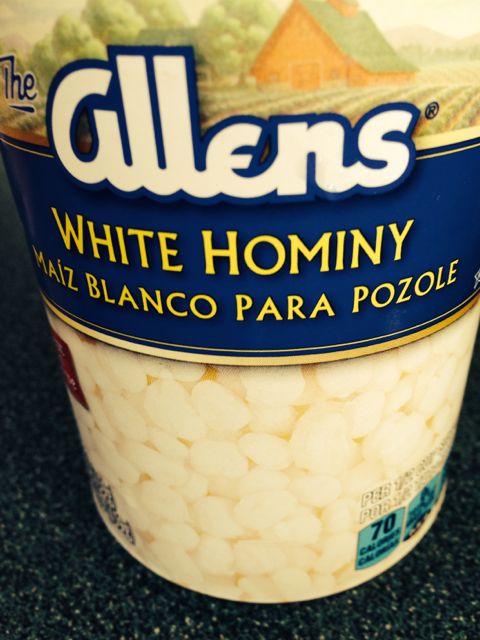
Perhaps you’re wondering what hominy is? Hominy is made from whole corn kernels that have been soaked in a lye or lime solution to soften the tough outer hulls. The kernels are then washed to remove the excess solution, the hull and often the germ. You can find ready-to-eat hominy in cans. Once you’ve had hominy, you’re not likely to forget it. The big kernels of corn are puffy and chewy with a very unique flavor. And they make a wonderful addition to this stew.
Pork and Hominy Stew
Ingredients:
2 Tbsp chili powder
2 tsp oregano
1 ½ tsp paprika
1 tsp cumin
½ tsp salt
1 ½ pounds of pork tenderloin, trimmed and cut into small chunks
1 Tbsp olive oil
1 ½ cups red pepper
1 Tbsp garlic, minced
2 ½ cups chicken broth
1 (28 oz) can hominy, drained
1 (14.5 oz) can fire roasted diced tomatoes, undrained
Directions:
Combine the chili powder, oregano, paprika, cumin and salt in a large bowl. Add pork to the mixture and toss to coat well.
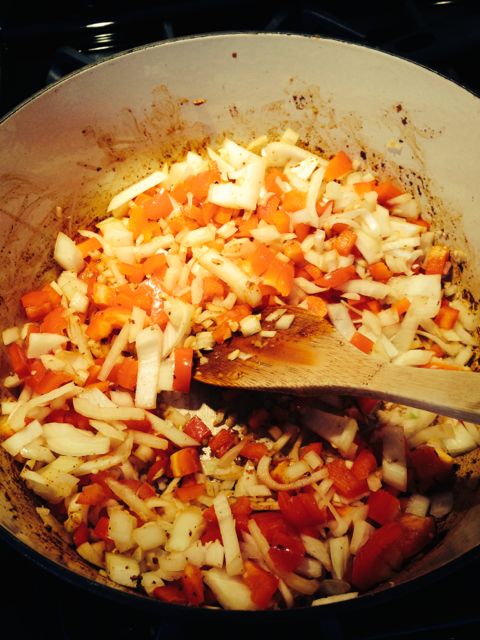
In a large Dutch oven heat 2 tsp of the olive oil over medium heat, add the pork and cook until browned, about 5 minutes. Remove the pork from pan and set it aside. Add the remaining 1 tsp of olive oil to the pan and sauté the onion, pepper and garlic until tender, about 5 minutes. Return the pork to the pan, add broth, hominy and tomatoes.
Bring to a boil, cover and reduce heat and simmer for 25 minutes. Serve with salad and bread and you’ve got a delicious meal!
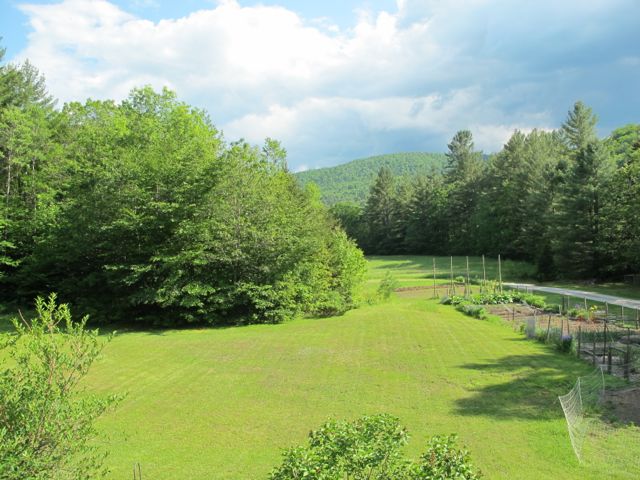
As spring rolls around, we start to think of being outside, enjoying the wonderful weather. Now is also the time to think about establishing your vegetable garden – it’s a wonderful way to save money, get exercise, and help your family to eat healthy. And taking care of a garden is a never-ending and rewarding learning experience.
The most important thing to consider is where your garden will be located. Gardens need sun, the more the better. Locate your garden away from any shadows cast by large trees or buildings. Ideally, you would like to have level ground; if the garden is on too steep a slope, the soil will erode and nutrients will be washed away. Ideally you want to choose the sunniest, brightest spot in the whole yard. If you are limited for space you can also grow some vegetables in containers on a sunny patio or deck. I have a friend who lines their front walk with large containers planted with lettuce. It’s very pretty to look at, convenient and it provides plenty of fresh greens.
If this is your first year gardening, you also want to consider the size. It is better to start small and increase your garden size year by year. A 15 x 15 foot plot would be a good size to start with.
Once you have decided where to place your garden, the next thing to consider is the soil preparation. Well-prepared soil will help you have a successful garden. However, any soil can be improved. Soil quality is determined by three characteristics: composition, pH (its acidity), and fertility. All of these areas can be improved by adding generous amounts of organic humus: compost, peat moss, well-rotted manure, or processed manure. Be sure to mix the organic humus thoroughly with your existing soil.
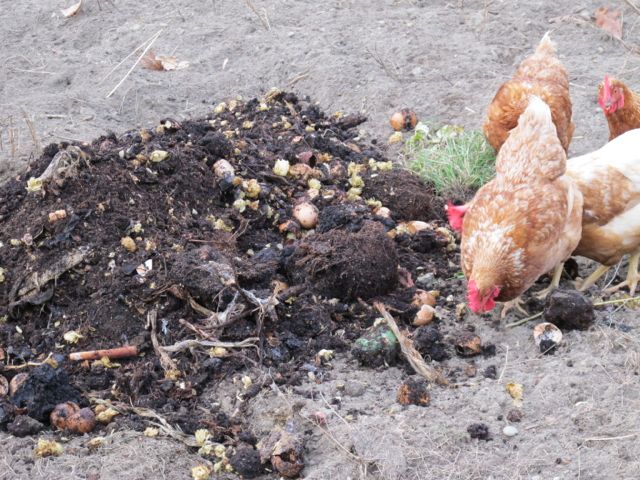
Our chickens enjoy scratching through the compost.
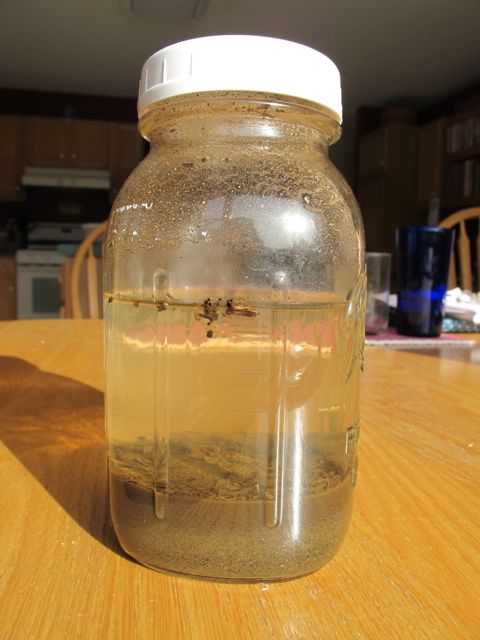
* Composition: The composition of the soil determines a great deal about its growing potential. Soil is made up of clay, sand, silt, and biological sediment. If the soil is too loose and sandy, or too heavy and clayish, aeration, drainage, and nutrient retention will suffer. You can determine the composition of your soil by doing this simple test. Take a shovel and dig a hole about six inches deep and remove the surface layer. Spoon about one cup of the mix into a glass canning jar and fill with two cups of water. Shake it up for several minutes to fully mix the contents. Let the jar sit for 24 hours and look at it. The small clay particles will be on the top; the silt will be in the middle and the coarse sand particles on the bottom. An ideal garden soil would be 40% sand, 40 % silt and 20% clay.
Mixing a soil sample and water can help determine your composition.
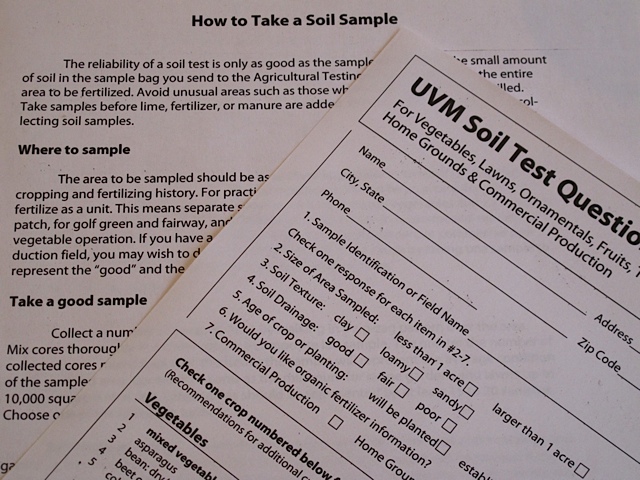
* pH: Vegetables require a pH range of 6.0 – 7.0, anything above or below that and optimal growth will be affected. The pH is a measurement of the acidity or alkalinity of your soil. Basically it is a measure of the amount of lime contained in your soil and the type of soil you have. An acid soil has a pH lower than 7, and alkaline soil has a pH higher than 7. You can test your soil yourself with a pH soil tester which you can purchase at your local garden center or online. Your local Extension bureau will also test your soil for a modest fee. Once you have determined your soil’s pH, you can improve it. To have your soil tested by your local Extension office you purchase a kit, which includes a mailer, sample bag, and information form. The fee for the basic test in Vermont is $14.00, this includes the pH and your potassium, phosphorus, and calcium levels as well as magnesium, sulfur, micronutrients, CES (carbon exchange capacity), BS (basic saturation percent), and organic matter. The report will give recommendations for one crop (since ideal soils vary by crops). When you are filling out the form you can say that you are growing mixed vegetables. This is the best way to find out exactly what shape your garden is in and what the recommendations are to improve the soil.
UVM Soil Testing Form
* Fertility: The fertility of a soil refers to its ability to supply nutrients for plant growth. Insufficient fertility cannot support healthy crops. For a soil to be healthy, it must have nutrients readily available and a pH value at a recommended level for the plants that will be growing in the soil. The nutrients that should be available for the plants are nitrogen (for leaf growth), phosphorus (root growth), and potassium (overall health). In addition to the essential nutrients there should also be trace elements like calcium and magnesium. Plants grown in fertile soil will be stronger and healthier and produce well.
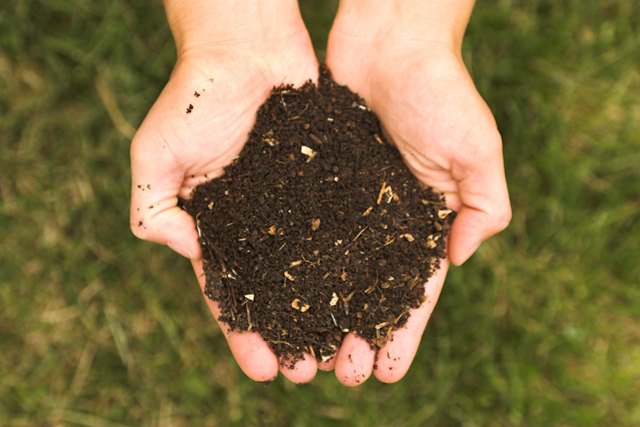
No matter what type of soil you have, the addition of organic matter will work wonders. Organic matter is plant and animal residues in varying forms of decomposition. Compost is an excellent way to help amend your soil. Compost is already decomposed and can work wonders in the garden. If your soil is lacking nutrients and you don’t have access to compost you can purchase various fertilizers at your garden center.
Compost
Now that your garden plot is laid out and the soil is ready, it is time to decide what vegetables you want to plant. Before you decide what to plant in your garden, determine the eating habits of your family. You want to grow vegetables that your family will eat. There are many sources online that will help you determine just how many rows to plant of each vegetable. One source I found is this simple seed-planting chart: http://www.humeseeds.com/seedneed.htm. If you want a rewarding, productive garden, do some research to find out what grows well in your area. An excellent resource is your state’s Agricultural Extension office. You want to make sure you know what growing zone you are living in; when your last frost date is expected in the spring, and when the first date of frost in the fall is expected. These dates will determine when you can plant outdoors, what you should try to grow, since the days to maturation will need to fit in this last frost to first frost window, and when you should be harvesting your vegetables.
Sample garden plot
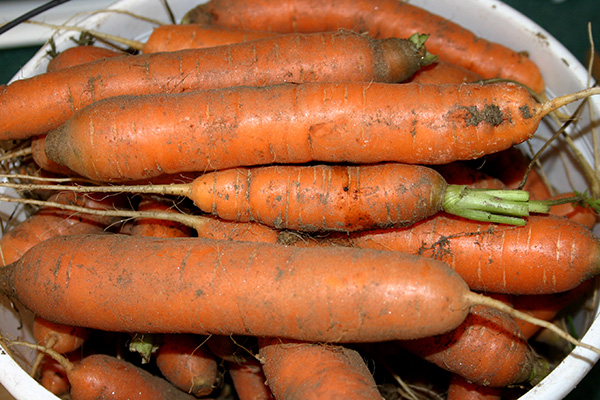
You have now decided on your garden location, figured out which vegetables and how many to grow. You must now figure out where the plants will be placed in your garden. The taller crops should be planted on the north side of your garden so they don’t shade the other plants. At the southern end of the garden plant your shorter vegetables, like your carrots and lettuce. By taking time to plan out your garden now you will be rewarded with a bountiful harvest later this summer.