Frugal Tips: Saving More of Your Income

Did you know that according to the Bureau of Economic Analysis, on average Americans currently save around 4.2% of their income? There are also some supersavers that manage to put away close to half of their take home pay. I don’t want to be drastic and I’m not willing to give up my hot showers but here are some small steps to take that will help you save more of your hard earned cash.

Reuse plastic sandwich bags. Sandwich bags can be easily rinsed out and dried and used again the next day. As long as the bags didn’t touch raw meat, it’s hygienic—and environmentally friendly. With a pack of 100 bags going for around $3, a family of four can save about $30 a year. I have a wonderful drying rack which is perfect for drying sandwich and other ziploc bags.

saving, money
Reusing plastic bags is easy!

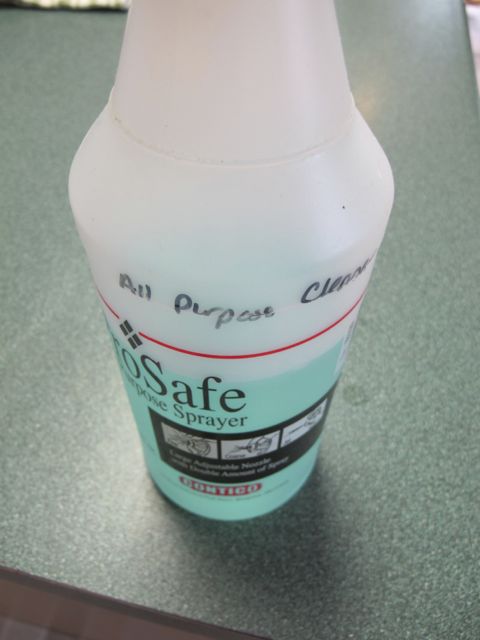
Make your own cleaning supplies. Martha Stewart has long recommended vinegar and lemons as kitchen cleaners. To absorb unpleasant smells, leave vinegar in a shallow bowl on a kitchen counter. To deodorize a garbage disposal, squeeze lemon juice down it. You can save up to $10 a month on cleaning supplies. I make my own all purpose cleaner, find the recipe HERE.

All Purpose Cleaner
All Purpose Cleaner

Buy in bulk. Often buying a large pack of meat and then breaking it down into smaller portions and freezing it will help save you money. I buy flour and sugar in large bags and then store it in the pantry to use later.

Stockpile supplies. Cans of beans and tomatoes are cheap, store easily, and make quick, filling meals. In addition to cans of tomatoes and beans, you will also find home canned items in my pantry!pantrystock

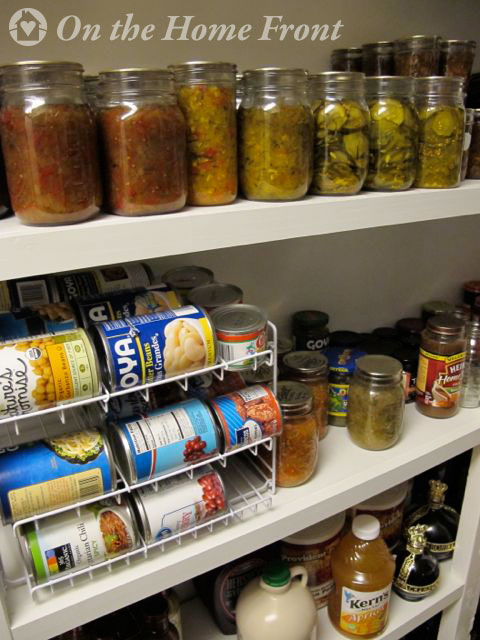
Compare prices. For some items, such as fruit, buying from street vendors turns out to be cheaper than shopping at large grocery stores. Setting up a price book will help you here.

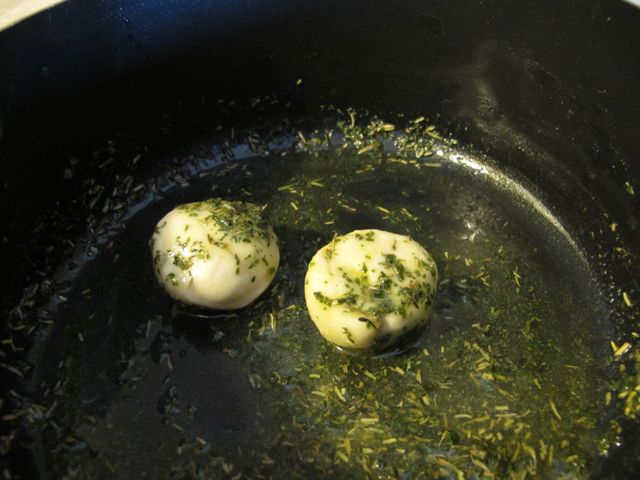
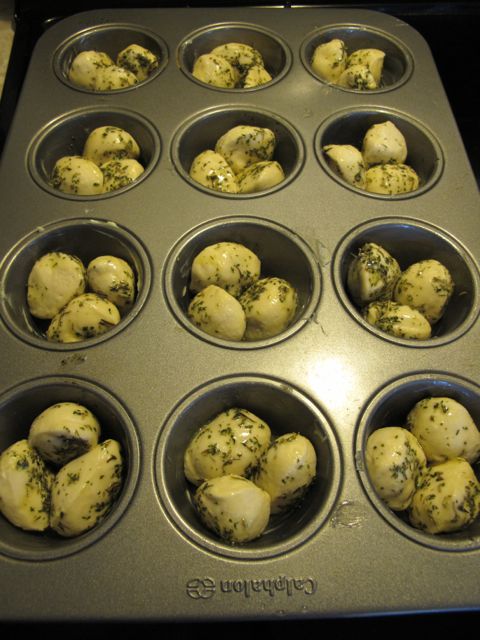
Cook big. You can make lots of soup, chili, and other big dishes that can turn into leftovers or even go into the freezer for a future meal. To spruce up the dishes and make them even bigger, add pasta or rice. One of my favorite meals to freeze is homemade  Beef and Beer Chili.

Beer and Beef Chili
Beer and Beef Chili

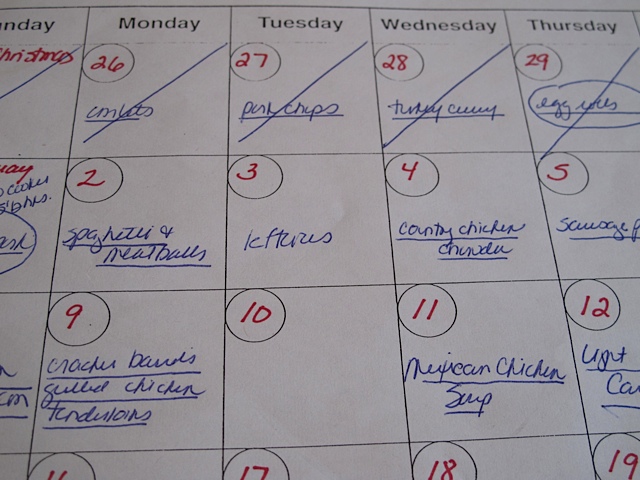
Plan ahead. By loosely deciding in advance which meals to cook on which nights, you can avoid getting home from work—starving—and eating out just because it seems easier. I have a monthly meal calendar I use, I may not follow it exactly but it does help me plan ahead!

calendar, planning meals, menu calendar
A view of my menu calendar.

These are just a few tips to help you save ore of your hard earned income. What is your favorite way to save?

prudent livingLinked To: WonderfulWednesday, WhimsyWednesday, PennyPinchingParty, AdornedFromAbove, WFMW, WakeUpWednesday, FabulouslyFrugalThursday, CreateItThursday, ThursdayFavoriteThings, DIYAccomplshed, TimeTravelThursday, CatchAGlimpse, ThrivingThursday, ThinkTankThursday, 4SeasonsBlogHop, FrugalDaysSustainableWays

Recipe Box: Pommes Anna

The other day I was looking for recipes to use up some potatoes I had on hand. With both sweet and white potatoes in hand I decided to use them in a Pommes Anna recipe. What a winning combination this was!

The recipe was easy and the end result was delicious.

Pommes Anna

Ingredients:

2-3 pounds of potatoes (I used both sweet and white potatoes)
4-6 Tbsp butter
1 ½ tsp salt

Directions:

Preheat the oven to 400 degrees. Melt the butter in a small saucepan.

Heat a well-seasoned cast iron skillet over medium heat. Peel and slice your potatoes as thinly as possible.

potatoes, casseroles
Brush the bottom of the pan with butter and arrange the sliced potatoes over the bottom of the pan in concentric circles. Brush each layer lightly with butter and season with salt and continue layering.  I alternated the layers with sweet and white potatoes.
potatoes, casseroles
Cook on low heat until the potatoes are golden on the bottom, about 25-30 minutes. Cover and place in the oven for an additional 30-45 minutes or until the potatoes are cooked through. Remove from the oven. Place a serving plate on the top of the pan and gently flip over.

potatoes anna

Slice into wedges and serve.

My Garden: Spring Is Coming

Here in Vermont it doesn’t much look like spring is coming. The ground is still white and the temperatures are quite chilly this week. However in just a few weeks I’ll be starting my seeds for my garden!

Vermont, winter
Still looking like winter in VT!

I’ve looked through the various catalogs, placed my seed orders and the other day I received an envelope filled with seeds from Solstice Seeds. Sylvia who runs Solstice Seeds is an avid seed collector and I know that her seeds will grown in my garden as she is only a few towns away. Sylvia not only sells heirloom seeds she has saved herself but she encourages you to start saving your own seeds.

seed starting, gardening
Sylvia’s heirloom seeds.

One of the things you need to start your own seeds is some sort of potting mix designed for seed starting. Of course I could go out and purchase some seed starting soil but did you know it is very easy to make yourself?

Following the directions in one of my favorite books, America’s Garden Book by James and Louise Bush-Brown, the mixture only requires three ingredients. Top Soil or garden loam, sand or perlite and peat moss. I usually mix up a large container, which will last me the whole season for as many seeds as I need to start.

gardening, garden books
One of my favorite books.

Just combine equal parts of the three ingredients and mix well.

Top soil, Peat moss, gardening
Ingredients to make your own seed starting mixture.

Perlite is used to increase aeration in a mixture. It is derived from a type of volcanic rock and is processed into light, porous, sterile particles that hold many times their own weight in water.

Perlite, soil mixture, gardening
Perlite

Sand is used to add body and drainage to a soil medium, and is also excellent when used alone for root cuttings.

Peat moss is used in heavy mixtures to lighten and increaser porosity; it is derived from partly decomposed aquatic plants.

Peat moss, soil mixtures, gardening
Peat Moss

Once I have mixed up my seed starting soil I am ready to start planting seeds.

seed starting mixture, gardening
Homemade seed starting mixture.

The first seeds I will start will be my leek and onion seeds. They need time to grow and establish themselves before I can plant them directly into the garden.

seeds, planting seeds
Onions and Leeks will be first.

I may not be able to get outside and work in my garden yet but starting seeds indoors is a sure sign that spring is coming!

butterflies, iris, spring
Spring is coming!

Linked To: GardenTuesday, FreshFoodsWednesday, OutdoorWednesday, WildcraftingWednesday, WakeUpWednesday, RuralityBlogHop, DIYAccomplished, TootsieTime, TheBackyardFarmingConnection, TuesdayGreens, TuesdaysWithATwist, ScoopsMegaSpringLinkyParty, TuesdayGardenParty

Homemade Emergency Candles

Years ago I purchased a set of Emergency Candles. They were candles in jars, which were perfect to use when the electricity went out. They didn’t create a lot of light but I also didn’t have to worry about them getting tipped over. They were the perfect emergency candle. Recently I decided I should get a few more or perhaps I should make some Homemade Emergency Candles. We manage a short-term rental house and since we often loose power I thought it would be a good addition for the other house.

After spending some time searching on the Internet I was amazed at how expensive Emergency candles were, not to mention I couldn’t find exactly what I wanted. So I decided to make my own. Turned out to be pretty simple. I only needed some wax (I used Soy Wax Flakes purchased here), some canning jars (these I had on hand) and some wicks and tabs (purchased here).

Homemade Emergency Candles

Ingredients:

Soy Wax Flakes
Canning Jars (I used jelly jars)
Wicks and Tabs

Directions:

The first step is to set up your jar. Set the tabs with the wick material inserted on the bottom of your jar. I used clothespins to keep the wicks in place.

Set your jars up with the wicks in place.

When melting the wax use a double boiler. I use an old coffee can set in a pot of boiling water. I crimp the can on one side to make for easy pouring. Do be very careful, as the wax is very hot!

Use caution when melting the wax!

Once the wax is melted carefully pour it into your jars. Soy wax is all natural and non-toxic which is why it is a good choice.

Carefully fill the jars with the hot wax.

Once the wax has cooled and hardened, trim your wicks to about ¼ inch above the wax.

Trim the wicks before using.

Using my recycled jars the cost for 12 emergency candles was only $2.90 each plus I have enough wax and wicks to make at least another two dozen which would make the price about .97 cents each, much cheaper than purchasing online!

Not bad, and now we’re ready for the next time we loose power!

Homemade Emergency Candles.

French Toast Casserole

We’ve had some busy days on the home front, lots of friends and family visiting. Everyone wants to come up and play in the snow. This French Toast Casserole recipe is one of those wonderful casseroles you can mix up the night before and then just pop it in the oven for a warm, delicious breakfast. It’s perfect for when you have a houseful of company. I have made it twice in the past few weeks and every time it was enjoyed by all.

Playing in the snow!

French Toast Casserole

10 cups of French bread, cut into 1-inch cubes.
8 eggs
3 cups milk
4 tsp sugar
1 tsp vanilla extract
¾ tsp salt (optional)

Topping:
2 Tbsp butter
3 Tbsp sugar
2 tsp cinnamon

Cube the bread.

Place the bread cubes in a greased 13×9 inch-baking dish. In a large bowl, whisk the eggs, milk, sugar, vanilla and salt. Pour the mixture over the bread.

Pour the egg mixture over the bread.

Cover and refrigerate for 8 hours or overnight.

Remove the casserole from the refrigerator 30 minutes before baking. Dot the top with the butter. Combine sugar and cinnamon and sprinkle over the top.

Cover and bake at 350 for 45-50 minutes or until a knife inserted in the center comes out clean. Let stand for five minutes and serve. Wonderful served with maple syrup.

French Toast Casserole

Serves 8-12 depending on appetites.

Delicious!

Busy Days On The Home Front!

Life On The Home Front has been packed. I still have items left over from Christmas that haven’t been put away! With the upheaval in my life from loosing my mom and the trips back and forth to CT, life has been crazy to say the least. Usually I have my posts written several weeks in advance, that way if life gets in the way I have my posts written and the blog can continue to post. However the last two months have been hit or miss. My numbers are down and I apologize for the lack of content. I am trying to get back on track.

This past weekend was a fun filled weekend with old friends. I’m always thankful for my full pantry on weekends like this. We live in a very rural area of Vermont and dashing out to the store is not quite so easy. Instead I plan the meals ahead of time and make sure everything is on hand to host our company for the weekend.

Pantry's full - making meals easy.
Pantry’s full – making meals easy.

What a fun time we had. Thursday and Friday it snowed, yes both days and as a result we got a lot of snow!

We got a lot of snow!

Beautiful, light, fluffy snow perfect for sledding and snowshoeing. Not easy packing a trail through the woods but well worth it as the woods were just beautiful.

Snowshoeing through the woods.

My daughter and her two children arrived Sunday for the week, overlapping our company by a day. I see a busy week ahead! I love company and we always have such fun!

I love company!
I love company!

What are you doing this week? Any special plans for your week?

Linked To: Your’reGoingtoLoveItTuesday, MMMLinkUp, NourishingJoy, WonderfulWednesday, WhimsyWendesday, WFMW, OutdoorWedesday, WakeUpWednesday, RuralityBlogHop, AdornedFromAbove, TimeTravelThursday, ThursdayFavoriteThings, ServingJoyfully, CatchAGlimpse, BlogHop

Turkey, Quinoa and Zucchini Meatloaf

Looking for a delicious and healthy meal? Try this delicious Turkey, Quinoa and Zucchini Meatloaf  recipe, it works best to make individual meatloaves. If you have some extra zucchini from the garden and you’re wondering how to use them try these tasty little meatloaves.

Turkey, Quinoa and Zucchini Meatloaf

Ingredients:

½ cup quinoa, rinsed
1 small zucchini, coarsely chopped
2 large egg whites
½ cup chili sauce
½ onion, chopped
1 Tbsp chopped fresh sage
½ tsp salt
½ tsp pepper
1 pound ground turkey
1 Tbsp spicy mustard

Directions:

Cook the rinsed quinoa in 1 cup of water. Bring to a boil and then let simmer 20-30 minutes. Fluff with a fork and let cool slightly.

Preheat your oven to 425F. Line a large baking sheet with foil, spray the foil with nonstick spray.

Squeeze the zucchini dry.

Shred zucchini and squeeze dry

Place zucchini in a large bowl with the egg whites, ¼ cup chili sauce, onion, sage, salt and pepper. Add the turkey and quinoa and mix well.

Combine turkey and zucchini in a large bowl.

Shape into six oval loaves and place on your baking sheet.

Mix together the remaining ¼ cup chili sauce and 1 Tbsp mustard.

Combine chili sauce and mustard.

Spread mustard-chili mixture mixture over the loaves.

Ready for the oven.

Bake until done (165F), about 30-35 minutes. Let stand 5 minutes before serving. Enjoy!

Enjoy!

Valentine Treats for the Birds

My husband loves to feed the birds. We both enjoy sitting at our kitchen table to watch the numerous birds come to our feeders. There are two large forsythia bushes near the feeders where the birds can take refuge.

We love bird watching.

I decided to try making some birdseed ornaments to hang in the trees and give the birds and extra treat. I didn’t need any special equipment, everything needed to make these I had on hand.

This is what I used:

4 feet of ¼ inch wide ribbon, cut into 12 inch long sections
2 envelopes of Knox gelatin
1 ½ cups birdseed
Baking sheet lined with wax paper
Four cookie cutters of any shape, about 4 inches by 4 inches
Cooking spray

This makes about 4- 8 cookie cutter ornaments depending on the size of the cookie cutter.

Combine the gelatin with ½ cup of boiling water. Stir well to dissolve the gelatin.

Stir well to dissolve gelatin.

Add the birdseed.

Add your birdseed to the gelatin.

Stir well, if the mixture is too watery add a little more seed until it is stiff but sticky.

Place the cookie cutters on your prepared baking sheet. I chose heart shapes for Valentine’s Day. Lightly coat each cookie cutter with cooking spray.

Spray cookie cutters with oil.

Fill each cookie cutter halfway with birdseed.

Fill cookie cutters with birdseed.

Before the birdseed hardens push a straw through the mix to create a little hole for your ribbon. Firmly press the mix with your hands or the back of a spoon.

After a few hours, coax each ornament onto fresh waxed paper. Let dry, turning them over every so often, for about 72 hours or until hard. Hang the ornaments outside for the birds to enjoy!

Treats for the birds!
Valentine treats for the birds!

 Linked To: GardenTuesday, OutdoorWednesday, WildcraftingWednesday, GooseberryPatch, WakeUpWednesday, RuralityBlogHop, KatherinesCorner, AdornedFromAbove, TimeTravelThursday, CatchAGlimpse, DIYAccomplished, ThrivingThursday, LinkParty, MommyOnlyHas2Hands, FourSeasonBlogHop, FrugallySustainable, RattlebridgeFarm, TootsieTime, FromTheFarm, TheBackyardFarmingConnection, HomesteadBarnHop, FlashbackFriday

Prudent Pantry: Hot Cocoa Anyone?

When all four of our children were living at home hot cocoa was a regular staple in our house in the winter. I would mix up my own batch of instant hot cocoa to get us through the winter. It was pretty good and cheaper than buying the little packages of instant hot cocoa.

However now that we are empty nesters I don’t need to have large amounts of hot cocoa on hand. Instead I mix it up a mug at a time. The ingredient list is very simple and the ingredients can all be found in my pantry.

hot chocolate
Ingredients for hot cocoa.

Next time you want to enjoy a cup of steaming hot cocoa try this recipe, in just the time it takes to heat up your milk you will have a delicious cup of hot cocoa.

Homemade Hot Cocoa

¼ cup unsweetened cocoa powder
½ cup sugar
⅓ cup hot water
⅛ tsp salt
4 cups of milk
1 tsp vanilla extract

Combine the cocoa, sugar, water and salt in a saucepan.

Combine water, sugar, cocoa and salt in a saucepan.

Over medium heat, stir the mixture until it boils. Cook for one minute. Slowly stir in the milk but do not boil.

Slowly add milk.
Slowly add milk.

Remove from heat and stir in the vanilla. Stir and serve. For a special treat use some of your leftover candy cane sugar or a pinch of cinnamon.

Hot Cocoa
Hot Cocoa

It’s a perfect way to warm up after an afternoon of playing in the snow!


Linked To: TastyTuesdays, TuesdaysTable, ShareYourStuff, CreateLinkInspire, WhimseyWendesday,  WonderfulWednesday,  RealFoodWednesdays, TheThriftyHome, FreshFoodsWednesday, WFMW, FullPlateThursday, ThinkTankThursday

Amazing Dinner Rolls from the Recipe Box

I often make dinner rolls from scratch but if you have bread dough on hand in your freezer, this recipe is a quick way to make delicious dinner rolls. If you use frozen bread dough you just need to thaw it first and in no time at all you will be enjoying these amazing dinner rolls!

This recipe can be made with your own bread dough recipe or you can purchase uncooked bread dough at the grocery store. Having frozen bread dough on hand in your freezer can be a great time saver.

Amazing Dinner Rolls

Ingredients:

¼ cup butter, melted
1 Tbsp chopped fresh parsley
1 ½ tsp chopped fresh rosemary
1 ½ tsp chopped fresh thyme leaves
1 – 1 pound loaf of  bread dough,  if frozen – thawed

Directions:

Stir together the butter, parsley, rosemary and thyme in a shallow dish. Set aside.

Using a sharp knife or a pair of scissors, cut the bread dough into 36 pieces, about 1 inch i diameter.

Amazing Dinner Rolls

With your hands shape each piece into a ball and roll each ball in the herb-butter mixture.

Amazing Dinner Rolls

Place 3 balls in each of the 12 un-greased muffin cups.

Amazing Dinner Rolls

Cover and let rise for 30 minutes or until doubled in size.

Heat oven to 400 degrees F. Bake for 15-20 minutes or until golden brown. These rolls are best enjoyed immediately. They can also be frozen and served at another time.

Amazing Dinner Rolls

Design a site like this with WordPress.com
Get started