My Garden: My Worm Farm

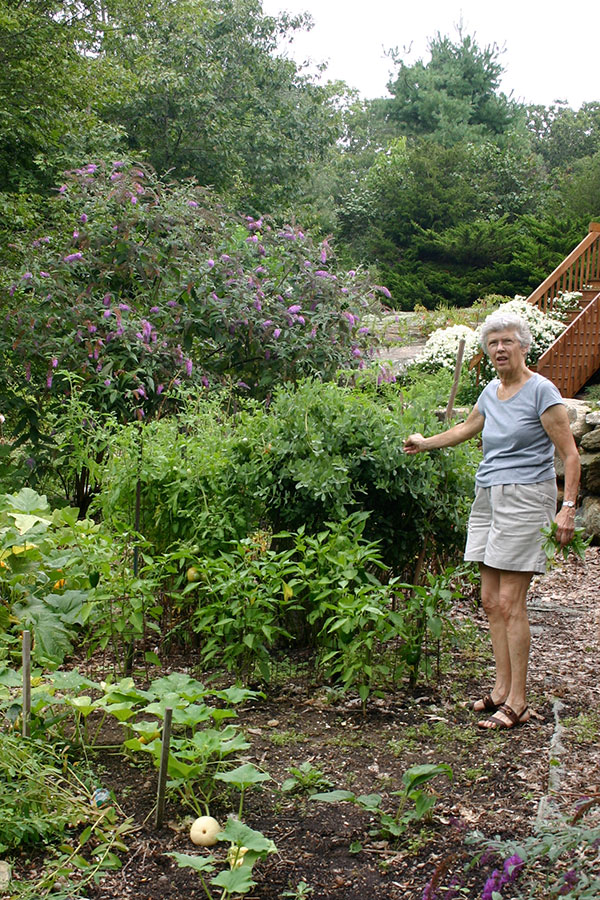
You’ll never guess what I got for Christmas? A Worm Farm complete with worms! My granddaughter thought it was the most amazing things that “Grammy got worms for Christmas!” I’ve actually wanted to try composting with worms for years.

A Worm Farm!
A Worm Farm!

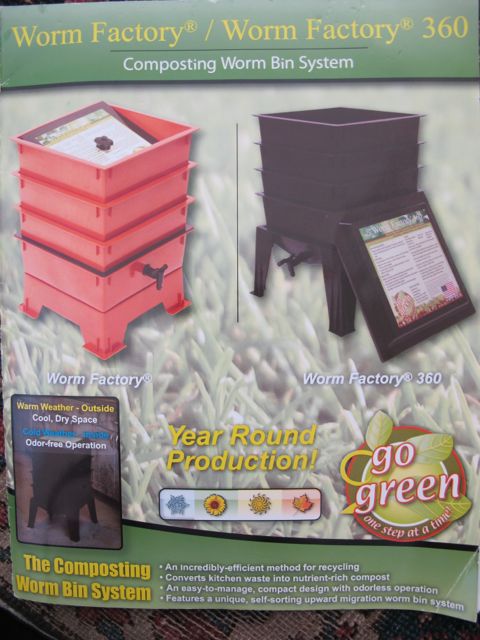
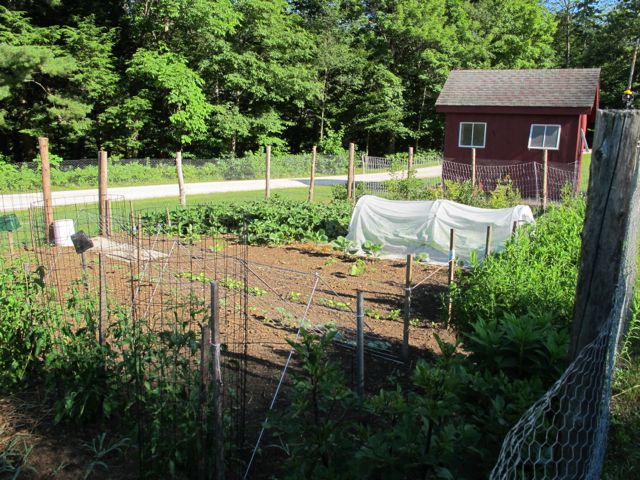
A worm composter is an incredibly efficient way to quickly convert your kitchen waste, cardboard, newspaper, junk mail, dried leave and other organic matter into nutrient-rich compost for your plants, planters, flower beds and garden.

Setting up the worm farm.

When my worm composter or vermicomposter is in full operation, it will house 10,000 to 12,000 worms, helping the microorganisms process up to five pounds of food waste and junk mail a week.

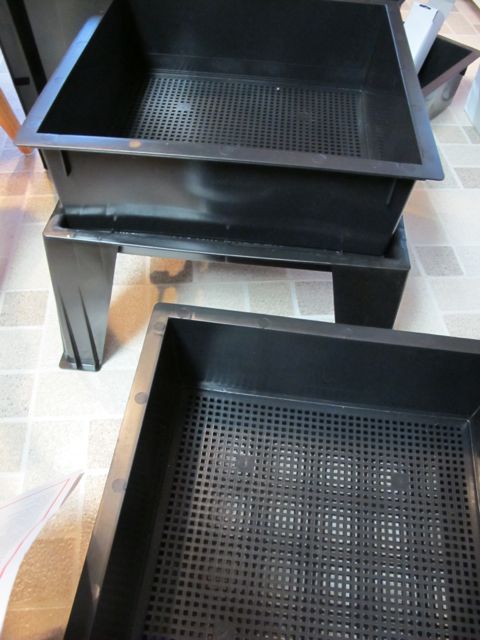
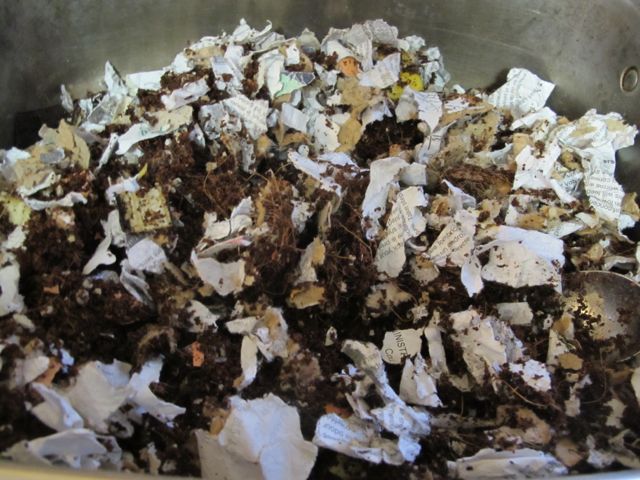
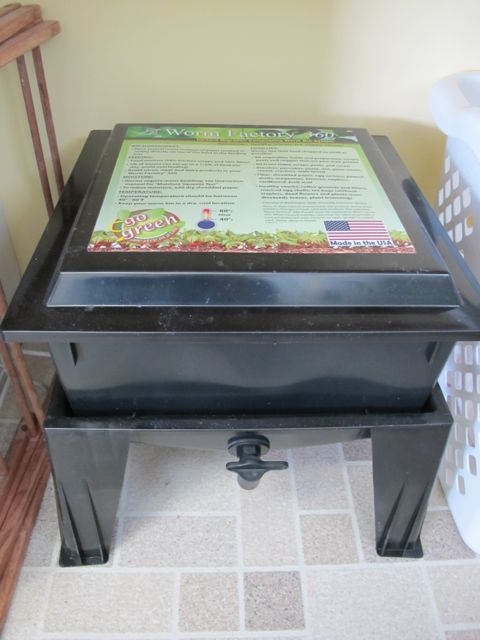
The vermicomposter was easy to set up. The directions were clear and easy to follow. You line an empty working tray with 3-4 sheets of newspaper. You then mix up some bedding composed of a partial block of coir (supplied in the kit),

Coir
Coir

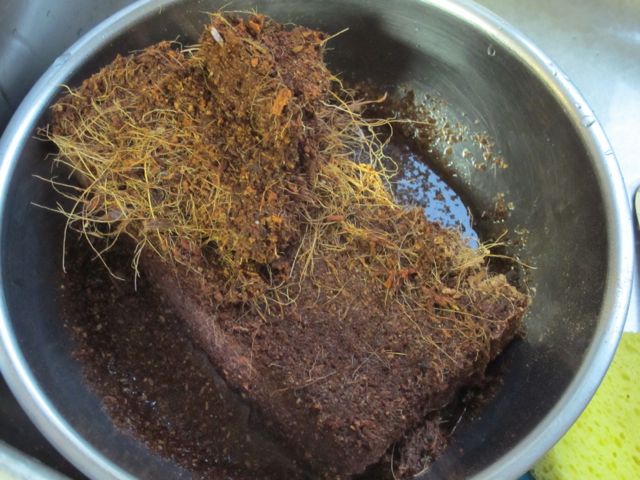
some active compost of leaf litter and some shredded newspaper. This mixture is spread over the sheets of newspaper. Several handfuls of food scraps are then placed in one corner of the working tray.

Mixture ready for worms!

The worms are then placed on top of this mixture and covered with several more sheets of moist newspaper.

Red Wigglers!
Red Wigglers!


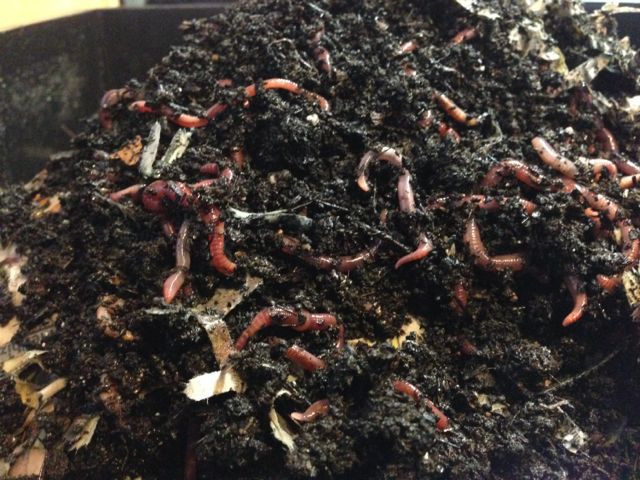
The lid is then placed on the vermicomposter and the worms are allowed to settle. Every three days I remove the lid from the working tray and lift the layer of moist newspaper. If the worms are crawling in and around the food in the working tray it is time to add more handfuls of food waste. It will take 1-2 months for the working tray to be full at which point I will add a new working tray to the vermicomposter. I have not had my worms long enough to have to add another tray yet.

Working Worm Farm
Working Worm Farm

I am keeping the vermicomposter in our laundry room and there is no smell to it at all. My granddaughter is so excited about the whole process and can’t wait to visit so she can feed the worms!
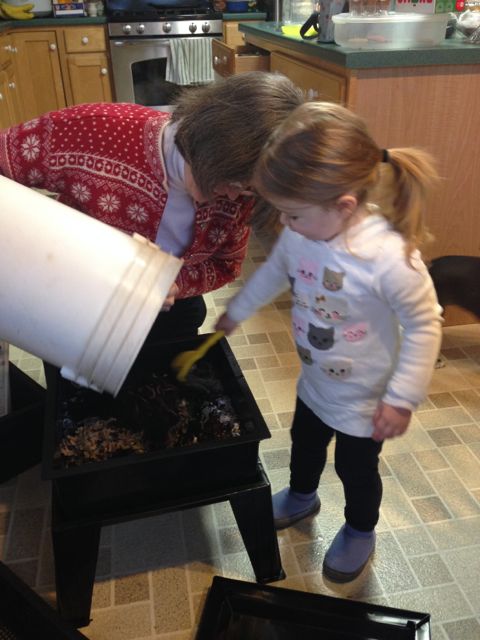
Linked to: Sidewalk Shoes, ASouthernDayDreamer, PennyPinchingParty, WildcraftingWednesday, HomemakersChallenge, FabulouslyFrugalThursday, ThinkTankThursday, FertilizerFriday, SmallFootprintFriday, DIYLinky, RealFoodFriday, FromTheFarmBlogHop, FarmGirlFriday, SimplyNaturalSaturdays, CleverChicksBlogHop, HomesteadBarnHop, theBackyardFarmingConnection, TuesdayGreens, TunedInTuesday, TuesdaysWithATwist

Winter Warmer

With all the cold winter weather this year you want to make sure your using efficient heating.

It's been so cold lately I can see where the spiders lived!
It’s been so cold lately I can see where the spiders lived!

The basic principles of efficient heating are keeping the warm air in and the cold air out! You also want to keep your heater or furnace in tip-top shape. Here are a few steps you can take to ensure a cozy winter without wearing your parka indoors!

When your heat is on, set your thermostat as low as possible. Lower the thermostat to 55F degrees at night. Even a few degrees will lead to considerable savings. Just wear a sweater during the day or add an extra blanket to your bed to stay warm.

Lower your thermostat.

Make sure your windows next to the thermostat are closed tightly so that the rest of the house is not several degrees warmer than the area around the thermostat.

Make sure your heating system is operating efficiently. Check your filter every other month during the winter. Clean the filter as needed and replace when it appears to be worn out. Oil fired heating systems should be cleaned once a year. Gas fired and heat pumps need to be tuned only once every two years.

Have your furnace cleaned regularly.

Close off any unoccupied rooms or rooms not currently in use.  Turn the heat down if you can, although if there are water pipes in the room make sure the temperature doesn’t go below freezing!

Close doors of unused rooms

Keep your fireplace damper closed when not in use. It also helps to install a glass front to keep warm air from going up the chimney.

The days are getting longer and spring will be here in just a few months. In the meantime take a few steps to make your house more energy efficient and save yourself some money!

Spring is on the way!


Linked to; TuesdayGreens, TheBackyardFarmingConnection , TuesdaysWithATwist, HomesteadBarnHop

Cod in Thai Curry Sauce

Have you ever come upon a recipe that is so good that you want to put it on the menu every week? This Cod in Thai Curry Sauce one of those recipes. This fall my husband went out deep-sea fishing with a group of men from church. It was an opportunity for  the men to spend time together, getting to know each other and if you came home with fish it was an added bonus.

My husband has enjoyed fishing for years, mostly salt water fishing. Living in Vermont he doesn’t get much of an opportunity to fish in the salt water. He came home with several cod, which were filleted and placed in the freezer. I’ve made this recipe twice since he’s been fishing and not only is it good the first night but it is even better the next day! You could use any firm white fish in this recipe such as halibut or cod.

Cod in Thai Curry Sauce

Ingredients:

1 can (13.5-14oz) coconut milk
1 tsp grated peeled fresh ginger
1 tsp brown sugar
½ tsp Thai red or green curry paste
1 clove garlic, finely chopped
4 pieces skinless cod fillet (6 oz each)
2 scallion, chopped
¼ cup fresh cilantro, chopped
1 lime, cut into wedges
Cooked jasmine rice

Directions:

In a nonstick 12” skillet whisk the coconut milk, ginger, brown sugar; curry paste and garlic until blended. Heat to boiling over high heat, stirring occasionally. Reduce heat to medium low and cook 5 minutes. Add fish fillets to the skillet and cook for 4-5 minutes or until the fish flakes.

Thai, fish

Transfer to a warm deep platter. (I usually leave the fish in the skillet until the end) Remove skillet from the heat,  stir in scallions and cilantro into the sauce.

Cilantro and scallions are added.

Pour sauce over the fish.

Cod in Thai curry sauce.

Serve with lime wedges and rice. Good to the last bite!

A Celebration of a Life

To my faithful readers I apologize for my sporadic posting this last month. Having my mom go into the hospital December 17th for emergency surgery and then the roller coaster ride we were on until she passed on January 4th was so hard. I knew someday I would loose my mom but I thought I had so many more days ahead to enjoy her company.

Saturday we celebrated her life. The church, which holds 450 people, was standing room only. The love and support from the community was amazing. Each of my mother’s grandchildren took part in the service in some way. Reading a poem, singing a song or just sharing their remembrances. No one conferred about what they would be reading or sharing and the words they spoke gave a clear picture of who my mother was.

As my sister shared, my mom changed the world, day-by-day, person-by-person. She gathered friends at an early age and like tending a garden nurtured those friendships her entire life. She not only cared deeply about her friends but she also cared deeply about the environment and her town and took steps to change things for the better. Whether it was starting a recycling program, picking up trash along the road or working to save a piece of property for others to enjoy.

She was always moving; tending her gardens, fighting invasive plants, feeding the birds and finding special lands and then working to preserve them. She taught us so many lessons growing up. She taught us all how to never go to bed mad, how to forgive and how to believe in ourselves. She then taught her grandchildren these same lessons. She loved us all dearly.2011_Carolie&Alma

It’s so true that sometimes you don’t realize what you have until it’s gone. The hole my mother has left behind is so large. Our world is forever changed. However I will remember all my mother taught me and I will move on. I will strive to live as my mother did and make the world a better place. I will be passionate about my work and my life. I will embrace each day and when I am walking in the woods or spending time in my garden I will remember my mom. The world is richer when we share our passions as my mom did. I am so thankful for everything she did to help me become the person I am.2014_Finalphoto_Carolie2007

A Note From Over The Hill

While higher hills before you
Obscure the rise beyond,
Those who’ve passed beyond the peaks
And entered valleys green,
Can tell you that the future
Lies rosy, calm, serene.

The weathered sides of mountains,
Three-oh, four-oh, or five,
Yield to persistent testing
Of goals for which you strive.

The highest peaks and passes
Which lie before life’s way,
Come early to prepare you
For a gentler, happy day.

Take heart, you lads and lasses,
With tears of growing old,
I’ve seen the other valley
And its streets are paved with gold.

Gold of life, with golden friends,
Gold of conscious pleasure
Of each Past and present soul
Who has become your treasure.

So, gather rosebuds every day,
They bloom among the faces
Of those who with you climb the heights
Or rest in sheltered places.

Texas Swanjord

 Linked to: AdornedFromAbove, WFMW, WakeUpWednesday, TheViewFromHere, ThursdayFavoriteThings, HomemakersChallenge, BrambleberryCottage, ThrivingThursday

Prudent Pantry: 10 Uses for Vinegar

I have written before about the merits of keeping vinegar in your pantry. It can be used for so many things beside cooking.frugal tips, prudent pantry, prudent living

Get rid of odors. Did you know if you soak a piece of bread with vinegar and set it in the bottom of your trash can and leave it over night, it will get rid of any nasty odor?

Get rid of fruit flies. You can take a little apple cider vinegar and place it in a small dish. Cover the dish with plastic wrap and poke a few holes in it. The fruit flies will crawl in and die.

Get rid of wrinkles. Spray a shirt with one part vinegar and three parts water. Let hang and the wrinkles will disappear.

Order the Dress Shirt
(Photo credit: Roberto_Ventre)

Keep cats off your furniture. Cats hate the smell of vinegar. Spray your couch with a little vinegar and the cats will stay a way.

Русский: Кошка
(Photo credit: Wikipedia)

Flowers last longer. If you add a little apple cider vinegar to your water your fresh flowers will last longer.

You can mix up a window washing solution using vinegar. Click here. Or you can just spray a little vinegar on the glass to clean it.

Make an all purpose cleaner using vinegar, water and a few drops of dish soap. Click here.

All Purpose Cleaner
All Purpose Cleaner

Do you have a pan that you are having a hard time cleaning? Pour equal parts of vinegar and water into the pan. Bring to a boil and then let sit. Cleans right up.

Unclog your drain. Pour ½ cup baking soda and 1 cup vinegar into your drain. When it has stopped foaming pour boiling water down the drain.

Floor Drain
(Photo credit: Wikipedia)

Sticky residue. Do you have sticky residue on a jar or on your wall. Use a little white vinegar to clean it up.

These are just ten ways to use vinegar. There are many more. It’s a good idea to have some vinegar in your pantry.

Linked To: HomesteadBarnHop, TheThriftyHome, WildcraftingWednesday, FabulouslyFrugalThursday, SmallFootprintFriday, FrugallySustainable, FromTheFarm, SimplyNaturalSaturdays, FarmGirlFriday, PrepAlong, WildcraftingWedneday

Enhanced by Zemanta

Shredded Brussels Sprouts with Prosciutto

Did you ever find a recipe that tasted so good you wondered why you’d never tried the combination before? My brother-in-law first introduced me to Shredded Brussels Sprouts with Prosciutto. I hadn’t made it in a few years but found myself making it twice in the last few months. It’s a wonderful combination of flavors and sure to enhance any meal whether it be an ordinary dinner or a holiday meal.

vegetables

Shredded Brussels Sprouts with Prosciutto

Ingredients:

2 lbs of Brussels sprouts, cleaned and shredded by slicing each sprout into thin slices
8 Tbsp butter (no wonder it’s so good)
6 cloves of garlic, minced
¼ lb thinly sliced prosciutto, cut into narrow slivers
3 Tbsp flour
1 ½ cup heavy cream
¼ cup marsala
1 tsp nutmeg
salt and pepper to taste
1 ½ cup grated Parmesan cheese

Directions:

Prepare the Brussels spouts and set aside. Heat butter over medium heat in a large sauté pan. Add garlic and prosciutto and cook for four minutes.

Saute garlic and prosciutto.

Add Brussels spouts and cook for another four minutes.

Add Brussels sprouts.

Stir in 3 Tbsp flour and toss to coat the Brussels sprouts. Gradually stir in the heavy cream and marsala. Lower the heat and simmer for five minutes or more, until the Brussels sprouts are just tender. Add the nutmeg and season to taste with salt and pepper. Stir in 1 cup of Parmesan cheese and cook just until the cheese is melted. Remove from the heat. Transfer mixture to a shallow, ovenproof au gratin dish. Top with remaining Parmesan.

Ready for the oven.

Bake in a 350 degree oven for about 20 minutes or until bubbly and brown. This dish can be made ahead. This dish will enhance an ordinary dinner or be a perfect side for your next holiday meal.

A perfect side for any meal!

The Seed Catalogs Have Arrived!

The days outside may be cold and snowy but in my mailbox I have already received numerous seed catalogs. Looking through the catalogs I am reminded that spring can’t be too far off and it’s time to plan for this season’s garden!

seeds
The seed catalogs have arrived!

Before I order any seeds I usually go through my box of seeds to see what I still have on hand and what I need to order. Some seeds will last several seasons while others should be replaced.

gardening, prudent living
Going through the old seeds.

Since I start my own seeds indoors I need to make sure I have seeds that I can plant with good results. Nothing is more discouraging than taking the time to start your own seeds only to have nothing come up! By then there is not enough time to start more seeds and you will have to resort to purchasing plants at your local nursery.

The last few weeks haven’t been easy for me. Losing my mom January 4th set my world upside down. I miss her so. However she herself was an avid gardener and I have so many fond memories of her working in the gardens, growing various vegetables and having the most beautiful flowers.

My mom in her garden.

I will take time to sort through my seeds. I will spend several hours reading through the seed catalogs planning this year’s garden. And I will think of my mom as I work in my garden this year.gardeningLinked To: SidewalkShoes, AdornedFromAbove, ASouthernDayDreamer, TheViewFromRightHere, KatherinesCorner,BrambleberryCottage, ServingJoyfully, SmallFootprintFriday, TootsieTime, FromTheFarmBlogHop

Frugal Tips: Enjoying a Clean Floor

I am in the process of slowly removing all commercial cleaners from our house and replacing them with a homemade version. Some cleaners I use more than  others and so things like window cleaner or an all purpose cleaner have long since been replaced. Others like floor cleaners are finally being used up. Hmmm… maybe I don’t wash my floor that often. Anyway I went to go wash my floor the other day and there were no store bought cleaners on hand. I quickly went through my folder and found this homemade version. I don’t know where I found it and I apologize if someone reading this made it first. I have to say it worked as good or better than any commercial product I’ve ever bought!

I had all the ingredients on hand and it took me no longer to mix this cleaning solution up than it would take to open a bottle of commercial floor cleaner. If you’re looking for a homemade floor cleaner this is it!

Chemical Free Floor Cleaner

To wash your floor mix:

1 cup of vinegar
1 Tbp Dish soap
1 cup of baking soda
2 gallons of water

Wash your floor as usual.

The mop picked up a lot of dirt

I did not rinse the floor and I was quite pleased with my clean floor afterward! There was evidence of just how dirty the floor was in the sink!

Evidence of a dirty floor!

Rendering Lard

One of the by products of buying local pork is being able to get the leaf lard from the pig. I had never even heard of rendering lard until I was asked if I wanted the leaf lard, I wasn’t even sure what leaf lard was. However I do remember my husband’s grandmother talking about using lard to make piecrust. So I decided to try rendering my own lard. Learning how to make lard is not hard; it requires that you have water, a large stock pot, a source of leaf lard and some time.

Rendering Lard

I had heard that you might not want to do this in your kitchen so a friend of mine offered me the use of their side burner on their outdoor grill. It was a beautiful fall afternoon when I decided to render the lard and I couldn’t think of a more beautiful spot to spend the afternoon.

It was a beautiful fall afternoon.

Directions:

The first step is to cut the fat into ½ inch cubes. Pour about ½ cup of filtered water into the bottom of the pot and add the chopped fat. The water keeps the fat from burning.

Cut the fat into smaller pieces

Simmer over low heat, stirring occasionally. The fat will begin to melt, the water will evaporate and the little bits of browned fat or cracklings will float to the surface.

Cook over low heat, stirring occasionally.

When the cracklings sink to the bottom of your pot you will want to remove the pot from the heat. Be careful as you now have a pot full of very hot fat. Strain the melted fat using a fine mesh sieve. Pour the melted fat into mason jars and allow to cool. When you first pour the melted fat into the jars it will be a golden color.

When the lard is liquid it will be golden in color.

As the jars cool the color will turn to a cream white.

Rendered lard

Rendered lard is good in pastries or as a fat for seasoning meats or braising vegetables. Have you rendered lard before? Do you have any tips or tricks to share about the process?


Turkey Curry

We often have left over chicken or turkey, especially after the holidays. This Turkey Curry has got to be one of the best recipes I’ve found for using up the leftovers. It is so flavorful, serve it with rice and garnish with yogurt, chutney, raisins and cashews. Just delicious!

Turkey Curry
4 generous servings

Ingredients:

1 large onion,  cut into chunks
1 red pepper, cored, seeded and cut into chunks
2 tsp olive oil
3 cloves garlic, peeled
1 inch piece of fresh ginger, peeled
1 jalapeno pepper, seeded and quartered
1 Tbsp curry powder
1 tsp ground coriander
1 cup chicken broth
¼ cup coconut milk
1 ripe banana, peeled and sliced
2 cups cooked turkey or chicken meat, cut into ½ inch dice
1 cup peas
¼ cup chopped fresh cilantro
1 ½ Tbsp fresh lime juice
¼ tsp salt
¼ tsp ground black pepper

Directions:

Place the onions and red pepper in a food processor and pulse until just chopped. Heat the oil in a Dutch oven over medium heat. Add the onion pepper mixture and cook stirring, until soft, about 5-7 minutes.

Saute onion and pepper.

Meanwhile drop the garlic, ginger and jalapeño into the food processor and process until finely chopped. Add the garlic mixture to the onions along with the curry powder and coriander; cook, stirring until fragrant, about 2 minutes. Add the chicken stock, coconut milk and banana.

Simmer until the banana is soft.

Bring the mixture to a simmer, reduce the heat to low and cover. Continue to cook, stirring occasionally, until the bananas are very soft, about 10 minutes.

Mash the bananas to incorporate hem into the sauce. Add the turkey, peas, cilantro and lime juice and simmer until heated through, about 5 minutes.

Heat through.

Season with salt and pepper and serve.

Turkey Curry


Design a site like this with WordPress.com
Get started